As summer sizzles, I find myself craving vibrant flavors and fun meals that bring everyone together. Nothing beats hosting friends and family for a fiesta-style dinner! Picture this: a table filled with sizzling grilled carne asada, fresh guacamole, and crunchy tortilla chips swimming in salsa.
But wait, the real star of the show sneaks in with some crispy, flavorful baked chimichangas! These beauties packed with tender chicken and melted cheese are a must-have.
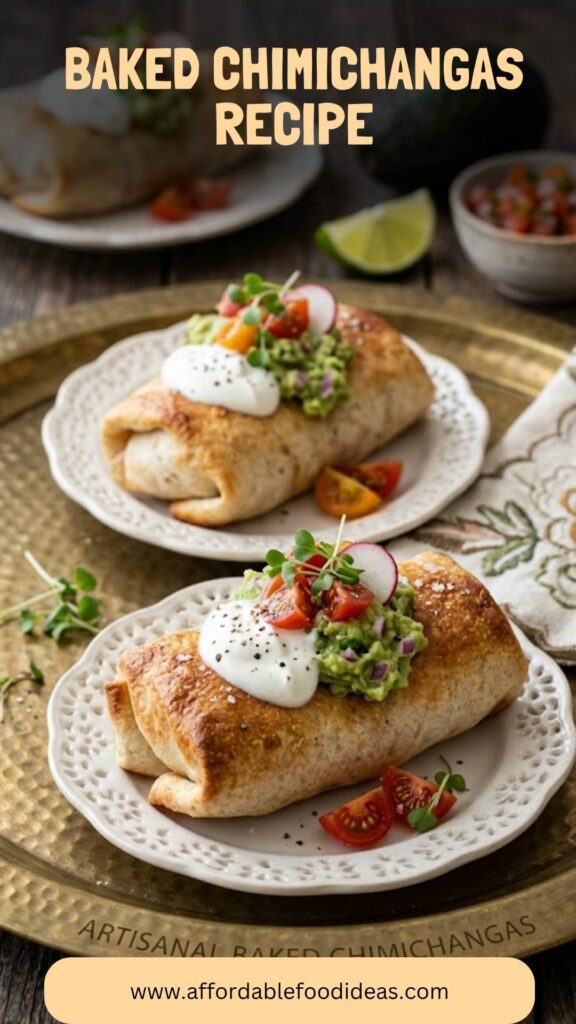
Baked chimichangas are essentially a sun-soaked celebration wrapped in a tortilla. They combine all the delicious elements of traditional chimichangas but with a healthier twist! Instead of frying, we bake these wonders until golden brown and delightfully crisp.
With every bite, you’ll experience a harmony of juicy chicken, zesty salsa, and gooey melted cheddar. Whether it's Taco Tuesday or a casual game night, these baked chimichangas are a crowd-pleaser that will have your guests asking for seconds.
Baked chimichangas are flour tortillas filled with tender meats, cheese, and spices, then rolled up and baked until golden. While traditional chimichangas are deep-fried, this baked version is healthier without sacrificing flavor. The beauty lies in the flexibility of the fillings; you can mix up ingredients based on what you have on hand or your family’s preferences.
Why You'll Love this Baked Chimichangas Recipe!
This baked chimichanga recipe stands out for several reasons. First, it’s a time-saver—ready in under an hour from prep to plate. The versatility of the fillings means you can always customize it to keep things exciting. Plus, the crispy exterior and deliciously warm interior create an enticing contrast that everyone loves. You’ll also appreciate that it’s a healthier alternative to the fried version, allowing you to indulge without a side of guilt!
The Ingredients You Will Need To Make This Dish
For this delightful dish, gather the following ingredients:
- 2 cups cooked chicken, chopped or shredded
- 1 cup of your favorite salsa
- 1 teaspoon ground cumin
- 1/2 teaspoon crushed dried oregano
- 1 cup shredded Monterey Jack cheese
- 1/4 cup diced bell pepper (for a touch of sweetness and color)
- 2 green onions, finely chopped
- 6 (8-inch) flour tortillas
- 2 tablespoons butter, melted
- Topping options: diced tomatoes, sour cream, guacamole, extra salsa, and additional cheese for sprinkling
Ingredients From : the-girl-who-ate-everything.com
How to Make Baked Chimichangas Recipe?
Let’s plunge into the marvelous world of making baked chimichangas! You’ll love how easy and satisfying this dish is. With just a few simple steps, you’ll have a delightful meal ready for your family or guests.
Step-by-step Directions
Step 1: Preheat the Oven
First things first, preheat your oven to 400°F. This ensures that your chimichangas will bake evenly and become wonderfully crispy.
Step 2: Prepare the Filling
In a mixing bowl, combine 2 cups of cooked chicken, 1 cup of your favorite salsa, 1 teaspoon of ground cumin, 1/2 teaspoon of crushed oregano, 1 cup of shredded Monterey Jack cheese, and 1/4 cup of diced bell pepper. Stir it all together until everything is nicely mixed and coated. This filling is the heart of your chimichangas, full of flavor and variety.
Step 3: Assemble the Chimichangas
Lay out your flour tortillas on a clean surface. Spoon about 1/3 cup of the chicken mixture into the center of each tortilla. Take the sides of the tortilla and fold them over the filling. Then roll from the bottom up to create a tight bundle. The tortillas should be seam-side down when you place them on your baking sheet.
Step 4: Brush with Butter
To achieve that golden-brown crust, brush the tops of each chimichanga with melted butter. This step is essential for that beautiful color and a bit of added flavor!
Step 5: Bake to Perfection
Pop the baking sheet with chimichangas into your preheated oven. Bake for about 25 minutes, or until they’re golden brown and crispy. It’s aroma time! The scent of baking chimichangas will surely get everyone’s mouth watering.
Step 6: Serve and Enjoy
When they are ready, remove them from the oven and let them cool for a minute. Top them with your favorite garnishes, like diced tomatoes, sour cream, guacamole, or more salsa. Enjoy these warm, crispy delights straight from the oven!
Notes
- Chicken Options: Use rotisserie chicken for even quicker prep.
- Tortilla Alternatives: Whole wheat tortillas can add extra fiber and flavor.
- Dairy Substitute: If you're dairy-free, try using a non-dairy cheese alternative.
- Spicy Kick: Add jalapeños to the filling if you enjoy a bit of heat.
- Storage: If you have leftovers, they can be reheated in the oven for maximum crispiness.
Storage Tips
To store baked chimichangas, let them cool completely before transferring them to an airtight container. They will keep in the refrigerator for up to 3 days. If you want to make them ahead of time, you can assemble them and freeze them before baking. Just add an extra 5–10 minutes to the baking time if baking from frozen.
Serving Suggestions
To make your chimichanga night unforgettable, consider these serving ideas:
- Accompany with Fresh Guacamole: A creamy dip that adds richness and flavor.
- Serve with a Side Salad: Bright greens balance the meal nicely.
- Offer a Variety of Salsas: Try mild, medium, and spicy options for fun!
- Pair with Mexican Rice: A fantastic complement that makes your plate more filling.
- Include Corn on the Cob: Sweet corn adds a pop of color and sweetness.
What Other Substitutes Can I Use in Baked Chimichangas Recipe?
If you’re looking to switch things up, here are some great alternatives:
- Protein Swap:Ground turkey or beef can be used in place of chicken for a heartier filling.
- Veggie Delight: Instead of chicken, black beans and corn make a great vegetarian option.
- Cheese Variation: Swap Monterey Jack with pepper jack for added kick.
- Tortilla Alternatives: Try corn tortillas or even lettuce wraps for a low-carb version.
- Herb & Spice Enhancements: Add fresh cilantro for a burst of fresh flavor.
Conclusion
Baked chimichangas gracefully marry comforting flavors with health-conscious choices, making them a delightful addition to your family dinners or parties. Whether you follow the recipe to the tee or branch out with personal touches, these chimichangas promise to be a hit.
They’re easy, versatile, and just plain delicious. So roll up those tortillas, get baking, and prepare to wow your friends and family with this tasty masterpiece!
Baked chimichangas are essentially a sun-soaked celebration wrapped in a tortilla. They combine all the delicious elements of traditional chimichangas but with a healthier twist! Instead of frying, we bake these wonders until golden brown and delightfully crisp.
Ingredient
For this delightful dish, gather the following ingredients:
2 - cups cooked chicken, chopped or shredded
1 - cup of your favorite salsa
1 - teaspoon ground cumin
1/2 - teaspoon crushed dried oregano
1 - cup shredded Monterey Jack cheese
1/4 - cup diced bell pepper (for a touch of sweetness and color)
2 - green onions, finely chopped
6 - (8-inch)
2 - tablespoons butter, melted
- Topping options: diced tomatoes, sour cream, guacamole, extra salsa, and additional cheese for sprinkling
Instructions
Step 1: Preheat the Oven
1
First things first, preheat your oven to 400°F. This ensures that your chimichangas will bake evenly and become wonderfully crispy.
Step 2: Prepare the Filling
2
In a mixing bowl, combine 2 cups of cooked chicken, 1 cup of your favorite salsa, 1 teaspoon of ground cumin, 1/2 teaspoon of crushed oregano, 1 cup of shredded Monterey Jack cheese, and 1/4 cup of diced bell pepper. Stir it all together until everything is nicely mixed and coated. This filling is the heart of your chimichangas, full of flavor and variety.
Step 3: Assemble the Chimichangas
3
Lay out your flour tortillas on a clean surface. Spoon about 1/3 cup of the chicken mixture into the center of each tortilla. Take the sides of the tortilla and fold them over the filling. Then roll from the bottom up to create a tight bundle. The tortillas should be seam-side down when you place them on your baking sheet.
Step 4: Brush with Butter
4
To achieve that golden-brown crust, brush the tops of each chimichanga with melted butter. This step is essential for that beautiful color and a bit of added flavor!
Step 5: Bake to Perfection
5
Pop the baking sheet with chimichangas into your preheated oven. Bake for about 25 minutes, or until they’re golden brown and crispy. It’s aroma time! The scent of baking chimichangas will surely get everyone’s mouth watering.
Step 6: Serve and Enjoy
6
When they are ready, remove them from the oven and let them cool for a minute. Top them with your favorite garnishes, like diced tomatoes, sour cream, guacamole, or more salsa. Enjoy these warm, crispy delights straight from the oven!
Nutrition Facts
Servings 6
Amount Per Serving
% Daily Value *
Total Fat17.2g27%
Saturated Fat7.5g38%
Cholesterol64.4mg22%
Sodium827.4mg35%
Total Carbohydrate26g9%
* Percent Daily Values are based on a 2,000 calorie diet. Your daily value may be higher or lower depending on your calorie needs.
Note
- Chicken Options: Use rotisserie chicken for even quicker prep.
- Tortilla Alternatives: Whole wheat tortillas can add extra fiber and flavor.
- Dairy Substitute: If you're dairy-free, try using a non-dairy cheese alternative.
- Spicy Kick: Add jalapeños to the filling if you enjoy a bit of heat.
- Storage: If you have leftovers, they can be reheated in the oven for maximum crispiness.
Keywords:
Baked Chimichangas Recipe
April Cherry
Registered dietitian, food enthusiast and recipe developer
Hi Everyone! I’m April Cherry, a registered dietitian and the creator of Affordable Food Ideas. Growing up near Waltham, MA, I learned that flavorful, wholesome meals don’t need to be expensive, and that lesson has shaped my approach to cooking and nutrition. Through my blog, I share budget-friendly recipes and tips to help others eat well without breaking the bank, while still enjoying delicious, nutritious meals.