When I’m in the kitchen experimenting with flavors, rice milk often becomes my go-to dairy alternative.
It pairs beautifully with various dishes. One of my favorite meals to enjoy alongside rice milk is a hearty bowl of granola topped with fresh fruit. The creaminess of the rice milk complements the crunchy texture of granola perfectly.
Plus, it’s super easy to make at home, which is a huge win for anyone looking to embrace healthier eating habits without breaking the bank.

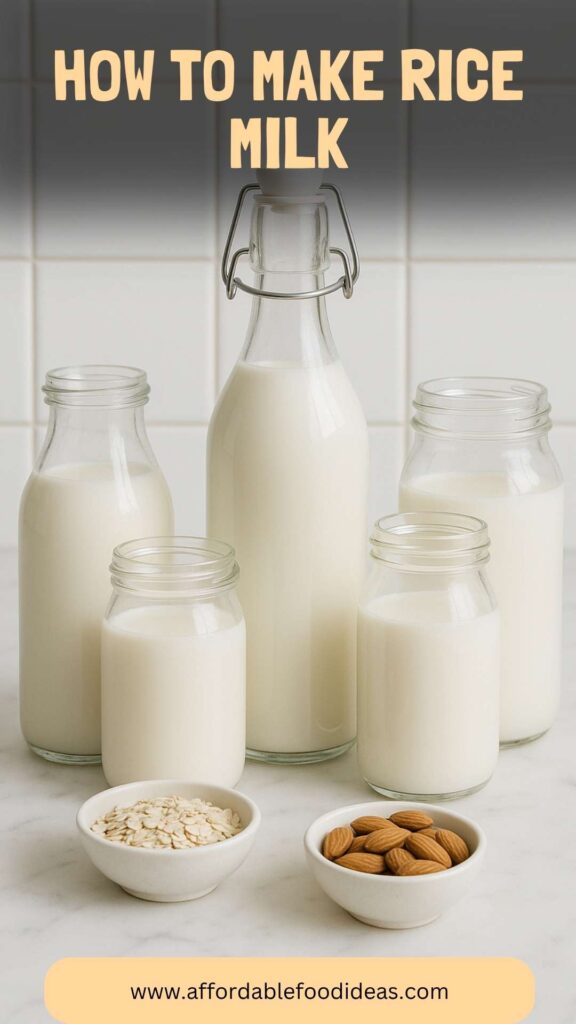
What is Rice Milk?
Rice milk is a non-dairy beverage made from blended rice and water.
This plant-based milk has a mild flavor, making it versatile enough for a range of uses—from adding to smoothies to pouring over your morning cereal. And the best part? You can make it from scratch with just a few simple ingredients.
The Ingredients
To whip up some delightful rice milk, you’ll need:
- 4 cups filtered water
- 3/4 cup uncooked long-grain white rice
- 1 pitted Medjool date
- 1/4 cup mixed fresh berries
- 2 tablespoons unsweetened cocoa powder
- 1 teaspoon ground cinnamon
- 1/2 teaspoon pure vanilla essence
- 1 teaspoon natural maple syrup
- A small pinch of sea salt

How to Make Rice Milk
Making rice milk is straightforward and requires minimal effort. I promise it’s worth it.
Step 1: Rinse the Rice
Start by rinsing the rice under cold water in a fine-mesh sieve. This removes excess starch and helps prevent the milk from becoming too thick. It only takes a minute or two, but it makes a noticeable difference in texture.
Step 2: Combine Ingredients
In a blender, place the rinsed rice, filtered water, the pitted Medjool date, and any additional ingredients like berries or cocoa powder. Blend on high until everything is thoroughly combined and smooth. This process takes about a minute.
Step 3: Strain the Milk
After blending, pour the mixture through a nut milk bag or a clean cheesecloth placed over a bowl. This step is crucial for separating the liquid from the solid rice pulp. Gather the cloth and twist it to extract as much liquid as possible. It’s a bit like squeezing the last bit of toothpaste from a tube—take your time!
Step 4: Sweeten and Flavor
Once strained, you can taste the rice milk. If it needs a little boost, this is the time to add the vanilla essence, maple syrup, and sea salt. Blend briefly to combine the flavors.
Step 5: Chill and Store
Pour the rice milk into a clean glass container and refrigerate it. The milk is best served cold. Don’t forget to give it a good shake before you pour, as it can separate over time.
Notes: Tips for Making Great Rice Milk
- Rice Variety: Long-grain white rice works wonders, but feel free to experiment with brown rice for a nuttier flavor.
- Sweetness Control: Adjust the sweetness to your liking by adding more or less date and maple syrup.
- Storage: Homemade rice milk typically lasts about 4-5 days in the fridge. Make only what you’ll use.
- Rice Pulp Usage: Don’t toss the leftover rice pulp! Use it in smoothies, add to baked goods, or mix it into oatmeal.
- Temperature Matters: Using cold water can help cool the rice milk faster and make for a more refreshing drink.
Storage Tips
Once made, store rice milk in an airtight container in the refrigerator. It’s best enjoyed within 4 to 5 days. If it starts to separate, just shake it up!
Serving Suggestions
Here are some fun ways to enjoy your homemade rice milk:
- Cereal Companion: Pour it over cereal for a delightful breakfast experience. The subtle sweetness adds a touch of magic.
- Smoothie Base: Use rice milk as a base for smoothies. It blends effortlessly with fruits and makes for a creamy texture.
- Coffee and Tea: Great for lattes or tea; try it instead of cream for a unique twist.
- Baking Substitute: Swap regular milk in baking recipes for rice milk. It works well in muffins and pancakes.
- Making Creamy Soups: Use it in place of dairy in creamy soup recipes for a smooth finish.
What Other Substitutes Can I Use for Rice Milk?
Need alternatives? Here are some substitutes for rice milk:
- Almond Milk: A nutty, slightly sweet option that’s lower in calories and packed with Vitamin E.
- Soy Milk: A protein powerhouse, great for those wanting a creamy texture and comparable protein to cow’s milk.
- Oat Milk: Creamy with a hint of sweetness, oat milk is excellent for coffee and baking.
- Coconut Milk: Rich and tropical, coconut milk adds a unique flavor and is especially good in smoothies.
- Cashew Milk: Creamy and rich, perfect for making sauces and desserts.

Conclusion
Homemade rice milk is not just simple to make; it’s also incredibly versatile and perfect for various culinary adventures. From pouring it over cereal to using it in your favorite dishes, the possibilities are endless.
Plus, the joy of making it from scratch adds a touch of pride to your culinary repertoire. So, next time you’re in the kitchen, why not whip up a batch? Your taste buds will thank you. Enjoy the creamy goodness!
You’ll also like the following recipes!
How To Make Rice Milk – Affordable Food Ideas
When I'm in the kitchen experimenting with flavors, rice milk often becomes my go-to dairy alternative.
It pairs beautifully with various dishes. One of my favorite meals to enjoy alongside rice milk is a hearty bowl of granola topped with fresh fruit. The creaminess of the rice milk complements the crunchy texture of granola perfectly.
Ingredients
Instructions
Step 1: Rinse the Rice
-
Start by rinsing the rice under cold water in a fine-mesh sieve. This removes excess starch and helps prevent the milk from becoming too thick. It only takes a minute or two, but it makes a noticeable difference in texture.
Step 2: Combine Ingredients
-
In a blender, place the rinsed rice, filtered water, the pitted Medjool date, and any additional ingredients like berries or cocoa powder. Blend on high until everything is thoroughly combined and smooth. This process takes about a minute.
Step 3: Strain the Milk
-
After blending, pour the mixture through a nut milk bag or a clean cheesecloth placed over a bowl. This step is crucial for separating the liquid from the solid rice pulp. Gather the cloth and twist it to extract as much liquid as possible. It's a bit like squeezing the last bit of toothpaste from a tube—take your time!
Step 4: Sweeten and Flavor
-
Once strained, you can taste the rice milk. If it needs a little boost, this is the time to add the vanilla essence, maple syrup, and sea salt. Blend briefly to combine the flavors.
Step 5: Chill and Store
-
Pour the rice milk into a clean glass container and refrigerate it. The milk is best served cold. Don’t forget to give it a good shake before you pour, as it can separate over time.
Nutrition Facts
Servings 8
- Amount Per Serving
- Calories 24kcal
- % Daily Value *
- Total Fat 0.1g1%
- Sodium 3mg1%
- Total Carbohydrate 7g3%
- Protein 1g2%
* Percent Daily Values are based on a 2,000 calorie diet. Your daily value may be higher or lower depending on your calorie needs.
Note
- Rice Variety: Long-grain white rice works wonders, but feel free to experiment with brown rice for a nuttier flavor.
- Sweetness Control: Adjust the sweetness to your liking by adding more or less date and maple syrup.
- Storage: Homemade rice milk typically lasts about 4-5 days in the fridge. Make only what you’ll use.
- Rice Pulp Usage: Don’t toss the leftover rice pulp! Use it in smoothies, add to baked goods, or mix it into oatmeal.
- Temperature Matters: Using cold water can help cool the rice milk faster and make for a more refreshing drink.