When it comes to banana bread, what you pair with it can elevate your experience. For instance, a hot cup of coffee complements the soft texture and rich flavors perfectly. If you prefer something colder, a glass of almond milk balances the sweetness nicely.
You can also consider serving it with yogurt, especially Greek yogurt, which adds a creamy contrast. For a little indulgence, try a slather of nut butter like almond or peanut butter.
Each of these will enhance the banana bread’s delightful flavor while providing different textural experiences, making breakfast or a snack feel like a treat.

What is One Bowl Gluten-Free Banana Bread?
At its core, one bowl gluten-free banana bread is a delectable loaf made without traditional wheat flour. Instead, we use gluten-free alternatives, making it suitable for those with celiac disease or gluten sensitivity.
The beauty of this recipe lies in its simplicity: all the ingredients combine in a single bowl, ensuring minimal fuss and maximum flavor.
What Does It Taste Like?
Get ready for a slice that dances between sweet and savory. The banana lends natural sweetness, while a hint of cinnamon spices things up just enough to keep your taste buds intrigued.
The addition of nuts adds a crunch that perfectly contrasts with the softness of the bread. Overall, it’s like a warm hug in baked form – comforting, wholesome, and utterly satisfying.
Why This Recipe Works
Simple Ingredients: Each element in this recipe contributes to both flavor and texture. Using ripe bananas ensures natural sweetness and moisture.
One Bowl Convenience: No one likes the tedious cleanup from a complicated baking process. By using just one bowl, you save time and effort. It’s as easy as it gets!
Gluten-Free Versatility: Whether you’re gluten-sensitive or simply looking for a healthier option, this cake meets all needs. It’s made with gluten-free flour and oats, which keep it light and fluffy.
Adjustable Sweetness: The recipe allows for adjusting sweetness according to your preference. If your bananas are particularly ripe, you can cut back on added sugars and still achieve the perfect flavor.
Ingredients for One Bowl Gluten-Free Banana Bread
Let’s gather everything you’ll need!
- 1 whole egg (or use 1 flax or chia egg as an alternative)
- 3 tablespoons melted avocado oil or coconut oil
- ¼ cup organic cane sugar
- ¾ teaspoon fine sea salt
- 1¼ cups gluten-free flour mix
- ½ teaspoon ground cinnamon
- 2–3 tablespoons maple syrup (adjust to banana sweetness; honey works too)
- ½ teaspoon pure vanilla extract
- 1¼ cups finely ground almond meal
- 1¼ cups gluten-free rolled oats
- 3½ teaspoons baking powder (aluminum-free)
- ¼ cup firmly packed organic light brown sugar
- ¾ cup unsweetened almond milk or other plant-based milk
- 3 medium ripe bananas (yields approximately 1½ cups or 337 g, mashed)
- ¼ teaspoon ground nutmeg
- ⅓ cup chopped walnuts

Step by Step Instructions
Step 1: Preheat Your Oven
Start by preheating your oven to 350°F (175°C). This ensures your bread will bake evenly and rise beautifully.
Step 2: Prepare Baking Pan
Grease a standard loaf pan with cooking spray or line it with parchment paper for easy removal. A 9×5-inch pan works perfectly for this recipe.
Step 3: Mash the Bananas
In a large bowl, mash your bananas thoroughly. Aim for a smooth consistency; small lumps won’t hurt, but you want most of the banana to break down.
Step 4: Mix in Wet Ingredients
Add the egg, melted oil, sugar, maple syrup, and vanilla extract to the mashed bananas. Stir until well combined.
The mixture should be lush and a little shiny, hinting at the moisture to come.
Step 5: Combine Dry Ingredients
In a separate bowl (yes, I know, we’re breaking our one-bowl rule just a bit), mix the gluten-free flour, rolled oats, baking powder, salt, cinnamon, and nutmeg.
Step 6: Combine Wet and Dry Ingredients
Now’s the fun part! Gradually fold the dry mixture into the wet ingredients until just combined. Avoid over-mixing; it’s okay if the batter looks a little lumpy.
Step 7: Add Almond Meal and Nuts
Gently stir in the almond meal and walnuts. This step adds texture and a nutty flavor that goes perfectly with the sweetness of the bananas.
Step 8: Pour Batter into Pan
Transfer the batter into your prepared loaf pan. Use a spatula to smooth the top if needed.
Step 9: Bake
Place your pan in the preheated oven and let it bake for 50-60 minutes. Keep an eye on it! A toothpick inserted into the center should come out clean.
Step 10: Cool and Serve
Once done, remove the loaf from the oven and allow it to cool in the pan for about 10 minutes. Then, transfer it to a wire rack to cool completely. Slice, serve, and enjoy the delightful warm banana bread!
Notes: Tips for Success
Use Overripe Bananas: The browner, the better! They bring maximum flavor and sweetness without needing added sugars.
Don’t Skip the Nuts: Walnuts add a delightful crunch that contrasts well with the soft bread. However, feel free to omit them if allergies are a concern.
Storing Unused Bananas: If you have leftover bananas, freeze them. They make for an ideal banana bread ingredient later!
Alternative Milk Options: If you don’t have almond milk, feel free to use any plant-based milk. Coconut or soy milk also works lovely in this recipe.
Check for Doneness Carefully: Ovens can vary. If the top browns too quickly, consider covering it loosely with aluminum foil toward the end to prevent burning.
Nutrition Information
Here’s a rough breakdown per slice (based on 12 slices):
- Calories: 180
- Protein: 4g
- Fat: 7g
- Carbohydrates: 25g
- Fiber: 3g
- Sugar: 5g
These numbers can fluctuate based on the exact ingredients you use, but it’s a great start to gauge nutritional value!
How To Store The Leftovers?
If you find yourself with leftover banana bread (which can be a miracle, given how good it is), here’s how to keep it fresh:
At Room Temperature: Wrap the cooled bread in plastic wrap or foil and store it at room temperature for up to three days.
In the Fridge: For longer storage, keep it in the fridge. It can last for up to a week when wrapped properly.
Freezing: If you want to save some for later, slice the bread, wrap each slice individually, and store in a freezer-safe bag. It will last for about three months. Just thaw at room temperature before enjoying!
Sides for One Bowl Gluten-Free Banana Bread
Pair your banana bread with complementary sides for a well-rounded snack or breakfast option.
Nut Butter: Spread a layer of almond or peanut butter for a protein punch. This combo is not only delicious but satisfying too.
Fresh Berries: A side of mixed, fresh berries adds a burst of freshness with sweetness that balances the banana bread. Plus, they add a lovely pop of color to your plate!
Yogurt: A dollop of Greek yogurt adds creaminess and a tangy twist that beautifully complements the sweetness of the bread.
Herbal Tea: For something warm, a calming cup of herbal tea like chamomile or peppermint enhances the cozy vibe as you enjoy each slice.
Alternative Choices for Ingredients
You might not always have every ingredient in your pantry. Here are some alternatives:
Flour Mix: If you run out of gluten-free flour mix, try a blend of almond flour and coconut flour. Just keep in mind, you may need to adjust the liquid in the recipe since coconut flour absorbs more moisture.
Sweeteners: Instead of cane sugar, you can use coconut sugar or agave syrup as a natural sweetener alternative.
Oil Alternatives: If you’re out of avocado or coconut oil, olive oil is a fantastic substitute that still brings moisture without changing the flavor significantly.
Nuts: If you’re allergic to walnuts, feel free to use any nut or seed that suits your palate. Sunflower seeds are a great nut-free alternative!

Conclusion
One bowl gluten-free banana bread is more than just a recipe. It’s a celebration of flavors, a time-saver in the kitchen, and a crowd pleaser. From breakfasts to snacks, this banana bread fits seamlessly into any occasion and guarantees smiles all around.
Whether you’re gluten-free or just in search of a simple, healthier treat, this recipe has your back.
Dust off your measuring cups, grab those ripe bananas, and let’s bake something special today! You’ll be so happy with the results. Trust me, one slice is never enough.
You’ll also like the following recipes!
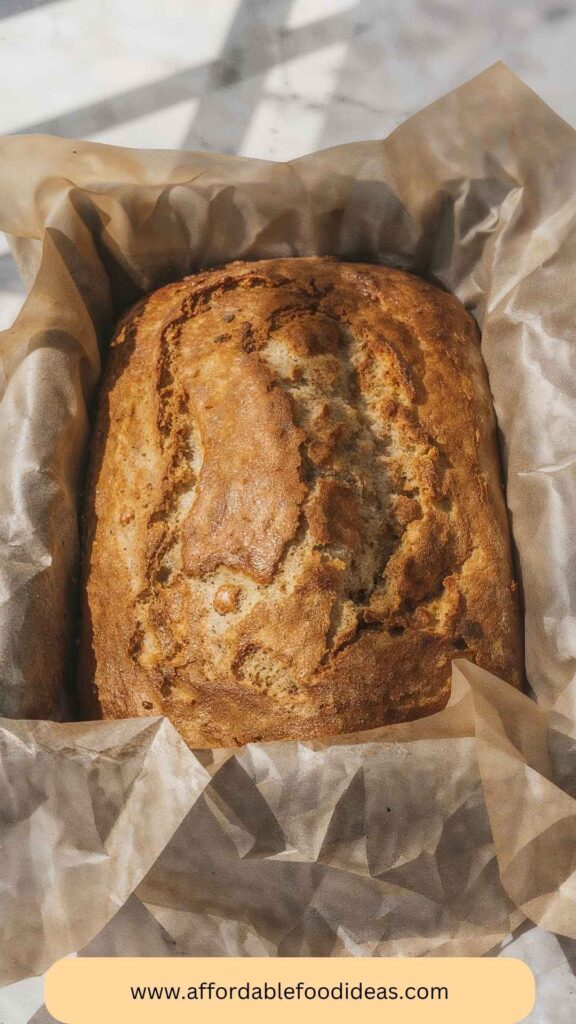
One Bowl Gluten-Free Banana Bread – Affordable Food Ideas
Banana bread has been a beloved staple in many households, transforming overripe bananas into a deliciously moist loaf. But what if I told you there’s a version that’s not only gluten-free but also incredibly easy to make? Enter the one bowl gluten-free banana bread!
Imagine whipping up this delightful treat without the stress of multiple bowls and endless cleanup. That's exactly what this recipe offers.
Quick, simple, and oh-so-tasty, it will win over even the most discerning of taste buds – and it might just become your new favorite way to enjoy bananas. Let’s dive into the details of this incredible recipe.
Ingredients
Instructions
Step 1: Preheat Your Oven
-
Start by preheating your oven to 350°F (175°C). This ensures your bread will bake evenly and rise beautifully.
Step 2: Prepare Baking Pan
-
Grease a standard loaf pan with cooking spray or line it with parchment paper for easy removal. A 9x5-inch pan works perfectly for this recipe.
Step 3: Mash the Bananas
-
In a large bowl, mash your bananas thoroughly. Aim for a smooth consistency; small lumps won’t hurt, but you want most of the banana to break down.
Step 4: Mix in Wet Ingredients
-
Add the egg, melted oil, sugar, maple syrup, and vanilla extract to the mashed bananas. Stir until well combined.
The mixture should be lush and a little shiny, hinting at the moisture to come.
Step 5: Combine Dry Ingredients
-
In a separate bowl (yes, I know, we're breaking our one-bowl rule just a bit), mix the gluten-free flour, rolled oats, baking powder, salt, cinnamon, and nutmeg.
Step 6: Combine Wet and Dry Ingredients
-
Now’s the fun part! Gradually fold the dry mixture into the wet ingredients until just combined. Avoid over-mixing; it's okay if the batter looks a little lumpy.
Step 7: Add Almond Meal and Nuts
-
Gently stir in the almond meal and walnuts. This step adds texture and a nutty flavor that goes perfectly with the sweetness of the bananas.
Step 8: Pour Batter into Pan
-
Transfer the batter into your prepared loaf pan. Use a spatula to smooth the top if needed.
Step 9: Bake
-
Place your pan in the preheated oven and let it bake for 50-60 minutes. Keep an eye on it! A toothpick inserted into the center should come out clean.
Step 10: Cool and Serve
-
Once done, remove the loaf from the oven and allow it to cool in the pan for about 10 minutes. Then, transfer it to a wire rack to cool completely. Slice, serve, and enjoy the delightful warm banana bread!
Nutrition Facts
Servings 10
- Amount Per Serving
- Calories 180kcal
- % Daily Value *
- Total Fat 7g11%
- Total Carbohydrate 25g9%
- Dietary Fiber 3g12%
- Sugars 5g
- Protein 4g8%
* Percent Daily Values are based on a 2,000 calorie diet. Your daily value may be higher or lower depending on your calorie needs.
Note
- Use Overripe Bananas: The browner, the better! They bring maximum flavor and sweetness without needing added sugars.
- Don’t Skip the Nuts: Walnuts add a delightful crunch that contrasts well with the soft bread. However, feel free to omit them if allergies are a concern.
- Storing Unused Bananas: If you have leftover bananas, freeze them. They make for an ideal banana bread ingredient later!
- Alternative Milk Options: If you don’t have almond milk, feel free to use any plant-based milk. Coconut or soy milk also works lovely in this recipe.
- Check for Doneness Carefully: Ovens can vary. If the top browns too quickly, consider covering it loosely with aluminum foil toward the end to prevent burning.