If you’re looking for the perfect companion to your actually crispy baked chickpeas, you’re in for a treat! These delightful bites can complement a variety of dishes beautifully. Think about serving them alongside a vibrant Mediterranean quinoa salad brimming with cherry tomatoes and cucumbers. Alternatively, toss them into a warm spinach and feta salad for added crunch. They also pair well with creamy dips like hummus or tzatziki, offering a satisfying contrast of textures.
Alright, let’s dive in!

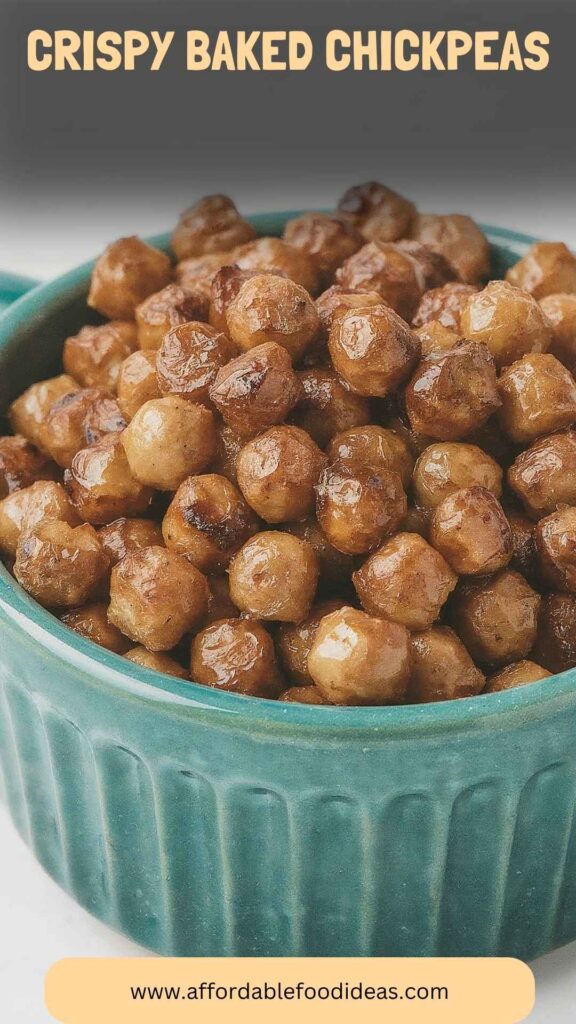
What Are Actually Crispy Baked Chickpeas?
Actually crispy baked chickpeas are precisely that: crunchy, flavorful, and an irresistibly satisfying snack. Chickpeas, also known as garbanzo beans, are legumes that originate from the Middle East and have become a staple in many cuisines around the globe. When roasted, they transform into a crispy treat that can be seasoned in countless ways—from spicy to savory to sweet.
The beauty of this preparation lies not only in its snack-worthy crunch but also in the abundant nutrients these little powerhouses offer. Filled with protein, fiber, and vitamins, chickpeas are not just food; they’re tiny nuggets of health.
Why This Recipe Works
1. The Roasting Technique: The magic of achieving the ultimate crunch lies in the roasting process. Pre-heating the oven properly and roasting at specified temperatures ensure that the chickpeas cook evenly. A little oil helps facilitate the crunch, while the dry heat from the oven draws out moisture effectively.
2. The Seasoning Symphony: It’s not just about crunch; it’s about flavor, too. By using spices like cumin, chili powder, and thyme, you infuse each chickpea with layers of taste that keep you coming back for more. You can mix and match different spices according to your preferences.
3. No Skimping on Quality: Using quality ingredients makes a significant difference. High-quality extra virgin olive oil and fresh garlic elevate the dish’s flavor without introducing unnecessary fats or calories.
4. Versatility in Preparation: Once you master the basic recipe, the possibilities expand. You can add your favorite herbs, adjust spice levels, or even sweeten them up with cinnamon for a delicately different variation. You’ll never feel boxed in.
Ingredients You’ll Need to Make This Dish
To whip up a batch of actually crispy baked chickpeas, gather these simple ingredients from your kitchen:
- 1 tablespoon extra virgin olive oil
- 1 small garlic clove, minced
- 1 can (19 oz) chickpeas, drained and thoroughly rinsed
- ½ teaspoon sea salt
- ¾ teaspoon ground chili powder
- ½ teaspoon dried thyme leaves
- 1 teaspoon ground cumin
It’s straightforward, isn’t it? Just a handful of ingredients, but you can feel the nutritious intention behind every one of them.

How To Make Actually Crispy Baked Chickpeas
Let’s get down to the actual cooking part. Here’s how you make these delightful morsels step by step.
Step 1: Preheat Your Oven
Kick things off by preheating your oven to 400°F (200°C). This step is crucial for creating the perfect environment for crisping up those chickpeas. A hot oven helps water evaporate quickly, leading to that desired crunch.
Step 2: Prepare the Chickpeas
Rinse your chickpeas under cool water and drain them thoroughly. Place them on a kitchen towel or paper towel and pat them dry; moisture is the enemy of crispiness. You want each chickpea to feel like it’s ready for a night out.
Step 3: Season the Chickpeas
In a bowl, mix your olive oil, minced garlic, sea salt, chili powder, thyme, and cumin with the dried chickpeas. Stir until all the chickpeas are evenly coated. It’s like giving your chickpeas a little spa treatment, prepping them for their oven transformation.
Step 4: Arrange on a Baking Sheet
Spread the chickpeas in a single layer on a baking sheet lined with parchment paper. A single layer ensures that the heat circulates evenly, allowing every chickpea the chance to become perfectly crispy.
Step 5: Bake
Pop your baking sheet into the preheated oven and bake for about 25-30 minutes. Be sure to give the pan a shake or stir halfway through to promote even cooking. Keep an eye on those little beauties; you want them golden brown but not burnt.
Step 6: Cool and Enjoy
Once baked, remove the chickpeas from the oven and let them cool for a few minutes on the baking sheet. They’ll continue to crisp up as they cool. Then enjoy them as a snack, toss them into salads, or sprinkle them atop soups.
Tips & Tricks
Here are some handy tips to elevate your baked chickpeas even further:
Drying Matters: Take your time patting the chickpeas dry. The drier they are, the crunchier they’ll get during baking.
Experiment with Spices: Don’t shy away from creativity. Use paprika, smoked paprika, or curry powder to give them extra depth of flavor.
Check for Doneness: If you’re unsure, keep a close eye toward the end of the baking time. They can go from perfectly crispy to burnt very quickly.
Batch It Up: Make multiple batches at once! They keep well and are perfect for meal prep.
Store Wisely: Once completely cool, store them in an airtight container. Just make sure to keep them away from humidity.
Nutrition Information
Curious about what’s under the surface of these crispy treats? Here’s a quick breakdown of the nutritional benefits for one serving (about 1/2 cup) of baked chickpeas:
- Calories: 120
- Protein: 6 grams
- Fat: 3 grams
- Carbohydrates: 20 grams
- Fiber: 5 grams
- Calcium: 4% of the Daily Value (DV)
- Iron: 10% of the DV
These little nuggets pack a powerful punch in protein and fiber, making them ideal for a healthy snacking option.
How Do You Store The Leftovers?
If you ever have leftovers (which, let’s be honest, is unlikely—they’re that good!), here’s how to keep them fresh:
1. Cool Completely: Make sure the chickpeas are entirely cool before storing.
2. Use Airtight Containers: Place them in an airtight container to keep their crunchy texture. Glass or plastic containers work well.
3. Room Temperature: They can be stored at room temperature for a week. However, if you live in a humid area, consider refrigerating them. Just know that refrigeration may slightly impact their texture.
What Sides Would Complement Actually Crispy Baked Chickpeas?
1. Mediterranean Quinoa Salad: This salad bursts with flavors that balance the crispy chickpeas. Ingredients like cucumbers, ripe tomatoes, olives, and feta cheese drizzled with lemon vinaigrette create a refreshing accompaniment.
2. Creamy Hummus: The dip pairs wonderfully with chickpeas. You get a lovely contrast in texture and flavor. Whether you opt for traditional hummus or a roasted red pepper variant, it’s bound to be a hit.
3. Zucchini Noodles: Lightly sautéed zucchini noodles tossed with grilled veggies create a fresh, healthy plate that meshes perfectly with the crunchiness of your chickpea snack.
What Alternatives Can You Use for Ingredients if They Are Not Present?
1. Coconut Oil: Swap the olive oil for coconut oil if you prefer a hint of sweetness and flavor.
2. Other Beans: Can’t find chickpeas? Try using black beans or kidney beans instead. Each will lend a different flavor profile.
3. Garlic Powder: If fresh garlic isn’t handy, garlic powder can stand in. Use about 1/4 teaspoon for a quick substitute.
4. Different Seasonings: Use whatever spices you have at home. From Italian herbs to taco seasoning, it all works. Experiment and see what flavors resonate with you!

Conclusion
Now, you’re all set to embark on a crispy chickpea journey that promises to delight anyone lucky enough to try them. With this simple recipe, you’ll whip up a snack that’s both healthy and totally addictive. We’ve explored techniques, tips, and even delved into some food science. Plus, the versatility of actually crispy baked chickpeas means you can tailor them to check all the boxes on your flavor wishlist.
So, gather those ingredients, channel your inner foodie, and whip up a batch for your next gathering—or just a snack night for yourself (I won’t judge!). Savor every crunchy bite knowing you’ve created something deliciously healthy. Your new favorite snack awaits. Enjoy!
You’ll also like the following recipes!
Crispy Baked Chickpeas – Affordable Food Ideas
Welcome to my culinary adventure with baked chickpeas! As a registered dietitian and passionate food blogger, I’ve always loved exploring ways to make healthy snacks just as exciting as their less wholesome counterparts.
Recently, I experimented with roasted chickpeas and stumbled upon a version that is not just crunchy but truly crispy. Forget minor shortcomings of other recipes; this one takes chickpeas to the next level.
But who needs a snack that’s just tasty? I believe we should aim for something that satisfies the palate while also being nutritious. So let’s walk through the delightful journey of making actually crispy baked chickpeas. Trust me; your taste buds and your better judgment will thank you for it!
Ingredients
Instructions
Step 1: Preheat Your Oven
-
Kick things off by preheating your oven to 400°F (200°C). This step is crucial for creating the perfect environment for crisping up those chickpeas. A hot oven helps water evaporate quickly, leading to that desired crunch.
Step 2: Prepare the Chickpeas
-
Rinse your chickpeas under cool water and drain them thoroughly. Place them on a kitchen towel or paper towel and pat them dry; moisture is the enemy of crispiness. You want each chickpea to feel like it’s ready for a night out.
Step 3: Season the Chickpeas
-
In a bowl, mix your olive oil, minced garlic, sea salt, chili powder, thyme, and cumin with the dried chickpeas. Stir until all the chickpeas are evenly coated. It’s like giving your chickpeas a little spa treatment, prepping them for their oven transformation.
Step 4: Arrange on a Baking Sheet
-
Spread the chickpeas in a single layer on a baking sheet lined with parchment paper. A single layer ensures that the heat circulates evenly, allowing every chickpea the chance to become perfectly crispy.
Step 5: Bake
-
Pop your baking sheet into the preheated oven and bake for about 25-30 minutes. Be sure to give the pan a shake or stir halfway through to promote even cooking. Keep an eye on those little beauties; you want them golden brown but not burnt.
Step 6: Cool and Enjoy
-
Once baked, remove the chickpeas from the oven and let them cool for a few minutes on the baking sheet. They’ll continue to crisp up as they cool. Then enjoy them as a snack, toss them into salads, or sprinkle them atop soups.
Nutrition Facts
Servings 2
- Amount Per Serving
- Calories 120kcal
- % Daily Value *
- Total Fat 3g5%
- Total Carbohydrate 20g7%
- Dietary Fiber 5g20%
- Protein 6g12%
* Percent Daily Values are based on a 2,000 calorie diet. Your daily value may be higher or lower depending on your calorie needs.
Note
- Drying Matters: Take your time patting the chickpeas dry. The drier they are, the crunchier they’ll get during baking.
- Experiment with Spices: Don’t shy away from creativity. Use paprika, smoked paprika, or curry powder to give them extra depth of flavor.
- Check for Doneness: If you’re unsure, keep a close eye toward the end of the baking time. They can go from perfectly crispy to burnt very quickly.
- Batch It Up: Make multiple batches at once! They keep well and are perfect for meal prep.
- Store Wisely: Once completely cool, store them in an airtight container. Just make sure to keep them away from humidity.