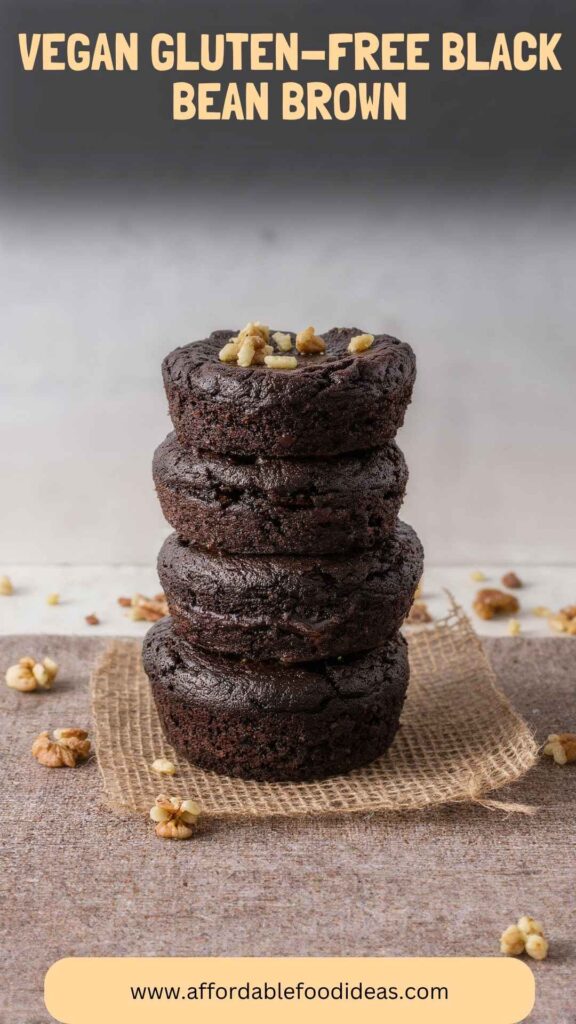
Picture this: it’s a rainy day, and you’re craving something chocolatey and indulgent. But wait—you’re vegan, gluten-free, and want to keep it healthy too. Should you ditch your desires? Absolutely not! Let me introduce you to vegan gluten-free black bean brownies—a creation that not only satisfies your sweet tooth but also packs a nutritional punch.
As a food enthusiast and registered dietitian, I’ve tried countless brownie recipes, but these little squares of joy stand out. Why? Because they have an impressive texture, a lovely richness, and you won’t believe they’re made with black beans. Stick around as I take you on a journey to bake these delights yourself.

What Are Vegan Gluten-Free Black Bean Brownies?
At their core, vegan gluten-free black bean brownies take two seemingly unrelated concepts—black beans and brownies—and create magic. These brownies are made from black beans as the base, which replaces traditional flour while boosting fiber and protein. They are naturally sweetened, packed with nutrients, and are so chewy and rich that you might just forget they’re allergy-friendly.
I’ve experimented with different variations, and each time, these brownies have managed to steal the show. There’s something empowering about using wholesome ingredients to whip up a sweet treat that feels indulgent without the guilt.
Why You’ll Love This Recipe
Let me explain. You’ll adore these brownies for a handful of reasons. Firstly, they’re incredibly easy to make. Secondly, the ingredients are often ones you already have in your pantry. Lastly, they taste fantastic—rich, fudgy, and, as I mentioned before, indulgent without the guilt.
When I share these brownies with friends and family, their reactions are priceless. Initially hesitant, they dive in and can’t resist going back for seconds. It’s a magical moment when they realize they’re vegan and gluten-free!
The Ingredients
Preparing vegan gluten-free black bean brownies requires just a few straightforward ingredients. Here’s what you’ll need:
- 6 tablespoons filtered water
- 3 tablespoons melted coconut oil (or substitute with another neutral oil)
- 1 (15-ounce) can black beans, thoroughly rinsed and drained (about 1 3/4 cups)
- 1/2 heaping cup organic cane sugar, lightly pulverized for a finer texture
- 1 tablespoon espresso powder (optional, to deepen chocolate flavor)
- 3/4 cup premium cocoa powder (choose the finest quality available)
- 1 teaspoon pure vanilla extract
- 2 heaping tablespoons ground flaxseed
- 1 1/2 teaspoons baking powder
- 1/4 teaspoon ground cinnamon (for warmth and complexity)
Optional Toppings:
- Chopped walnuts
- Pecan pieces
- Dairy-free semisweet chocolate chunks
These items are not only easy to find but also packed with flavor. Each ingredient plays a significant role in crafting the ultimate brownie.

Step-by-Step Instructions
Step 1: Preheat Your Oven
Start by preheating your oven to 350°F (175°C). This initial step ensures that your brownies cook evenly and develop that lovely texture we crave.
Step 2: Prepare Your Baking Dish
Grab a square baking dish (an 8×8 inch one works perfectly). Line it with parchment paper, leaving some overhang on the sides. This will make removing your brownies a walk in the park!
Step 3: Blend The Black Beans
In a blender or food processor, combine the black beans, melted coconut oil, filtered water, and vanilla extract. Blend this mixture until it’s smooth and creamy. You’re aiming for a texture that resembles a thick pudding.
Step 4: Combine The Dry Ingredients
In a separate bowl, mix together the cocoa powder, organic cane sugar, espresso powder, ground flaxseed, baking powder, and ground cinnamon. Stir these ingredients well until they’re evenly combined.
Step 5: Combine Wet and Dry Mixtures
Now it’s time to combine. Pour the blended black bean mixture into the bowl with your dry ingredients. Gently fold everything together with a spatula until fully incorporated. Be careful not to over-mix.
Step 6: Pour Into Baking Dish
Transfer the brownie batter into your prepared baking dish. Use the spatula to spread the mixture evenly across the dish, smoothing out the top.
Step 7: Add Toppings
Here’s where you can get a bit creative! If you desire, sprinkle chopped walnuts, pecan pieces, or dairy-free chocolate chunks on top. If you’re anything like me, you always go for the chocolate chunks!
Step 8: Bake
Place the dish in your preheated oven and bake for about 25-30 minutes, or until a toothpick inserted into the center comes out clean. Don’t overbake! A little fudginess is ideal.
Step 9: Cool and Slice
Once baked, remove the brownies from the oven and let them cool in the dish for about 10-15 minutes. Then, use the parchment overhang to lift them out and transfer them to a cooling rack. Once cooled, slice them into squares.
Now, take a moment to enjoy the aroma—trust me, it’ll be hard to resist diving in right away!
Tips & Tricks
These handy tips will ensure you’re set up for success:
- Use Fine Sugar: Pulverizing your organic cane sugar gives a smoother texture to the brownies.
- Experiment with Oil: Coconut oil adds a unique flavor, but feel free to swap it with another neutral oil that you prefer.
- Chill for More Flavor: For a richer taste, allow the brownies to sit for a few hours or overnight. The flavors meld beautifully!
- Change Up the Toppings: Try using different nuts or even dried fruits for a new spin.
- Don’t Skip the Flaxseed: This ingredient acts as a binder and contributes to the fudgy texture.
Nutrition Information
Let’s talk nutrition! Each brownie has roughly the following profile:
- Calories: 133
- Protein: 4g
- Fat: 5g
- Carbohydrates: 18g
- Fiber: 4g
- Sugar: 7g
Not only are they delicious, but you’re also getting a good dose of fiber and nutrients thanks to the black beans and flaxseed.
Can I Store Vegan Gluten-Free Black Bean Brownies?
Absolutely! These brownies store beautifully. Place them in an airtight container and keep them at room temperature for about 3-4 days. If you want to keep them longer, pop them in the fridge, where they can last up to a week. For even longer storage, freeze them. Just wrap individual squares in plastic wrap and store them in a freezer-safe bag. They’ll keep for about 3 months!
What Can I Serve With Vegan Gluten-Free Black Bean Brownies?
Serving suggestions can enhance your brownie experience even further. Here are a few ideas:
- Vegan Ice Cream: Serve with a scoop of dairy-free ice cream for a decadent dessert.
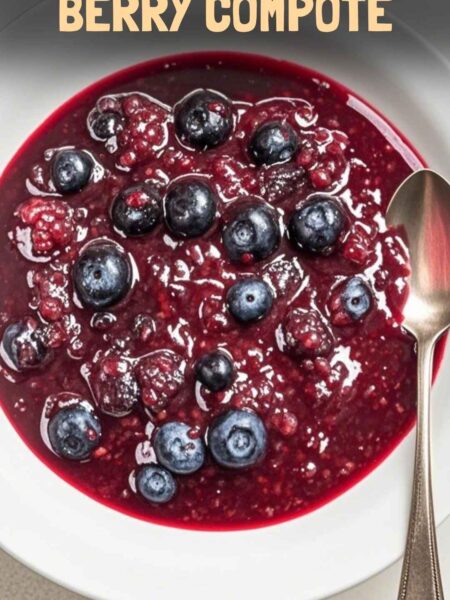
- Fresh Fruit: Pair these brownies with fresh fruits like berries for a refreshing contrast.
- Nut Butter Drizzle: A drizzle of almond or peanut butter can elevate your brownie game.
- Coconut Whipped Cream: Add a dollop for a light and airy touch.
- Espresso: Enjoy with a cup of your favorite coffee for that classic café experience.
Variations
Feeling creative? Here are some variations to spice up your brownies:
- Nut Butter Swirl: Before baking, swirl in your favorite nut butter for added creaminess.
- Mint Chocolate Chip: Add a couple of drops of peppermint extract and sprinkle in some vegan chocolate chips for a minty twist.
- Caramel Drizzle: Top the brownies with a vegan caramel sauce right before serving.
- Chili Chocolate: For a spicy kick, mix in a pinch of chili powder or cayenne into the batter.
- Protein-Packed: Substitute a portion of the cocoa powder with a high-quality chocolate protein powder to boost the protein content.

Conclusion
In a world where indulgence often comes at a cost, vegan gluten-free black bean brownies offer a delightful compromise. With each bite, you get chocolatey goodness that’s satisfying yet guilt-free. This recipe allows you to indulge your sweet tooth without throwing your diet or lifestyle out the window.
So go ahead, gather your ingredients, and get baking! You’ll impress yourself and anyone lucky enough to share these brownies with you. Trust me; they won’t be able to tell the difference, and you’ll feel accomplished knowing you created something both delicious and nutritious. Dive in, and enjoy the balance of health and decadence!
You’ll also like the following recipes!
Vegan Gluten-Free Black Bean Brown – Affordable Food Ideas
Picture this: it’s a rainy day, and you’re craving something chocolatey and indulgent. But wait—you're vegan, gluten-free, and want to keep it healthy too. Should you ditch your desires? Absolutely not! Let me introduce you to vegan gluten-free black bean brownies—a creation that not only satisfies your sweet tooth but also packs a nutritional punch.
Ingredients
Optional Toppings:
Instructions
Step 1: Preheat Your Oven
-
Start by preheating your oven to 350°F (175°C). This initial step ensures that your brownies cook evenly and develop that lovely texture we crave.
Step 2: Prepare Your Baking Dish
-
Grab a square baking dish (an 8x8 inch one works perfectly). Line it with parchment paper, leaving some overhang on the sides. This will make removing your brownies a walk in the park!
Step 3: Blend The Black Beans
-
In a blender or food processor, combine the black beans, melted coconut oil, filtered water, and vanilla extract. Blend this mixture until it's smooth and creamy. You’re aiming for a texture that resembles a thick pudding.
Step 4: Combine The Dry Ingredients
-
In a separate bowl, mix together the cocoa powder, organic cane sugar, espresso powder, ground flaxseed, baking powder, and ground cinnamon. Stir these ingredients well until they're evenly combined.
Step 5: Combine Wet and Dry Mixtures
-
Now it’s time to combine. Pour the blended black bean mixture into the bowl with your dry ingredients. Gently fold everything together with a spatula until fully incorporated. Be careful not to over-mix.
Step 6: Pour Into Baking Dish
-
Transfer the brownie batter into your prepared baking dish. Use the spatula to spread the mixture evenly across the dish, smoothing out the top.
Step 7: Add Toppings
-
Here’s where you can get a bit creative! If you desire, sprinkle chopped walnuts, pecan pieces, or dairy-free chocolate chunks on top. If you're anything like me, you always go for the chocolate chunks!
Step 8: Bake
-
Place the dish in your preheated oven and bake for about 25-30 minutes, or until a toothpick inserted into the center comes out clean. Don’t overbake! A little fudginess is ideal.
Step 9: Cool and Slice
-
Once baked, remove the brownies from the oven and let them cool in the dish for about 10-15 minutes. Then, use the parchment overhang to lift them out and transfer them to a cooling rack. Once cooled, slice them into squares.
Now, take a moment to enjoy the aroma—trust me, it’ll be hard to resist diving in right away!
Nutrition Facts
Servings 12
- Amount Per Serving
- Calories 133kcal
- % Daily Value *
- Total Fat 5g8%
- Total Carbohydrate 18g6%
- Dietary Fiber 4g16%
- Sugars 7g
- Protein 4g8%
* Percent Daily Values are based on a 2,000 calorie diet. Your daily value may be higher or lower depending on your calorie needs.
Note
- Use Fine Sugar: Pulverizing your organic cane sugar gives a smoother texture to the brownies.
- Experiment with Oil: Coconut oil adds a unique flavor, but feel free to swap it with another neutral oil that you prefer.
- Chill for More Flavor: For a richer taste, allow the brownies to sit for a few hours or overnight. The flavors meld beautifully!
- Change Up the Toppings: Try using different nuts or even dried fruits for a new spin.
- Don’t Skip the Flaxseed: This ingredient acts as a binder and contributes to the fudgy texture.