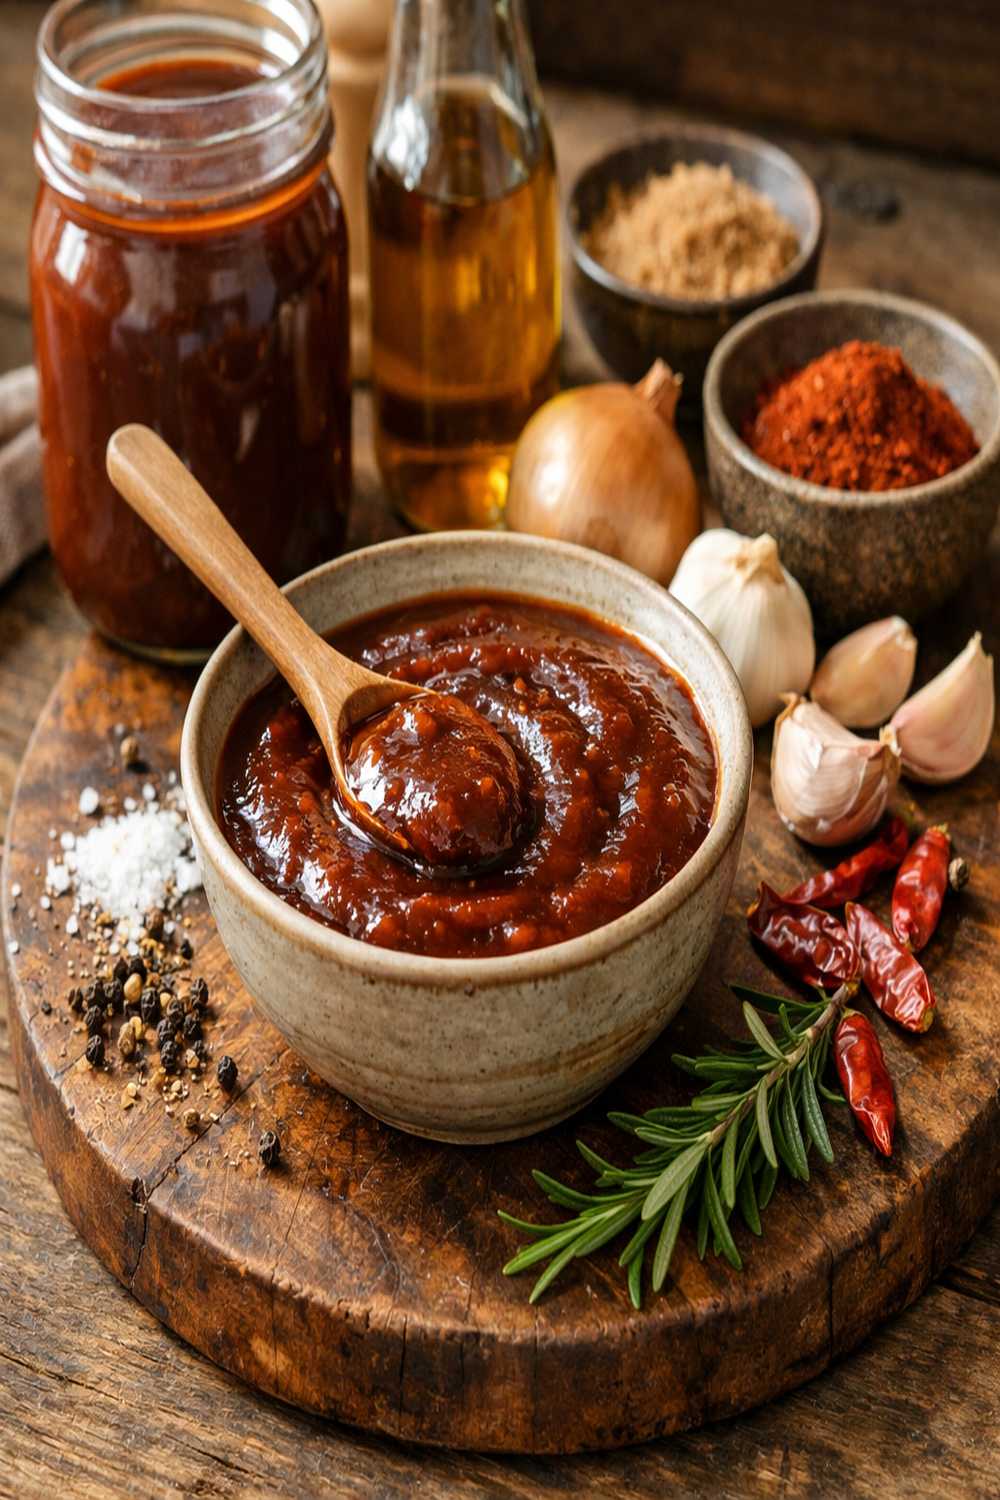
Ingredients
Method
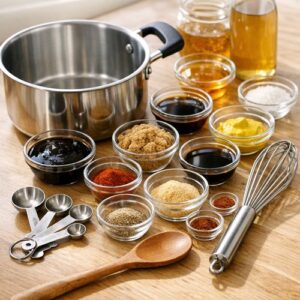
Step 1: Gather Your Equipment and Ingredients
- Pull out a medium saucepan (three-quart capacity works perfectly), a whisk, measuring spoons, and a heat-safe spoon for stirring. Arrange all your ingredients on the counter so you're not searching mid-process. This mise en place approach—preparing everything before cooking—comes from professional kitchens and makes the whole experience smoother. I also recommend having a mason jar or glass container ready for storage. You'll want to pour the finished sauce into something airtight, so prep that now while you're thinking about it.
Step 2: Combine All Ingredients in Your Saucepan
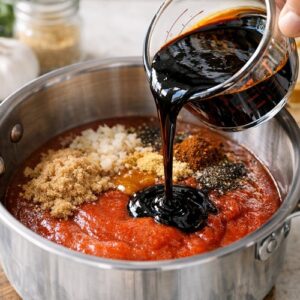
- Pour the two cups of tomato sauce directly into your saucepan. Add the molasses next—it's thick, so use a measuring cup you don't mind getting sticky, or use an ice-cream scoop to help it release. Pour in the apple cider vinegar, then sprinkle in all the dry seasonings: salt, garlic powder, onion powder, black pepper, cayenne, and smoked paprika. If you're using Worcestershire sauce, add that now too. Here's the important part: don't start cooking yet. Use your whisk to stir everything together thoroughly until completely combined. You want no lumps of molasses remaining and the spices evenly distributed throughout. This takes about two minutes of steady whisking.
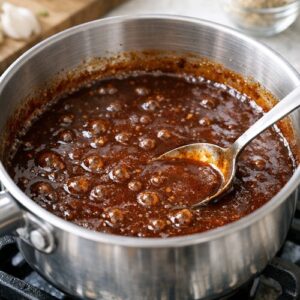
Step 3: Heat to Medium-High and Watch for the Boil
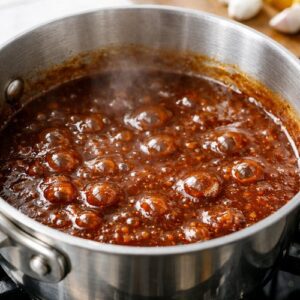
- Set your burner to medium-high heat. You're looking for the mixture to come to a gentle, rolling boil—not a vigorous, violent one. This usually takes about five to seven minutes depending on your stove. You'll notice the surface will begin to bubble, and steam will rise from the pan. Once you reach that gentle boil, let it hold steady for exactly one minute. This brief boil helps the ingredients meld and ensures any bacteria from canned ingredients are neutralized. Don't skip this step or extend it too long—one minute is perfect.
Step 4: Reduce Heat and Simmer for Flavor Development
- After that one-minute boil, immediately reduce your heat to medium-low or low—whichever setting keeps the sauce at a gentle simmer with just a few bubbles breaking the surface. This is where the magic happens. Over the next twenty minutes, the flavors will develop and deepen as the sauce reduces slightly and the ingredients get to know each other. Stir occasionally—about every four or five minutes—but don't feel like you need to stand there watching constantly. Use this time to clean up your prep dishes or set your table. The occasional stir prevents sticking on the bottom and ensures even cooking. You'll notice the sauce darkening slightly, becoming more concentrated, and smelling increasingly aromatic. After twenty minutes, the sauce should coat the back of a spoon and look glossy. If you draw your finger across the back of a spoon and the sauce doesn't immediately run back together, you've got the right consistency.
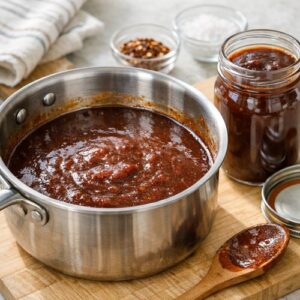
Step 5: Cool and Transfer to Storage
- Remove the saucepan from heat and let the sauce cool to room temperature—this typically takes thirty to forty-five minutes. While it cools, you can wash out your mason jar or prep your storage containers. Once cooled, carefully pour the sauce into your storage container. You can use a funnel to make this neater, or simply pour slowly and carefully. Leave about half an inch of space at the top—the sauce will settle as it cools completely. Cover tightly and refrigerate. Pro tip: I like to cool the sauce completely on the counter before refrigerating because it prevents condensation buildup inside the jar, which can lead to mold formation. Patience here pays off in longevity.
Notes
- Use homemade tomato sauce if possible - If you can, make your own tomato sauce by simmering fresh tomatoes with garlic and olive oil. Store-bought works fine, but homemade tastes noticeably better and often costs less when tomatoes are in season.
- Blackstrap molasses versus maple syrup - Blackstrap molasses is the most nutritious option because it's the byproduct of sugar refinement and retains minerals. Maple syrup works if that's what you have, but the sauce will be slightly thinner and less rich. Pure maple syrup is also pricier, so blackstrap is the budget winner.
- Don't skip the apple cider vinegar - This is what gives the sauce its characteristic tang and helps preserve it. Regular white vinegar works in a pinch, but apple cider vinegar adds subtle sweetness that balances the molasses beautifully.
- Taste as you go - After simmering, let the sauce cool slightly and taste a small spoonful. Adjust the salt, cayenne, or vinegar if needed. Remember that flavors are more pronounced when warm and mellow as it cools, so taste-test lukewarm rather than piping hot.
- Double the batch if you have time - The cooking time doesn't increase much if you double the recipe. Make six cups instead of three, and you've got sauce for a full month. Freeze half in ice cube trays for individual portions.
- Worcestershire sauce is optional but highly recommended - This adds umami depth that makes the sauce taste more complex and restaurant-quality. It's also very affordable and lasts forever in your pantry.