This post contains affiliate links. As an Amazon Associate I earn from qualifying purchases.
I’ve always believed that the best meals come from your own kitchen, not a fancy bottle from the specialty aisle. This homemade barbecue sauce without that store-bought red stuff is exactly what I mean—it’s bold, tangy, and costs a fraction of what you’d spend on premium brands. Pair it with Baked Beans Recipe on the Stovetop for a complete backyard feast, or brush it on Buffalo Wings Recipe for game day glory.
How I Discovered the Perfect Sauce Without the Red Stuff
Growing up in a small New England town, my family didn’t have much money, but we had something better: a garden and creativity. My grandmother made everything from scratch—bread, jam, even her own condiments. I remember watching her combine simple pantry staples to create sauces that tasted restaurant-quality. One summer, when she ran out of bottled sauce before a Fourth of July cookout, she grabbed what she had on hand: tomato sauce, vinegar, and molasses. What came together was pure magic.
That memory stuck with me through culinary school and my years working as a registered dietitian. I realized that the biggest barrier to healthy eating wasn’t knowledge—it was cost and complexity. So many families skip homemade sauces because they think it requires fancy ingredients or special techniques. The truth? This barbecue sauce proves otherwise.
Now, I make this sauce year-round at my home near Waltham, and I’ve perfected it to be not just delicious, but also nutrient-dense and wallet-friendly. Today, I’m sharing exactly how you can do the same.
What is Barbecue Sauce Without Ketchup Recipe?
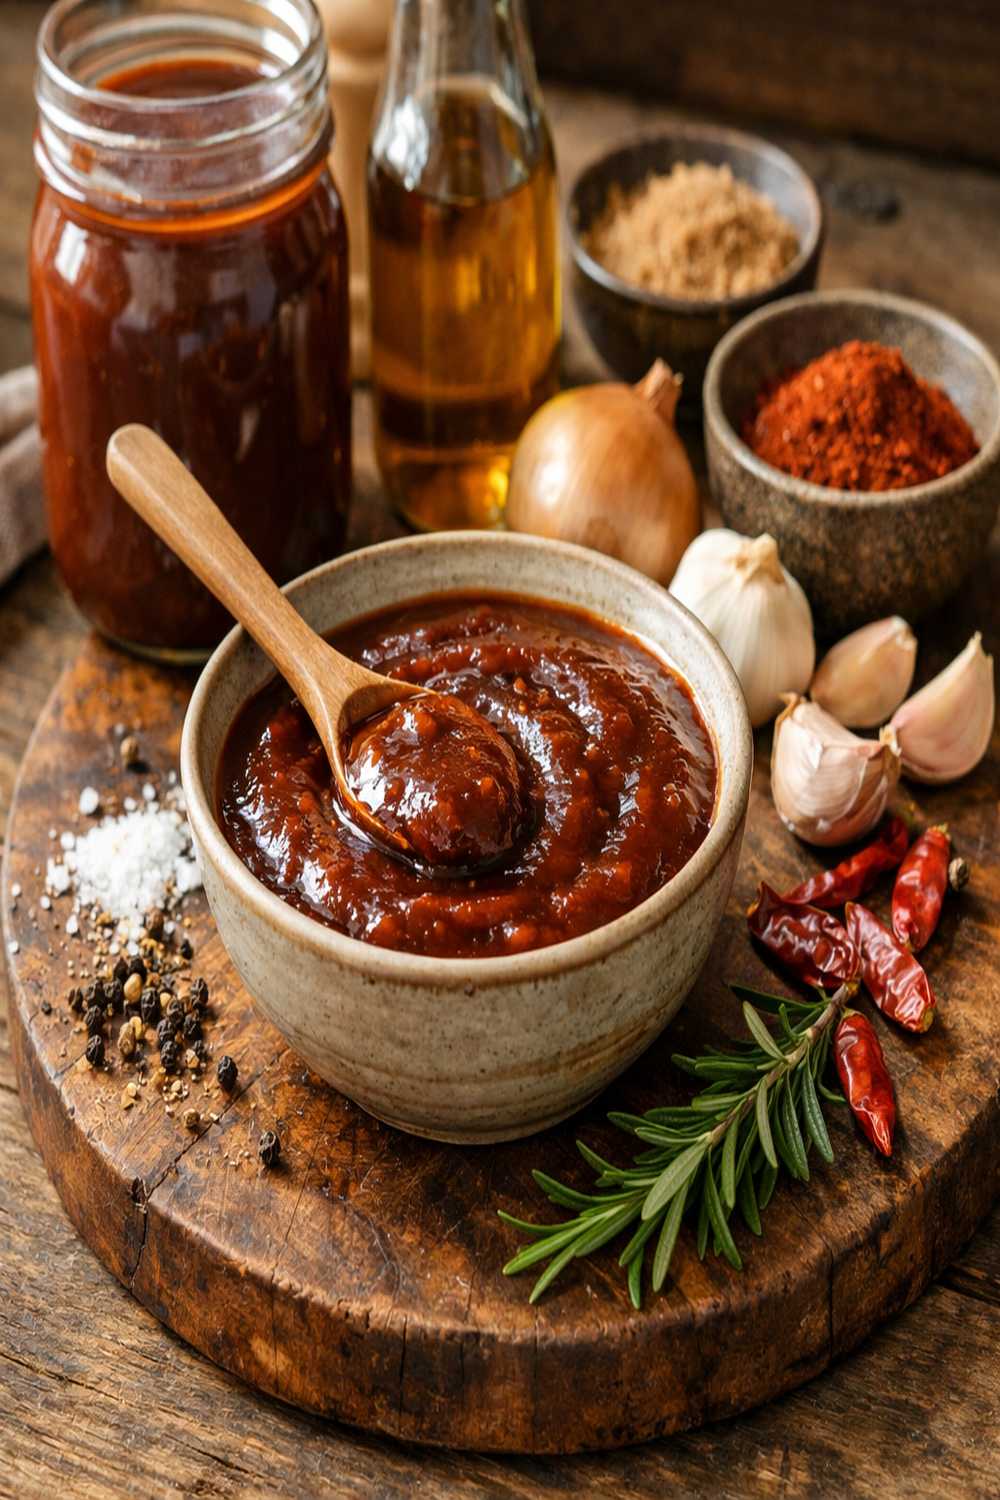
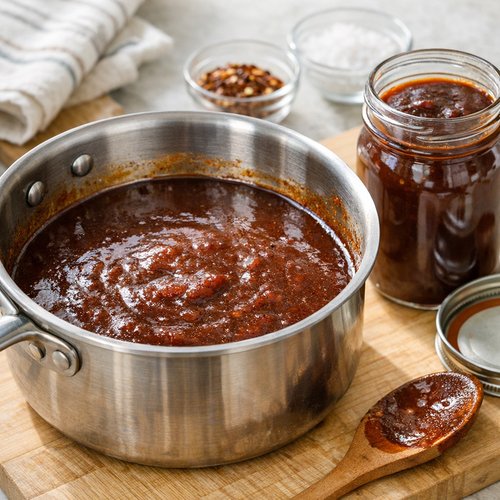
This is a from-scratch barbecue sauce that skips the commercial red sauce entirely and builds its flavor foundation on tomato, vinegar, and molasses instead. The result is deeper, more complex, and ironically more “barbecue-forward” than many bottled versions.
Traditionally, barbecue sauce comes from regional American smoking and grilling customs. In the South, you’ll find thin, vinegar-based sauces. Move to the Midwest, and you get thicker, sweeter versions. This recipe sits somewhere in the middle—it honors both traditions while being completely customizable to your family’s preferences.
What makes it special is that you’re controlling every single ingredient. No high fructose corn syrup. No mysterious preservatives. Just honest, whole-food components that you can pronounce and afford. As a dietitian, I appreciate that it delivers real nutrition too—the tomato provides lycopene, the vinegar aids digestion, and the molasses contributes minerals like iron and calcium.
Why You’ll Love This Barbecue Sauce Without Ketchup Recipe
- Budget-friendly from start to finish – You’re likely paying under two dollars for enough sauce to last three weeks of meals. A single bottle of premium barbecue sauce costs three to five times that amount.
- Makes your kitchen smell incredible – As this simmers, your entire home fills with warm, caramelized aromas that no store-bought sauce can replicate. It’s the smell of real food coming together.
- Completely customizable to your tastes – Like it spicier? Add more cayenne. Prefer tangier? Double the vinegar. This is your sauce, not the manufacturer’s recipe.
- Packed with nutritional benefits – Blackstrap molasses brings iron, calcium, and potassium. Apple cider vinegar supports gut health. Tomatoes deliver lycopene, an antioxidant linked to heart health.
- Lasts longer than you’d expect – Properly stored, you’ve got three to four weeks of sauce ready to go. That’s meal prep efficiency at its finest.
- Contains zero artificial ingredients – Every single component serves a purpose: flavor, texture, or preservation. Nothing else.
The Ingredients
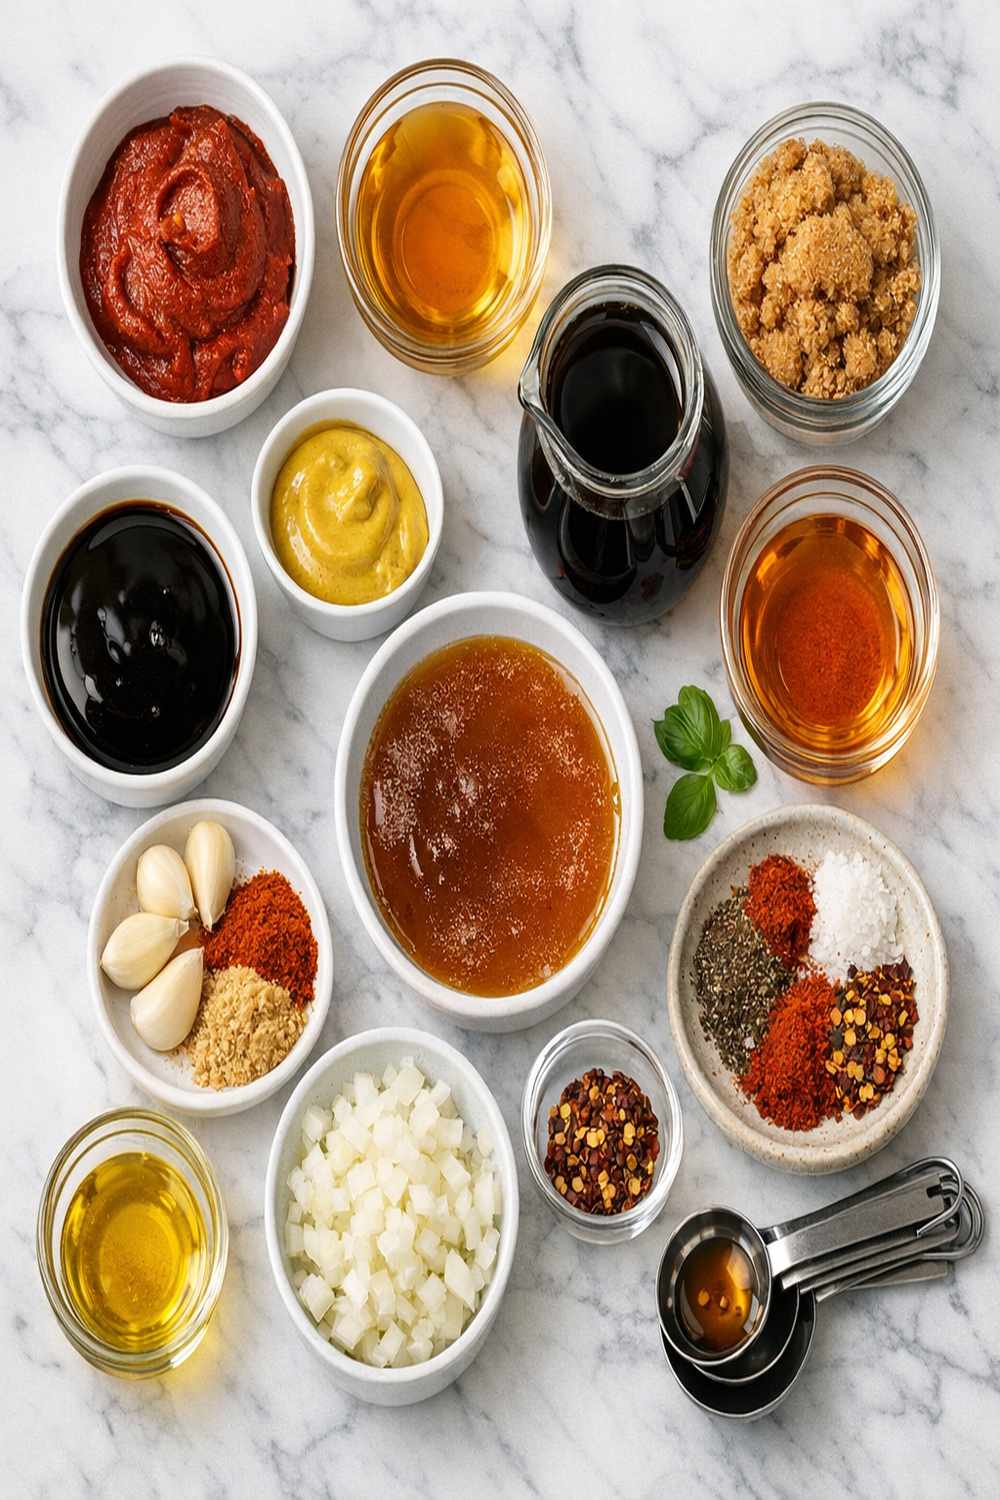
I’ve chosen these ingredients because they work together harmoniously—each one does a job. The tomato provides body and acidity balance. The molasses brings sweetness and complexity. The vinegar adds bite. The spices tie everything together. You likely have most of these in your pantry already, which means you’re already halfway to homemade barbecue sauce perfection.
This recipe makes approximately three cups of finished sauce, enough for about eight servings of pulled pork, eight grilled chicken breasts, or multiple side dishes.
- ¼ teaspoon garlic powder (freshly ground if possible)
- 1 tablespoon Worcestershire sauce (optional but recommended for depth)
- ½ teaspoon fine sea salt (adjustable to your preference)
- pinch cayenne pepper (start small, adjust upward)
- ½ teaspoon smoked paprika (adds subtle smokiness without a grill)
- ¼ teaspoon freshly ground black pepper (white pepper works too)
- ½ cup blackstrap molasses (or pure maple syrup as a substitute)
- 2 cups tomato sauce (homemade or canned, unsweetened variety works best)
- ¼ cup apple cider vinegar (raw, with mother, for maximum benefit)
- ¼ teaspoon onion powder (not onion salt)
How to Make Barbecue Sauce Without Ketchup Recipe?
This process takes about thirty minutes total, with minimal hands-on time. Most of that is letting the sauce develop its flavors through gentle simmering. I recommend making this on a weekend so you can portion it into containers for the week ahead.
Step 1: Gather Your Equipment and Ingredients
Pull out a medium saucepan (three-quart capacity works perfectly), a whisk, measuring spoons, and a heat-safe spoon for stirring. Arrange all your ingredients on the counter so you’re not searching mid-process. This mise en place approach—preparing everything before cooking—comes from professional kitchens and makes the whole experience smoother.
I also recommend having a mason jar or glass container ready for storage. You’ll want to pour the finished sauce into something airtight, so prep that now while you’re thinking about it.

Step 2: Combine All Ingredients in Your Saucepan
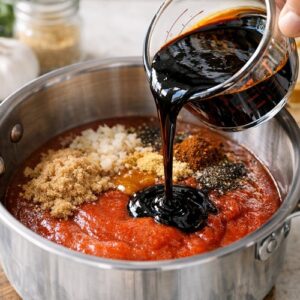
Pour the two cups of tomato sauce directly into your saucepan. Add the molasses next—it’s thick, so use a measuring cup you don’t mind getting sticky, or use an ice-cream scoop to help it release. Pour in the apple cider vinegar, then sprinkle in all the dry seasonings: salt, garlic powder, onion powder, black pepper, cayenne, and smoked paprika. If you’re using Worcestershire sauce, add that now too.
Here’s the important part: don’t start cooking yet. Use your whisk to stir everything together thoroughly until completely combined. You want no lumps of molasses remaining and the spices evenly distributed throughout. This takes about two minutes of steady whisking.

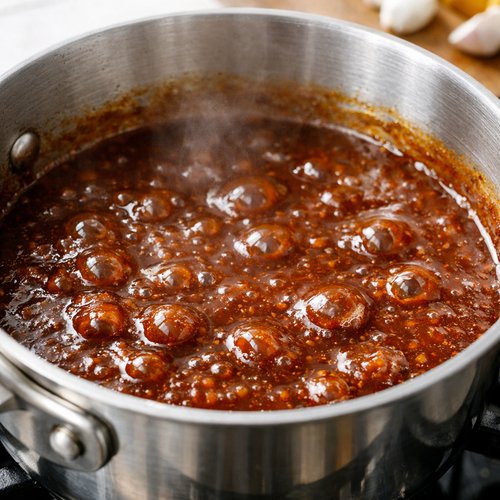
Step 3: Heat to Medium-High and Watch for the Boil
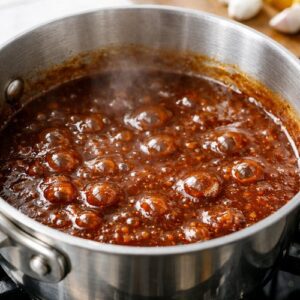
Set your burner to medium-high heat. You’re looking for the mixture to come to a gentle, rolling boil—not a vigorous, violent one. This usually takes about five to seven minutes depending on your stove. You’ll notice the surface will begin to bubble, and steam will rise from the pan.
Once you reach that gentle boil, let it hold steady for exactly one minute. This brief boil helps the ingredients meld and ensures any bacteria from canned ingredients are neutralized. Don’t skip this step or extend it too long—one minute is perfect.
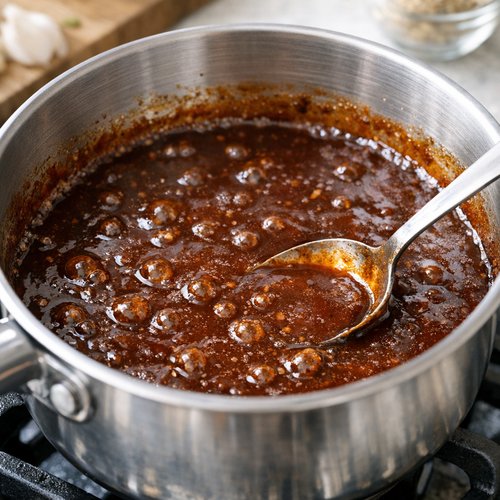
Step 4: Reduce Heat and Simmer for Flavor Development
After that one-minute boil, immediately reduce your heat to medium-low or low—whichever setting keeps the sauce at a gentle simmer with just a few bubbles breaking the surface. This is where the magic happens. Over the next twenty minutes, the flavors will develop and deepen as the sauce reduces slightly and the ingredients get to know each other.
Stir occasionally—about every four or five minutes—but don’t feel like you need to stand there watching constantly. Use this time to clean up your prep dishes or set your table. The occasional stir prevents sticking on the bottom and ensures even cooking. You’ll notice the sauce darkening slightly, becoming more concentrated, and smelling increasingly aromatic.
After twenty minutes, the sauce should coat the back of a spoon and look glossy. If you draw your finger across the back of a spoon and the sauce doesn’t immediately run back together, you’ve got the right consistency.
Step 5: Cool and Transfer to Storage
Remove the saucepan from heat and let the sauce cool to room temperature—this typically takes thirty to forty-five minutes. While it cools, you can wash out your mason jar or prep your storage containers.
Once cooled, carefully pour the sauce into your storage container. You can use a funnel to make this neater, or simply pour slowly and carefully. Leave about half an inch of space at the top—the sauce will settle as it cools completely. Cover tightly and refrigerate.
Pro tip: I like to cool the sauce completely on the counter before refrigerating because it prevents condensation buildup inside the jar, which can lead to mold formation. Patience here pays off in longevity.
Tips and Tricks
- Use homemade tomato sauce if possible – If you can, make your own tomato sauce by simmering fresh tomatoes with garlic and olive oil. Store-bought works fine, but homemade tastes noticeably better and often costs less when tomatoes are in season.
- Blackstrap molasses versus maple syrup – Blackstrap molasses is the most nutritious option because it’s the byproduct of sugar refinement and retains minerals. Maple syrup works if that’s what you have, but the sauce will be slightly thinner and less rich. Pure maple syrup is also pricier, so blackstrap is the budget winner.
- Don’t skip the apple cider vinegar – This is what gives the sauce its characteristic tang and helps preserve it. Regular white vinegar works in a pinch, but apple cider vinegar adds subtle sweetness that balances the molasses beautifully.
- Taste as you go – After simmering, let the sauce cool slightly and taste a small spoonful. Adjust the salt, cayenne, or vinegar if needed. Remember that flavors are more pronounced when warm and mellow as it cools, so taste-test lukewarm rather than piping hot.
- Double the batch if you have time – The cooking time doesn’t increase much if you double the recipe. Make six cups instead of three, and you’ve got sauce for a full month. Freeze half in ice cube trays for individual portions.
- Worcestershire sauce is optional but highly recommended – This adds umami depth that makes the sauce taste more complex and restaurant-quality. It’s also very affordable and lasts forever in your pantry.
Expert’s Nutritional Tip: The Power of Blackstrap Molasses
As a registered dietitian, I want to highlight something special about blackstrap molasses. It’s not just sweetener—it’s a nutrient powerhouse that most people overlook. Unlike refined white sugar or high fructose corn syrup, blackstrap molasses contains significant amounts of iron, calcium, magnesium, and potassium.
One tablespoon of blackstrap molasses provides about 20% of your daily iron needs and 10% of your calcium needs. These minerals are crucial for bone health, energy production, and muscle function. When you’re making a homemade sauce instead of buying commercial versions sweetened with corn syrup, you’re not just saving money—you’re upgrading the nutritional profile of your meals.
This is exactly what I mean when I talk about wholesome dishes not requiring expensive ingredients. Blackstrap molasses is one of the most affordable superfoods in your grocery store, yet most families never use it beyond the occasional batch of baked goods.
Can I Store Barbecue Sauce Without Ketchup Recipe?
Yes, and this is one of my favorite things about homemade sauce. The acidity from the vinegar and tomato acts as a natural preservative, allowing the sauce to keep far longer than you might expect.
In the refrigerator, this sauce lasts three to four weeks when stored in an airtight container. The key is keeping air exposure minimal and maintaining cold temperature. Glass jars work better than plastic for long-term storage because they don’t absorb odors or stains.
For freezer storage, you can keep this sauce for up to three months. I recommend freezing it in ice cube trays first, then transferring the frozen cubes to a labeled freezer bag. This way, you can pull out exactly the amount you need for a single meal without thawing an entire jar.
You’ll know the sauce has gone bad if you notice mold (black or green spots), separation that won’t blend back together, or any off-smells. If stored properly, these issues are extremely rare.
Common Mistakes to Avoid
- Boiling too aggressively or for too long – If you boil the sauce for more than one minute or at high heat, you’ll lose the volatile compounds that make the sauce taste fresh and aromatic. Keep that initial boil gentle and brief.
- Skipping the cooling period before refrigerating – Placing hot sauce directly in the fridge can cause condensation, which leads to mold. Let it cool to room temperature on the counter first. Yes, this takes longer, but it’s worth it for food safety.
- Using iodized table salt instead of sea salt – Iodized salt can taste metallic in small quantities. Sea salt or kosher salt tastes cleaner and doesn’t interfere with the other flavors. This small change makes a noticeable difference.
- Adding all the spices at once without tasting – Everyone’s heat tolerance is different. Start with half the cayenne, taste after simmering, then add more if needed. You can’t remove cayenne once it’s in.
Make-Ahead Guide: Prep Like a Professional
From my years working with meal planning, I know that advance preparation is what separates people who cook regularly from those who order takeout. This sauce is perfect for make-ahead strategies.
Sunday Prep Method: Set aside thirty minutes on Sunday afternoon. Make a full triple batch (nine cups total) using the recipe scaled up. While it cools, prepare three mason jars for refrigerator storage and label them with the date made. Fill the jars once cooled, and you’ve got sauce for three weeks of dinners. Total time investment: thirty-five minutes. Benefit: You’ve eliminated sauce preparation for twenty-one days.
Freezer Portioning Method: Use ice cube trays to freeze the sauce in two-tablespoon portions. Each cube equals enough sauce for two grilled chicken breasts or a serving of pulled pork. Once frozen solid (about six hours), pop the cubes into a labeled freezer bag. Now you can grab exactly what you need without thawing excess. This method is perfect if you don’t cook regularly or cook for varying numbers of people.
Dry Spice Blend Shortcut: If you find yourself making this sauce frequently, premix the garlic powder, onion powder, black pepper, cayenne, and smoked paprika in a small jar at home. Label it “BBQ Sauce Spice Blend.” When you’re ready to make sauce again, you’ll have two fewer steps and less measuring to do.
Seasonal Variations
One reason I love this recipe is its flexibility. The base is stable enough to handle adjustments based on what’s available and what you’re craving seasonally.
Spring Version: Add one tablespoon of fresh lemon juice and one teaspoon of fresh ginger (minced fine). The brightness complements grilled vegetables and lighter proteins perfectly as the weather warms.
Summer Version: Incorporate one tablespoon of fresh lime juice and a pinch of cumin. This gives the sauce a slightly different profile that works beautifully on fish, grilled shrimp, or vegetarian kebabs featuring seasonal produce from farmers’ markets.
Fall Version: Stir in one teaspoon of pumpkin pie spice (cinnamon, nutmeg, cloves blend) after the sauce finishes simmering. This creates a subtle autumnal note that’s perfect for pulled pork sandwiches and grilled chicken breasts as the weather cools.
Winter Version: Add one tablespoon of bourbon or whiskey and one teaspoon of liquid smoke (use sparingly—it’s potent). This deepens the sauce for heartier proteins and slow-cooker meals during cold months. The alcohol cooks off; the complexity remains.
Nutrition Information
Per one-quarter cup serving (approximately two tablespoons, which is a standard serving size for sauce): This sauce contains approximately 60 calories, 14 grams of carbohydrates, 0 grams of fat, 0 grams of protein, and 2 grams of fiber. Sodium content is approximately 280 milligrams, which is reasonable for a seasoned condiment.
The beauty here is that you’re getting real nutrients alongside your flavor. The molasses provides iron, calcium, and potassium. The tomato delivers lycopene, an antioxidant that research from the USDA shows may support cardiovascular health. The vinegar contains acetic acid, which some studies suggest aids blood sugar regulation and digestive health.
Compare this to commercial barbecue sauces, which often contain 70-80 calories per serving but deliver much of those calories from added sugars rather than whole-food sources. You’re getting similar calorie counts with superior nutritional density—exactly what I advise my clients to aim for.
What Can I Serve With Barbecue Sauce Without Ketchup Recipe?
This sauce is wonderfully versatile. Its complexity makes it appropriate for proteins, vegetables, and even some grain-based dishes. Here are my favorite applications from years of recipe testing and meal planning consultations.
- Grilled chicken breasts – This is probably the most common use in my kitchen. Brush the sauce on during the final few minutes of grilling, or serve it on the side for dipping. Pairs perfectly with my favorite salad for a complete plate.
- Pulled pork sandwiches – Whether you’re using a slow cooker or instant pot, finish the pork with a generous coating of this sauce. The tanginess complements the rich meat beautifully.
- Baked beans – Swirl this sauce into Baked Beans Recipe on the Stovetop instead of using canned bean sauce. The flavor depth elevates the entire dish, and you’ve eliminated another processed ingredient.
- Grilled vegetables – Brush it on zucchini, bell peppers, eggplant, or corn during the last minutes of grilling. The sauce caramelizes beautifully and turns simple vegetables into something special.
- Ribs and other grilled meats – Apply this sauce to beef ribs, lamb chops, or grilled sausages. The molasses adds a slight sweetness that balances savory proteins perfectly.
- Buffalo wings – Mix equal parts of this sauce with hot sauce for a unique wing coating. Serve alongside Buffalo Wings Recipe for interesting flavor combinations.
- Roasted root vegetables – Toss roasted carrots, parsnips, or sweet potatoes with this sauce just before serving. The warm spices complement the natural sweetness of roasted vegetables.
- Glazed tofu or tempeh – For vegetarian applications, brush this sauce on grilled or baked tofu. The umami depth from the Worcestershire sauce makes plant-based proteins taste more substantial.
Substitutes
- Maple syrup instead of blackstrap molasses – Use equal amounts of pure maple syrup. The sauce will be slightly thinner and less earthy, but still delicious. This is my recommended swap for those with molasses allergies or who simply prefer a cleaner flavor profile. Maple costs more, but the substitution works perfectly.
- Brown sugar instead of molasses – You can use one-third cup of brown sugar plus two tablespoons of water to approximate the consistency and sweetness of molasses. The result won’t have quite the same mineral content or depth, but it’s a workable substitute if molasses isn’t available.
- Rice vinegar or white vinegar instead of apple cider vinegar – Both work in equal proportions. Rice vinegar creates a slightly sweeter sauce. White vinegar creates a sharper sauce. Neither is as nuanced as apple cider vinegar, but both are cheaper and equally shelf-stable.
- Fresh garlic and onion instead of powders – Use one minced garlic clove and two tablespoons of finely minced onion instead of the powders. Add these to the saucepan in Step 2. The flavor will be fresher but slightly more assertive—taste-test and adjust accordingly.
- Liquid smoke instead of smoked paprika – Use ¼ teaspoon of liquid smoke. Start with half, taste, then add more if desired. Liquid smoke is potent and can easily overpower other flavors if over-applied.
- Hot sauce instead of cayenne – If you have hot sauce on hand and need heat, substitute ½ teaspoon of hot sauce for the cayenne. You’re adding both heat and flavor complexity, so this actually improves the sauce in some applications.
Barbecue Sauce Without Ketchup Recipe
Ingredients
Method
- Pull out a medium saucepan (three-quart capacity works perfectly), a whisk, measuring spoons, and a heat-safe spoon for stirring. Arrange all your ingredients on the counter so you're not searching mid-process. This mise en place approach—preparing everything before cooking—comes from professional kitchens and makes the whole experience smoother. I also recommend having a mason jar or glass container ready for storage. You'll want to pour the finished sauce into something airtight, so prep that now while you're thinking about it.

- Pour the two cups of tomato sauce directly into your saucepan. Add the molasses next—it's thick, so use a measuring cup you don't mind getting sticky, or use an ice-cream scoop to help it release. Pour in the apple cider vinegar, then sprinkle in all the dry seasonings: salt, garlic powder, onion powder, black pepper, cayenne, and smoked paprika. If you're using Worcestershire sauce, add that now too. Here's the important part: don't start cooking yet. Use your whisk to stir everything together thoroughly until completely combined. You want no lumps of molasses remaining and the spices evenly distributed throughout. This takes about two minutes of steady whisking.
- Set your burner to medium-high heat. You're looking for the mixture to come to a gentle, rolling boil—not a vigorous, violent one. This usually takes about five to seven minutes depending on your stove. You'll notice the surface will begin to bubble, and steam will rise from the pan. Once you reach that gentle boil, let it hold steady for exactly one minute. This brief boil helps the ingredients meld and ensures any bacteria from canned ingredients are neutralized. Don't skip this step or extend it too long—one minute is perfect.
- After that one-minute boil, immediately reduce your heat to medium-low or low—whichever setting keeps the sauce at a gentle simmer with just a few bubbles breaking the surface. This is where the magic happens. Over the next twenty minutes, the flavors will develop and deepen as the sauce reduces slightly and the ingredients get to know each other. Stir occasionally—about every four or five minutes—but don't feel like you need to stand there watching constantly. Use this time to clean up your prep dishes or set your table. The occasional stir prevents sticking on the bottom and ensures even cooking. You'll notice the sauce darkening slightly, becoming more concentrated, and smelling increasingly aromatic. After twenty minutes, the sauce should coat the back of a spoon and look glossy. If you draw your finger across the back of a spoon and the sauce doesn't immediately run back together, you've got the right consistency.

- Remove the saucepan from heat and let the sauce cool to room temperature—this typically takes thirty to forty-five minutes. While it cools, you can wash out your mason jar or prep your storage containers. Once cooled, carefully pour the sauce into your storage container. You can use a funnel to make this neater, or simply pour slowly and carefully. Leave about half an inch of space at the top—the sauce will settle as it cools completely. Cover tightly and refrigerate. Pro tip: I like to cool the sauce completely on the counter before refrigerating because it prevents condensation buildup inside the jar, which can lead to mold formation. Patience here pays off in longevity.

Notes
FAQs
Can I make this sauce without Worcestershire sauce?
Absolutely. Worcestershire sauce adds umami depth and complexity, but it’s not essential for a delicious sauce. If you skip it, consider adding one teaspoon of balsamic vinegar or one tablespoon of soy sauce instead. These additions provide similar umami richness. The sauce will still be excellent without any of these additions—it will just taste cleaner and slightly less complex.
Why does my sauce separate or look watery?
Separation usually happens if the sauce cools too quickly or if you’ve simmered it for significantly longer than twenty minutes. The molasses and tomato have different densities, and extended cooking can cause them to part ways. To fix this, reheat the sauce gently over low heat and whisk vigorously until recombined. For prevention, stick to the exact timing and cool the sauce at room temperature rather than refrigerating while still warm.
Is this sauce safe for canning and long-term shelf storage?
This recipe is not formulated for safe water-bath or pressure canning at home. The acidity is adequate, but the testing for safety hasn’t been done through university extension programs. I recommend keeping this sauce refrigerated or frozen only. If you want shelf-stable sauce for emergencies or gifts, use a tested, approved recipe from the USDA or Ball Canning guidelines.
How can I make this sauce thicker?
If your finished sauce is thinner than you’d like, simmer it for an additional five to ten minutes on low heat without a lid. This reduces the liquid content and thickens the sauce naturally. Another option: stir in one teaspoon of cornstarch mixed with one tablespoon of cold water, then simmer for two more minutes. The cornstarch method works immediately, while extended simmering takes longer but feels more natural if you prefer avoiding added thickeners.
Can I double or triple this recipe?
Yes, and I actually recommend it. The cooking time increases only slightly if at all—a tripled batch still needs about twenty minutes of simmering. Your yield increases proportionally, giving you sauce for multiple weeks. The only consideration is using a larger saucepan to prevent overflow. I use a five-quart saucepan when making triple batches. All other steps remain exactly the same.
What’s the difference between this sauce and regular barbecue sauce?
Traditional barbecue sauces usually contain ketchup as the base, which brings corn syrup, added sugar, and preservatives. This version builds on tomato sauce instead, giving you more control over sweetness and ingredients. The result is more complex, with better balance between sweet, tangy, and savory. Additionally, this sauce is cheaper to make at home than buying premium bottled versions.
More Recipes You’ll Love
- Baked Creamy Chicken Recipe – A budget-friendly protein dish that pairs beautifully with this barbecue sauce for a complete dinner that costs just a few dollars per serving.
- Baked Beans Recipe on the Stovetop – The classic barbecue side dish becomes elevated when you finish it with homemade sauce instead of relying on canned bean sauce.
- Air Fryer Carrot Recipe – Roasted vegetables gain surprising depth when brushed with this sauce during cooking—a vegetable side that tastes indulgent but costs pennies.
- Awesome Sauce Recipe – Another from-scratch condiment that pairs beautifully with this barbecue sauce for layered flavor in grain bowls and sandwiches.
Making your own barbecue sauce is one of those small acts that builds confidence in the kitchen. You’re not just saving money—though you absolutely are, and significantly. You’re also taking control of your family’s nutrition, reducing your dependence on processed foods, and discovering that you’re capable of creating restaurant-quality results at home.
I hope this recipe becomes as much of a staple in your kitchen as it is in mine. The next time you’re grilling or roasting, brush this sauce on whatever protein you’re cooking. Notice how much better it tastes than bottled versions. Feel good about the ingredients you’re serving your family. And don’t forget to mention @affordablefoodideas if you try this recipe!