This post contains affiliate links. As an Amazon Associate I earn from qualifying purchases.
A good breakfast sets the tone for your entire day, and I learned that lesson in my grandmother’s kitchen back in Massachusetts when I was just eight years old. She’d whip up the most vibrant fruit drinks with whatever was on sale that week, teaching me that nutrition doesn’t require fancy ingredients or a hefty grocery bill. This berry smoothie has become my go-to when mornings get hectic, and it pairs beautifully with The Best Damn Vegan Biscuits for a complete, satisfying breakfast that keeps you full until lunch.
The Story Behind This Simple Berry Smoothie
I remember watching my grandmother stand at her kitchen counter with a half-empty container of Greek yogurt, a bruised banana, and whatever berries hadn’t made it into her fruit pie. She’d smile and say, “April, the best meals come from what we already have.” That philosophy stuck with me through my dietitian training and into my practice here near Waltham, where I work with families trying to eat well without breaking the bank.
This berry smoothie recipe represents everything I believe in: real nutrition, minimal waste, maximum flavor, and a price tag that won’t make you wince at checkout. I’ve made versions of this thousands of times—for clients managing blood sugar concerns, for busy parents grabbing something before soccer practice, for college students living on ramen budgets.
What is Berry Smoothie Recipe?
A berry smoothie is one of the most straightforward nutritional powerhouses you can make at home. It’s essentially a blended beverage combining fruit, protein, and liquid into one drinkable meal that delivers fiber, antioxidants, probiotics, and sustained energy. The beauty lies in its simplicity—there’s no cooking involved, no special equipment beyond a basic blender, and the ingredient list reads like something you probably already have in your kitchen.
What makes this particular recipe special is how it balances sweetness from natural fruit with protein from Greek yogurt, creating a smoothie that actually stabilizes blood sugar rather than spiking it. The optional honey means you control the sweetness level entirely, which I find crucial when helping families reduce refined sugar intake without feeling deprived.
Why You’ll Love This Berry Smoothie Recipe
- Ready in under five minutes – From grabbing ingredients to sipping your drink, this takes less time than waiting for toast to pop up, making it perfect for mornings when you’re running behind
- Loaded with antioxidants – Berries contain anthocyanins and polyphenols that support heart health and cognitive function, backed by decades of nutritional research I reference in my practice daily
- Keeps you full for hours – The combination of protein, fiber from whole fruit, and healthy liquid creates sustained satiety without that mid-morning energy crash
- Endlessly customizable – Once you nail this basic formula, you can swap ingredients based on sales, seasonal availability, and what your family actually enjoys eating
- Budget-friendly by design – Frozen berries cost significantly less than fresh, yogurt provides protein cheaper than protein powder, and one batch serves two people for under three dollars total
- Works for every dietary preference – Whether your household includes omnivores, vegetarians, or people managing specific health conditions, this recipe adapts easily to everyone’s needs
The Ingredients
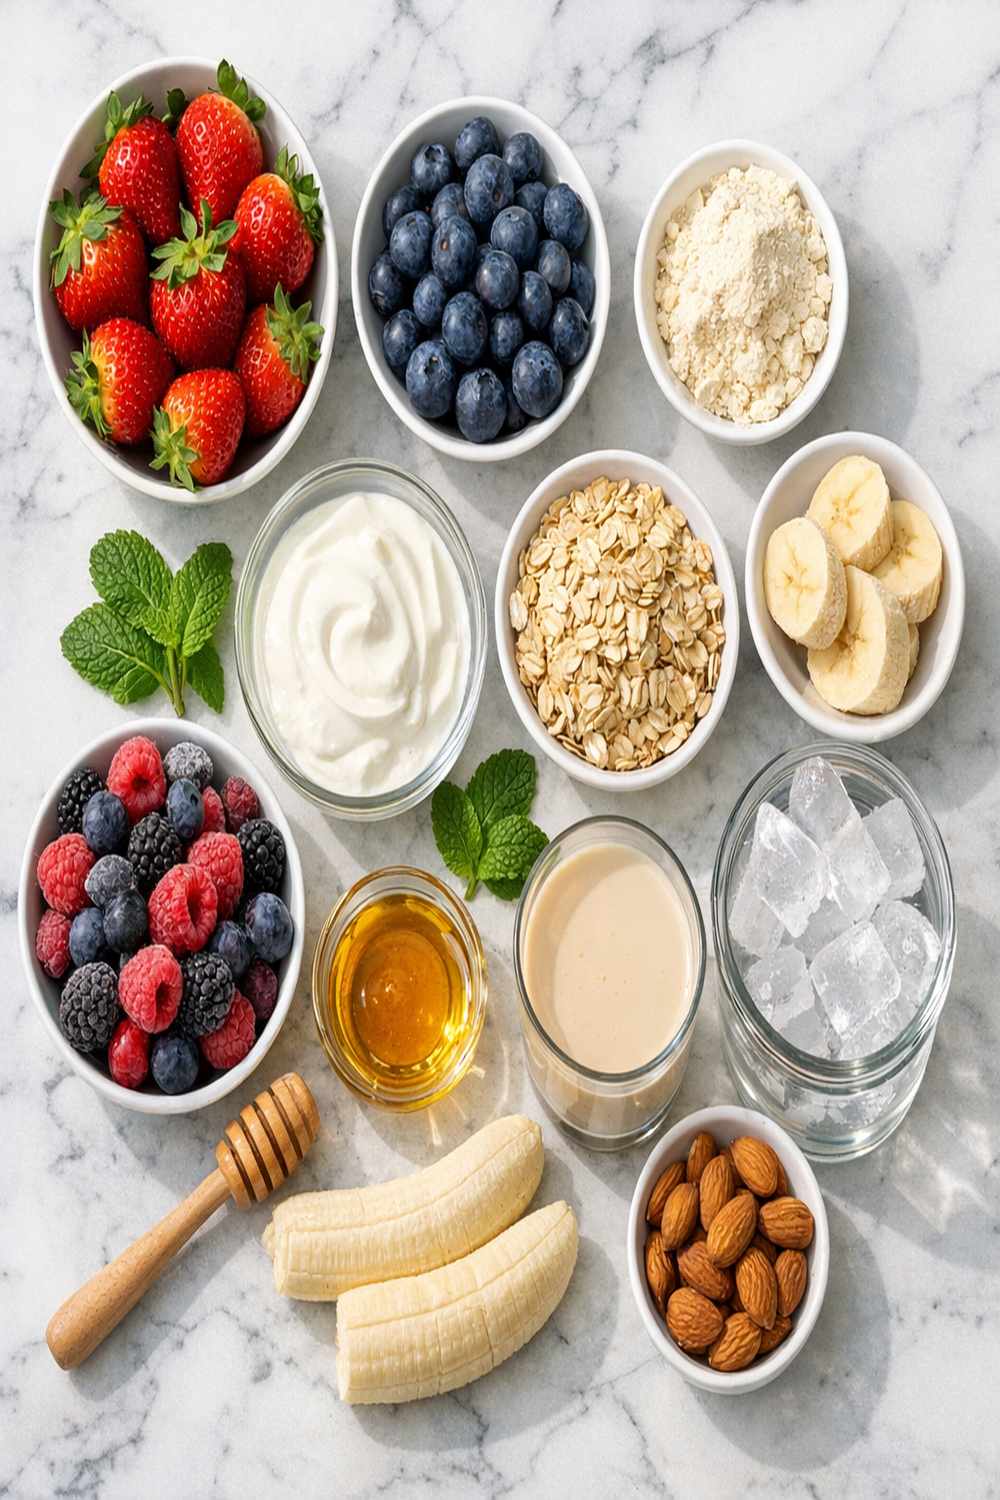
I’ve organized these ingredients by what they do in your smoothie, and I’ve included the budget-conscious swaps I use in my own kitchen. The magic of this recipe is that every single ingredient serves a purpose—nothing’s here just for looks or marketing hype.
- 1½ cups frozen mixed berries (blueberries, strawberries, raspberries—whatever’s on sale or what you froze from your garden)
- 1 tablespoon raw honey (optional, but transforms the smoothie if your berries lean tart)
- 1 ripe banana (sliced before freezing if you have time, which makes blending easier and keeps texture smoother)
- 3-4 fresh berries for serving garnish (reserved from your container)
- 1½ cups liquid base—apple juice, unsweetened almond milk, skim milk, or coconut milk (see my budget swap section below)
- ¾ cup plain Greek yogurt (full-fat or nonfat both work; I prefer full-fat for creamier texture and better satiety, but budget matters more than preference)
- Fresh mint leaves for garnish (optional but lovely—I grow mine in a pot on my windowsill year-round)
Makes 2 servings
How to Make Berry Smoothie Recipe?
The actual technique here is straightforward, but I’m going to walk you through exactly how I do it, including the small details that transform this from “acceptable” to “restaurant-quality” at home. Even experienced cooks sometimes miss these details, so stay with me.
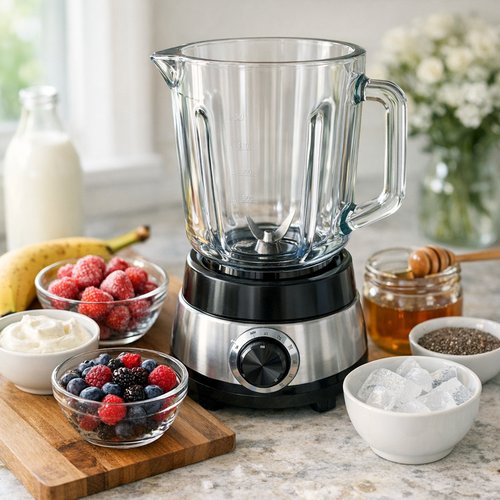
Step 1: Prepare Your Blender and Gather Ingredients
Before you touch anything, pull out your blender and make sure the pitcher is clean and dry. Place it on a stable, flat surface—I learned this lesson the hard way when I was in grad school and made a smoothie on an uneven shelf. Add your frozen berries to the blender first, followed by your sliced banana pieces. This order matters because denser ingredients at the bottom give your blender something substantial to grip onto, making the entire blending process smoother and faster.
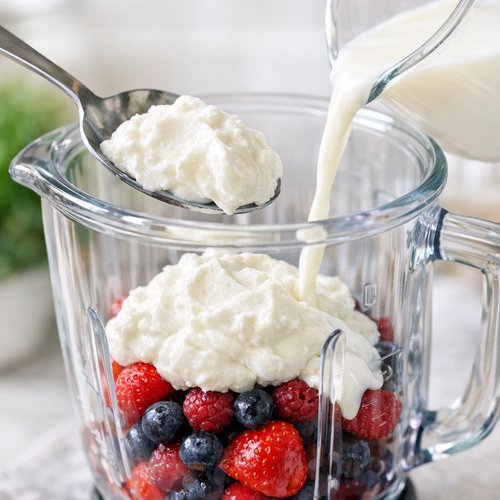
Step 2: Add Your Protein and Liquid Base
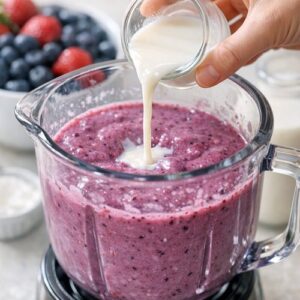
Spoon your Greek yogurt directly into the blender next—don’t thin it with liquid yet. The yogurt will sit on top of your fruit. Pour your liquid choice slowly around the yogurt and fruit, filling to about three-quarters full. This step should take about thirty seconds of careful pouring. I’ve found that adding liquid gradually, rather than dumping it all at once, prevents those stubborn pockets where ingredients stick to the blender walls.
Step 3: Blend Until Completely Smooth
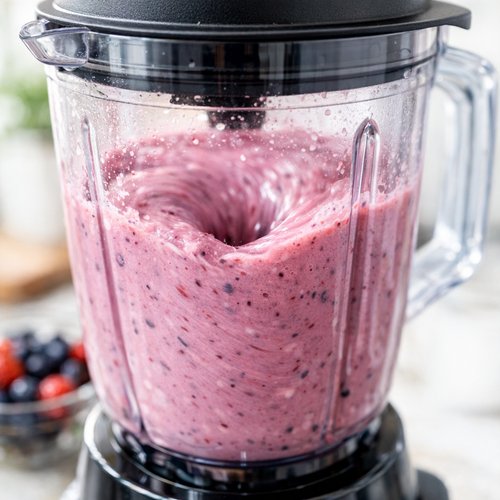
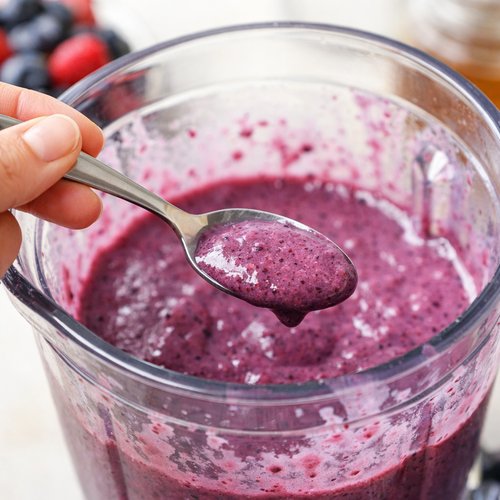
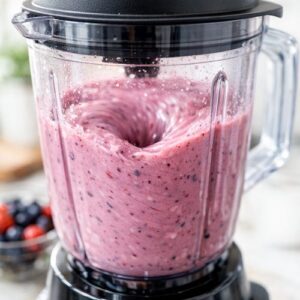
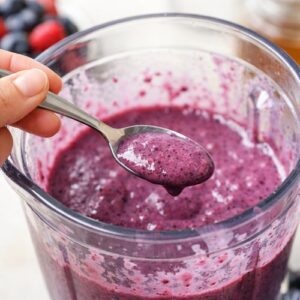
Turn on your blender to medium speed first—not high, not low—for about 15 to 20 seconds. You’ll hear the machine working steadily, and you should see the fruit and yogurt starting to break down. Then increase to high speed and blend for another 20 to 30 seconds until absolutely everything is smooth with no visible fruit chunks or yogurt streaks. The consistency should be pourable but thick, like a milkshake.
Step 4: Taste and Adjust Sweetness
Here’s where personal preference matters most. Stop blending and taste a tiny bit—I usually dip a clean spoon into the blender. If you’re using tart berries, you’ll probably want that tablespoon of honey. If you’re using naturally sweet berries like strawberries, you might skip it entirely. Add honey if needed and blend for just 5 more seconds to incorporate completely. Remember, you’re not making a dessert; you’re making breakfast.
Step 5: Adjust Texture if Needed
If your smoothie seems too thick to drink easily through a straw, add an additional ¼ cup of your liquid base and blend for 10 more seconds. If it seems too thin and watery, add a handful more frozen berries and blend briefly. This adjustment step is crucial because blender power varies wildly, frozen fruit moisture content differs by season, and yogurt brands have different water content.

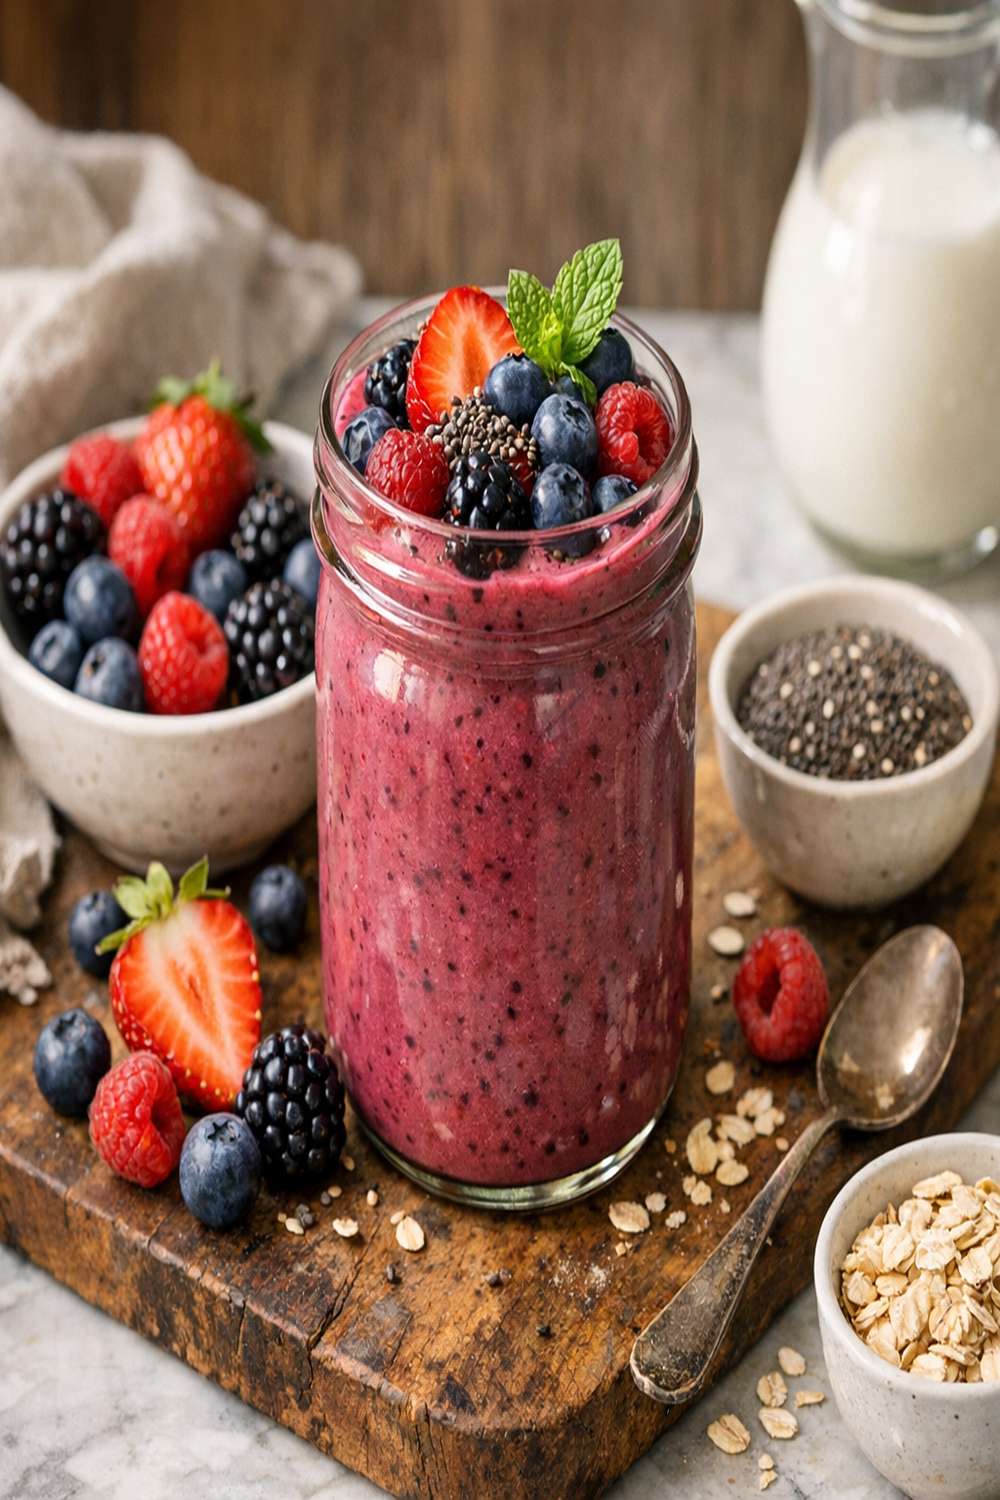
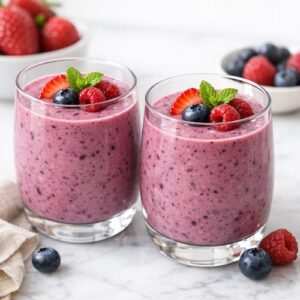
Step 6: Pour and Garnish
Pour the smoothie evenly into two glasses, filling about three-quarters full. If you’re using garnish, place 2-3 fresh berries and a small mint sprig on top of each glass. This isn’t just pretty—it actually signals to your brain that you’re eating something special and intentional, which research shows genuinely improves satisfaction and digestion. Serve immediately while still cold and thick.

Expert’s Nutritional Tip
Here’s something I explain to clients constantly: frozen berries actually contain more anthocyanins than fresh berries most of the time. Why? Because they’re frozen at peak ripeness within hours of picking, locking in all those powerful antioxidants. Fresh berries often travel hundreds of miles before reaching your store, losing potency along the way. So buying frozen isn’t a compromise—it’s actually the more nutritious choice. As a registered dietitian, I recommend frozen berries to virtually everyone, especially families managing their food budgets.
Tips and Tricks
- Freeze your banana slices in advance – When bananas start getting those brown spots (which means they’re sweetest), peel them, slice them into coins, spread them on a baking sheet, freeze for two hours, then transfer to a freezer bag. This prevents brown banana syndrome where your smoothie tastes like baby food instead of breakfast
- Make your liquid cold but not frozen – Refrigerate your milk or juice overnight. If it’s too warm, it melts your frozen fruit and creates a watery smoothie instead of a thick one
- Don’t over-blend – Blending longer than 45 seconds total actually breaks down fiber and separates the smoothie into liquid and pulp. You want power, not prolonged abuse
- Layer your ingredients intentionally – Frozen fruit and banana at bottom, yogurt in middle, liquid on top. This arrangement makes blending more efficient and creates better texture
- Clean your blender immediately – Fill it halfway with warm water, add a drop of dish soap, blend for 10 seconds, rinse. Do this right after drinking and you’ll never deal with hardened yogurt or berry stains
- Use yogurt as your base consistency creator – If you don’t have yogurt, you can substitute silken tofu or cottage cheese, but Greek yogurt is cheapest and delivers probiotics your gut actually needs
Make-Ahead Guide
As someone who helps families with meal planning, I can tell you that smoothie prep is one of the easiest ways to guarantee healthy breakfasts happen consistently. Here’s exactly how I do it:
Freezer Prep Method (My Favorite): Portion your frozen berries and sliced banana into individual freezer bags, one per smoothie. Label with the date. You can store these for up to three months. On mornings when you’re running late, grab your pre-portioned bag, dump it in the blender, add your yogurt and liquid, and blend. Total time: three minutes instead of eight.
Liquid Prep: Pour your milk or juice into glass jars the night before and refrigerate. This cold liquid base is crucial for preventing your smoothie from becoming watery. You can also freeze juice in ice cube trays and use those cubes instead of additional liquid.
Blended Smoothie Storage: If you absolutely must make your smoothie ahead (like for a road trip), pour it into glass jars, cover tightly, and refrigerate for up to 24 hours. The texture will separate—just shake well before drinking. It won’t be perfect, but it’s infinitely better than skipping breakfast entirely.
Common Mistakes to Avoid
- Using room-temperature ingredients: Warm yogurt, warm milk, and thawed berries create a thin, soupy drink that tastes warm. Always chill your base ingredients overnight.
- Skipping the banana: I know some smoothie recipes use just yogurt and berries, but the banana creates natural creaminess without added fat or sugar, and it helps your blender do its job more effectively.
- Over-relying on honey or sweeteners: When berries are in season and properly ripe, they’re already sweet enough. Adding honey every single time builds a sugar habit your taste buds shouldn’t develop at breakfast time.
- Forgetting to prep frozen fruit ahead: Waiting until morning to portion berries means fumbling with frozen containers when you’re tired. Spend 20 minutes on Sunday prepping smoothie bags for the whole week.
Seasonal Variations
One reason I love this smoothie is how it adapts throughout the year. Growing up in Massachusetts taught me to eat with the seasons, and here’s how I modify this basic recipe:
Summer (June-August): Use fresh berries when they’re locally available and cheap. Add a handful of spinach if you want extra greens—it completely disappears flavor-wise but adds iron and calcium. Consider making your own coconut milk as your liquid base for a tropical twist.
Fall (September-November): Switch to apple juice as your liquid base and add ¼ teaspoon cinnamon. Some weeks I’ll toss in a tablespoon of ground flaxseed for omega-3s. Frozen blackberries are particularly inexpensive in September and October.
Winter (December-February): Embrace frozen berries entirely since fresh ones are imported and expensive. Add a small piece of fresh ginger (about ½ inch) for warming spice and digestive support. Increase yogurt to ⅞ cup for a creamier, more filling smoothie.
Spring (March-May): As fresh berries start appearing at farmers markets, buy small quantities and freeze your own. The quality is superior and you’re supporting local farmers. Add fresh lemon juice (about 1 tablespoon) to brighten the flavor as the season shifts lighter.
Can I Store Berry Smoothie Recipe?
Storage depends entirely on when you prepare your smoothie. Let me break down each scenario so you can make the best decision for your schedule:
Fresh blended smoothie: Drink immediately for best texture and temperature. If you must wait, refrigerate in a glass jar with a tight lid for up to 4 hours maximum. The smoothie will separate—the thicker part sinks, the liquid rises. Just shake well before drinking.
Frozen smoothie packs (my preferred method): Store portioned bags of fruit and banana in your freezer for up to 3 months. Label clearly with the date. On smoothie mornings, pull out a bag, dump contents in your blender, add your refrigerated yogurt and liquid, and blend. This method ensures perfect texture every single time.
Prepared yogurt containers: If you pre-portion your Greek yogurt into small containers with a label, store in the refrigerator for up to 7 days (check your yogurt’s expiration date first—never go past that). This one step saves so much morning time.
Never freeze a blended smoothie: The texture becomes grainy and separated in ways that blending again won’t fix. Freeze components, not final products.
Nutrition Information
Per serving (one smoothie, based on half the recipe): approximately 200-230 calories, 8-10 grams of protein, 42-48 grams of carbohydrates, 2-3 grams of fat, and 5-7 grams of dietary fiber. The nutrition varies slightly based on your specific liquid choice and whether you add honey, so these numbers represent the base recipe with almond milk and no honey.
What I find most valuable about this smoothie nutritionally is the fiber-to-sugar ratio. The whole fruit berries and banana provide natural sugars, but they come packaged with adequate fiber to slow absorption, preventing that blood sugar spike and crash cycle that derails so many well-intentioned breakfast attempts. The Greek yogurt adds 8-10 grams of complete protein, making this a meal rather than a snack. According to USDA nutritional databases, berries contain some of the highest antioxidant levels of any common fruit, particularly anthocyanins that research links to better cognitive function and heart health.
What Can I Serve With Berry Smoothie Recipe?
A smoothie is technically a complete breakfast on its own, but sometimes you want something to chew alongside it. Here are my favorite pairings that keep the meal balanced and affordable:
- Whole grain toast with almond butter – The toast provides sustained carbohydrates while almond butter adds fat for satiety. This combination keeps blood sugar stable and prevents the mid-morning hunger that sends people to the vending machine
- Hard-boiled eggs – Prepare a batch on Sunday and you have grab-and-go protein ready all week. Two eggs plus your smoothie creates a complete, satisfying breakfast for under a dollar total
- Homemade biscuits – The Best Damn Vegan Biscuits pair beautifully with this smoothie and you can make a batch ahead, freezing them for weeks
- Plain oatmeal with cinnamon – A half-cup of cooked oatmeal alongside your smoothie adds fiber, B vitamins, and keeps you full until lunch. The warm-cold contrast is actually quite pleasant
- Fresh fruit salad with lime juice – If you have access to inexpensive bananas, oranges, or other seasonal fruit, a small fresh fruit bowl rounds out the meal beautifully
My professional recommendation is choosing a pairing with additional protein if you’re active in the morning or have a physically demanding day ahead. The smoothie alone at 8-10 grams of protein is solid, but adding eggs or nut butter gets you closer to the 15-20 gram protein level that research shows optimizes satiety and muscle maintenance.
Substitutes
- Almond milk instead of apple juice – Saves money (usually 50 cents cheaper per carton), provides the same liquid consistency, and works beautifully if you prefer less sugar. It’s my default choice for budget-conscious families
- Coconut milk instead of dairy yogurt – If someone in your household has dairy sensitivity, full-fat canned coconut milk (the kind in the Asian foods aisle, not coconut beverage) creates incredible creaminess. Use ½ cup coconut milk plus ½ cup additional liquid to match the yogurt’s binding effect
- Skim milk instead of yogurt – Reduces protein slightly but keeps the smoothie creamy and affordable. You lose the probiotics but gain simplicity if your household doesn’t do yogurt
- Mango or peach instead of berries – When berries go out of season, frozen stone fruits are significantly cheaper and provide similar nutritional benefits. The smoothie tastes entirely different but remains nutritious and delicious
- Chia seeds or ground flaxseed instead of banana – If someone dislikes banana (I know they exist!), add 1 tablespoon of chia seeds or 1 tablespoon ground flaxseed for thickness and fiber. The texture won’t be quite as smooth but the nutrition improves
- Honey or maple syrup interchangeably – If you’re out of honey, pure maple syrup works identically. Use the same 1 tablespoon amount. Avoid pancake syrup, which contains added ingredients you don’t need
- Spinach as a sneaky addition – A full cup of fresh spinach (or ½ cup frozen) blends completely invisibly into this smoothie while adding iron, calcium, and magnesium. Most people never notice it’s there
Berry Smoothie Recipe
Ingredients
Method
- Before you touch anything, pull out your blender and make sure the pitcher is clean and dry. Place it on a stable, flat surface—I learned this lesson the hard way when I was in grad school and made a smoothie on an uneven shelf. Add your frozen berries to the blender first, followed by your sliced banana pieces. This order matters because denser ingredients at the bottom give your blender something substantial to grip onto, making the entire blending process smoother and faster.

- Spoon your Greek yogurt directly into the blender next—don't thin it with liquid yet. The yogurt will sit on top of your fruit. Pour your liquid choice slowly around the yogurt and fruit, filling to about three-quarters full. This step should take about thirty seconds of careful pouring. I've found that adding liquid gradually, rather than dumping it all at once, prevents those stubborn pockets where ingredients stick to the blender walls.

- Turn on your blender to medium speed first—not high, not low—for about 15 to 20 seconds. You'll hear the machine working steadily, and you should see the fruit and yogurt starting to break down. Then increase to high speed and blend for another 20 to 30 seconds until absolutely everything is smooth with no visible fruit chunks or yogurt streaks. The consistency should be pourable but thick, like a milkshake.
- Here's where personal preference matters most. Stop blending and taste a tiny bit—I usually dip a clean spoon into the blender. If you're using tart berries, you'll probably want that tablespoon of honey. If you're using naturally sweet berries like strawberries, you might skip it entirely. Add honey if needed and blend for just 5 more seconds to incorporate completely. Remember, you're not making a dessert; you're making breakfast.
- If your smoothie seems too thick to drink easily through a straw, add an additional ¼ cup of your liquid base and blend for 10 more seconds. If it seems too thin and watery, add a handful more frozen berries and blend briefly. This adjustment step is crucial because blender power varies wildly, frozen fruit moisture content differs by season, and yogurt brands have different water content.
- Pour the smoothie evenly into two glasses, filling about three-quarters full. If you're using garnish, place 2-3 fresh berries and a small mint sprig on top of each glass. This isn't just pretty—it actually signals to your brain that you're eating something special and intentional, which research shows genuinely improves satisfaction and digestion. Serve immediately while still cold and thick.
Notes
FAQs
Can I make this smoothie without yogurt?
Absolutely, though the texture changes. Greek yogurt provides both creaminess and protein, so if you skip it, you need to replace both functions. Use ½ cup coconut milk plus ½ cup additional liquid and add 1 tablespoon of ground flaxseed or chia seeds for protein and thickness. Alternatively, use silken tofu (¾ cup), which creates nearly identical texture and provides complete protein. The smoothie will be slightly thinner but still delicious.
What’s the difference between frozen berries and fresh berries nutritionally?
Frozen berries are actually more nutritious in most cases. They’re frozen within hours of harvesting at peak ripeness, which locks in anthocyanins and other antioxidants. Fresh berries often travel long distances, losing nutritional potency along the way. Additionally, frozen berries cost significantly less year-round, making them the smarter choice for budget and nutrition. The only downside is texture—frozen berries won’t work in a salad—but for smoothies, they’re superior in every way.
Why does my smoothie come out grainy instead of smooth?
Three common causes: your blender isn’t powerful enough (older or budget blenders sometimes struggle with frozen fruit), you’re not blending long enough, or your frozen fruit is too hard. Solutions: make sure you blend for the full 40-45 seconds on high speed, add a touch more liquid to help the blender work, or let frozen berries sit on the counter for five minutes before blending. If you consistently have texture problems, that’s actually a sign you need to upgrade your blender—a quality machine is an investment that pays dividends for years.
Can I drink this smoothie if I’m trying to lose weight?
Yes, absolutely. At 200-230 calories with 8-10 grams of protein and 5-7 grams of fiber, this is actually an excellent breakfast for weight management. The protein and fiber create satiety, preventing overeating later. The natural sugars from fruit come with beneficial antioxidants rather than empty calories. What matters most is the overall calorie balance throughout your day, and a nutritious, satisfying breakfast made with real food sets you up for better choices at every other meal. I recommend this exact smoothie to many clients managing their weight.
What liquid should I choose for my budget?
Store-brand unsweetened almond milk is almost always the cheapest option, usually 50-80 cents per carton on sale. If you have regular milk at home anyway, that works equally well and often costs less. Avoid juice unless it’s on deep sale—it’s more expensive and adds unnecessary sugar. Coconut milk varies wildly in price; generic canned coconut milk (not coconut beverage) is cheap but thick, requiring more adjustment. My recommendation for absolute budget families: use whatever milk product you already buy, no special purchases needed.
More Recipes You’ll Love
- this protein smoothie – Another breakfast smoothie that’s equally quick and budget-friendly with a completely different flavor profile
- Peanut Butter Overnight Oats – When you want something you can prep the night before and eat cold, this delivers similar nutrition with different texture
- The Best Damn Vegan Biscuits – The perfect companion to this smoothie if you want something warm and slightly more substantial alongside your drink
I hope this recipe brings a little ease to your mornings the way it does to mine and so many families I work with. That moment when you realize you’ve got a nutritious, delicious breakfast made in under five minutes using ingredients you already had at home—that’s real wellness, not the complicated kind magazines try to sell you. Don’t forget to mention @affordablefoodideas if you try this recipe! I genuinely love seeing how families adapt it and make it their own. Thank you for being part of this journey!