This post contains affiliate links. As an Amazon Associate I earn from qualifying purchases.
I remember the first time my family gathered around a plate of warm, loaded nachos on a Friday night in my small Massachusetts hometown. It wasn’t fancy—just what we had on hand—but somehow that simplicity made it taste better. These days, I serve this Black Bean Nacho Recipe to friends and clients alike because it proves that restaurant-quality appetizers don’t require a restaurant budget. Pair this with Baked Eggs Recipe Spinach for a complete brunch, or follow it with Baked Creamy Chicken Recipe for a full meal that keeps your grocery bill reasonable.
When a Simple Snack Became My Signature Dish
Growing up, my mom taught me that the best meals aren’t about ingredient count—they’re about intention. She’d stretch a can of beans into something magical by layering flavors and textures thoughtfully. That philosophy stuck with me through dietitian school and into my practice near Waltham, where I work with families trying to eat better without breaking the bank.
These nachos represent exactly that principle. They’re loaded with plant-based protein from black beans, contain real vegetables, cost less than seven dollars to make for six servings, and taste like you spent an hour in the kitchen. The best part? You can customize them completely based on what’s already in your pantry.
What Is Black Bean Nacho Recipe?
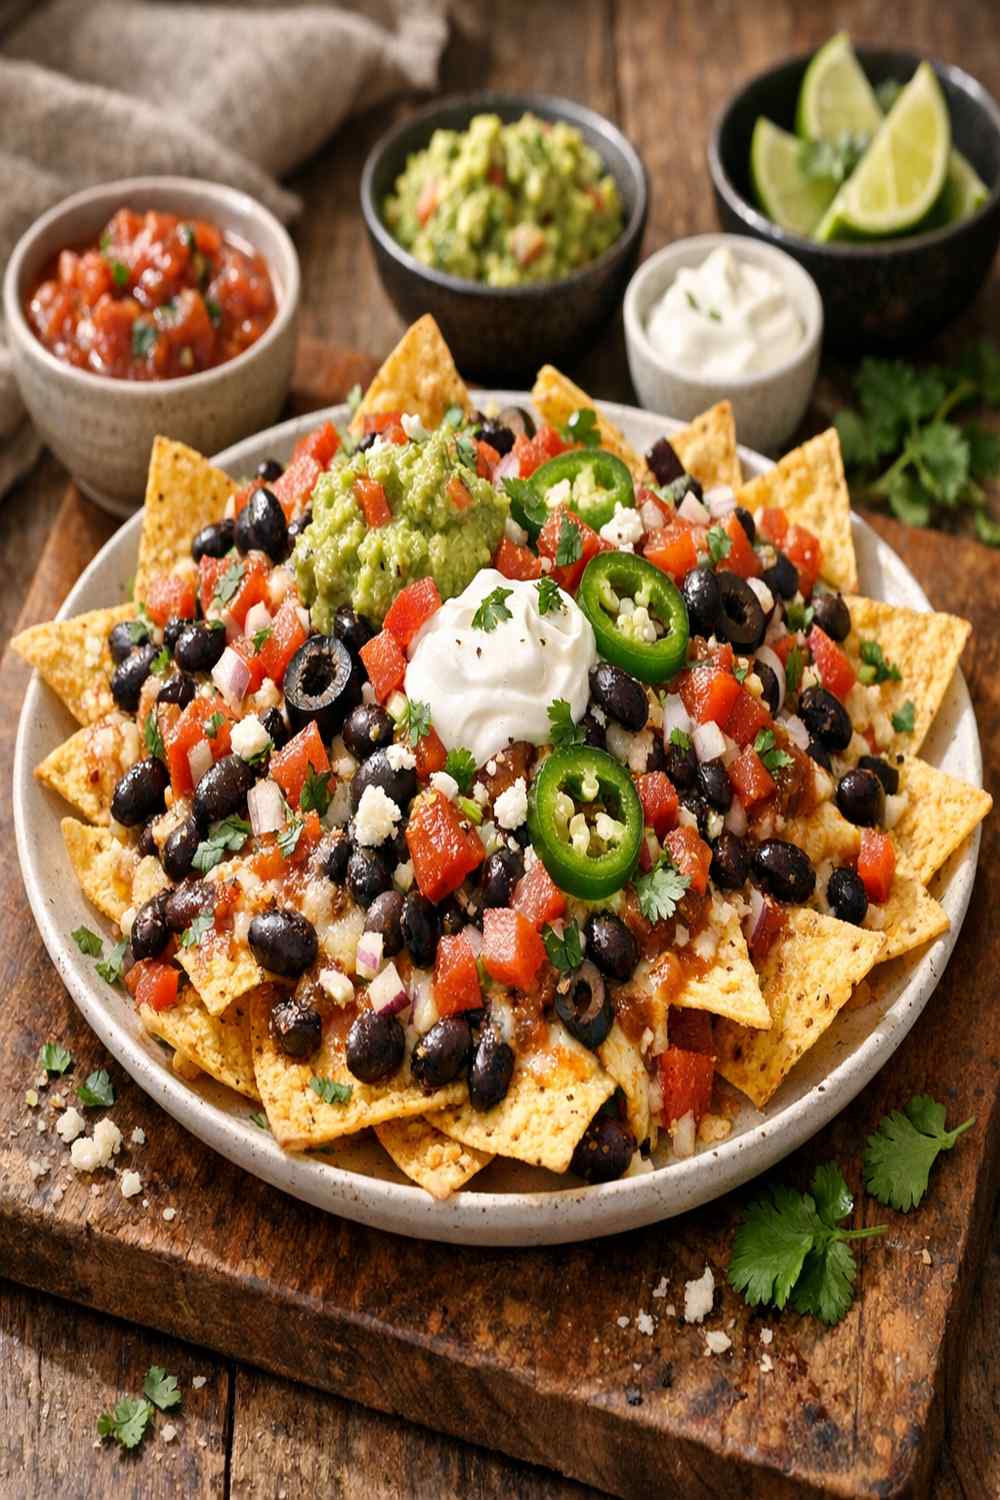
This recipe is a layered appetizer or light meal featuring crispy tortilla chips topped with a seasoned black bean and tomato mixture, melted cheese, and fresh garnishes. Unlike traditional nachos that rely on processed cheese sauces or heavy toppings, this version builds flavor through whole-grain ingredients and spices.
Black bean nachos originated from Mexican cuisine but have become a popular American appetizer and party food. What makes this particular recipe special is how the beans are prepared—I don’t drain them completely, which means the starchy liquid creates a natural binding sauce that clings to each chip. The result? Every bite has flavor, not just the toppings.
This approach also makes it significantly more affordable than restaurant versions, since we’re using pantry staples instead of fancy ingredients or specialty preparations.
Why You’ll Love This Black Bean Nacho Recipe
- Budget-friendly – Costs approximately $1.17 per serving when divided among six people, making this perfect for gatherings where you want to feed a crowd without stress.
- Quick preparation – From start to plated dish takes about 30 minutes, with only 15 minutes of active cooking time.
- Plant-based protein powerhouse – Black beans deliver 8 grams of protein per half-cup, making this suitable for vegetarians and anyone looking to reduce meat consumption.
- Customizable for any dietary preference – Easily adaptable for vegan, gluten-free, or low-sodium diets without losing any deliciousness.
- Impressive enough for guests – Looks restaurant-quality while tasting like homemade comfort food, which is the best combination.
- Complete nutritional profile – Provides fiber, B vitamins, iron, and magnesium all in one appetizer or light meal.
The Ingredients
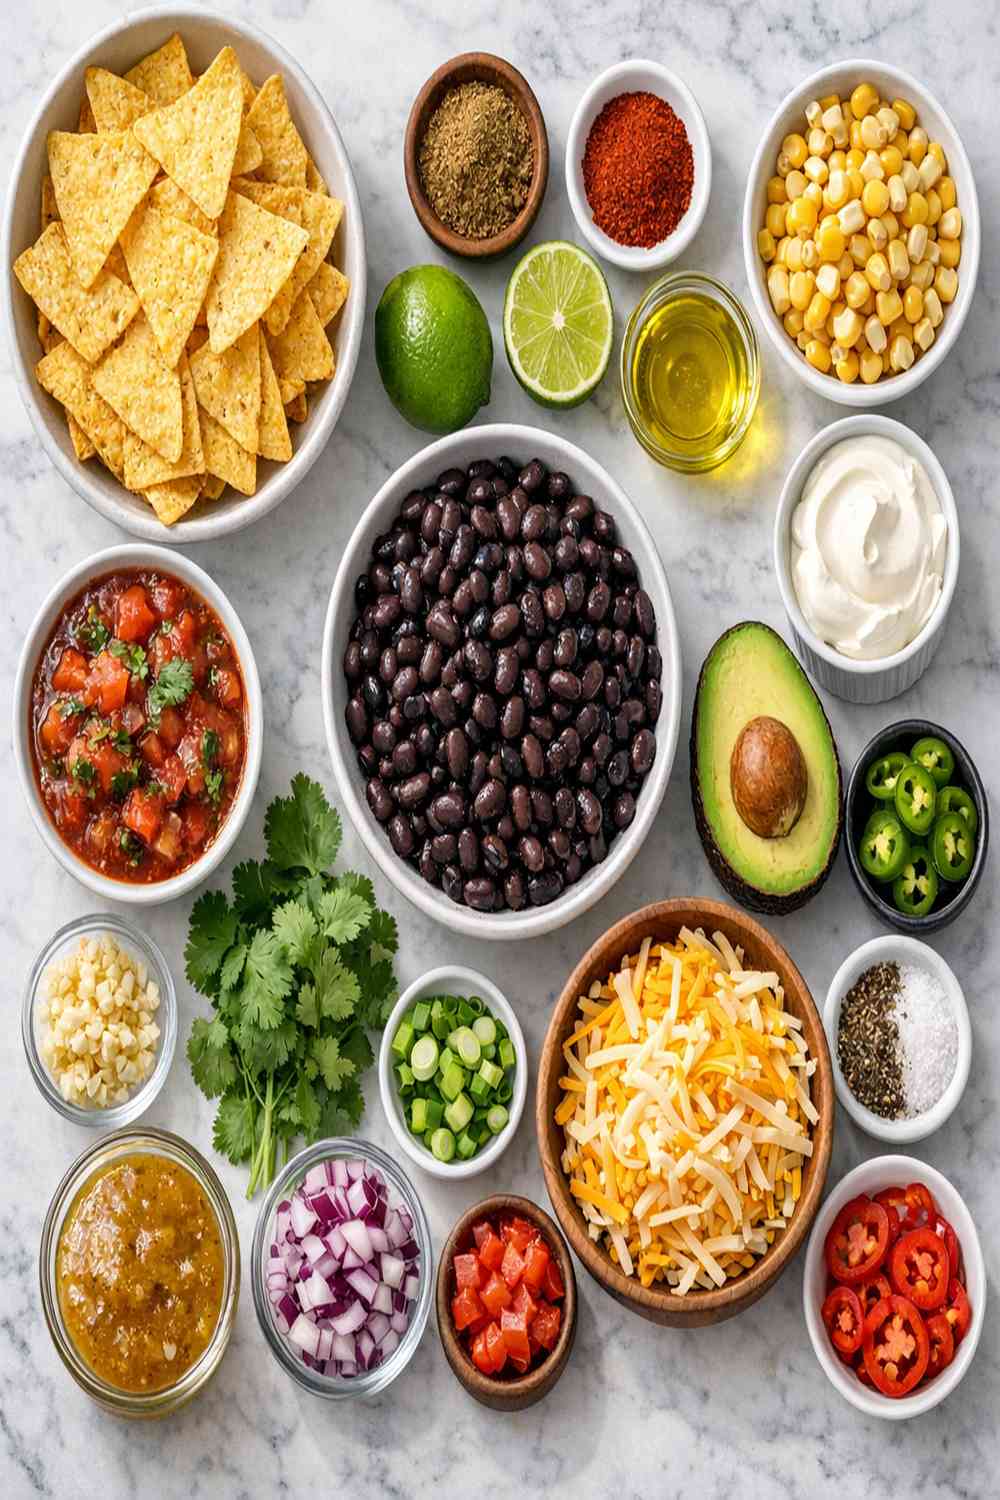
I’ve organized these ingredients by category to make shopping and prep easier. Everything listed here should be available at your local grocery store, and I’ve included budget-friendly substitutions for nearly every item.
For the Bean Base
- 1/4 teaspoon salt (adjust based on how salty your canned beans are)
- 1 tablespoon olive oil (extra-virgin tastes better, but regular grocery store brands work perfectly)
- 1/2 teaspoon chipotle powder (smoky heat, adjust based on preference)
- 1 ten-ounce can diced tomatoes with green chiles (fire-roasted varieties add more depth if available)
- 1/4 teaspoon garlic powder (cannot be skipped—this is nonnegotiable for flavor)
- 1 fifteen-ounce can black beans (do not drain—the starchy liquid is crucial for texture)
- 1 small onion (yellow or white, about 4 ounces and finely diced)
- 1/2 teaspoon ground cumin (earthy undertone that ties everything together)
For Layering and Baking
- 8 ounces sturdy corn tortilla chips (thick chips prevent sogginess—this matters more than you think)
- 4 ounces sharp cheddar cheese, shredded (pre-shredded works but fresh-shredded melts more smoothly)
For Fresh Toppings
- 1/4 cup sour cream (dolloped on top just before serving for richness)
- 1 handful fresh cilantro (roughly 1/4 cup chopped, though you can use parsley as substitution)
- 1 Roma tomato (vine-ripened if possible, finely diced and seeds removed slightly to prevent excess moisture)
- 1 jalapeño pepper (thinly sliced with seeds removed for less heat, or left in for more kick)
- 1/3 cup pickled red onions (homemade or store-bought—this adds necessary brightness and acidity)
Total yield: Serves 6 people as an appetizer, or 3-4 people as a light lunch or dinner.
How to Make Black Bean Nacho Recipe?
This recipe involves simple steps performed in a logical sequence. You’ll prepare your beans first while the oven preheats, then assemble everything quickly so the nachos stay crispy. The entire process moves at a comfortable pace with no rushing required.
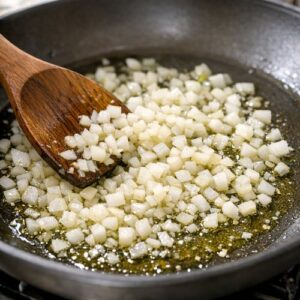
Step 1: Prepare Your Aromatic Base
Begin by finely dicing your small onion into pieces roughly the size of a pea. Heat one tablespoon of olive oil in a large skillet over medium heat for about one minute until you can smell the oil warming. Add your diced onion to the hot oil and stir occasionally as it cooks.
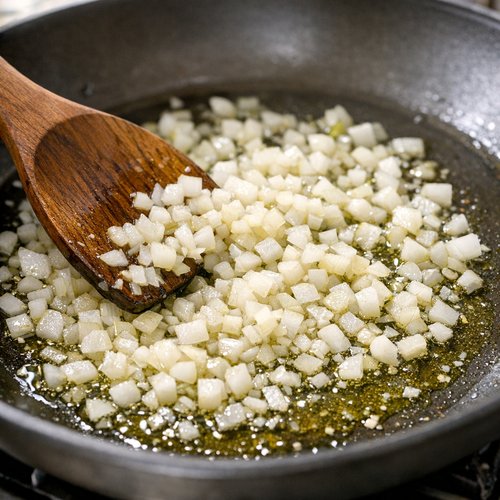
You’re looking for the onion to become soft and translucent, which takes approximately five minutes. You’ll notice the pieces transform from opaque white to glassy and slightly golden at the edges. This is the perfect moment to move forward—don’t let it brown too much, as we want sweetness rather than caramelization here.
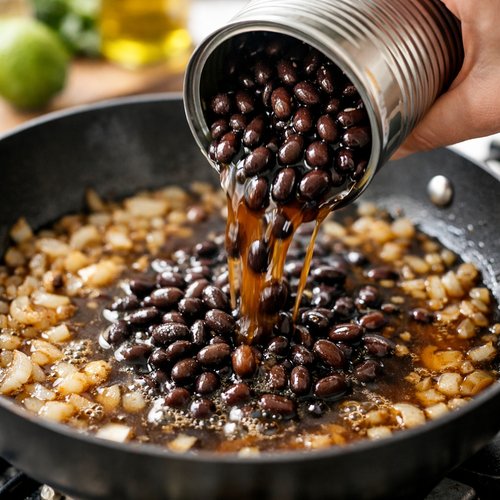
Step 2: Build the Bean Mixture
Grab your can of black beans and pour the entire contents—including all the liquid—directly into your skillet with the cooked onions. Do not drain or rinse the beans. That starchy liquid is liquid gold for creating a cohesive sauce that binds everything together.
Next, add your ten-ounce can of diced tomatoes with green chiles, again using the entire can including the juice. Sprinkle in your 1/2 teaspoon chipotle powder, 1/2 teaspoon ground cumin, 1/4 teaspoon garlic powder, and 1/4 teaspoon salt. Stir everything together thoroughly, making sure the spices distribute evenly.
Let this mixture simmer over medium heat for approximately ten minutes, stirring occasionally. You’ll know it’s ready when the liquid reduces significantly and no longer pools on the bottom of the skillet. The mixture should be thick and clingy, almost like a thick stew rather than soup.
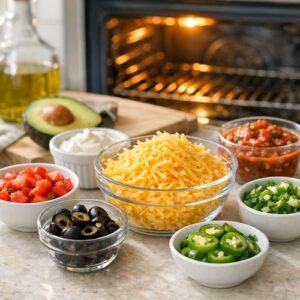
Step 3: Preheat and Prepare Your Toppings
While your bean mixture simmers, preheat your oven to 350 degrees Fahrenheit. This moderate temperature melts the cheese perfectly without burning the chip edges.

Now prep all your toppings so everything is ready when you need it. Shred your four ounces of cheddar cheese (use the large holes on a box grater if shredding fresh). Finely dice your Roma tomato, removing some of the seeds to prevent the nachos from becoming soggy. Thinly slice your jalapeño. Roughly chop your fresh cilantro. These prep steps take about five minutes total and make assembly stress-free.
Step 4: Layer Your Nachos for Maximum Flavor
Line a standard baking sheet with parchment paper or aluminum foil for easy cleanup. Spread your eight ounces of sturdy tortilla chips in a single layer across the baking sheet, trying to minimize overlapping. Overlapped chips don’t get crispy and don’t hold toppings well, so take a moment here to arrange them nicely.

Spoon approximately half of your bean mixture over the chips, distributing it as evenly as possible. You want beans on most chips, but you don’t need to be perfect here. Sprinkle half of your shredded cheddar cheese over the beans. Now repeat: another layer of chips, another layer of bean mixture, and the remaining cheese on top.
Step 5: Bake Until Cheese Melts Perfectly
Transfer your assembled nachos to the preheated 350-degree oven. Bake for five to seven minutes, watching carefully as you approach the end. You’re looking for the cheese to be completely melted and bubbly, with the chip edges just beginning to turn a light golden brown color.
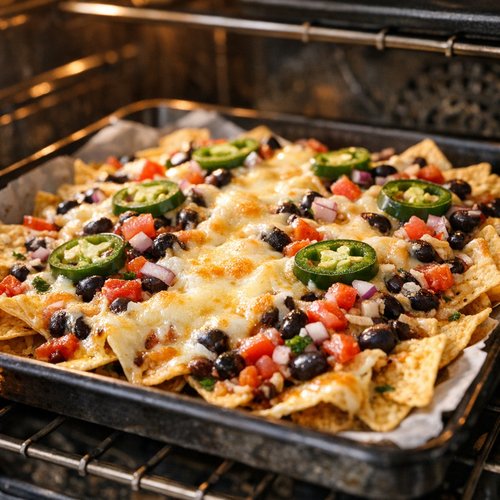
Do not overbake—even one extra minute can make chips tough and bitter. The moment you see that golden color appearing, remove the nachos from the oven. They’ll continue cooking slightly from residual heat, so removing them early prevents that crispy-turning-to-stale transition.
Step 6: Top With Fresh Garnishes and Serve Immediately
Remove the baking sheet from the oven and place it on a trivet or cooling rack. Immediately drizzle or dollop your sour cream over the top of the hot nachos. The warmth will slightly soften the sour cream, creating wonderful flavor pockets throughout.
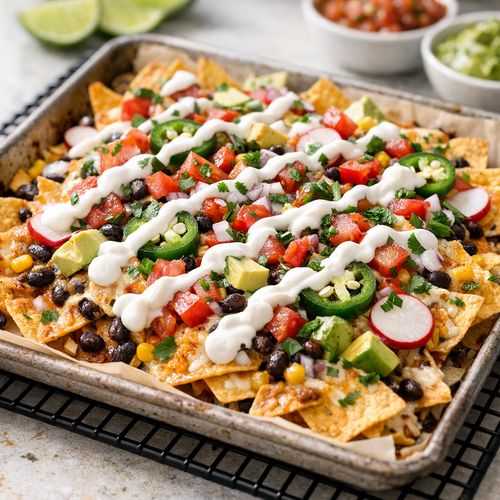
Now add your fresh toppings: scatter the diced Roma tomato, sliced jalapeño, pickled red onions, and chopped cilantro evenly across the nachos. These fresh elements provide brightness, acidity, and texture that contrast beautifully with the warm, creamy, savory base.
Serve immediately while the nachos are still warm and the chips are at their crispiest. This dish doesn’t hold well after more than about five minutes, so gather your guests before plating.
Tips and Tricks
- Don’t skip the tortilla chip quality – Thicker, sturdier chips make an enormous difference. Thin chips will become soggy and fall apart under the weight of toppings. Look for chips labeled “sturdy” or “dipping style” rather than the ultra-thin varieties.
- Make the bean mixture ahead – Prepare the seasoned bean base up to two days in advance and store it in an airtight container in your refrigerator. Simply reheat it gently before assembling nachos. This makes entertaining much less stressful.
- Use fresh lime juice as a brightness booster – A squeeze of fresh lime juice over the finished nachos adds brightness that takes them from good to memorable. I always keep limes on hand for this reason.
- Try the oven setting that works for your kitchen – Some ovens run hot while others run cool. Watch your first batch carefully so you learn your oven’s timing. Every oven is different.
- Preserve pickled onion color by adding them last – If you add pickled red onions during baking, they’ll bleed color into everything and lose their brightness. Always add them as a final garnish.
- Toast your cumin and chipotle powder in the oil first – For deeper flavor development, add these spices directly to the oil with the onions for 30 seconds before adding the beans. This “blooms” the spices and intensifies their flavor.
Expert’s Nutritional Tip
As a registered dietitian, I want to highlight something important about black beans: they contain resistant starch, which functions similarly to fiber in your digestive system. This means your body processes the carbohydrates in these beans more slowly than regular starch, creating steadier blood sugar levels and longer-lasting satiety. The addition of fat (from cheese and sour cream) and protein further slows digestion.
When I serve these nachos to clients looking to manage blood sugar or reduce afternoon energy crashes, I emphasize that the whole package matters more than individual ingredients. The bean mixture creates a complete macronutrient profile—carbohydrates, protein, and fat together—making these nachos suitable as a legitimate meal, not just an indulgent snack.
Make-Ahead Guide
One of the reasons I love this recipe for entertaining is how well it breaks down into advance preparation. Here’s my professional approach to getting everything ready without last-minute stress.
Up to two days ahead: Prepare the complete bean mixture and store it in an airtight container in your refrigerator. Chop your cilantro and store it in a damp paper towel wrapped in a plastic bag. Dice your Roma tomato and store it in a small container (though it’s best used within one day to maintain texture).
One day ahead: Make your pickled red onions if using homemade rather than store-bought versions. Shred your cheese and store it in an airtight container. Slice your jalapeño and store it in a small container.
One hour before serving: Preheat your oven to 350 degrees Fahrenheit. Arrange all your toppings on small serving bowls or plates so guests can see exactly what’s available. This also helps you stay organized during assembly.
Fifteen minutes before serving: Begin heating your bean mixture gently in a small saucepan if it’s been refrigerated. Assemble and bake your nachos exactly as described in the recipe.
Common Mistakes to Avoid
- Draining the black beans – This is the most common mistake I see. People assume canned bean liquid is waste, but that starch is essential. It creates the sauce that holds everything together. Keep it!
- Using thin or flimsy tortilla chips – Cheap, thin chips will crumble under the weight of toppings and become unpleasantly soggy. Spend the extra 50 cents per bag for quality. You’ll notice immediately.
- Overlapping chips during assembly – When chips overlap, the bottom layer steams rather than bakes, creating a soggy mess. Arrange them in a single layer with small gaps between each chip.
- Adding all toppings before baking – The sour cream, tomato, and cilantro should go on after baking. Adding them beforehand makes everything watery and the cilantro loses its bright color.
Seasonal Variations
Spring version: Replace the Roma tomato with fresh corn kernels (fresh or thawed frozen). Add thinly sliced radishes and fresh green onions. Swap cilantro for a mixture of cilantro and fresh mint. This version becomes lighter and brighter.
Summer version: Use the freshest, ripest tomatoes available from your farmers market or garden. Add diced fresh mango or peaches alongside the tomato for a sweet-savory combination. Increase the jalapeño if you like heat. This version celebrates peak produce season.
Fall version: Add roasted pumpkin seeds (pepitas) on top for crunch and nutrition. Include a handful of diced apple with the tomato for subtle sweetness. Switch from cilantro to parsley. This version adds autumn warmth.
Winter version: Use canned diced tomatoes with roasted red peppers instead of diced tomatoes with chiles. Add thinly sliced Brussels sprouts that have been lightly roasted in the oven alongside your nachos. Use pomegranate arils instead of pickled red onions for festive color and brightness.
Can I Store Black Bean Nacho Recipe?
Here’s where I’m completely honest: these nachos are best served immediately after baking. The moment they cool, the chips lose their crispness and begin absorbing moisture. If you serve them after more than five minutes from the oven, they become noticeably softer.
That said, the bean mixture stores beautifully for up to three days in an airtight container in your refrigerator. Simply reheat it gently in a small saucepan before assembling fresh nachos. This is actually my preferred approach for entertaining—prepare the hardest part ahead of time, then assemble just before serving.
Individual components also store well separately: beans keep for three to four days, fresh toppings keep for one to two days (with tomatoes being the shortest-lasting), and cheese keeps for up to two weeks if tightly wrapped.
I don’t recommend freezing assembled or fully prepared nachos, as the texture suffers dramatically when thawed. The bean mixture alone freezes reasonably well for up to two months in a freezer-safe container, which is wonderful if you’re batch-cooking for future snacking.
Nutrition Information
According to USDA nutrition data, each serving of this recipe (calculated as 1/6 of the total batch) provides approximately 285 calories, 12 grams of protein, 28 grams of carbohydrates, and 12 grams of fat. The fiber content reaches 6 grams per serving, making this appetizer surprisingly filling and satisfying.
The black beans contribute significant amounts of iron, magnesium, and B vitamins, while the cheese provides calcium and additional protein. The pickled red onions add probiotics if using fermented versions, supporting digestive health. The fresh cilantro and tomatoes contribute vitamins A and C.
This nutritional profile makes nachos suitable as part of a balanced meal rather than empty calories. The combination of fiber, protein, and healthy fat means blood sugar impacts remain moderate even though chips are involved. For my clients managing diabetes or prediabetes, I emphasize pairing these nachos with a protein-rich side like grilled chicken or black bean soup to further stabilize blood sugar response.
What Can I Serve With Black Bean Nacho Recipe?
These nachos function beautifully as a standalone appetizer, but if you’re planning a larger gathering or meal, here are my favorite pairings that complement the flavors and create a complete experience.
For a Mexican-inspired menu, serve alongside Baked Chimichangas Recipe, which shares the same warm spice profile. For something lighter, try 5-Minute Vegan Cashew Queso as an additional dipping option if your guests have dairy-free preferences.
- Grilled chicken breast or carnitas – Adds protein and smoke flavor that pairs gorgeously with the spiced beans and sour cream.
- Mexican street corn (elote) – Charred corn with lime, mayo, and cheese echoes similar flavor notes while providing vegetable nutrition.
- Fresh cucumber salad with lime vinaigrette – Bright, cool, and refreshing, providing textural contrast to warm nachos.
- Black bean soup – Creating depth by using a similar base in multiple forms creates a cohesive meal that feels intentional.
- Grilled fish tacos – Light, fresh, and complementary without competing for flavor dominance.
- Cilantro-lime rice – Absorbs flavors and provides textural contrast without overwhelming the nacho flavors.
- Roasted vegetable medley – Peppers, zucchini, and onions roasted with similar spices create visual appeal and nutritional balance.
Substitutes
- Pinto beans instead of black beans – Works well functionally and tastes nearly identical. Use the same amount and preparation method. Pinto beans are often slightly cheaper at my local stores.
- Pepper jack cheese instead of cheddar – Adds spice that reinforces the chipotle and cumin flavors. Use the same amount. This substitution makes nachos more assertively flavored.
- Greek yogurt instead of sour cream – Creates a tangier finish with higher protein content. Use the same amount or slightly less since Greek yogurt is thicker.
- Fresh lime juice instead of pickled red onions – If you don’t have pickled onions on hand, a squeeze of fresh lime juice over finished nachos provides similar brightness and acid.
- Cilantro-lime crema instead of plain sour cream – Mix sour cream with fresh lime juice and cilantro for a more assertive topping. This adds herbaceous brightness.
- Diced red bell pepper instead of Roma tomato – Offers sweetness and texture without the moisture concerns that tomatoes sometimes bring. Provide similar dicing and amount.
- Serrano pepper instead of jalapeño – Thinner and significantly spicier. Use roughly half the amount or fewer slices for similar heat level as jalapeño.
- Homemade pickled onions instead of store-bought – Simply combine thinly sliced red onions with equal parts red wine vinegar and water, plus a teaspoon of sugar and a pinch of salt. Let sit for at least two hours before using.
- Plain tortilla chips if sturdy ones aren’t available – While thinner chips aren’t ideal, they still work. Just serve these nachos immediately and don’t let them sit, as sogginess will happen faster.
- Rotisserie chicken instead of vegetarian base – If you want to add protein, shred rotisserie chicken and mix it into the bean base or scatter it on top before baking. This transforms nachos into a heartier meal.
Black Bean Nacho Recipe
Ingredients
Method
- Begin by finely dicing your small onion into pieces roughly the size of a pea. Heat one tablespoon of olive oil in a large skillet over medium heat for about one minute until you can smell the oil warming. Add your diced onion to the hot oil and stir occasionally as it cooks. You're looking for the onion to become soft and translucent, which takes approximately five minutes. You'll notice the pieces transform from opaque white to glassy and slightly golden at the edges. This is the perfect moment to move forward—don't let it brown too much, as we want sweetness rather than caramelization here.
- Grab your can of black beans and pour the entire contents—including all the liquid—directly into your skillet with the cooked onions. Do not drain or rinse the beans. That starchy liquid is liquid gold for creating a cohesive sauce that binds everything together. Next, add your ten-ounce can of diced tomatoes with green chiles, again using the entire can including the juice. Sprinkle in your 1/2 teaspoon chipotle powder, 1/2 teaspoon ground cumin, 1/4 teaspoon garlic powder, and 1/4 teaspoon salt. Stir everything together thoroughly, making sure the spices distribute evenly. Let this mixture simmer over medium heat for approximately ten minutes, stirring occasionally. You'll know it's ready when the liquid reduces significantly and no longer pools on the bottom of the skillet. The mixture should be thick and clingy, almost like a thick stew rather than soup.

- While your bean mixture simmers, preheat your oven to 350 degrees Fahrenheit. This moderate temperature melts the cheese perfectly without burning the chip edges. Now prep all your toppings so everything is ready when you need it. Shred your four ounces of cheddar cheese (use the large holes on a box grater if shredding fresh). Finely dice your Roma tomato, removing some of the seeds to prevent the nachos from becoming soggy. Thinly slice your jalapeño. Roughly chop your fresh cilantro. These prep steps take about five minutes total and make assembly stress-free.
- Line a standard baking sheet with parchment paper or aluminum foil for easy cleanup. Spread your eight ounces of sturdy tortilla chips in a single layer across the baking sheet, trying to minimize overlapping. Overlapped chips don't get crispy and don't hold toppings well, so take a moment here to arrange them nicely. Spoon approximately half of your bean mixture over the chips, distributing it as evenly as possible. You want beans on most chips, but you don't need to be perfect here. Sprinkle half of your shredded cheddar cheese over the beans. Now repeat: another layer of chips, another layer of bean mixture, and the remaining cheese on top.

- Transfer your assembled nachos to the preheated 350-degree oven. Bake for five to seven minutes, watching carefully as you approach the end. You're looking for the cheese to be completely melted and bubbly, with the chip edges just beginning to turn a light golden brown color. Do not overbake—even one extra minute can make chips tough and bitter. The moment you see that golden color appearing, remove the nachos from the oven. They'll continue cooking slightly from residual heat, so removing them early prevents that crispy-turning-to-stale transition.

- Remove the baking sheet from the oven and place it on a trivet or cooling rack. Immediately drizzle or dollop your sour cream over the top of the hot nachos. The warmth will slightly soften the sour cream, creating wonderful flavor pockets throughout. Now add your fresh toppings: scatter the diced Roma tomato, sliced jalapeño, pickled red onions, and chopped cilantro evenly across the nachos. These fresh elements provide brightness, acidity, and texture that contrast beautifully with the warm, creamy, savory base. Serve immediately while the nachos are still warm and the chips are at their crispiest. This dish doesn't hold well after more than about five minutes, so gather your guests before plating.

Notes
FAQs
Can I make these nachos vegan?
Absolutely! The bean mixture is naturally vegan. Simply substitute dairy cheese with a quality vegan cheddar alternative (Miyoko’s and Violife are excellent brands), and use dairy-free sour cream or cashew cream instead of regular sour cream. Everything else remains exactly the same. These modifications don’t reduce flavor or satisfaction at all—I make them this way regularly for friends with dairy preferences.
How do I prevent these nachos from becoming soggy?
Three key steps: First, use sturdy chips with real thickness. Second, don’t add fresh toppings (tomato, cilantro, sour cream) before baking—only add them after. Third, serve immediately. That five-minute window is important. If you’re making nachos for a crowd, assemble and bake in batches so everyone gets hot, crispy nachos rather than waiting and getting soft ones.
What if I don’t have canned tomatoes with green chiles?
Use regular canned diced tomatoes and add one fresh jalapeño (finely minced) directly into the bean mixture during cooking. You’ll get similar heat and flavor. Alternatively, use canned fire-roasted diced tomatoes, which add more depth even without the chiles. Adjust the chipotle powder amount based on your heat preference if making this substitution.
Can I make the bean mixture in advance?
Yes! This is one of my favorite aspects of this recipe. Make it up to two days ahead, store it in an airtight container in your refrigerator, and reheat it gently before assembling nachos. This advance preparation removes the most time-consuming component from the final assembly, letting you focus on quick garnish addition. I often make the bean mixture on a weekend to use throughout the week for nachos or taco fillings.
Is this recipe suitable for meal prep?
The bean mixture is excellent for meal prep, but assembled nachos are not. Prepare large batches of the bean mixture and portion it into individual containers. Store for up to three days. Then, whenever you want nachos, assemble them fresh using store-bought chips and toppings. This approach lets you enjoy these nachos multiple times without ever serving soggy ones. It’s my approach during busy work weeks when I want nutritious food that tastes homemade.
More Recipes You’ll Love
- Baked Chimichangas Recipe – Similar flavor profile with a heartier, more filling presentation using the same spice base.
- 5-Minute Vegan Cashew Queso – A complementary dip that works beautifully alongside these nachos for guests with dairy preferences.
- Baked Beans Recipe on the Stovetop – Another bean-based recipe that showcases how versatile canned beans become when properly seasoned and prepared.
I hope this recipe brings as much joy to your table as it does to mine. Black Bean Nachos represent everything I believe in: affordable, nutritious, impressive, and genuinely delicious. They’re perfect for weeknight appetizers, game day gatherings, or simply when you want something warm and satisfying that doesn’t require complicated cooking.
Try making a batch this week and notice how the simple combination of pantry ingredients transforms into something restaurant-quality. Pay attention to the textures, the flavors building throughout cooking, and that perfect moment when melted cheese meets warm beans and fresh cilantro. That’s the magic of intentional cooking using affordable ingredients.
Don’t forget to mention @affordablefoodideas if you try this recipe! I’d love to see how you customize it and hear what variations work best for your family. Cooking together, learning together, and eating well within budget—that’s the journey we’re on, and I’m honored you’re part of it.