This post contains affiliate links. As an Amazon Associate I earn from qualifying purchases.
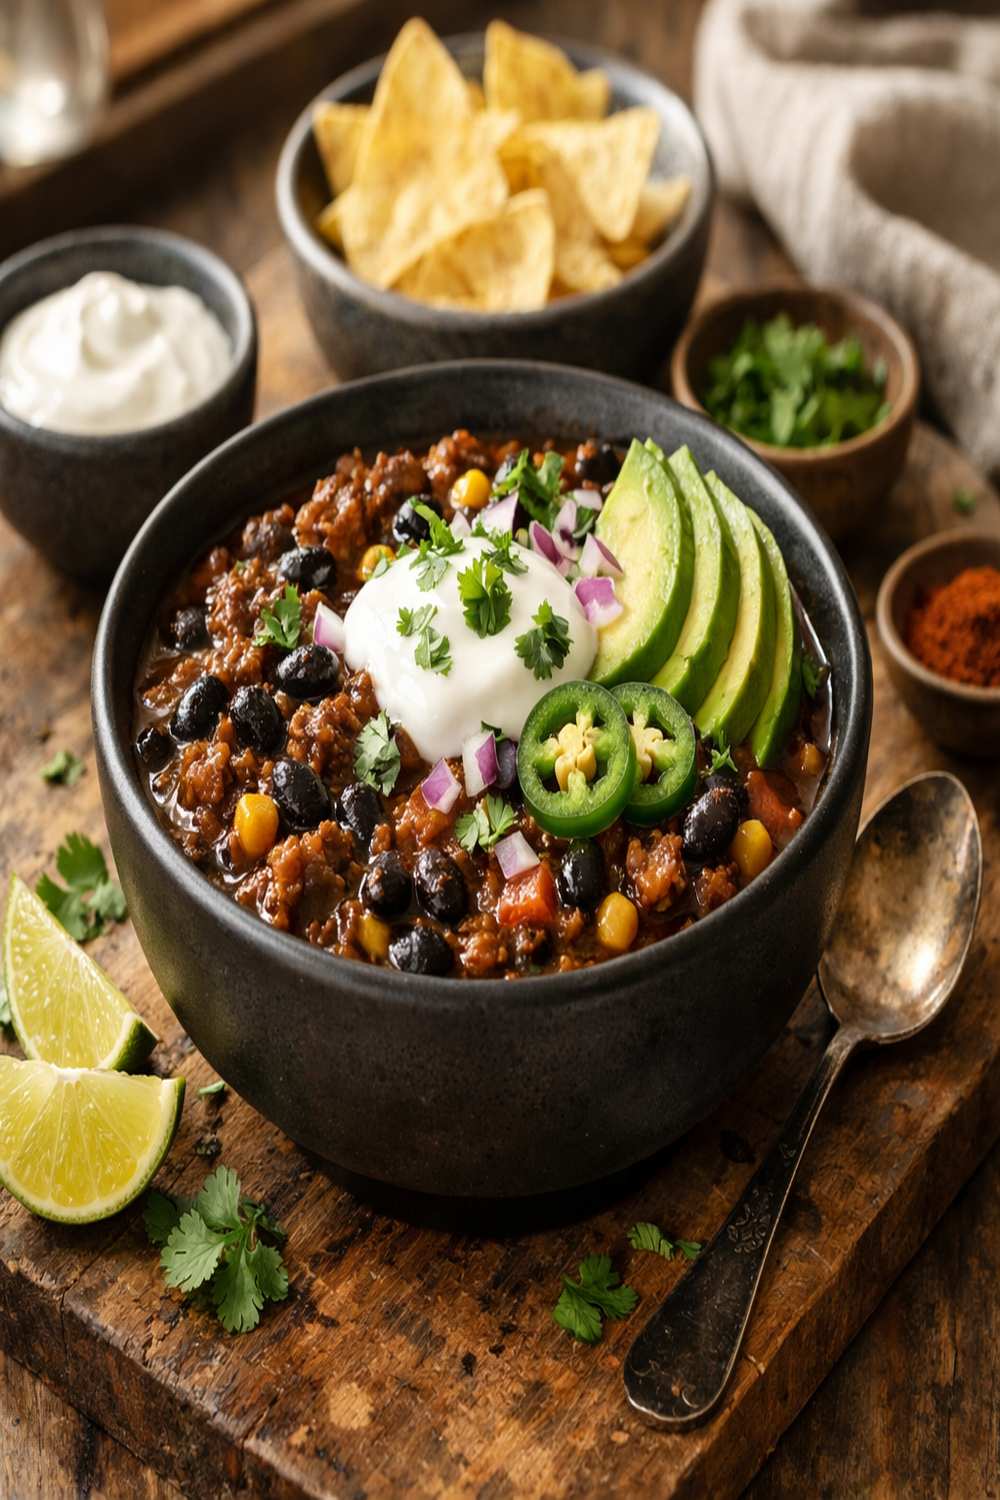
There’s something deeply satisfying about a warm bowl of hearty chili, especially when it costs just pennies per serving. This black chili is one of my go-to recipes when I’m feeding my family on a tight budget—it’s filling, nutritious, and honestly, it tastes like you spent hours in the kitchen when you’ve really only invested about 30 minutes. Pair it with baked chimichangas for a complete meal, or serve it alongside awesome sauce for extra flavor without breaking the bank.
The Story Behind My Favorite Black Chili
I grew up in a small Massachusetts town where my mom made chili every October like clockwork. It wasn’t fancy—just pantry staples simmered together—but on those crisp fall evenings, it became the centerpiece of our family table. My brothers and I would argue about toppings while my parents stretched one pot into multiple meals for our family of five. That memory stuck with me through nutrition school and into my practice.
Years later, when I started working with clients who felt like healthy eating was beyond their reach financially, chili became one of my first recommendations. It’s affordable, it’s nutritious, and it’s forgiving. You can make it your own. This black chili recipe represents everything I believe about feeding ourselves well: you don’t need expensive ingredients, restaurant menus, or complicated techniques. You just need wholesome, basic components and a little time.
What Is Black Chili?
Black chili is a hearty, protein-packed stew built around black beans rather than kidney beans or a mix. The “black” in the name refers to both the dominant beans and often a deeper, richer flavor profile created by the spice blend. Traditional chili varies wildly by region—Texas red chili skips beans entirely, Cincinnati chili is spiced and served over spaghetti, and countless family versions exist in between.
This black chili sits somewhere wonderfully accessible: it’s meat-based but bean-forward, making it filling without requiring a pound of ground beef. The combination of smoked paprika, cumin, chili powder, and oregano creates a warm, complex flavor that tastes like it simmered all day, even though it’s ready in under 45 minutes from start to finish.
What makes this version special is its affordability without sacrificing depth. Every ingredient serves a purpose, and nothing fancy is required. This is real food for real budgets.
Why You’ll Love This Black Chili Recipe
- Costs less than $9 total to make – That’s roughly $1.13 per serving for a generous bowl, making it one of the most budget-friendly dinners you can prepare at home.
- Packed with plant-based protein – The three cans of black beans provide substantial fiber and plant protein, meaning the meat stretches further and you stay satisfied longer.
- Makes 8 servings, perfect for meal prep – Double or triple this recipe and you’ve got lunches and dinners covered for days, which is how busy families actually eat affordably.
- Naturally gluten-free and adaptable – Whether you need to skip ingredients or swap them, this chili is forgiving and flexible.
- No specialty ingredients required – Everything lives in a standard grocery store, and most items are pantry staples you probably already own.
- Tastes even better the next day – The flavors continue developing as it sits, making this ideal for make-ahead meal planning.
The Ingredients
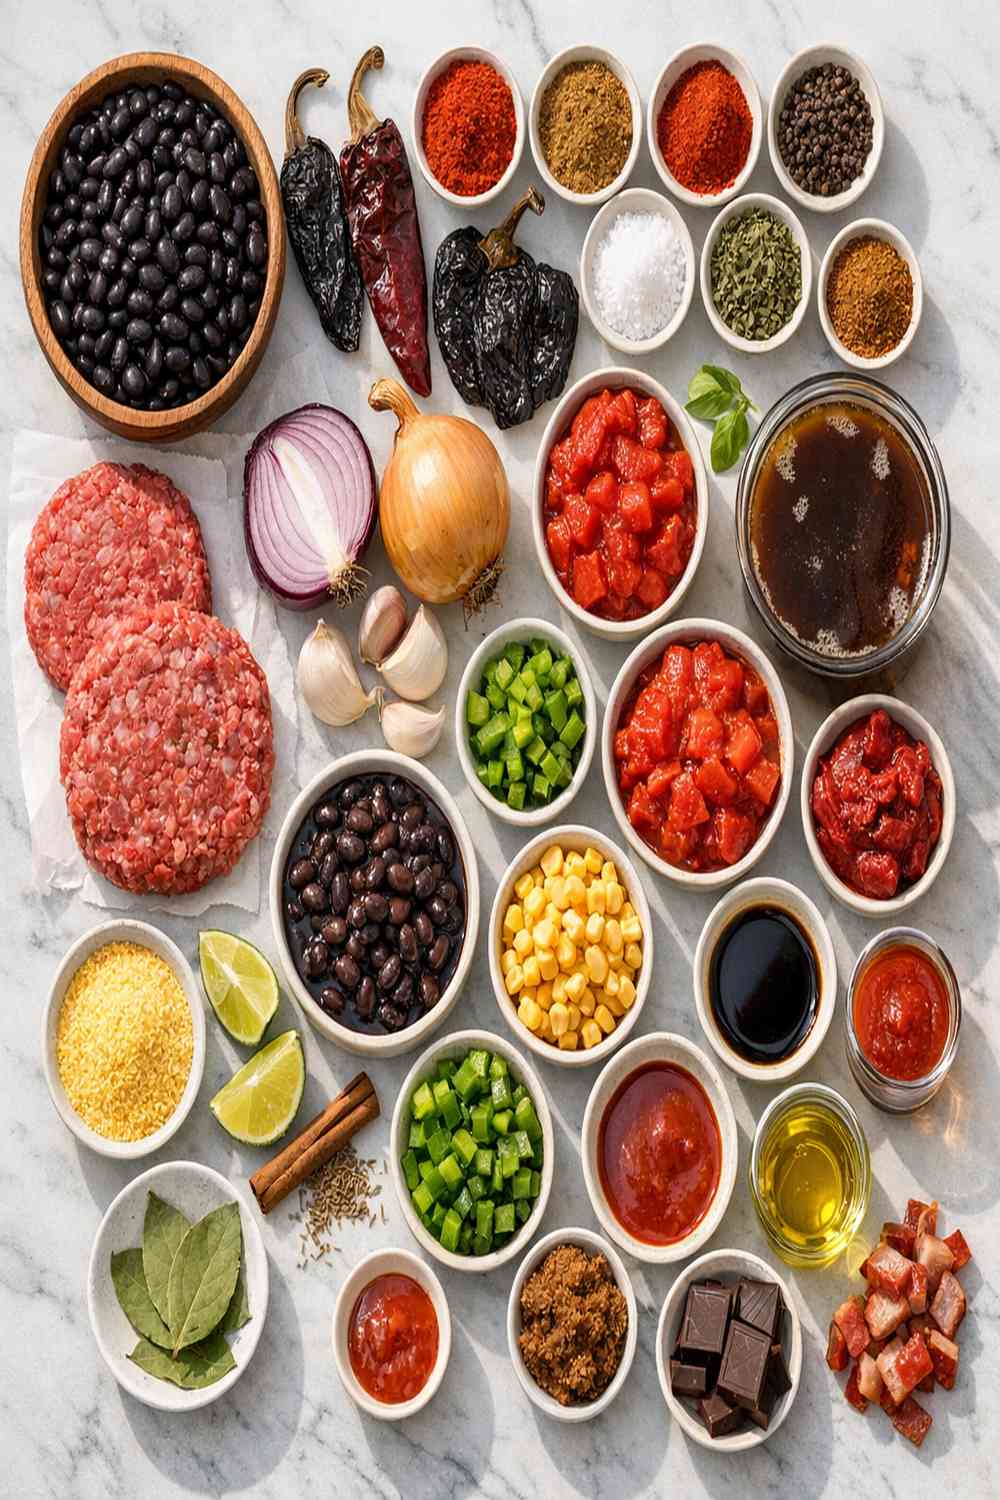
I’ve organized these ingredients by what you’re likely to have on hand versus what you’ll buy specifically for this recipe. Every single item plays a role—there’s nothing filler here. Makes 8 generous servings.
- 1 medium yellow onion (diced, about 1.5 cups)
- ¼ teaspoon cayenne pepper (optional, for those who like gentle heat)
- 1 can (10 ounces) diced tomatoes with green chiles (fire-roasted adds depth, but regular is fine)
- 1 tablespoon olive oil (or any neutral cooking oil you have available)
- 1 teaspoon ground cumin (earthy warmth that defines this chili’s character)
- 4 cloves garlic (minced fresh, or 1.5 teaspoons jarred garlic in a pinch)
- 3 cans (15 ounces each) black beans (drained and rinsed, canned is more affordable than dried)
- 1 tablespoon chili powder (the spice blend, not a spice mix)
- 2 cups water (essential for simmering and developing flavors)
- ½ teaspoon dried oregano (Mediterranean touch that brightens the beans)
- ½ pound ground beef (85/15 blend works perfectly, no need for leaner cuts)
- ½ teaspoon salt (adjust to taste based on your canned goods)
- 1 can (6 ounces) tomato paste (concentrated flavor that extends further than crushed tomatoes)
- ½ teaspoon smoked paprika (creates that slow-cooked richness)
How to Make Black Chili
This recipe comes together in straightforward steps. Don’t skip the simmering time—that’s where the magic happens. You’ll move from raw ingredients to something that tastes like comfort in about 35 minutes.
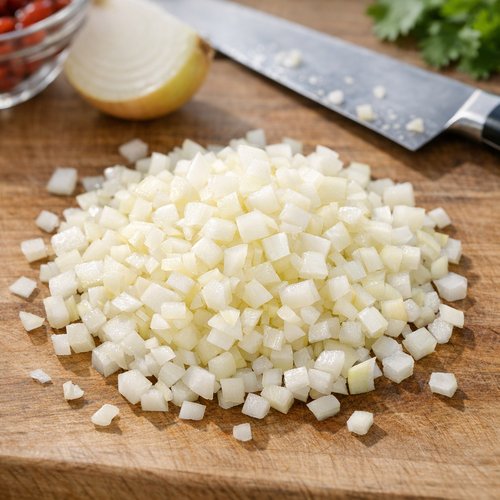
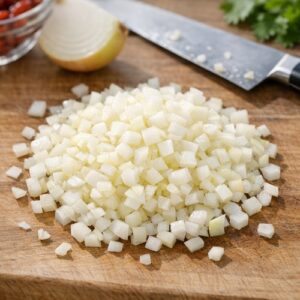
Step 1: Prepare Your Vegetables
Start by dicing your yellow onion into pieces about the size of a pea. You’re aiming for pieces small enough to soften quickly but large enough that you can still identify them in the finished chili. For the garlic, I like mincing it fine—about the thickness of a coin when sliced, then chopped into tiny pieces. This helps it distribute throughout the pot and prevents any harsh, raw garlic flavor.
Step 2: Build Your Flavor Base
Add your tablespoon of olive oil to a large pot (I use a 5-quart Dutch oven, but any heavy-bottomed pot works) over medium heat. Once the oil is shimmering—you’ll see it move easily when you tilt the pot—add your diced onion and minced garlic. You’re looking for the onion to turn translucent and slightly softened, which takes about 2 to 3 minutes. Stir occasionally so nothing sticks to the bottom. You’ll smell the garlic becoming fragrant—that’s your cue that it’s working.

Step 3: Brown the Ground Beef
Add your ½ pound of ground beef directly to the pot with the softened onions and garlic. Using a wooden spoon or spatula, break the beef into smaller pieces as it cooks. You want it distributed throughout the pot rather than in one large clump. This should take about 5 to 7 minutes of cooking over medium heat. The beef is done when it’s no longer pink and has turned a light brown color. Don’t worry about getting a deep golden crust—we’re not searing here, just cooking it through.

Step 4: Add the Beans and Tomatoes
Now comes the satisfying part where your pot transforms from savory-smelling to visibly hearty. Drain and rinse your three cans of black beans—this removes excess sodium and the starchy liquid that can make chili gummy. Add them to the pot along with your can of diced tomatoes with green chiles (include all the juice), the tomato paste, and your 2 cups of water. The tomato paste should be stirred in well so it doesn’t clump.

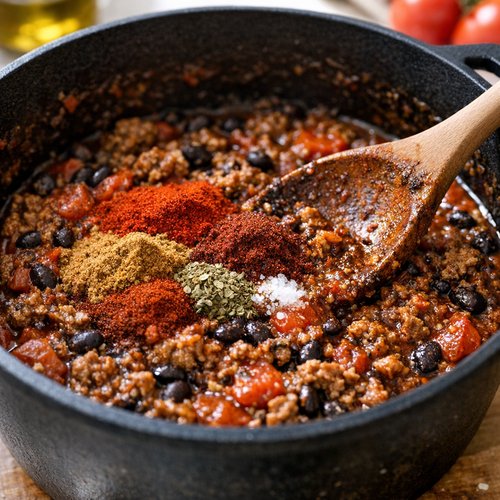
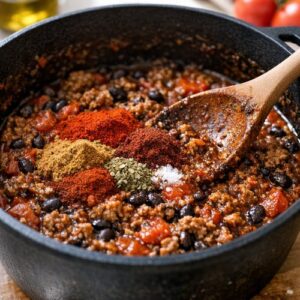
Step 5: Season and Spice
Add your chili powder, ground cumin, smoked paprika, dried oregano, and salt. I like to stir everything together thoroughly—you’ll see the color deepen and the aroma become noticeably more complex. The spices activate when they touch the warm liquid, releasing their essential oils. This is where the chili starts smelling like the real thing.
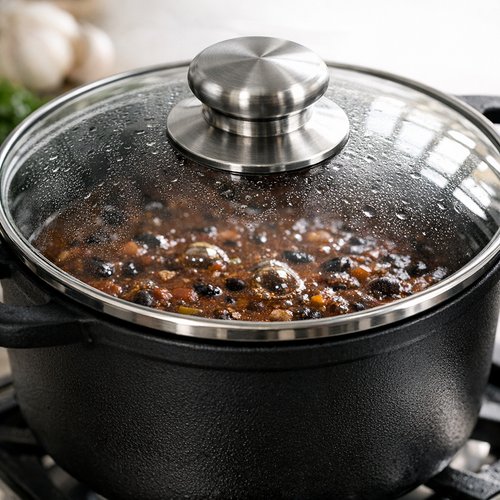
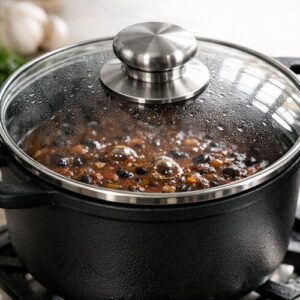
Step 6: Simmer for Flavor Development
Place a lid on your pot and bring the mixture to a simmer. You’re aiming for gentle bubbles breaking the surface—not a rolling, aggressive boil. Reduce heat to medium-low if needed. Let this simmer for approximately 15 minutes, stirring occasionally. What you’re doing during this time is allowing the flavors to meld, the beans to soften further, and some of the liquid to reduce slightly, making the chili thicker and more concentrated.
Step 7: Taste and Adjust
After simmering, taste your chili. Add additional salt as needed—this depends entirely on how much sodium was in your canned goods. I usually add about ¼ to ½ teaspoon more, but start small because you can always add more. If you like spice, this is when you’d add that optional cayenne pepper. Stir well and let it sit for a minute so the new seasoning distributes.

Expert’s Nutritional Insight
As a registered dietitian, I want to highlight something about this chili that makes it nutritionally superior to many restaurant versions: the combination of beans and ground beef creates a complete protein with all nine essential amino acids. Black beans contain amino acids that beef lacks, and vice versa. This is why traditional cuisines paired beans and meat—they intuitively understood nutrition.
The fiber from three cans of beans (roughly 18 grams total) supports digestive health and stable blood sugar, meaning you’ll stay satisfied longer after eating. That’s why a single bowl of this chili is genuinely filling, not just temporarily filling. The lycopene in tomatoes is also fat-soluble, meaning it’s better absorbed when eaten with the fat in ground beef. Your body is getting more nutritional benefit from the combination than from either ingredient alone.
Tips and Tricks
- Brown your beef in a separate skillet first if you have time – This develops a deeper, richer flavor. Cook the beef alone over medium-high heat until nicely browned (about 5 minutes), then add it to your pot with the softened onions and garlic. It’s an extra step that takes five minutes and noticeably improves the final result.
- Drain and rinse your canned beans – This removes up to 40% of the sodium and eliminates the thick, starchy liquid that can make chili gummy. It matters more than you’d think.
- Use smoked paprika, not regular paprika – The smoke flavor is what makes this taste slow-cooked. Regular paprika is milder and won’t give you that depth.
- Let it cool before storing – Chili releases steam that can condense inside your container. Let it cool on the counter for 20 minutes before refrigerating to prevent soggy chili.
- Taste as you add spices – Everyone’s palate is different, and canned goods vary in sodium. You might want less salt than the recipe calls for, or you might crave more heat. This is your chili—make it yours.
Make-Ahead Guide
This is where black chili becomes a meal-prep superstar. Here’s my professional approach to making this work for busy weeks:
Refrigerator storage: This chili keeps beautifully in an airtight container for up to 5 days in the refrigerator. Actually, it tastes better on day two or three because the spices continue melding. I often make a double batch on Sunday and eat from it all week.
Freezer storage: You can freeze this chili for up to 3 months. I recommend freezing it in individual portions using freezer bags laid flat or in ice cube trays for smaller portions. This way you can thaw exactly what you need. Frozen chili thaws in the refrigerator overnight, or you can reheat it directly from frozen on the stovetop over low heat, stirring occasionally (about 20 minutes).
Reheating: On the stovetop is best. Add it to a pot over medium heat, stirring occasionally, until heated through (about 5 to 7 minutes). You can also reheat individual portions in the microwave, though the texture stays slightly better on the stovetop. Add a splash of water if it seems too thick after sitting in the fridge—the beans continue absorbing liquid.
Can I Store Black Chili?
Absolutely, and this is one of chili’s greatest strengths as a practical meal. Chili actually improves with storage as flavors deepen and meld together. I typically make a large batch specifically for storing.
In the refrigerator, your black chili will keep safely for up to 5 days in an airtight container. Make sure it cools to room temperature before refrigerating—never put hot food directly into the fridge as this raises the internal temperature of your refrigerator and can compromise food safety. I usually let mine cool for about 20 minutes on the counter, then transfer it.
For longer storage, freezing is ideal. Portions freeze beautifully for up to 3 months. I like freezing in individual portions because it gives me flexibility—I can thaw and reheat just what I need for one or two people. Lay freezer bags flat so they stack efficiently, or use ice cube trays for smaller portions. Thaw overnight in the refrigerator, or reheat directly from frozen on the stovetop over low heat with a splash of water, stirring occasionally.
One note: the beans will continue absorbing liquid as chili sits, so if it seems too thick after a few days, add a quarter cup of water and stir. If it seems too thin after freezing and thawing, simmer it uncovered for 5 to 10 minutes to reduce the liquid again.
Nutrition Information
Based on USDA data and analyzed per serving (with 8 total servings), one bowl of this black chili contains approximately 285 calories, 18 grams of protein, 24 grams of carbohydrates, 12 grams of fat, and 6 grams of fiber. The sodium content is approximately 680 milligrams, though this varies based on your canned goods and additional salt added.
What makes this nutritionally valuable is the balance. The protein is substantial enough to support muscle maintenance and satiety. The fiber is high enough to support digestive health without being excessive. The fat content comes from both the beef and olive oil, providing fat-soluble vitamins and supporting nutrient absorption. This is genuinely nourishing food—not a light snack, but a complete, satisfying meal.
If you’re monitoring sodium for health reasons, you can reduce it further by using no-salt-added canned beans and tomatoes, though you’ll need to adjust seasoning. Nutritionally, this chili works within most dietary frameworks: it’s naturally gluten-free, it’s paleo-friendly if served without toppings, and it’s appropriate for diabetic meal plans given the fiber and protein balance.
What Can I Serve With Black Chili?
This is where chili becomes infinitely customizable based on your budget and preferences. The basic bowl is satisfying on its own, but toppings make it feel special. Pair it with baked eggs with spinach for a protein-packed meal, or serve alongside baked beans on the stovetop for a fully hearty spread.
- Cornbread or crackers – A side of cornbread (homemade is cheapest) soaks up the broth and turns chili into a complete meal. Store-brand saltines work if you’re stretching pennies.
- Rice or pasta – A scoop of white or brown rice underneath chili adds bulk and transforms it into something new. Pasta works too—this is similar to Cincinnati-style chili.
- Toppings bar – Set out shredded cheese (cheapest), diced onion (raw for crunch), hot sauce, sour cream, or fresh cilantro if you have it. People love customizing their own bowls, and you’re stretching the main dish further.
- Baked potatoes or sweet potatoes – Bake potatoes in the oven while chili simmers, then serve chili over the top for a hearty, filling meal. This is budget-friendly and feels indulgent.
- Avocado or guacamole – If budget allows, a few slices of avocado add healthy fat and richness. This moves it from weeknight dinner to something restaurant-quality.
- Fresh lime juice and cilantro – These brighten everything without adding cost if you already use them for other cooking.
Common Mistakes to Avoid
- Skipping the simmering step – I understand the temptation to serve immediately after combining ingredients, but those 15 minutes of simmering are when the magic happens. The spices activate, flavors marry, and the liquid reduces slightly. It’s genuinely a different dish without this step. Trust the process.
- Using too much salt from the start – Canned beans and tomatoes already contain sodium. Taste before adding more salt, then add gradually. You can’t take salt out once it’s in there.
- Not draining and rinsing the beans – That starchy liquid makes chili gummy and increases sodium unnecessarily. It’s one extra minute that noticeably improves the texture. Do it.
- Cooking ground beef too thoroughly before adding onions – Adding raw beef to the softened onions and garlic means all your flavors develop together. If you pre-cook the beef alone, you miss that flavor foundation. The exception is if you’re browning it separately for texture (which I mentioned in Tips).
Seasonal Variations
Fall/Winter version: Add a diced bell pepper (usually cheapest in fall) and reduce water to 1.5 cups for a thicker, heartier texture. The bell pepper adds sweetness and color. You can use red, green, or yellow—whatever’s on sale.
Spring/Summer version: Fresh corn is wonderful stirred in during the last few minutes of simmering. If using frozen corn (which is actually more affordable), add it during simmering and reduce heat slightly. Fresh cilantro and lime juice at the end brighten this version significantly.
Make it vegetarian: Skip the ground beef entirely and use 1.5 cans of extra beans instead. Add a diced bell pepper and an extra tablespoon of tomato paste to increase depth. The nutrition changes slightly (less protein), but it’s still filling and genuinely affordable.
Spicy version: Add 1 to 2 teaspoons of cayenne pepper depending on heat tolerance, or stir in diced fresh jalapeños during the simmering step. A can of chipotles in adobo sauce (about $1) stirred in adds incredible smoky heat, though this is less budget-friendly.
Substitutes
- Ground beef alternatives – Ground turkey costs similarly but is leaner. Ground pork works beautifully and sometimes costs less. You can also skip meat entirely and use extra beans, though this changes the flavor profile and nutrition.
- Black beans alternatives – Kidney beans create a more traditional chili. Pinto beans are similar in cost and nutritionally comparable. A mix of beans is wonderful and often costs less than buying specifically matching cans.
- Diced tomatoes with green chiles – If unavailable, use a regular 15-ounce can of diced tomatoes plus ½ teaspoon of cumin to approximate the flavor. You won’t get the exact same heat, but it works.
- Tomato paste substitutes – You can use ½ cup of tomato sauce instead of the 6-ounce can of paste, though you might need to reduce water to 1.5 cups. Paste is more concentrated, so this adjustment is important.
- Spice swaps – If you don’t have smoked paprika, regular paprika works (you’ll lose the smoke flavor but gain the color). If you don’t have ground cumin, skip it rather than substituting—oregano alone won’t fill that gap well. Chili powder can’t really be substituted, so I’d buy that specifically.
Black Chili Recipe
Ingredients
Method
- Start by dicing your yellow onion into pieces about the size of a pea. You're aiming for pieces small enough to soften quickly but large enough that you can still identify them in the finished chili. For the garlic, I like mincing it fine—about the thickness of a coin when sliced, then chopped into tiny pieces. This helps it distribute throughout the pot and prevents any harsh, raw garlic flavor.
- Add your tablespoon of olive oil to a large pot (I use a 5-quart Dutch oven, but any heavy-bottomed pot works) over medium heat. Once the oil is shimmering—you'll see it move easily when you tilt the pot—add your diced onion and minced garlic. You're looking for the onion to turn translucent and slightly softened, which takes about 2 to 3 minutes. Stir occasionally so nothing sticks to the bottom. You'll smell the garlic becoming fragrant—that's your cue that it's working.

- Add your ½ pound of ground beef directly to the pot with the softened onions and garlic. Using a wooden spoon or spatula, break the beef into smaller pieces as it cooks. You want it distributed throughout the pot rather than in one large clump. This should take about 5 to 7 minutes of cooking over medium heat. The beef is done when it's no longer pink and has turned a light brown color. Don't worry about getting a deep golden crust—we're not searing here, just cooking it through.

- Now comes the satisfying part where your pot transforms from savory-smelling to visibly hearty. Drain and rinse your three cans of black beans—this removes excess sodium and the starchy liquid that can make chili gummy. Add them to the pot along with your can of diced tomatoes with green chiles (include all the juice), the tomato paste, and your 2 cups of water. The tomato paste should be stirred in well so it doesn't clump.

- Add your chili powder, ground cumin, smoked paprika, dried oregano, and salt. I like to stir everything together thoroughly—you'll see the color deepen and the aroma become noticeably more complex. The spices activate when they touch the warm liquid, releasing their essential oils. This is where the chili starts smelling like the real thing.
- Place a lid on your pot and bring the mixture to a simmer. You're aiming for gentle bubbles breaking the surface—not a rolling, aggressive boil. Reduce heat to medium-low if needed. Let this simmer for approximately 15 minutes, stirring occasionally. What you're doing during this time is allowing the flavors to meld, the beans to soften further, and some of the liquid to reduce slightly, making the chili thicker and more concentrated.
- After simmering, taste your chili. Add additional salt as needed—this depends entirely on how much sodium was in your canned goods. I usually add about ¼ to ½ teaspoon more, but start small because you can always add more. If you like spice, this is when you'd add that optional cayenne pepper. Stir well and let it sit for a minute so the new seasoning distributes.

Notes
FAQs
Can I make this chili without ground beef?
Absolutely. I’ve made vegetarian versions many times, especially when working with clients on plant-based diets. Simply skip the beef and use 4 cans of black beans instead of 3. You might also add a diced bell pepper and an extra tablespoon of tomato paste to build depth that the beef would have provided. The flavor is genuinely different—less savory umami, more vegetable-forward—but it’s delicious and significantly cheaper. Your protein comes entirely from beans, which is complete protein when combined with other foods throughout the day.
Why does my chili taste watery?
This usually happens when the simmering step is skipped or too brief. The liquid needs time to reduce and the ingredients need time to concentrate. If your chili is already made and too watery, simmer it uncovered for another 10 to 15 minutes to let evaporation do its work. In the future, you can also reduce the water from 2 cups to 1.5 cups if you prefer a thicker consistency from the start. Some people like brothier chili; others prefer it thick enough to hold together on a spoon. This is completely personal preference.
Can I double this recipe?
Yes, and I recommend it for meal prep. Simply double everything, including water (4 cups). You might need to increase simmering time by 5 to 10 minutes since there’s more volume to heat. Use a larger pot—at least 8 quarts. The cost per serving drops slightly when doubling, making it even more affordable. This yields 16 servings, which can be refrigerated for the week and frozen in portions for weeks beyond.
Is this recipe spicy?
Not inherently. The canned diced tomatoes with green chiles add only mild heat—mostly flavor with just a gentle warmth. If you’re heat-sensitive, this is quite mild. If you love spice, this tastes bland as-is. Add that optional ¼ to ½ teaspoon of cayenne pepper (or more, depending on tolerance), or include diced fresh jalapeños during cooking. For serious heat lovers, a can of chipotles in adobo sauce stirred in creates something wonderfully smoky and hot.
What’s the actual cost per serving?
Based on current grocery prices in my area (New England), this recipe costs approximately $9 total, which is about $1.13 per serving for 8 servings. This assumes buying standard canned goods and ground beef at regular grocery store prices, not sale prices. If you catch sales on ground beef or beans, or if you have a discount grocery store nearby, you could reduce this to 90 cents per serving. For context, this is less than most restaurant appetizers and more nutritious than most fast-food options.
More Recipes You’ll Love
- Baked Creamy Chicken Recipe – Another slow-cooked, comfort-forward meal that stretches protein affordably
- Easy Vegan Chorizo – A spiced bean-based protein that works as a chili topping or standalone option
- Buffalo Wings Recipe – A completely different direction, but another budget-friendly crowd-pleaser
Your Turn to Make This Chili
This black chili has fed my family through tight months, fueled meal prep Sundays, and proven to countless clients that wholesome eating doesn’t require fancy ingredients or large budgets. It’s forgiving enough for cooking beginners and satisfying enough for experienced cooks. The best part? It costs virtually nothing and tastes like you invested far more effort than you actually did.
Make a pot this week. Taste how the flavors develop. Notice how filling it is. Freeze the portions you don’t eat. See how it transforms your weekly budget and your relationship with home cooking. This is affordable food at its best—real, nourishing, and accessible to everyone.
Don’t forget to tag @affordablefoodideas if you try this recipe! I’d love to see your chili bowls and hear what toppings made it perfect for your family.