Ingredients
Method
Step 1: Warm Your Oil and Sauté the Aromatics
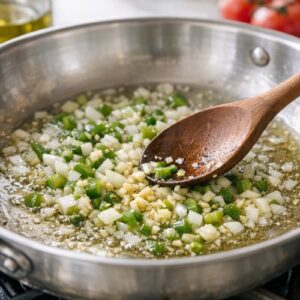
- Pour your tablespoon of oil into a large skillet (10-12 inches is ideal) and place it over medium heat. Let it warm for about 1 minute—you want it hot enough that when you add your vegetables, they sizzle immediately, but not so hot that anything smokes. Once you see the oil shimmer and move easily across the pan's surface, you're ready. Add your chopped onion and bell pepper. Stir them around for about 30 seconds to coat them in oil, then let them sit for roughly 2 minutes. You'll notice the onion begins to turn translucent at the edges. This is the moment to add your minced garlic. Stir everything together and continue cooking for another 3-4 minutes, stirring occasionally. You're looking for soft, fragrant vegetables that have released their natural oils into the pan. The kitchen should smell amazing—that's your sign you're on track.
Step 2: Brown the Ground Beef and Layer in Seasonings
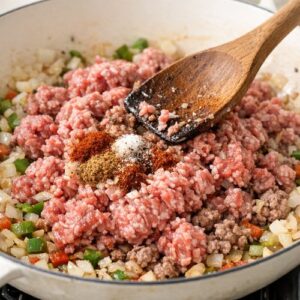
- Increase your heat to medium-high. Add your pound of ground beef directly to the pan with the vegetables. Using a wooden spoon or spatula, break the meat into smaller pieces as it cooks. Don't stir constantly—let it sit for 1-2 minutes between stirs so it develops color and flavor through contact with the hot pan. This browning process takes about 6-8 minutes total. You'll know the beef is ready when no pink remains visible and the meat has released its liquid into the pan. Once you reach that point, sprinkle in your adobo seasoning, black pepper, oregano, and sazón. Stir everything together thoroughly, making sure every piece of meat gets coated with the spice blend. The sazón will add a slight golden hue and a savory depth you can't replicate any other way.
Step 3: Build the Sauce and Simmer to Perfection
- Pour in your tomato sauce and water (or broth, if using). Stir to combine everything evenly. Reduce the heat to medium-low and let this simmer, uncovered, for 10-15 minutes. During this time, the liquid will gradually reduce and thicken, concentrating all the flavors together. Stir occasionally—not constantly, just every 2-3 minutes—to prevent sticking. Watch for the point when the mixture looks noticeably thicker and the liquid no longer pools at the bottom of the pan. When you drag your spoon through the mixture, it should leave a brief trail before closing back up. This is your sign that you've achieved the right consistency. If it seems too thin after 15 minutes, let it cook another 2-3 minutes.

Step 4: Add the Finishing Elements and Season to Taste
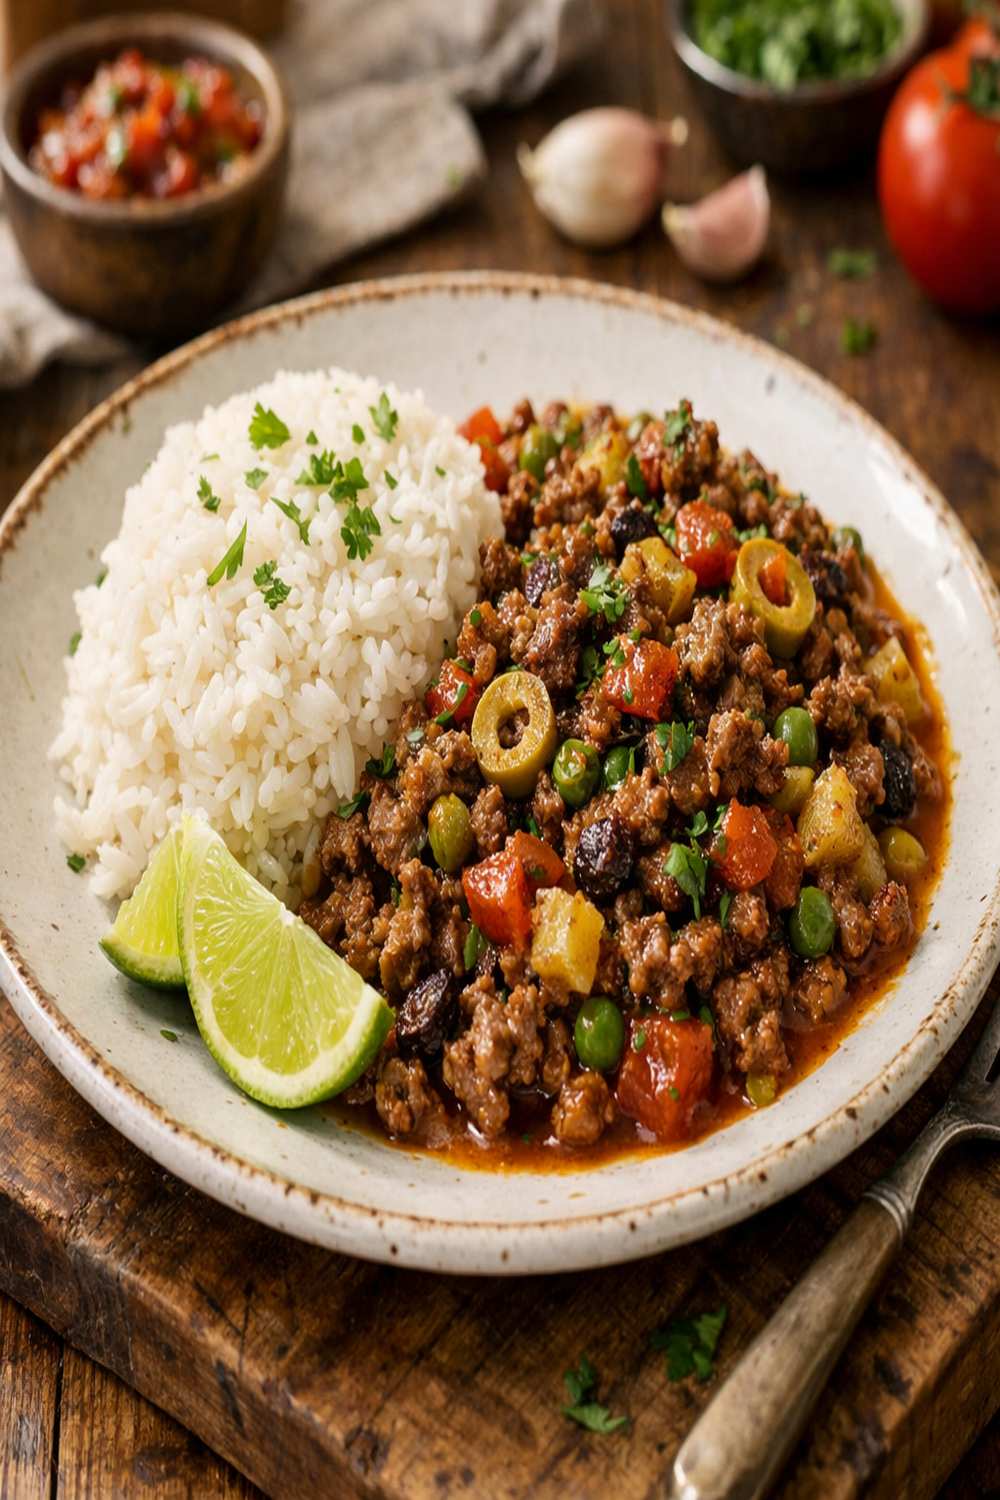
- Stir in your sliced olives and fresh lime juice. Add your cilantro if using. Taste a small spoonful carefully. Does it need more salt? More brightness? This is your moment to adjust. Some olives are saltier than others, so you may not need additional salt. If it tastes flat, a pinch of additional black pepper or a squeeze more lime can wake it up immediately.

Notes
- Use a wooden spoon, not metal - It won't scrape your pan's surface, and it won't conduct heat the way metal does. I've used the same wooden spoon for 15 years.
- Don't skip the sazón - I know it's an unfamiliar ingredient to some home cooks, but it's genuinely affordable and worth seeking out. The culantro and achiote create an authentic flavor profile that no substitute quite captures. That said, if you truly cannot find it, an extra ½ teaspoon of adobo works as a backup.
- Taste as you go - This is professional cooking 101. You're adjusting seasoning throughout, not fixing it at the end. Each time you add something new, taste it.
- Let your meat brown properly - Resist the urge to stir constantly in step 2. The Maillard reaction (that browning magic) happens through direct contact with heat. Let it sit, develop flavor, then stir.
- Fresh cilantro makes a genuine difference - If your budget allows it, grab fresh cilantro. That herbaceous brightness completely elevates the final dish. However, if it's $2.99 and stretched beyond your budget, dried oregano already provides herbal notes, so omit it without guilt.
- Double the recipe easily - This scales beautifully. I frequently make a double batch, freeze half, and have dinner ready another night. Follow the same timing; just use a larger skillet and add a couple extra minutes to the simmering time.