This post contains affiliate links. As an Amazon Associate I earn from qualifying purchases.
I still remember the Tuesday nights at my grandmother’s kitchen table in rural Vermont, watching her stretch a few affordable ingredients into something that made everyone gather close. That’s the spirit behind this boneless skinless chicken thigh and rice recipe—a humble, nourishing meal that proves you don’t need expensive cuts of meat or specialty ingredients to create something truly satisfying. Pair it with a simple green salad or roasted baked beans, and you’ve got a complete dinner that costs less than most takeout. Let me show you how to make this one-pan wonder that’s become a staple in my own kitchen.
From My Kitchen to Yours: A Story About Simple, Nourishing Meals
When I first became a registered dietitian, I quickly realized something important: people didn’t need complicated recipes or expensive superfoods to eat well. What they needed was permission to use affordable cuts of meat, pantry staples, and straightforward techniques that actually work. This chicken and rice dish came straight from that philosophy.
I was working with a client who felt overwhelmed by her family’s grocery budget. She loved the idea of cooking at home but thought it meant buying premium chicken breasts and organic everything. One afternoon, I brought her this recipe using chicken thighs—darker meat that’s naturally more forgiving, more flavorful, and significantly cheaper. Her eyes lit up when she tasted it. “This is better than what I make with the expensive stuff,” she said. That moment crystallized something for me: resourcefulness isn’t a limitation; it’s an art form.
This recipe has fed my own family countless times. It’s the meal I make when I want something warm and complete without spending an hour at the stove. The beauty is in the simplicity—the oven does most of the work while you handle homework, emails, or just sit down for a moment of peace.
What is Boneless Skinless Chicken Thigh and Rice Recipe?
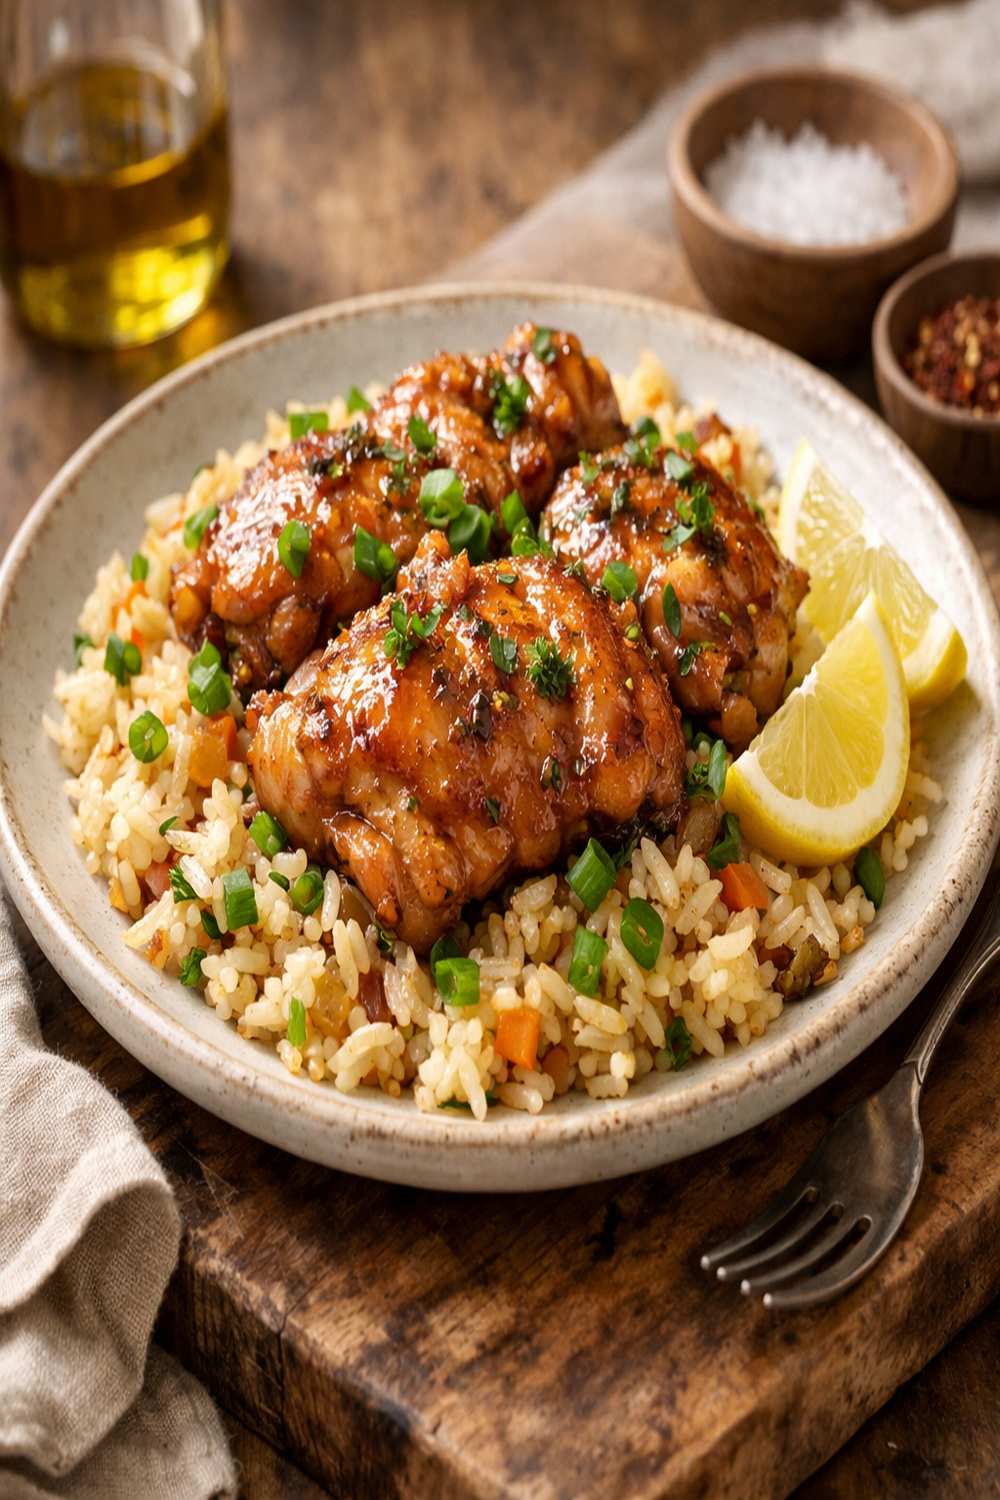
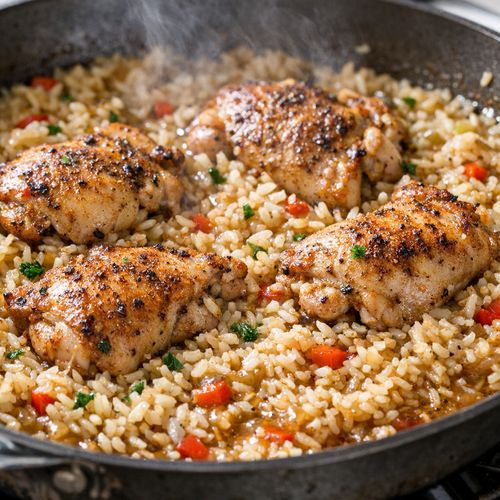
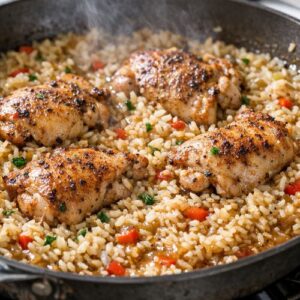
This is an oven-baked one-pan meal where seasoned chicken thighs nestle into a bed of rice, surrounded by aromatic broth that infuses every grain with flavor. The chicken emerges tender and juicy, the rice absorbs all those savory notes, and the whole dish comes together in about an hour with minimal hands-on time.
Unlike chicken breast recipes that can turn dry and disappointing, thighs contain more fat and connective tissue, which means they stay moist even if you accidentally overbake them. From a nutritional standpoint, this is actually an advantage—that fat carries fat-soluble vitamins and creates satiety, keeping you satisfied longer. The combination of protein and carbohydrates makes this a complete meal that stabilizes blood sugar and provides sustained energy.
This isn’t a fancy dish trying to be something it’s not. It’s honest food—the kind that nourishes you without pretension or excessive cost. The origins trace back to simple peasant cooking traditions where one pot, one protein, and one starch became a satisfying dinner for the whole family.
Why You’ll Love This Boneless Skinless Chicken Thigh and Rice Recipe
- Budget-friendly from start to finish – Chicken thighs cost roughly 40-50% less per pound than breasts, and when you combine them with basic rice and pantry seasonings, your total cost per serving lands around $2-3. This is genuine affordability without any sacrifice to taste or nutrition.
- Minimal active cooking time – Once you sauté the aromatics and assemble everything, the oven handles the heavy lifting. You’re looking at about 15 minutes of actual work spread across the cooking process.
- Naturally forgiving and hard to mess up – Because thighs contain more fat, they resist drying out. Even if your oven runs hot or you leave it in a few minutes longer, you’ll still get a delicious result. This makes it perfect for beginners or busy nights when timing feels uncertain.
- One-pan cleanup means less stress – Everything cooks in a single baking dish. No separate pots for rice, no stovetop monitoring, no pile of dishes at the end of dinner. This practical advantage matters more than people admit when you’re managing a household.
- Makes excellent leftovers – Unlike some one-pan meals that get soggy, this actually improves as flavors meld overnight. Lunch the next day is just as satisfying as dinner was.
- Builds a complete nutritional profile – You’re getting lean protein, complex carbohydrates, and vegetables all on one plate. No need to scramble for sides or worry about nutritional gaps.
The Ingredients
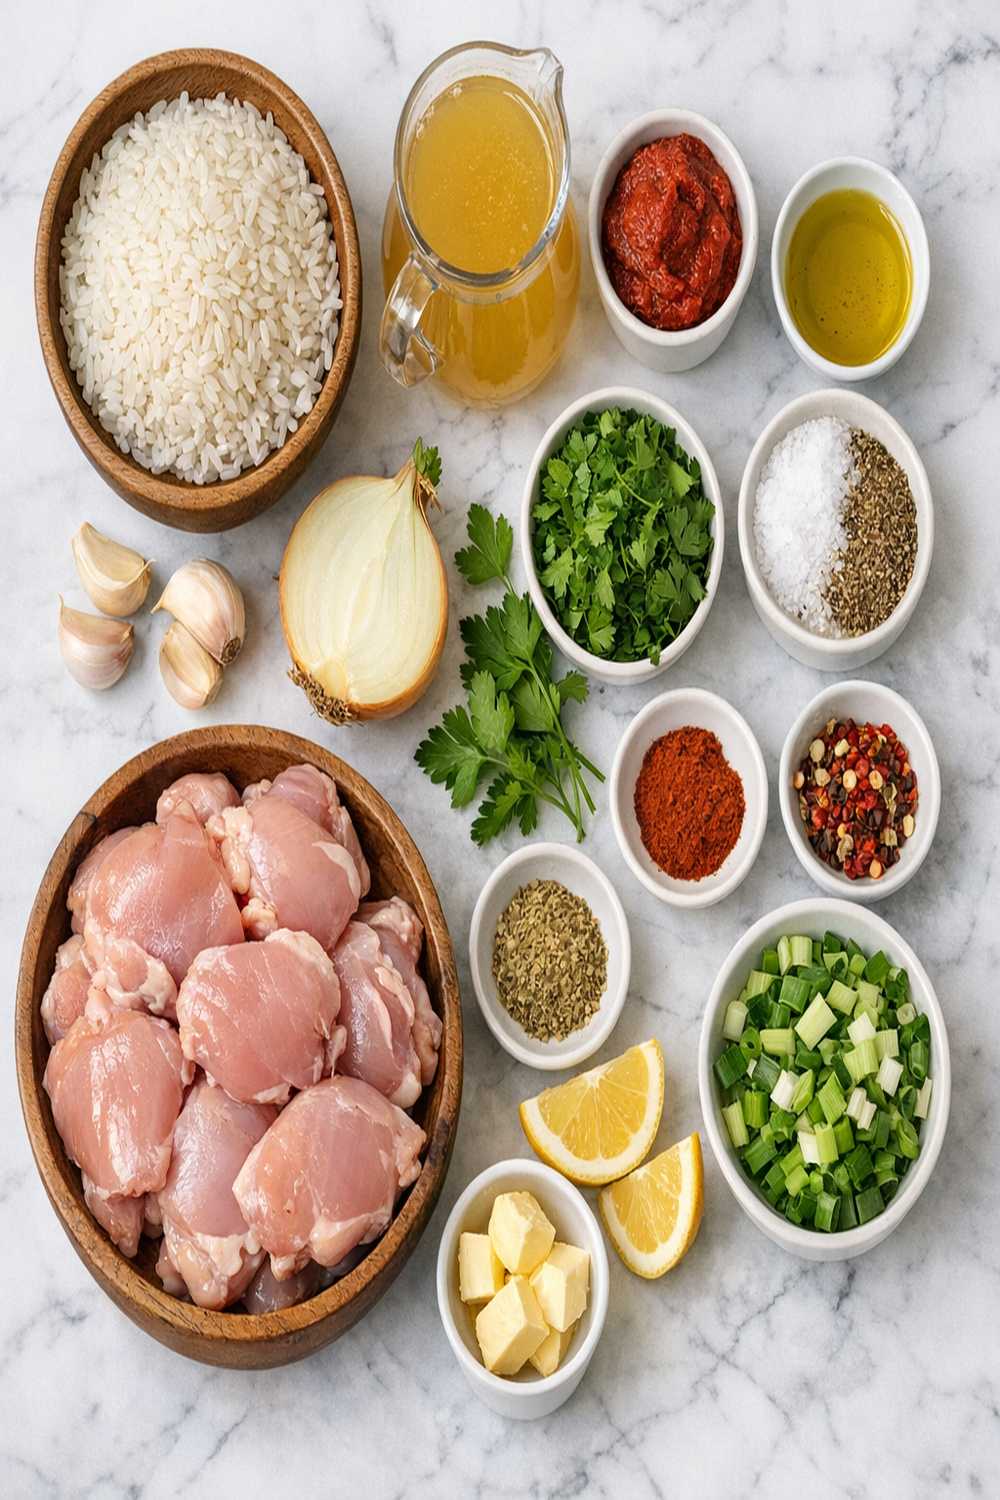
I’ve kept the ingredient list intentionally short because I believe in cooking that works with what people actually have on hand. Every item here should be available at any standard grocery store, and several have budget-friendly alternatives I’ll mention below.
- ¼ teaspoon black pepper (freshly ground tastes better)
- Cooking spray or oil (optional, for finishing the chicken)
- 1¼ cups hot water (tap temperature is fine)
- Fresh parsley or fresh thyme leaves (for garnish, optional but recommended)
- 5 boneless skinless chicken thighs (about 6-7 ounces each, pat dry before cooking)
- ½ teaspoon garlic powder
- 1 teaspoon dried thyme (or Italian seasoning in a pinch)
- 1 yellow onion (medium-sized, roughly chopped)
- ½ teaspoon onion powder
- ¾ teaspoon salt (taste before serving—you may need less or more depending on your broth’s sodium)
- 1½ cups uncooked white rice (long-grain works beautifully)
- 1 teaspoon paprika powder (sweet or smoked, your preference)
- 3 cloves garlic (minced finely, or use jarred if that’s what you have)
- 1½ cups chicken broth (or homemade stock if you save it)
- 2 tablespoons butter (or olive oil, vegetable oil works too)
Serves 5 people with modest appetites, or 4 people with hearty appetites. Perfect for meal prep since it reheats beautifully.
How to Make Boneless Skinless Chicken Thigh and Rice Recipe?
I’m going to walk you through this step by step. The process is straightforward, but I’ll include little details that make the difference between okay and genuinely delicious. Take your time reading through before you start—no surprises during cooking means you can actually relax while dinner happens.
Step 1: Prepare Your Workspace and Preheat the Oven
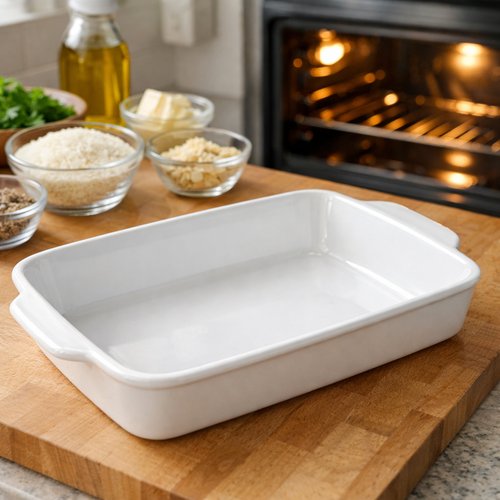
Set your oven to 350°F (175°C) and let it warm up while you prep. Gather a baking dish about 9 by 13 inches (the standard rectangular ceramic or glass one most people have). Pat your chicken thighs completely dry using paper towels—this matters more than you’d think because moisture prevents browning and keeps the chicken from developing that appealing finish. Wet chicken steams instead of sears, which affects the final texture.
Step 2: Create the Aromatic Base
Scatter your chopped onion across the bottom of the baking dish and add the minced garlic. Place the butter in the center of the dish. Slide this into the preheated oven for about 12-15 minutes. You’re looking for the onion and garlic to soften and become fragrant, with some golden-brown edges developing on the onion pieces. Check at the 12-minute mark—different ovens vary, and you want to catch it before anything burns. If the edges are browning too quickly, stir gently and continue cooking.
This step builds flavor through gentle caramelization. The butter melts and absorbs the aromatic compounds from the onion and garlic, creating a flavorful base that will infuse your rice.

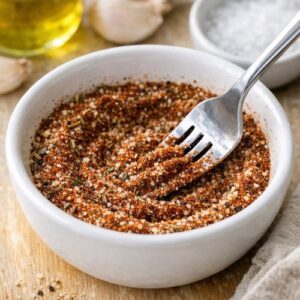
Step 3: Mix Your Spice Blend
While the aromatics cook, combine your paprika, thyme, garlic powder, onion powder, salt, and black pepper in a small bowl. Whisk together with a fork until evenly distributed. This is your chicken rub, and mixing it ahead means you’re not fumbling with multiple jars when you need to work quickly.
If you’re watching your sodium intake, start with ½ teaspoon salt and taste the final dish before adjusting. Store-bought broth can be quite salty, and you may not need the full amount.

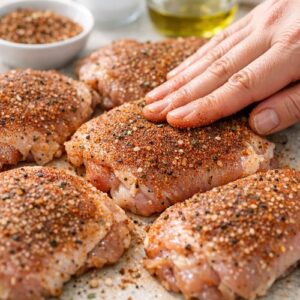
Step 4: Season the Chicken
Pat your dried chicken thighs again to make absolutely sure they’re dry. Sprinkle your spice blend evenly on both sides of each thigh, pressing gently so the seasonings adhere. Don’t be shy—this is where all your flavor comes from. The spices should coat the surface visibly.

Step 5: Combine Rice and Aromatics
Remove the baking dish from the oven. The onions should be soft and fragrant, and the butter should be melted and beginning to brown slightly. Pour in your uncooked white rice and stir well, making sure every grain gets coated with butter and mingles with the softened onion and garlic. This step, called “toasting” the rice in fat, helps the grains stay separate and fluffy rather than clumping together.
This takes about 2-3 minutes of gentle stirring. You should smell something warm and inviting—that’s the signal you’re doing it right.

Step 6: Arrange Chicken and Add Liquid
Arrange your seasoned chicken thighs directly on top of the rice, spacing them out so they’re not touching. They don’t need to be perfectly arranged—just try to distribute them evenly across the dish. This matters because air can circulate around each piece, promoting even cooking.
Pour the hot chicken broth around (not over) the chicken thighs, then add the hot water. The liquid should come up about three-quarters of the way up the chicken. You’re not covering the chicken completely—you want some of it exposed to the oven’s dry heat so it can develop a nice surface.
At this point, your dish looks humble, but trust the process. The magic is about to happen.

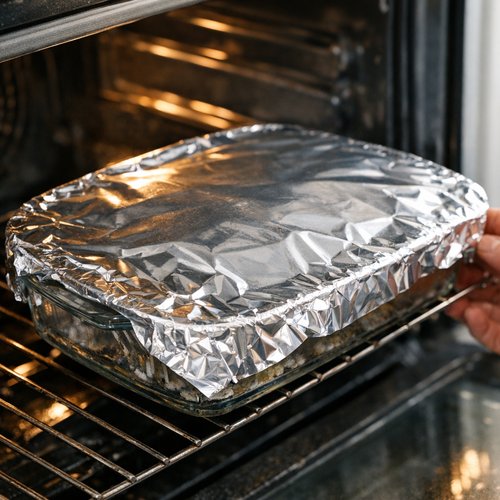
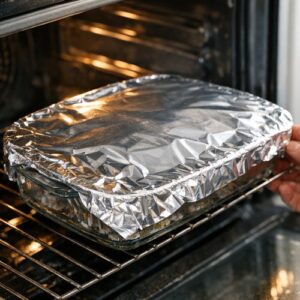
Step 7: First Bake with Foil Coverage
Cover the baking dish tightly with aluminum foil and slide it into the oven. Set a timer for 30 minutes. During this covered phase, steam circulates inside, cooking the rice and chicken gently without evaporation. The foil is essential—without it, too much liquid escapes as steam and your rice ends up undercooked.
This is your time to breathe. Set the table, help with homework, or just sit quietly with your coffee. The oven is doing the work now.
Step 8: Finish Cooking Uncovered
After 30 minutes, carefully remove the foil (watch for steam escaping). The rice should be mostly tender, and the liquid level should have reduced significantly. If you want extra-crispy chicken skin (well, the surface of skinless thighs, which gets a nice golden finish), lightly spray the chicken with cooking oil now. This step is entirely optional, but it does give the finished chicken a more appealing appearance.
Return the uncovered dish to the oven and bake for another 18-22 minutes. You’re waiting for the remaining liquid to be almost completely absorbed. The rice should look tender, and you should be able to see some light browning on the rice around the edges. A few grains at the bottom might even have a light golden crust, which adds wonderful texture (this is called the “socarrat” in Spanish cooking—it’s desirable).
The chicken is done when you poke it with a fork and it shreds easily. It should register 165°F on an instant-read thermometer at the thickest part.
Step 9: Rest and Finish
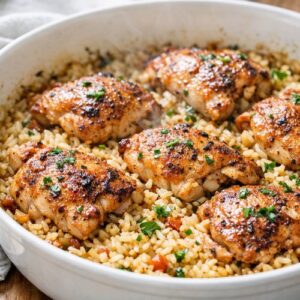
Remove from the oven and let the dish sit, uncovered, for 5 minutes. This brief rest allows residual heat to finish cooking the center of the thighs and lets the rice settle. It also makes plating easier because you won’t burn yourself on steam.
While it rests, chop your fresh parsley or thyme if you’re using it. Remove the chicken thighs and set aside on a serving plate. Use a fork to gently fluff the rice, breaking up any clumps that may have formed. The rice should look fluffy and individual, not mushy.
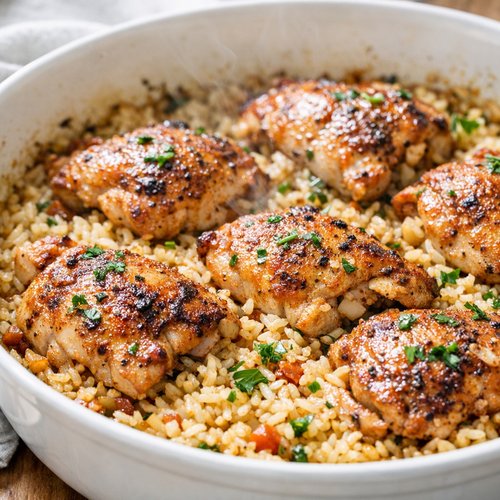
Return the chicken thighs to the rice, sprinkle with your fresh herbs, and serve immediately.
Expert’s Nutritional Insight: Why Thighs Beat Breasts
As a registered dietitian, I want to address something people often get wrong. For years, dietary guidance steered everyone toward chicken breast as the “healthier” choice. But here’s what the research actually shows: chicken thighs contain about 10 grams of fat per 3-ounce serving compared to 3.6 grams in breast meat. That sounds like thighs are less healthy, right? Not quite.
That fat is predominantly monounsaturated and polyunsaturated—the heart-healthy kinds—and it’s paired with higher levels of selenium, zinc, and B vitamins. The fat also makes the protein more bioavailable, meaning your body absorbs and utilizes it more efficiently. Additionally, thighs contain collagen and gelatin from connective tissue, which support joint health and gut integrity. The USDA nutritional database confirms that a 3-ounce serving of cooked thigh meat contains 26 grams of protein with only about 170 calories, making it a genuinely nutritious choice that also happens to taste better and cost less. From both a clinical and practical standpoint, this is a win.
Tips and Tricks
- Don’t skip the drying step – Moisture is the enemy of browning. Even if it seems like overkill, pat that chicken completely dry. Your finished dish will have better texture and appearance.
- Use hot liquid from the start – Cold liquid going into a hot dish causes temperature swings that can affect cooking. I microwave my broth for 2-3 minutes beforehand. This small detail helps the rice cook more evenly.
- Taste your rice before serving – Different brands of broth have different sodium levels. If your finished dish needs salt, sprinkle a pinch and stir before serving. It’s easier to add salt than remove it.
- Save the chicken fat – If your thighs render any fat, don’t discard it. Cool it and refrigerate in a jar. That’s liquid gold for sautéing vegetables or roasting potatoes—pure flavor and it costs nothing.
- Make it your own with additions – During the final uncovered bake, you can stir in frozen peas, diced bell peppers, or mushrooms. They’ll cook perfectly in the remaining 20 minutes. Just stir them in gently after removing the foil.
- Double the batch for meal prep – This recipe scales beautifully. Make it in two baking dishes if you’re prepping for the week. The texture actually improves as flavors meld overnight.
Common Mistakes to Avoid
- Using cold liquid – Cold broth and water added to hot rice disrupts the cooking process and extends the overall cooking time unpredictably. Always heat your liquid first for consistent results.
- Opening the oven repeatedly during the covered phase – Every time you open the door, steam escapes and the temperature drops. Resist the urge to peek. Trust your timer.
- Skipping the aromatics toasting step – This might seem like extra work, but those 12-15 minutes of onion and garlic cooking build a flavor foundation that makes the entire dish better. Don’t rush it or skip it.
- Using wet chicken – If your chicken is damp from rinsing, you won’t get browning. The moisture prevents the Maillard reaction (the chemical process that creates golden color and complex flavor) from happening efficiently.
Make-Ahead Guide: Meal Prep Like a Professional
One of my favorite things about this recipe is how beautifully it stores. Here’s how I prep it for the week when I’m working ahead:
The Night Before: Combine your spice blend in a small container and seal it. Chop your onion and garlic, store them in separate containers, and keep them refrigerated. Pat your chicken thighs dry and store them in a sealed container on the coldest shelf of your refrigerator. The advance prep takes about 15 minutes and reduces your cooking day to pure assembly.
Cooking Day: Everything proceeds exactly as written. The only difference is that you’re combining already-prepped ingredients, which means you move through the steps even faster.
Storing Leftovers: Let the cooked dish cool to room temperature, then transfer it to airtight containers. It keeps in the refrigerator for up to 4 days and freezes beautifully for up to 3 months. When freezing, I recommend removing the chicken thighs and storing them separately from the rice. This prevents the rice from absorbing too much moisture during thawing.
Reheating: For refrigerated portions, reheat gently in a 300°F oven for 15-20 minutes, covered with foil to prevent drying. For frozen portions, thaw in the refrigerator overnight, then reheat as above. If you’re in a hurry, the microwave works—just use 50% power and check every minute to avoid overheating the chicken.
Can I Store Boneless Skinless Chicken Thigh and Rice Recipe?
Absolutely, and this dish actually improves as it sits because the flavors have more time to meld together. Let the cooked meal cool to room temperature—about 15-20 minutes—then transfer it to airtight containers. It keeps safely in the refrigerator for up to 4 days.
For longer storage, this freezes wonderfully for up to 3 months. I recommend separating the chicken from the rice before freezing because the rice can become mushy when thawed if it absorbs too much liquid. Freeze them in separate containers, then combine when reheating.
To reheat, thaw overnight in the refrigerator if frozen, then warm gently in a 300°F oven for 15-20 minutes, covered with foil. Alternatively, reheat individual portions in the microwave at 50% power for 2-3 minutes, stirring halfway through. The stovetop method is to add a splash of water, cover your skillet, and warm over medium-low heat for 5-7 minutes.
Nutrition Information
Based on USDA nutritional databases, a single serving of this recipe (approximately 1 thigh with 1 cup of rice) provides roughly 520 calories, 38 grams of protein, 52 grams of carbohydrates, and 12 grams of fat. This composition makes it an excellent meal for stable blood sugar and sustained energy—the balance of protein and carbohydrates is exactly what nutrition science recommends for satiety and preventing energy crashes.
The 38 grams of protein covers a significant portion of daily requirements, and it’s complete protein containing all nine essential amino acids. The carbohydrates come primarily from white rice, which provides quick energy; you could substitute brown rice if you prefer higher fiber content, though it would require slightly more liquid and cooking time.
Sodium content depends on your broth, but assuming a low-sodium broth (about 400 mg sodium per cup), each serving contains approximately 650 mg sodium—reasonable for a main dish. If you’re monitoring sodium, use unsalted broth and minimize added salt.
This meal provides micronutrients including selenium, phosphorus, niacin, and B6. The onion and garlic contribute beneficial compounds like quercetin and allicin, though some of their potency diminishes with cooking. Overall, this is a nutritionally sound meal that needs only a vegetable side to round out a complete plate.
Seasonal Variations
One of my favorite aspects of this recipe is how easily it adapts to what’s in season. Here’s how I adjust it throughout the year:
Spring: Add 1 cup fresh asparagus pieces (cut into 2-inch lengths) and ½ cup fresh peas during the final uncovered baking phase. They’ll cook through in the remaining 20 minutes and add beautiful color. Substitute fresh tarragon for thyme if you can find it—the anise notes are magical in spring.
Summer: Add 1 diced bell pepper (any color) to the onion base during that initial sauté. Summer tomatoes are wonderful too—add ½ cup diced fresh tomato right after removing the foil. Use fresh basil for garnish instead of parsley.
Fall: Replace half the chicken broth with ½ cup apple juice for subtle sweetness that complements autumn flavors. Add ½ teaspoon smoked paprika to your spice blend and substitute sage for thyme. Some diced carrots in the onion base add seasonal comfort.
Winter: Root vegetables shine—add ½ cup diced parsnips or carrots with the onion base. Increase the thyme to 1½ teaspoons for deeper, earthier flavor. Rosemary is wonderful in winter too. Consider using half beef broth and half chicken broth for richer depth.
What Can I Serve With Boneless Skinless Chicken Thigh and Rice Recipe?
This dish is quite complete on its own, but a few simple sides elevate it beautifully. I’m thinking of things that are easy to prepare while your main course cooks, and that complement the warm, savory nature of the chicken and rice.
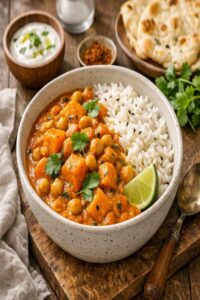
A simple green salad with lemon vinaigrette cuts through the richness and adds fresh vegetables and acidity. I often toss arugula or mixed greens with just lemon juice, a touch of olive oil, and a pinch of salt—nothing fancy, but it balances the meal perfectly. If you want something heartier, roasted baked beans made the stovetop way are wonderfully budget-friendly and add fiber and protein.
Steamed or roasted broccoli is always a winner—it takes 15 minutes in a hot oven with olive oil and salt. Sautéed spinach or kale (about 5-7 minutes in a skillet with garlic) adds nutrients and requires minimal effort. If you have time, a quick coleslaw made with shredded cabbage, a splash of vinegar, and a touch of oil provides crunch and contrast.
- Lemon-herb green salad – Fresh greens tossed with lemon juice and olive oil provide brightness and acidity that balances the savory richness of the chicken and rice.
- Steamed or roasted broccoli – Just toss with olive oil and salt, roast at the same temperature as your main dish for the final 20 minutes. Simple and nutritious.
- Sautéed spinach with garlic – Takes about 5-7 minutes in a skillet and requires nothing more than spinach, olive oil, garlic, and salt. Wilts beautifully and adds volume to your plate.
- Quick vinegar-based coleslaw – Shredded cabbage (green or purple), a splash of vinegar, a touch of oil, and salt create a crunchy side that takes 10 minutes to assemble and improves as it sits.
- Roasted root vegetables – Carrots, parsnips, or beets tossed with olive oil and roasted alongside your main dish add seasonal flavor and substance.
Substitutes and Variations
- Chicken breasts instead of thighs – You can use boneless skinless breasts if that’s what you have on hand. Use the same amount (about 5 breasts), though they may cook slightly faster—check for doneness at the 45-minute mark instead of 50 minutes. The final dish will be leaner but drier, so don’t extend cooking time.
- Brown rice instead of white rice – Use the same amount, but increase your liquid to 2 cups (chicken broth plus water combined) and add 10 minutes to the covered baking time. Brown rice takes longer to cook and requires more liquid.
- Vegetable broth instead of chicken broth – This creates a vegetarian-friendly version. The flavor will be lighter, so consider adding 1 teaspoon of soy sauce to deepen it. The chicken remains the same.
- Olive oil instead of butter – Use the same amount. It won’t brown quite as darkly, but the flavor will be excellent and it’s equally nutritious. Some people prefer olive oil for its Mediterranean flavor profile.
- Different herbs – If you don’t have thyme, rosemary, marjoram, oregano, or Italian seasoning all work beautifully. Use the same amounts and adjust to your preference.
- Smoked paprika for regular paprika – If you enjoy smokier flavors, substitute smoked paprika one-to-one. It adds wonderful depth, especially in fall and winter variations.
- Homemade broth if you have it – Homemade stock is wonderful here and often has more nuanced flavor than store-bought. Use the same amounts; just be aware that homemade broth is often less salty, so you may need to adjust seasoning slightly.
- Bone-in, skin-on chicken thighs – If you find bone-in thighs cheaper than boneless, use them! They’ll need 10-15 additional minutes of cooking time due to the bone conducting heat differently. Leave the skin on during cooking—it crisps beautifully and adds flavor. The yield will be less meat per thigh, so you might need 6-7 thighs instead of 5.
Boneless Skinless Chicken Thigh And Rice Recipe
Ingredients
Method
- Set your oven to 350°F (175°C) and let it warm up while you prep. Gather a baking dish about 9 by 13 inches (the standard rectangular ceramic or glass one most people have). Pat your chicken thighs completely dry using paper towels—this matters more than you'd think because moisture prevents browning and keeps the chicken from developing that appealing finish. Wet chicken steams instead of sears, which affects the final texture.

- Scatter your chopped onion across the bottom of the baking dish and add the minced garlic. Place the butter in the center of the dish. Slide this into the preheated oven for about 12-15 minutes. You're looking for the onion and garlic to soften and become fragrant, with some golden-brown edges developing on the onion pieces. Check at the 12-minute mark—different ovens vary, and you want to catch it before anything burns. If the edges are browning too quickly, stir gently and continue cooking. This step builds flavor through gentle caramelization. The butter melts and absorbs the aromatic compounds from the onion and garlic, creating a flavorful base that will infuse your rice.

- While the aromatics cook, combine your paprika, thyme, garlic powder, onion powder, salt, and black pepper in a small bowl. Whisk together with a fork until evenly distributed. This is your chicken rub, and mixing it ahead means you're not fumbling with multiple jars when you need to work quickly. If you're watching your sodium intake, start with ½ teaspoon salt and taste the final dish before adjusting. Store-bought broth can be quite salty, and you may not need the full amount.
- Pat your dried chicken thighs again to make absolutely sure they're dry. Sprinkle your spice blend evenly on both sides of each thigh, pressing gently so the seasonings adhere. Don't be shy—this is where all your flavor comes from. The spices should coat the surface visibly.
- Remove the baking dish from the oven. The onions should be soft and fragrant, and the butter should be melted and beginning to brown slightly. Pour in your uncooked white rice and stir well, making sure every grain gets coated with butter and mingles with the softened onion and garlic. This step, called "toasting" the rice in fat, helps the grains stay separate and fluffy rather than clumping together. This takes about 2-3 minutes of gentle stirring. You should smell something warm and inviting—that's the signal you're doing it right.

- Arrange your seasoned chicken thighs directly on top of the rice, spacing them out so they're not touching. They don't need to be perfectly arranged—just try to distribute them evenly across the dish. This matters because air can circulate around each piece, promoting even cooking. Pour the hot chicken broth around (not over) the chicken thighs, then add the hot water. The liquid should come up about three-quarters of the way up the chicken. You're not covering the chicken completely—you want some of it exposed to the oven's dry heat so it can develop a nice surface. At this point, your dish looks humble, but trust the process. The magic is about to happen.

- Cover the baking dish tightly with aluminum foil and slide it into the oven. Set a timer for 30 minutes. During this covered phase, steam circulates inside, cooking the rice and chicken gently without evaporation. The foil is essential—without it, too much liquid escapes as steam and your rice ends up undercooked. This is your time to breathe. Set the table, help with homework, or just sit quietly with your coffee. The oven is doing the work now.
- After 30 minutes, carefully remove the foil (watch for steam escaping). The rice should be mostly tender, and the liquid level should have reduced significantly. If you want extra-crispy chicken skin (well, the surface of skinless thighs, which gets a nice golden finish), lightly spray the chicken with cooking oil now. This step is entirely optional, but it does give the finished chicken a more appealing appearance. Return the uncovered dish to the oven and bake for another 18-22 minutes. You're waiting for the remaining liquid to be almost completely absorbed. The rice should look tender, and you should be able to see some light browning on the rice around the edges. A few grains at the bottom might even have a light golden crust, which adds wonderful texture (this is called the "socarrat" in Spanish cooking—it's desirable). The chicken is done when you poke it with a fork and it shreds easily. It should register 165°F on an instant-read thermometer at the thickest part.
- Remove from the oven and let the dish sit, uncovered, for 5 minutes. This brief rest allows residual heat to finish cooking the center of the thighs and lets the rice settle. It also makes plating easier because you won't burn yourself on steam. While it rests, chop your fresh parsley or thyme if you're using it. Remove the chicken thighs and set aside on a serving plate. Use a fork to gently fluff the rice, breaking up any clumps that may have formed. The rice should look fluffy and individual, not mushy. Return the chicken thighs to the rice, sprinkle with your fresh herbs, and serve immediately.
Notes
FAQs
Can I use frozen chicken thighs?
Yes, but you need to thaw them completely first. Frozen chicken releases too much moisture during cooking, which throws off your liquid ratio and can result in mushy rice. Thaw in the refrigerator overnight, which takes about 12-18 hours for bone-in thighs. Once thawed, pat completely dry before proceeding with the recipe exactly as written.
What if my rice is still crunchy after the cooking time?
This means your rice didn’t absorb all the liquid. You likely have one of these issues: your oven temperature is off (use an oven thermometer to check), or your liquid wasn’t hot when you added it (use hot liquid next time). If you’re caught mid-cooking, add another ¼ cup hot water, cover again, and bake for another 10 minutes. Check the rice grain by grain—it should be tender but still hold its shape.
Is it okay if my chicken registers a little over 165°F?
Yes, absolutely. The FDA safety guideline is 165°F, but chicken thighs can safely go to 170-175°F without becoming dry. In fact, many people prefer thighs cooked to 170°F for slightly more tenderness and more thorough breakdown of connective tissue. Don’t stress if your thermometer reads 168-172°F—it’s completely fine.
Can I make this on the stovetop instead of in the oven?
You can, but it requires more attention. Use a large, heavy-bottomed pot with a tight-fitting lid. Sauté onion and garlic in butter as written, add rice and toast it, then arrange chicken on top and add liquid. Bring to a boil over medium-high heat, then reduce to low, cover, and simmer for 40-45 minutes. Check at 40 minutes—the rice should be tender and liquid mostly absorbed. The stovetop version doesn’t brown the chicken as nicely, but it works perfectly well.
What should I do with leftover fresh herbs?
More Recipes You Will Love
- My Favorite Cabbage Dish – Worth adding to your recipe collection.
- This Flavorful Chicken Dish – Worth adding to your recipe collection.
Fresh parsley and thyme store beautifully in a damp paper towel inside a plastic bag in your refrigerator for about 1-2 weeks. If you have extra, you can chop them finely and freeze in ice cube trays with a little water or oil—perfect for cooking later. You can also dry them by hanging them in a cool, dry place for 2-3 weeks, then crumble and store in airtight containers. Homemade dried herbs are wonderful and cost nothing.
More Recipes You’ll Love
- Baked Creamy Chicken Recipe – Another one-pan wonder using affordable chicken that’s equally comforting and just as budget-conscious as this dish.
- Simple Delicious Coconut Curry – If you love the aromatic, spiced flavors of this recipe, a coconut curry takes those