This post contains affiliate links. As an Amazon Associate I earn from qualifying purchases.
I’ve learned over the years that some of the best comfort foods come together in a cast iron skillet—and this blueberry lemon cornbread is proof. It’s the kind of recipe that pairs beautifully with a simple breakfast spread, alongside savory soups, or even as a light dinner option. If you’re looking for more ways to use seasonal fruit affordably, you might also love my this simple cake, which teaches the same budget-conscious approach to incorporating fresh ingredients into everyday meals.
Growing Up in Small-Town Kitchens: Where This Recipe Found Me
I remember standing on a stool in my grandmother’s kitchen on a summer afternoon, watching her combine cornmeal and flour with the kind of confidence that only comes from making something hundreds of times. She didn’t have fancy equipment or expensive ingredients—just what was available at our local market and what grew in the gardens around town.
When I became a registered dietitian, I realized that so many people think healthy eating requires specialty items and deep pockets. That memory of my grandmother’s kitchen stuck with me. She understood something fundamental: wholesome, nourishing food doesn’t need to be complicated or expensive. This blueberry lemon cornbread recipe is my modern take on that lesson, combining the warm comfort of traditional cornbread with bright citrus and antioxidant-rich berries—all for under $2.30 per loaf.
That’s the kind of affordability that matters to families, and it’s why I’m so passionate about sharing recipes like this one with you.
What is Blueberry Lemon Cornbread?
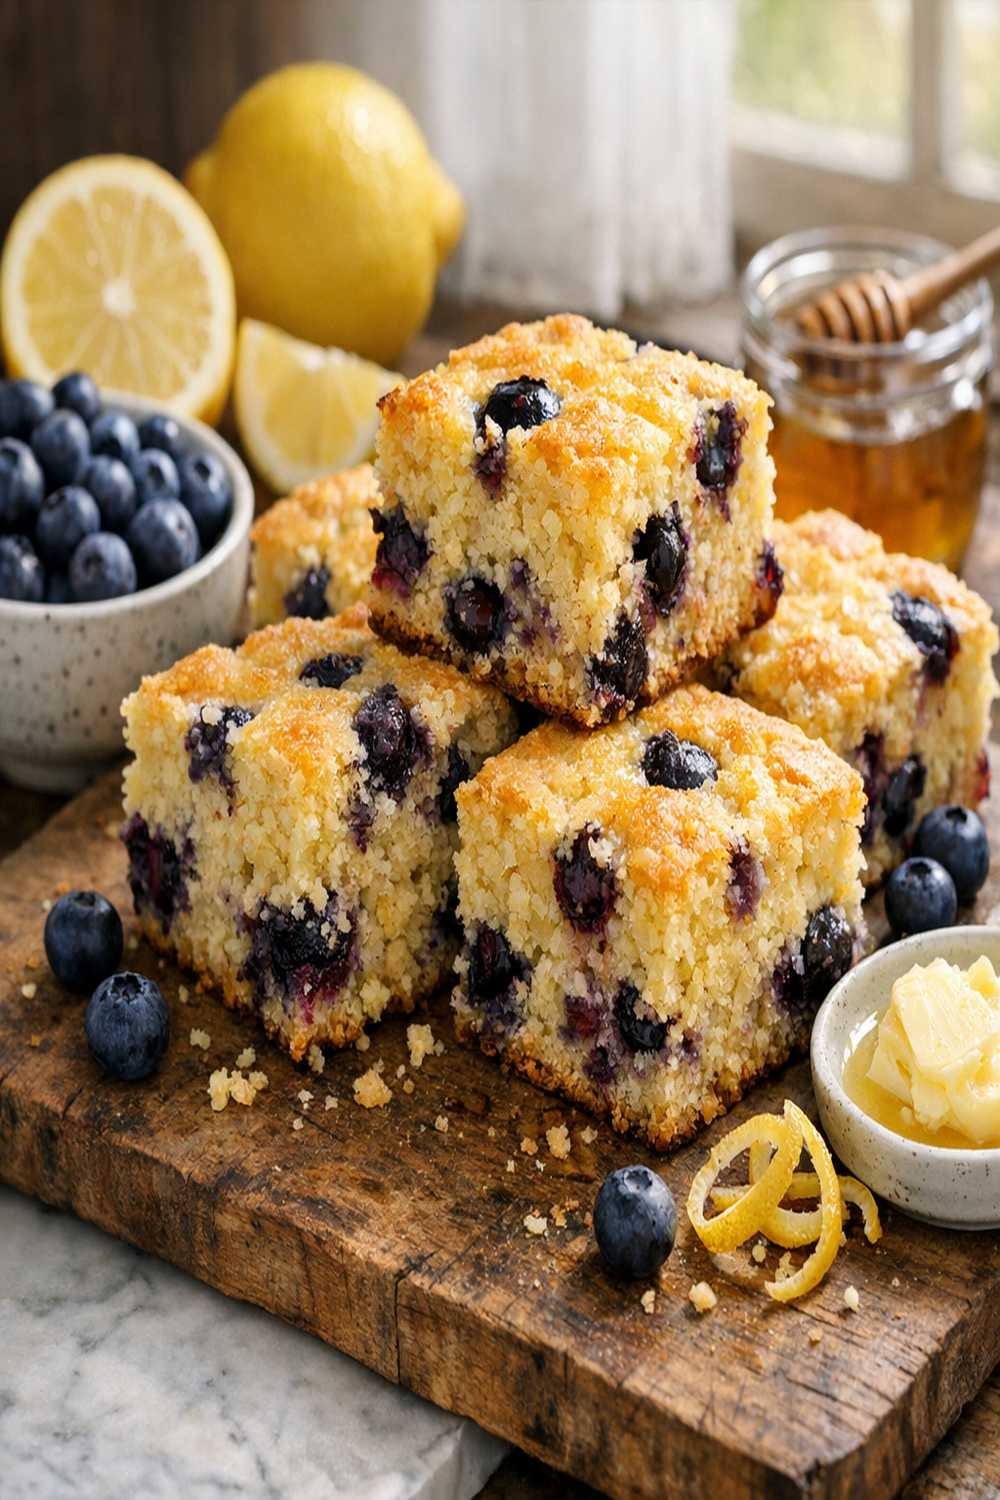
Cornbread has deep roots in American cuisine, originating from Native American cooking traditions and becoming a staple across Southern and Midwestern tables. What makes this version special is the addition of bright lemon zest and tart juice paired with sweet, juicy blueberries. The result is a tender, golden cake with subtle fruit notes that elevate cornbread beyond its traditional savory role.
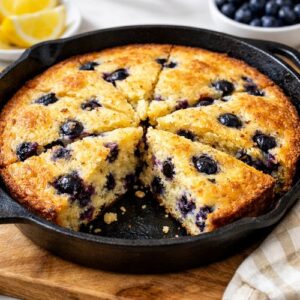
The texture comes from a combination of cornmeal and all-purpose flour, which creates that signature crumbly-yet-moist interior. Baking the batter in a preheated cast iron skillet is key—it gives you crispy golden edges while keeping the center tender. The frozen blueberries burst slightly during baking, releasing their juice throughout the bread and creating little pockets of flavor.
This is the kind of recipe that works equally well at a summer picnic, alongside a steaming bowl of vegetable soup, or as part of a wholesome breakfast spread. It’s accessible, affordable, and genuinely delicious.
Why You’ll Love This Blueberry Lemon Cornbread Recipe
- Budget-Friendly from Start to Finish – At just $2.27 for an entire loaf that serves 8 people, this recipe costs less than 30 cents per serving. I’ve calculated every ingredient, and included smart swaps below so you can reduce costs even further if needed.
- Naturally Sweetened and Nutrient-Dense – Unlike many cornbread recipes that rely on excessive sugar, this version uses just the right amount while letting lemon and blueberries provide natural flavor complexity. Blueberries are among the most antioxidant-rich fruits available, and lemon adds vitamin C and aids in mineral absorption.
- Perfect for Make-Ahead Meal Planning – This cornbread actually tastes better the next day as flavors meld together. You can prepare it the night before, wrap it well, and reheat gently before serving. As a dietitian, I love recipes that reduce weekday stress.
- Works for Any Meal – Serve it warm with breakfast, alongside lunch soups, or as part of a dinner spread. The versatility means you’re investing in one recipe that covers multiple meals.
- One-Bowl Mixing Method – No complicated techniques here. A few minutes of simple stirring is all you need. This isn’t a layered cake or a multi-step project—it’s straightforward kitchen work.
- Uses Ingredients You Already Have – Cornmeal, flour, eggs, and milk are pantry staples in most homes. This recipe doesn’t require specialty items or hard-to-find products.
The Ingredients
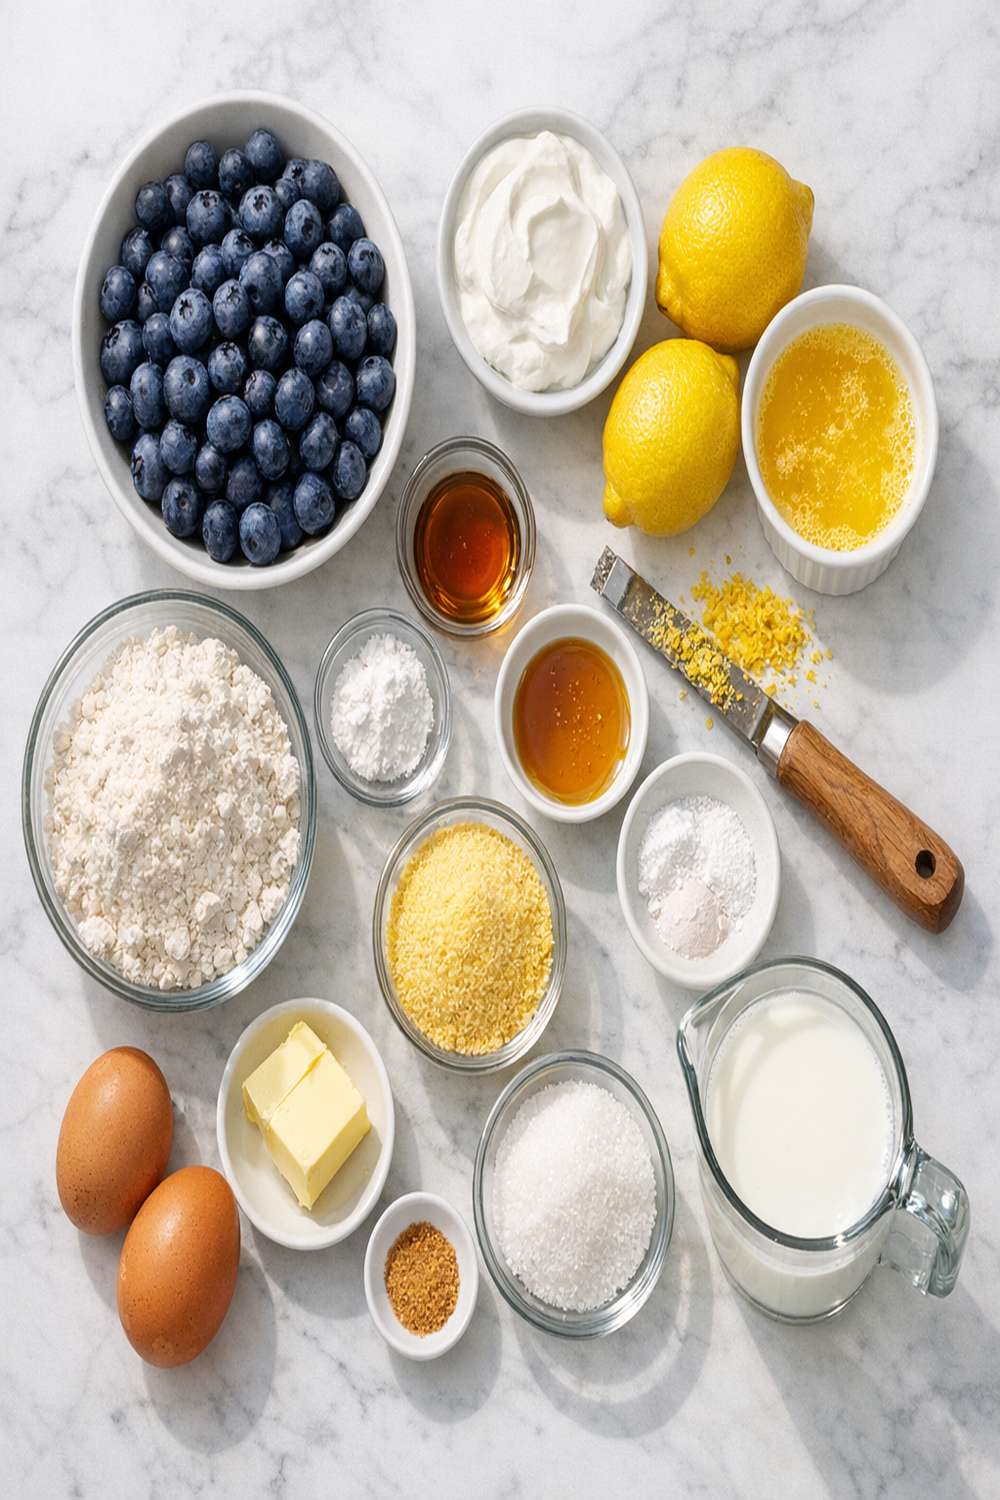
Before we dive into the instructions, let me walk you through each ingredient and why it matters. I’ve also included suggestions for budget-friendly swaps where they make sense. This recipe makes one 8-inch cast iron skillet of cornbread, yielding 8 generous wedges.
- ⅛ teaspoon vanilla extract (optional but recommended for extra depth)
- ½ teaspoon fine sea salt (or table salt if that’s what you have on hand)
- 1 cup yellow cornmeal (polenta or stone-ground varieties work just as well and often cost less)
- ½ cup frozen blueberries (no need to thaw—frozen berries are often cheaper and more convenient than fresh)
- 1 large egg (room temperature yields the best texture)
- ⅓ cup granulated sugar (white sugar is most budget-friendly; brown sugar adds molasses notes if you prefer)
- 1 tablespoon unsalted butter (for coating the hot skillet)
- 4 teaspoons baking powder (check the expiration date—old baking powder won’t rise properly)
- 1 fresh lemon (zest and juice both needed—look for firm, bright yellow lemons at the market)
- ⅓ cup neutral cooking oil (vegetable, canola, or light olive oil all work equally well)
- 1 cup whole milk (full-fat creates better texture, but 2% works fine if that’s your preference)
- 1 cup all-purpose flour (spooned and leveled, never packed into the measuring cup)
How to Make Blueberry Lemon Cornbread?
This recipe takes about 45 minutes from start to finish, with most of that time being hands-off baking. I’m going to walk you through each step with the kind of detail that comes from making this dozens of times and understanding exactly what you’re looking for at each stage.
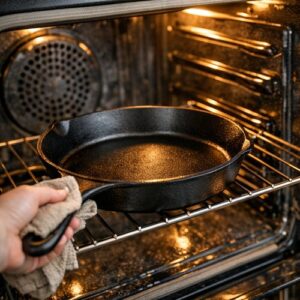
Step 1: Get Your Oven and Skillet Ready
Turn your oven on and set it to 425°F. Here’s the important part: place your cast iron skillet (or oven-safe baking dish if you don’t have cast iron) directly on the center oven rack right now, while the oven preheats. You want that skillet to get very hot—this takes about 10-12 minutes. The hot skillet is what creates those beautiful golden, crispy edges.
While the oven preheats, gather all your ingredients and set them near your mixing station. There’s something wonderfully grounding about having everything ready before you begin mixing.

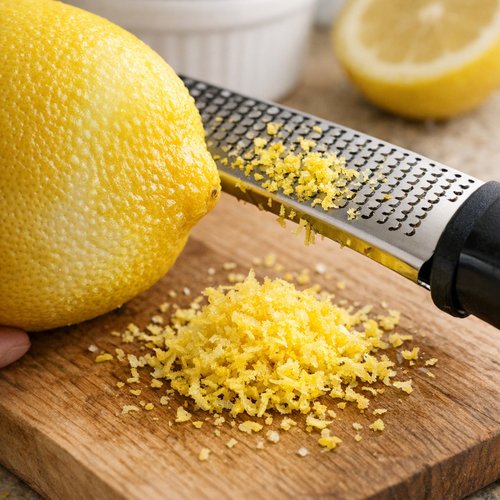
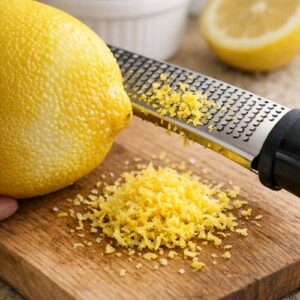
Step 2: Prepare Your Lemon
Take your fresh lemon and use a microplane or fine zester to remove the bright yellow zest. You’re looking for about 1 teaspoon of zest—just the colored part, not the white pith underneath, which can taste bitter. Once you’ve zested it, cut the lemon in half and squeeze out the juice. You’ll need about 1 tablespoon of juice. This small amount of lemon juice is crucial—it brightens all the other flavors and works with the milk to create a subtle tang.
Set both the zest and juice aside in small separate bowls. I find this prevents any mix-ups when I’m combining ingredients.
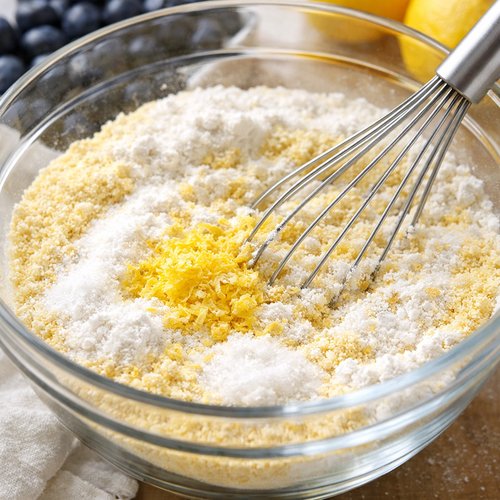
Step 3: Mix Your Dry Ingredients
In a large mixing bowl, combine the cornmeal, flour, sugar, baking powder, salt, and all of that lemon zest. Use a whisk to blend everything together evenly. Now here’s a technique I learned from my grandmother: use your fingers to gently massage the lemon zest into the dry mixture for about 15-20 seconds. This helps release the essential oils from the zest, distributing bright lemon flavor throughout every bite instead of having it clumped in one spot.
The mixture should be light and even, with no visible lumps of baking powder. Set this bowl aside.
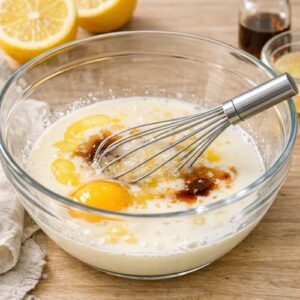
Step 4: Combine Your Wet Ingredients
In a separate medium bowl, whisk together the milk, cooking oil, egg, the tablespoon of lemon juice you squeezed earlier, and the vanilla extract if using. Whisk these together until well combined—about 30-45 seconds of stirring. The mixture should look homogeneous and slightly foamy on top.
Don’t skip the whisking step. This incorporates a little air into the batter, which helps create a lighter, more tender crumb.

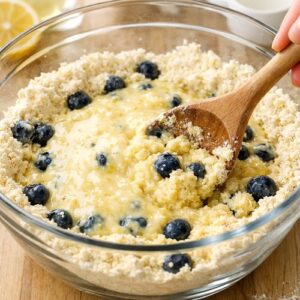
Step 5: Combine Wet and Dry
Pour the wet ingredient mixture into your bowl of dry ingredients. Using a wooden spoon or spatula, gently fold and stir until the dry ingredients are just barely moistened. This should take only about 20-30 seconds of gentle stirring. A few small lumps remaining in the batter are completely fine—even desirable. Overmixing creates a tough, dense cornbread, and we want ours to be tender and crumbly.
The batter will be thicker than cake batter but looser than cookie dough. It should pour easily from a spoon.

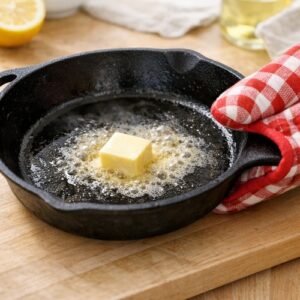
Step 6: Prepare Your Skillet
Using an oven mitt (the skillet is extremely hot!), carefully remove your preheated cast iron from the oven. Immediately add 1 tablespoon of butter to the center. Using a pastry brush or folded paper towel, quickly spread that melting butter up the sides and across the bottom of the skillet. You want a light, even coating everywhere the batter will touch. This is what creates those crispy, golden edges.
Work quickly but safely—you don’t want the butter to brown or smoke.

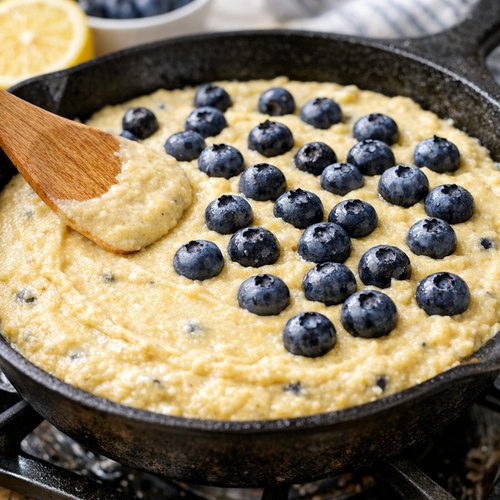
Step 7: Pour and Top with Berries
Carefully (remember, that skillet is still very hot!) pour your cornbread batter into the prepared skillet. Smooth the top gently with your spatula, but don’t press down or compress it. Now, sprinkle your frozen blueberries evenly over the top of the batter. There’s no need to thaw them—frozen berries are sturdier and won’t sink to the bottom as easily.
Using your fingers, gently press each berry slightly into the batter so they’re partially submerged. This keeps them distributed throughout the bread rather than all floating to the top.
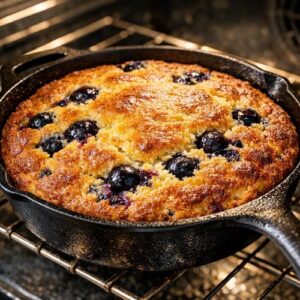
Step 8: Bake Until Golden
Return the skillet to the 425°F oven and bake for 20-25 minutes. You’ll know it’s done when the top and sides are a deep golden brown color and a toothpick inserted into the thickest part of the cornbread comes out clean or with just a few moist crumbs clinging to it. The edges should look slightly caramelized.
At 20 minutes, take a quick look. If the top is still pale, give it another 2-3 minutes. Oven temperatures vary, so trust your eyes more than the timer.

Step 9: Cool and Slice
Remove the cornbread from the oven and let it cool in the skillet for about 5-10 minutes. This allows the structure to set slightly, making it less likely to fall apart when you slice it. After cooling, run a thin knife around the edges to loosen it, then slice directly in the skillet into 8 wedges (like you’re cutting a pizza), or use a spatula to lift wedges out gently.
The cornbread is wonderful served warm, but it’s also delicious at room temperature. The flavor actually deepens as it sits, which is why it’s perfect for make-ahead planning.

Tips and Tricks
- Cast Iron Skillet Matters More Than You Think – If you don’t own cast iron, an oven-safe 8 or 9-inch baking dish works fine. However, cast iron distributes heat more evenly and creates superior browning. If cast iron seems intimidating, now’s a great time to invest. A basic skillet costs $15-25 and lasts decades.
- Preheat That Skillet Properly – This is non-negotiable. A hot skillet is what creates those golden, slightly crispy edges while keeping the interior tender. Don’t skip this step even if you’re in a hurry.
- Don’t Overmix the Batter – This is where many home bakers go wrong. The moment the dry ingredients are moistened, stop. Overmixing develops gluten, which makes cornbread tough and dense. A few small lumps are your friends.
- Frozen Blueberries Are Your Secret Weapon – They’re cheaper than fresh, available year-round, and they don’t sink because they hold their shape better. Plus, they burst beautifully during baking, creating flavor pockets throughout.
- Use Room Temperature Eggs – Cold eggs don’t incorporate as smoothly into the batter. Pull your egg out of the fridge 15 minutes before baking, or place it in warm water for 5 minutes.
- Zest Your Lemon Before Juicing – Once you cut into a lemon, the zest becomes harder to remove. Always zest first, then juice.
- Invest in a Microplane – A microplane zester is one of my most-used kitchen tools. It removes only the colored part of the zest, leaving the bitter white pith behind. It costs about $8-12 and makes a huge difference.
- Check Your Baking Powder Freshness – Baking powder loses potency over time. If yours is more than 6 months old, buy a new box. Old baking powder won’t lift your cornbread properly.
- The Toothpick Test Works – Insert a toothpick into the center and pull it out. If it comes out clean or with just a few moist crumbs (not wet batter), you’re done. If it’s wet and doughy, bake another 2-3 minutes.
- Temperature Matters for Milk – Cold milk can cool your batter slightly, affecting how evenly it bakes. Use milk that’s been sitting at room temperature for 30 minutes, or warm it gently for 15 seconds in the microwave.
Can I Store Blueberry Lemon Cornbread?
Absolutely, and it stores beautifully. Here’s how I handle it from a practical, meal-planning perspective: once the cornbread has cooled completely, wrap the entire loaf (or individual wedges) tightly in plastic wrap or aluminum foil. Store it at room temperature for up to 2 days without any quality loss. In fact, the flavor deepens and becomes more moist on day 2.
If you need to store it longer, refrigerate it in an airtight container for up to 5 days. The texture will be slightly denser, but it’s still delicious. Before serving refrigerated cornbread, I like to wrap it loosely in foil and warm it in a 300°F oven for about 10 minutes. This restores some of that freshly-baked tenderness.
For freezing, let the cornbread cool completely, then wrap individual wedges tightly in plastic wrap and place them in a freezer-safe container or bag. Frozen cornbread keeps well for up to 3 months. Thaw at room temperature for about an hour, or warm gently in a toaster oven at 300°F for 12-15 minutes.
From a meal-prep perspective as a registered dietitian, I often make two loaves on Sunday and use one throughout the week while freezing the other. It’s a smart way to ensure you always have a wholesome, homemade option available.
Nutrition Information
Based on USDA nutritional database standards, each wedge of this cornbread (one-eighth of the loaf) provides approximately 185 calories, 6 grams of protein, 28 grams of carbohydrates, 7 grams of fat, and 1.2 grams of fiber. The sodium content is approximately 245 milligrams per serving, which is well within healthy guidelines.
What I love most about this recipe from a nutritional standpoint is the balance. The cornmeal provides complex carbohydrates and B vitamins. The blueberries contribute anthocyanins, powerful antioxidants that support cognitive function and cardiovascular health. The lemon zest and juice add vitamin C, which enhances iron absorption from other foods. The egg provides choline, important for brain health, and the milk adds calcium and vitamin D.
Unlike many traditional cornbread recipes that rely on excessive butter and sugar, this version keeps added fats and sugars moderate while maximizing nutrient density. For families watching their budget and their health, that’s a win-win combination.
What Can I Serve With Blueberry Lemon Cornbread?
The beauty of this cornbread is its versatility. It works equally well as a sweet option for breakfast or as part of a savory meal spread. Here are some of my favorite pairing ideas:
- With Breakfast – Serve warm cornbread alongside scrambled eggs, fresh fruit, and a glass of milk for a satisfying morning meal. A simple dollop of unsalted butter is all it needs.
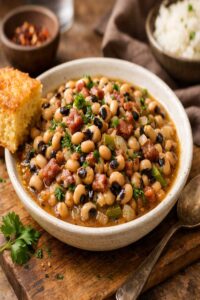
- Alongside Soup – Cornbread is the classic companion to hearty vegetable or bean soups. The subtle sweetness and tender crumb complement savory broths beautifully. Try it with my Mexican Pinto Beans made from scratch, where one slice of cornbread adds texture and completes the meal.
- As a Light Dinner Component – Pair cornbread with a simple salad and roasted vegetables for a comforting but not-too-heavy dinner. The cornbread provides substance while the vegetables keep things nutritionally balanced.
- With Cottage Cheese and Honey – For a simple, protein-rich snack, serve a warm wedge with a dollop of cottage cheese and a drizzle of honey. The tartness of the lemon plays beautifully against the sweetness of the honey.
- At Picnics and Potlucks – This cornbread is portable and improves over time, making it perfect for outdoor gatherings. Pack individual wedges wrapped in foil.
- With Cream Cheese – A thin spread of softened cream cheese adds richness without overwhelming the delicate lemon-blueberry flavors.
- Alongside Roasted Chicken – If you’re making Baked Creamy Chicken, cornbread is the perfect side. The slight sweetness balances the savory sauce beautifully.
Substitutes
- No Blueberries? Use Raspberries or Blackberries – Any frozen berry works beautifully. You could also try diced fresh peaches or even diced apple mixed with a pinch of cinnamon. Adjust based on what’s affordable at your market.
- No Fresh Lemon? Use Lemon Extract or Bottled Juice – Use ½ teaspoon of lemon extract in place of the zest and juice combined. Or use 1½ tablespoons of bottled lemon juice. Fresh is better for flavor, but these options work when fresh isn’t available.
- Buttermilk Instead of Milk – If you have buttermilk on hand, use it in place of regular milk. The acidity creates an even more tender crumb. This adds no extra cost if buttermilk is your household staple.
- Butter Instead of Oil – You can replace the ⅓ cup cooking oil with melted and slightly cooled butter. The cornbread will be slightly richer. Use equal amounts—⅓ cup melted butter.
- Honey Instead of Sugar – Use ¼ cup honey in place of ⅓ cup sugar. This adds moisture and creates a slightly different but equally delicious flavor profile. The cornbread will be marginally softer.
- Whole Wheat Flour Blend – You can replace up to half the all-purpose flour with whole wheat flour. Use ½ cup all-purpose and ½ cup whole wheat. The cornbread will be slightly denser and nuttier, with added fiber.
- Unsalted vs. Salted Butter – The recipe calls for unsalted butter in the skillet so you can control salt content. If you only have salted butter, reduce the added salt by ¼ teaspoon.
- Cast Iron Skillet Alternative – Use a 9-inch round cake pan or 8-inch square baking dish. Grease and preheat the same way. Baking time may be 1-2 minutes shorter since these distribute heat differently than cast iron.
Expert’s Nutritional Insight
As a registered dietitian, I want to highlight something important about the blueberries in this recipe. While blueberries are celebrated for their antioxidant content, what makes them especially valuable in a baked good like this is their fiber content. One-half cup of frozen blueberries provides approximately 1 gram of dietary fiber, and that fiber survives the baking process intact.
Dietary fiber is something many Americans don’t get enough of, yet it’s crucial for digestive health, blood sugar stability, and even cognitive function. By incorporating blueberries into baked goods rather than saving them only for smoothies or salads, you’re creating an opportunity for consistent fiber intake throughout the week. This is especially valuable for families on a budget—you’re getting nutritional benefit from affordable ingredients that also happen to taste wonderful.
Make-Ahead and Meal-Prep Guide
From a practical meal-planning perspective, this is one of my favorite recipes to prepare in advance. Here’s my recommended approach:
The Night Before: Prepare the cornbread as directed and bake it fully. Let it cool completely, wrap it tightly in plastic wrap, and store it at room temperature overnight. In the morning, you have a ready-to-serve breakfast option or lunch side. No reheating required—it’s perfect at room temperature—though you can warm it if you prefer.
Sunday Batch Cooking: Make two loaves on Sunday afternoon. Eat one throughout the week (store at room temperature for 2 days, then refrigerate for days 3-5). Freeze the second loaf in individual wedges. Throughout the month, you always have a homemade cornbread option ready to reheat and serve. This is the approach I use in my own home.
Freezer Strategy: Wrap individual wedges in plastic wrap, then place them in a freezer-safe container or bag labeled with the date. Frozen cornbread lasts up to 3 months. To serve, thaw at room temperature for about 1 hour, or warm directly from frozen in a 300°F oven for 15-18 minutes wrapped loosely in foil.
Dry Ingredient Prep: You can measure and mix all dry ingredients (cornmeal, flour, sugar, baking powder, salt) the night before, storing them in an airtight container. The morning you want to bake, you’ll skip straight to zesting your lemon and mixing wet ingredients. This cuts active baking time to just 10 minutes.
Common Mistakes to Avoid
- Not Preheating Your Skillet Thoroughly – This is the biggest mistake I see home bakers make. A skillet that’s been in the oven for less than 10 minutes won’t be hot enough to create those beautiful golden edges. Plan ahead and get your skillet going first.
- Overmixing the Batter – Once wet and dry ingredients combine, mix only until just moistened. Overmixing develops gluten, creating a tough, dense cornbread instead of the tender crumb you’re aiming for. A few small lumps are completely fine and actually desirable.
- Using Old Baking Powder – Baking powder loses potency over time. If yours is more than 6 months old, it won’t lift your cornbread properly, resulting in a dense, flat loaf. Buy fresh baking powder for the best rise.
- Thawing Blueberries Before Adding Them – Frozen blueberries hold their shape better during baking than thawed ones. Thawed berries release their juice too early, creating soggy spots in the batter. Keep them frozen right up until you sprinkle them on top.
- Not Crushing Lemon Zest into Dry Ingredients – Simply mixing lemon zest into dry ingredients leaves it clumpy and unevenly distributed. Taking 15 seconds to gently massage the zest into the dry mixture releases essential oils and spreads lemon flavor throughout. This small step makes a noticeable difference.
- Skipping the Butter Coating Step – That tablespoon of butter spread into the hot skillet is what creates crispy, golden edges. Don’t skip it or use cooking spray instead—the butter flavor and browning are essential to the final product.
Seasonal Variations
Spring Version: Replace blueberries with fresh or frozen strawberries, diced small. Strawberries pair beautifully with lemon and arrive at farmers markets in spring when they’re most affordable. The resulting cornbread will be slightly softer and tangier.
Summer Version: Add 2 tablespoons of fresh raspberries along with the blueberries for a mixed-berry version. Summer berries are at peak affordability during their local growing season. The flavor complexity is wonderful.
Fall Version: Replace blueberries with diced apple or pumpkin puree. Add ½ teaspoon of cinnamon to your dry ingredients. Use an equal amount of pumpkin puree in place of some of the milk (reduce milk to ¾ cup, add ¼ cup pumpkin puree). This creates an autumn-spiced variation that’s comfort food at its finest.
Winter Version: Use frozen cranberries instead of blueberries. Reduce sugar to ¼ cup since cranberries are very tart. Add ¼ teaspoon of nutmeg to your dry ingredients. This creates a traditional winter flavor profile that’s less sweet and more warming.
Blueberry Lemon Cornbread Recipe
Ingredients
Method
- Turn your oven on and set it to 425°F. Here's the important part: place your cast iron skillet (or oven-safe baking dish if you don't have cast iron) directly on the center oven rack right now, while the oven preheats. You want that skillet to get very hot—this takes about 10-12 minutes. The hot skillet is what creates those beautiful golden, crispy edges. While the oven preheats, gather all your ingredients and set them near your mixing station. There's something wonderfully grounding about having everything ready before you begin mixing.
- Take your fresh lemon and use a microplane or fine zester to remove the bright yellow zest. You're looking for about 1 teaspoon of zest—just the colored part, not the white pith underneath, which can taste bitter. Once you've zested it, cut the lemon in half and squeeze out the juice. You'll need about 1 tablespoon of juice. This small amount of lemon juice is crucial—it brightens all the other flavors and works with the milk to create a subtle tang. Set both the zest and juice aside in small separate bowls. I find this prevents any mix-ups when I'm combining ingredients.
- In a large mixing bowl, combine the cornmeal, flour, sugar, baking powder, salt, and all of that lemon zest. Use a whisk to blend everything together evenly. Now here's a technique I learned from my grandmother: use your fingers to gently massage the lemon zest into the dry mixture for about 15-20 seconds. This helps release the essential oils from the zest, distributing bright lemon flavor throughout every bite instead of having it clumped in one spot. The mixture should be light and even, with no visible lumps of baking powder. Set this bowl aside.

- In a separate medium bowl, whisk together the milk, cooking oil, egg, the tablespoon of lemon juice you squeezed earlier, and the vanilla extract if using. Whisk these together until well combined—about 30-45 seconds of stirring. The mixture should look homogeneous and slightly foamy on top. Don't skip the whisking step. This incorporates a little air into the batter, which helps create a lighter, more tender crumb.
- Pour the wet ingredient mixture into your bowl of dry ingredients. Using a wooden spoon or spatula, gently fold and stir until the dry ingredients are just barely moistened. This should take only about 20-30 seconds of gentle stirring. A few small lumps remaining in the batter are completely fine—even desirable. Overmixing creates a tough, dense cornbread, and we want ours to be tender and crumbly. The batter will be thicker than cake batter but looser than cookie dough. It should pour easily from a spoon.
- Using an oven mitt (the skillet is extremely hot!), carefully remove your preheated cast iron from the oven. Immediately add 1 tablespoon of butter to the center. Using a pastry brush or folded paper towel, quickly spread that melting butter up the sides and across the bottom of the skillet. You want a light, even coating everywhere the batter will touch. This is what creates those crispy, golden edges. Work quickly but safely—you don't want the butter to brown or smoke.
- Carefully (remember, that skillet is still very hot!) pour your cornbread batter into the prepared skillet. Smooth the top gently with your spatula, but don't press down or compress it. Now, sprinkle your frozen blueberries evenly over the top of the batter. There's no need to thaw them—frozen berries are sturdier and won't sink to the bottom as easily. Using your fingers, gently press each berry slightly into the batter so they're partially submerged. This keeps them distributed throughout the bread rather than all floating to the top.

- Return the skillet to the 425°F oven and bake for 20-25 minutes. You'll know it's done when the top and sides are a deep golden brown color and a toothpick inserted into the thickest part of the cornbread comes out clean or with just a few moist crumbs clinging to it. The edges should look slightly caramelized. At 20 minutes, take a quick look. If the top is still pale, give it another 2-3 minutes. Oven temperatures vary, so trust your eyes more than the timer.
- Remove the cornbread from the oven and let it cool in the skillet for about 5-10 minutes. This allows the structure to set slightly, making it less likely to fall apart when you slice it. After cooling, run a thin knife around the edges to loosen it, then slice directly in the skillet into 8 wedges (like you're cutting a pizza), or use a spatula to lift wedges out gently. The cornbread is wonderful served warm, but it's also delicious at room temperature. The flavor actually deepens as it sits, which is why it's perfect for make-ahead planning.
Notes
FAQs
Can I make this cornbread without a cast iron skillet?
Yes, you absolutely can. Use a 9-inch round cake pan or 8-inch square baking dish instead. Preheat it the same way—in the oven at 425°F for at least 10 minutes. Grease it with butter the same way. The main difference is that cast iron creates superior browning because it retains and distributes heat so evenly. Standard baking pans work fine, but the edges won’t be quite as golden. Baking time may be 1-2 minutes shorter in a standard pan since they don’t retain heat the way cast iron does.
Why does my cornbread always come out dense and heavy?
The most common culprits are overmixing the batter or using old baking powder. Remember: mix the wet and dry ingredients only until the dry ingredients are moistened. A few small lumps are fine. Additionally, check that your baking powder is fresh (less than 6 months old) and that you’re using the correct amount—4 teaspoons for this recipe. If you’re still having trouble, your oven temperature might be off. Use an oven thermometer to verify accuracy.
Can I use fresh blueberries instead of frozen?
You can, but frozen berries are actually preferable for baking. Fresh blueberries contain more water and release juice more readily during baking, which can create slightly soggy pockets in the cornbread. Frozen berries hold their shape better and distribute more evenly. That said, if you have fresh blueberries on hand, lightly coat them in flour before folding into the batter—this helps them stay suspended rather than sinking to the bottom.
How do I know when the cornbread is completely done?
Insert a toothpick into the center and pull it out. If it comes out clean or with just a few moist crumbs clinging to it (not wet batter), you’re done. The top and sides should be deep golden brown—not pale yellow, but a rich golden color. At 20-25 minutes, take a quick visual check. Trust your eyes more than the timer since ovens vary. If the top still looks pale, bake another 2-3 minutes.
Can I reduce the sugar in this recipe further?
You can reduce it to ¼ cup sugar without dramatically affecting the texture, though the cornbread will be less sweet and slightly less moist. I wouldn’t reduce it below ¼ cup because sugar plays a role in moisture retention and structure, not just sweetness. If you want even less sweetness, focus instead on the natural sweetness from blueberries and rely on the lemon brightness to create interest without additional sugar.
What if I don’t have lemon—can I substitute another citrus?
Yes, lime or orange both work beautifully. Use the same amount of zest and juice as you would lemon. Lime creates a more tropical flavor profile, while orange is slightly sweeter. Both pair wonderfully with blueberries. You could even do a combination—half lemon zest, half lime zest, for example.