This post contains affiliate links. As an Amazon Associate I earn from qualifying purchases.
I still remember the first time my dad brought home a real Philly cheesesteak from a food truck that stopped in our small Massachusetts town. I was maybe twelve, and I’d never experienced anything like it—the way the meat seemed to melt on my tongue, how the cheese blended perfectly with those caramelized onions. Years later, when I became a registered dietitian, I realized that cheesesteak sandwich taught me something vital: eating well doesn’t mean complicated ingredients or restaurant prices. The magic isn’t in exotic technique—it’s in understanding the science behind why simple ingredients transform into something extraordinary. Today, I’m going to show you how to create that same restaurant magic in your own kitchen for a fraction of what you’d pay downtown.
The Food Science Behind Perfect Cheesesteak Shaved Steak
As a registered dietitian with years of experience helping families stretch their food budgets, I’ve learned that the most affordable meals are often the ones that understand their own chemistry. A cheesesteak shaved steak recipe works because of three critical food science principles working in harmony: the Maillard reaction, protein denaturation, and fat-based flavor concentration.
When you cook thin-sliced beef at high heat, the amino acids and natural sugars in the meat undergo the Maillard reaction—that’s the same browning process that makes a perfect steak crust. But here’s the secret that restaurants don’t advertise: when you work with shaved beef instead of thick steaks, you increase the surface area dramatically. More surface area means more opportunity for browning, which means deeper, more complex flavors from less meat. This is why restaurant cheesesteaks taste so rich despite using modest portions of beef.
The onions play an equally important role. During the 6-10 minute caramelization process, the onions’ natural sugars break down and recombine into hundreds of new flavor compounds. This slow cooking process actually reduces the onion’s sharp bite while creating sweet, savory depth. Combined with Worcestershire sauce—which contains glutamates that trigger our umami taste receptors—you create a flavor profile that makes the dish feel indulgent even when you’re being budget-conscious.
The Science Behind Cheesesteak Shaved Steak Recipe
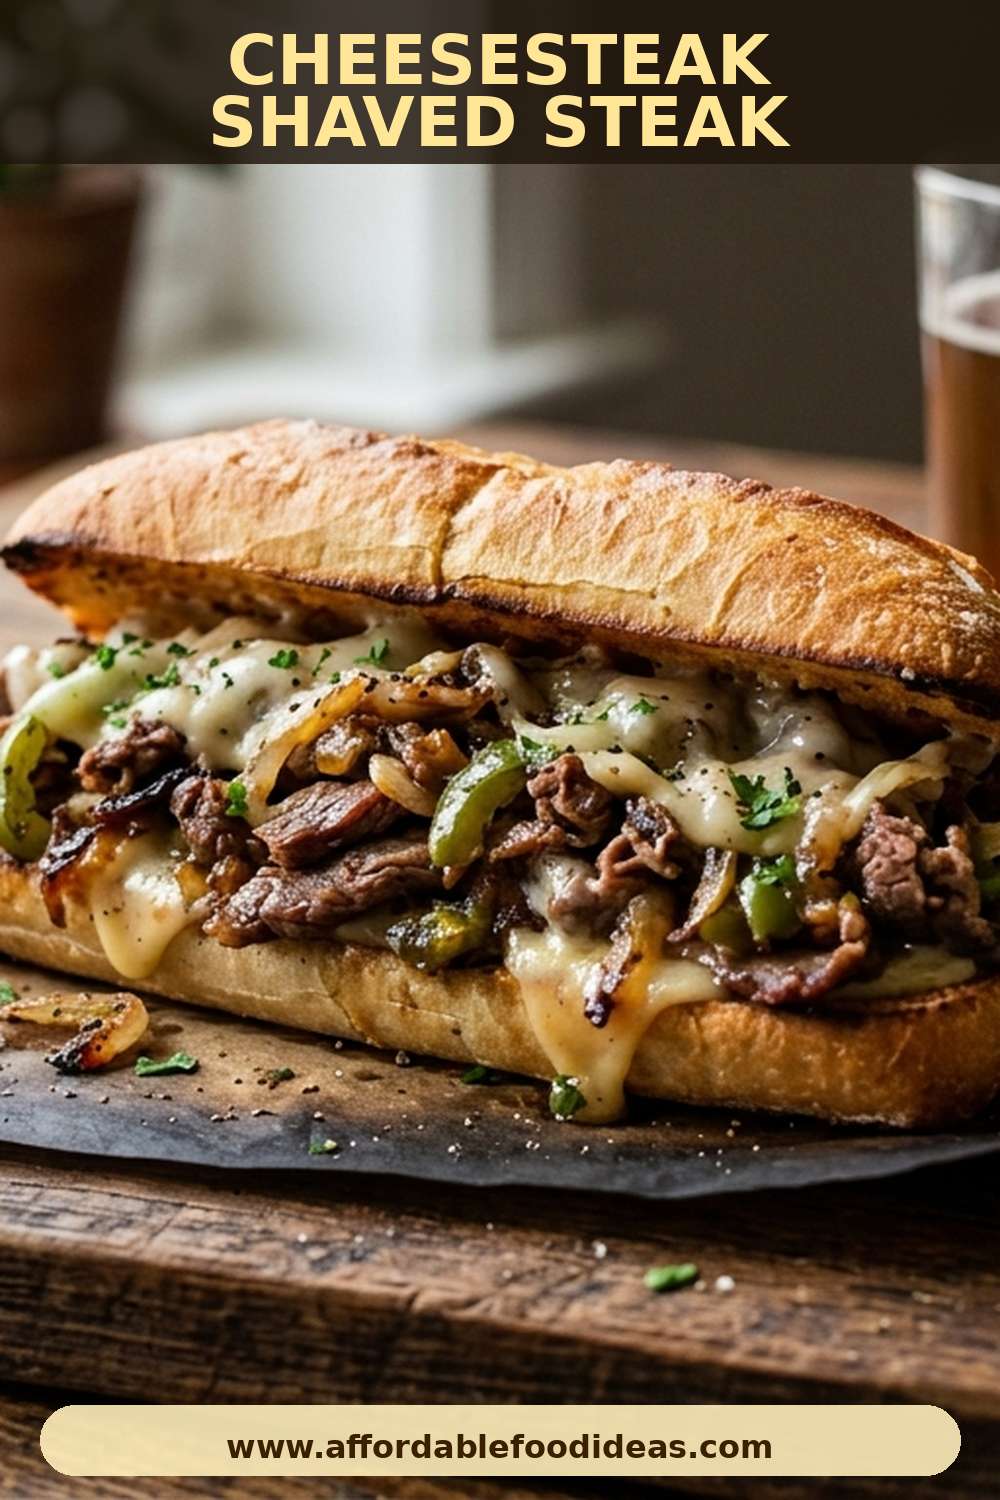
The true magic of this recipe lies in understanding how dairy fat interacts with heat and meat proteins. When melted cheese hits the hot beef mixture, the milk fat in the cheese emulsifies with the meat’s rendered fats and the Worcestershire reduction, creating a smooth, clingy sauce that coats every fiber of beef. This emulsification is why your homemade version can rival restaurant quality—you’re not trying to fight chemistry; you’re working with it.
The brief cooking time for the shaved beef (just 1-2 minutes per side) is critical. Extended cooking would cause the protein fibers to contract and squeeze out moisture, making the meat tough and dry. Instead, this quick sear creates a golden crust while keeping the interior tender and slightly pink. Professional kitchens call this “just kissing” the meat, and it’s the difference between a chewy sandwich and a tender one.
Why This Recipe Is Nutritionally Superior
I know what you’re thinking: isn’t a cheesesteak an indulgence? The truth is, when you make it at home with controlled portions and quality ingredients, you’re creating a surprisingly balanced meal. Let me break down the nutritional story your body is actually getting:
- Protein quality – Beef provides all nine essential amino acids and is particularly rich in bioavailable iron (the type your body absorbs most efficiently). USDA data shows that 3 ounces of lean beef delivers approximately 25 grams of complete protein, supporting muscle maintenance and satiety.
- B vitamin complex – Shaved beef retains B12, niacin, and B6, which regulate energy metabolism and nervous system function. One sandwich provides roughly 30% of your daily B12 needs.
- Selenium and zinc – These trace minerals support immune function and thyroid health. The beef delivers more bioavailable forms than most plant sources.
- Fat-soluble vitamin absorption – The butter and cheese fat actually enhance your body’s ability to absorb fat-soluble vitamins from vegetables you serve alongside (like the optional bell peppers).
When you compare homemade portions to restaurant versions, you’re also controlling sodium levels, bread quality, and total added fats—three major nutritional variables that restaurant kitchens often maximize for flavor but don’t publish.
Ingredient Deep Dive
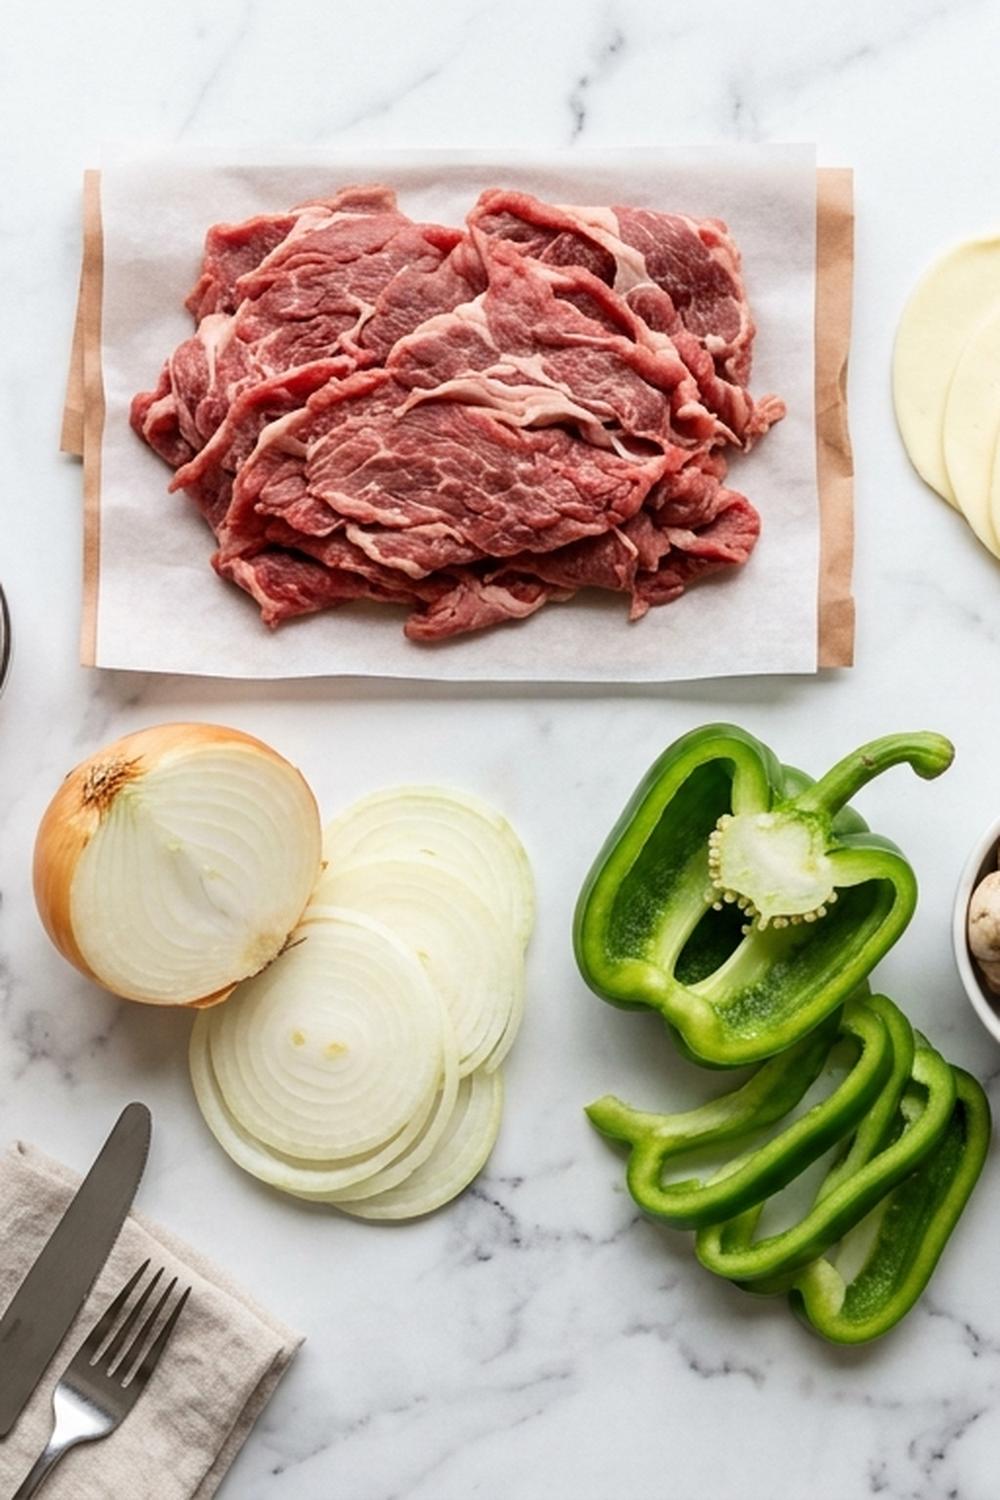
Understanding what each ingredient does in this recipe transforms you from someone following directions to someone who truly understands cooking. Every single ingredient serves a functional purpose beyond just taste.
For the Beef Mixture
- 1 large yellow onion (sliced thin; yellow onions have higher natural sugar content than white onions, creating better caramelization)
- 1 to 2 tablespoons hot sauce (optional; capsaicin in hot peppers boosts metabolism temporarily and adds complexity)
- 1 teaspoon seasoning salt (such as Lawry’s; the iodized salt supports thyroid function while the garlic and celery powder add complexity without extra ingredients)
- 2 teaspoons olive oil (the high smoke point prevents burning at medium-high heat, while the butter provides flavor)
- 1½ to 2 pounds shaved beef steak (frozen beef slices work wonderfully—they’re often more affordable and slice more uniformly than fresh)
- ½ cup Worcestershire sauce (provides umami through glutamates plus acid for brightness; the USDA classifies this as a flavor enhancer that compensates for lower sodium needs)
- 4 tablespoons unsalted butter (divided into portions for cooking; butter’s milk solids add browning power and flavor depth that oil alone cannot achieve)
For Assembly
- 6 sandwich rolls or hoagie rolls (Italian or French bread works; the crust structure supports weight distribution when the sandwich is loaded with toppings)
- 6 to 8 slices provolone cheese (or white cheddar, American, or pepper Jack; aged cheeses have more concentrated flavor, meaning you need less for the same taste satisfaction)
- 1 medium bell pepper (any color; optional but adds vitamin C and fiber—about 75 calories and 0.3 grams of added sugar)
- 1 package sliced mushrooms (optional; umami compounds in mushrooms amplify savory depth, similar to how Worcestershire works)
- 2 tablespoons unsalted butter (for toasting the roll exteriors, creating textural contrast)
The Technique: How to Make Cheesesteak Shaved Steak Recipe Properly
The order of operations in this recipe isn’t arbitrary—it’s designed to maximize flavor while keeping your stovetop organized. Professional kitchens call this “mise en place,” and it’s the single biggest difference between stressed home cooking and confident cooking. Before you begin, slice your onions, pat your beef completely dry (moisture prevents proper browning), and have your cheese sliced and ready. These small prep steps take five minutes but prevent the scrambling that leads to mistakes.
Step 1: Caramelize Your Onions First
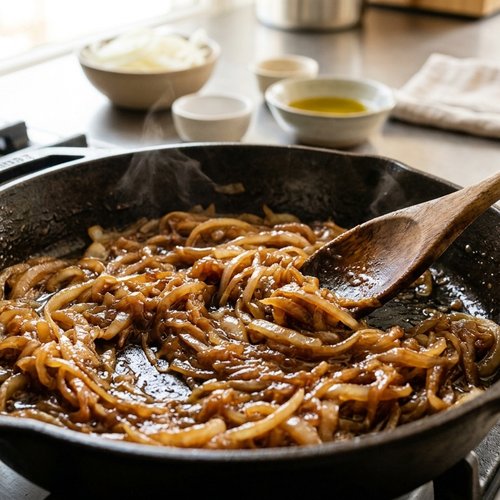
Heat a large skillet to medium heat (not medium-high yet—patience here creates better results) and melt 4 tablespoons of butter. Add your thinly sliced onion and stir frequently. This step takes 6 to 10 minutes, and you’re looking for the onions to transform from raw and white to deeply golden and soft. The onions should look almost caramel-colored, and they’ll smell sweet and complex rather than pungent. This isn’t rushed cooking—low and slow allows the natural sugars to caramelize rather than burn. When they reach this stage, remove them to a clean plate and set aside. This critical first step cannot be hurried.
Step 2: Season and Prepare Your Beef
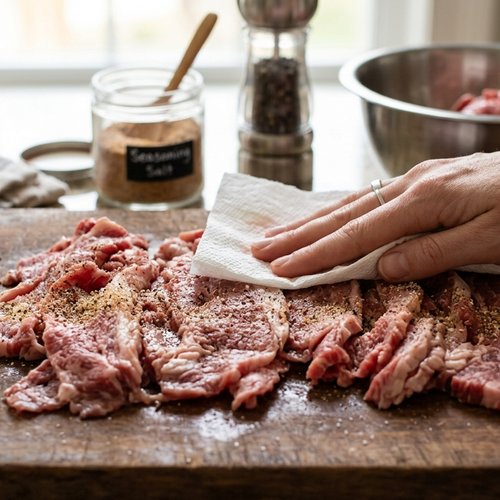
If your beef isn’t already sliced paper-thin, slice it as thinly as possible now (a sharp knife or partially frozen beef makes this easier). Pat the beef dry with paper towels—this removes surface moisture that would prevent browning through steam. Sprinkle seasoning salt lightly across all surfaces, using a gentle hand. You’re seasoning the exterior, not creating a salt crust. Remember, Worcestershire sauce adds significant saltiness, so you don’t need heavy seasoning here.
Step 3: Sear the Beef Over High Heat
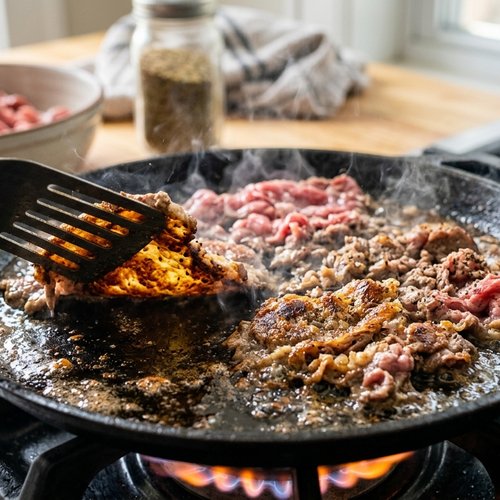
Increase your skillet heat to medium-high and add the remaining butter plus 2 teaspoons of olive oil. Wait for the butter to foam slightly and the pan to reach proper temperature—you’ll know because a single drop of water will sizzle and evaporate immediately. Add the beef in a single layer if possible (work in batches if needed—overcrowding prevents browning). This is critical: cook for only 1 to 2 minutes per side. You’re not cooking it through; you’re creating a golden crust. The beef will appear slightly underdone when you flip it, and that’s exactly right. It will continue cooking when you add the sauce and cover it later. If you cook it fully now, it will be tough and dry by the time you assemble the sandwich.
Step 4: Build Your Sauce
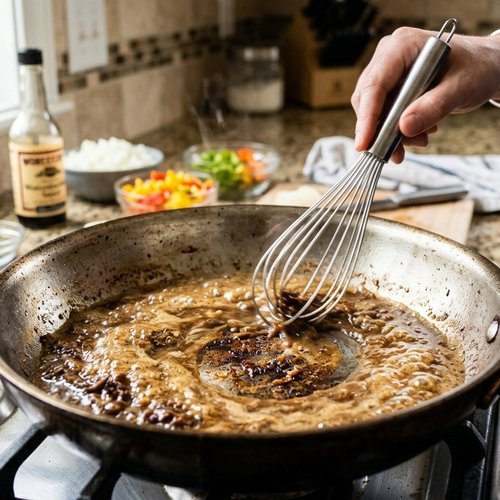
Once the beef is browned but still slightly pink in the center, pour in ½ cup of Worcestershire sauce and 1 to 2 tablespoons of hot sauce if using. Stir constantly for about 60 seconds. You’re doing two things: dissolving the flavorful browned bits (called fond) stuck to the pan bottom, and coating the beef with sauce. The acid in Worcestershire begins breaking down beef proteins slightly, which keeps them tender rather than firm.
Step 5: Return the Onions and Melt the Cheese
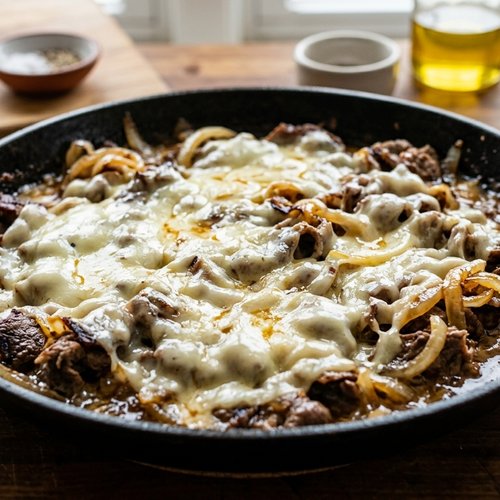
Return your caramelized onions to the pan and stir everything together, making sure the onions distribute evenly through the beef. Now place your cheese slices directly on top of the mixture. Cover the skillet with a lid or even foil for about 60 to 90 seconds. The residual heat plus the covered environment creates a steamy microclimate that melts the cheese perfectly. The cheese should be completely melted and starting to get glossy—this is the point where the fat emulsifies with the sauce and creates that classic cheesesteak texture. If you prefer extra-cheesy sandwiches, add a second layer of cheese and re-cover for another 30 seconds.
Step 6: Toast Your Rolls
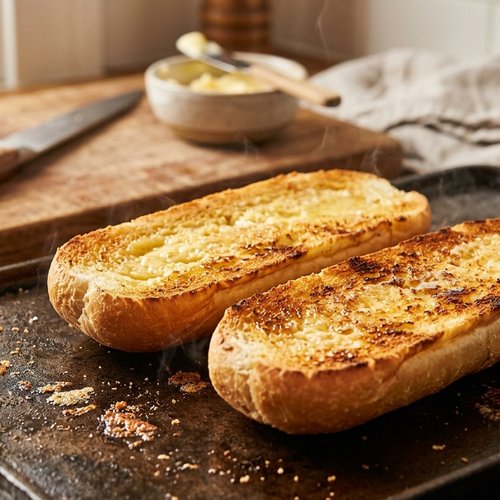
While the cheese is melting, heat a separate griddle or skillet to medium-high heat. Spread a thin but visible layer of butter on the cut side of each roll. Place them butter-side down on the hot griddle and toast until they’re golden brown and crispy, about 2 to 3 minutes. The butter creates a protective barrier that keeps the bread from absorbing too much of the mixture’s moisture, which would make the sandwich soggy. This toasting step is why your homemade version will be better than many restaurant versions—most places don’t toast their rolls properly.
Step 7: Assemble and Serve Immediately
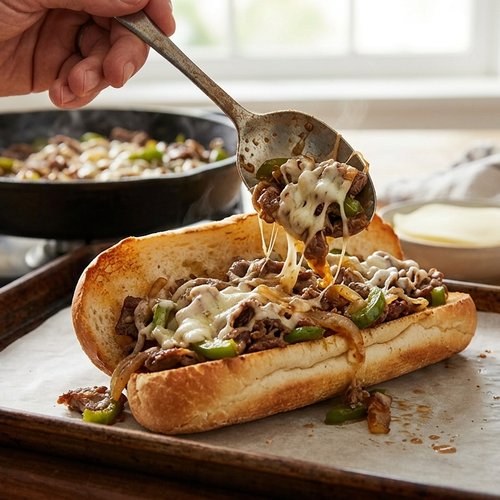
Place each toasted roll on a serving plate, open-side up. Spoon the cheesesteak mixture generously onto each roll, making sure to include the melted cheese and sauce. Serve immediately while the heat keeps everything melty and the roll is still crispy. The contrast between the crispy exterior and creamy interior is part of what makes this sandwich special.
Professional Tips From the Kitchen
- Freeze your beef before slicing – If you’re starting with a thick cut of beef, place it in the freezer for 30 to 45 minutes until it’s partially frozen. This firms up the muscle fibers and makes slicing paper-thin much easier. You’ll get more uniform pieces, which cook more evenly.
- Don’t skip the beef drying step – Moisture is browning’s enemy. Pat your beef completely dry with paper towels, even if it seems excessive. This single step makes the difference between gray, steamed beef and deeply golden, caramelized beef.
- Embrace the undercooking – This goes against every instinct for food safety with beef, but thin shaved beef cooks differently than thick steaks. At just 1-2 minutes per side, you’re creating a crust while keeping the interior tender. The carryover heat plus the warm sauce will finish cooking it perfectly. Trust the process.
- Taste your seasoning before assembly – Take a small piece of beef mixture on a fork before you add cheese. This is your last chance to adjust saltiness or add more hot sauce. Once the cheese is on, you can’t fix it.
- Use high-quality cheese – Cheap processed cheese (and yes, even “Cheese Whiz” has its place) melts differently than real cheese. Real provolone or aged cheddar creates a smoother emulsion with the sauce. If your budget is tight, buy one excellent block of cheese and slice it yourself rather than buying pre-sliced lower-quality cheese.
Ingredient Substitutions and Their Impact
- Shaved beef steak → Ground beef or thinly sliced deli roast beef: Ground beef (85/15 blend) will absorb more sauce and create a more uniform texture but less textural interest. Deli roast beef is the budget champion—it’s often half the price and requires zero cooking time, just heating in the sauce. The tradeoff is slightly less depth of browning and a softer texture throughout.
- Butter → Ghee or refined coconut oil: Ghee has higher browning capacity than regular butter and creates deeper Maillard reactions. Refined coconut oil works for cooking but won’t contribute the same creamy mouthfeel. Both are more expensive than butter, so this substitution is for preference rather than budget.
- Worcestershire sauce → Soy sauce plus balsamic vinegar: Mix 3 tablespoons soy sauce with 1 tablespoon balsamic vinegar (try my balsamic glaze recipe if you want to make your own). You lose some complexity but gain deeper umami. The tradeoff is slightly higher sodium.
- Provolone cheese → White American cheese or even sharp cheddar: White American cheese melts more smoothly (it’s designed to) but has a more plastic-like flavor. Sharp cheddar adds bite and complexity but melts less smoothly. Both work; it depends on your texture and flavor priorities.
- Fresh onions → Caramelized onions from a jar: This is genuinely budget-friendly since fresh onions are so cheap anyway, but jarred caramelized onions work and save 8 minutes of cooking time. The flavor is slightly less complex, but it’s a valid shortcut for weeknights.
Dietary Adaptations
Gluten-Free Version: Most store-bought rolls contain gluten, so seek out certified gluten-free bread or rolls. The filling itself is naturally gluten-free, but check your Worcestershire sauce—Lea & Perrin’s makes a gluten-free version. Gluten-free bread has different water absorption, so the toasting step becomes even more critical to prevent sogginess.
Dairy-Free Version: Replace dairy butter with refined coconut oil or vegan butter for cooking, and skip the cheese entirely or use a dairy-free cheese alternative. You’ll lose the emulsification that dairy fat creates, so the sauce will be thinner. Compensate by reducing Worcestershire to ⅓ cup and adding 1 tablespoon of tomato paste for body. The sandwich will be lighter and less rich but still delicious.
Low-Carb Version: Skip the rolls entirely and serve the cheesesteak mixture over cauliflower rice, zucchini noodles, or lettuce wraps. This reduces carbs from roughly 45 grams per sandwich to 3-5 grams while maintaining all the protein and flavor. You sacrifice the structural integrity of a sandwich but gain a warm, filling bowl meal instead.
Vegan Version: Use plant-based meat crumbles or thinly sliced seitan in place of beef, vegan butter for cooking, and a cashew-based cheese sauce instead of dairy cheese. The Maillard reaction will be less pronounced with plant proteins, so increase your pan temperature slightly and add 1 tablespoon of soy sauce to boost umami complexity. The texture will be different but satisfying.
Can I Store Cheesesteak Shaved Steak Recipe?
The beef mixture and assembled sandwich behave differently in storage, so I’ll address each separately.
Beef mixture (without bread): Store in an airtight container in the refrigerator for up to 3 to 4 days. The fats will solidify as it cools, which protects the beef from oxidation. Reheat gently over medium heat, adding 1 to 2 tablespoons of water to loosen the mixture as the fats melt again. The reheated version won’t have the same textural contrast as freshly made, but the flavor actually deepens slightly as aromatics continue breaking down.
Assembled sandwiches: Don’t make these ahead. The bread will absorb moisture from the filling and become soggy within 30 to 60 minutes, even wrapped tightly. Instead, store the beef mixture separately and assemble fresh rolls right before serving.
Freezing: The beef mixture freezes well for up to 2 to 3 months if stored in a freezer-safe container. The sauce protects the meat from freezer burn. Thaw overnight in the refrigerator, then reheat gently. Frozen rolls can be toasted directly from frozen, adding 1 to 2 minutes to the toasting time.
Nutrition Information
Based on USDA nutritional analysis, a single cheesesteak sandwich (using 6 ounces of beef, 1-2 cheese slices, and one roll) contains approximately:
- Calories: 520-580 (depending on cheese amount)
- Protein: 32-35 grams (complete amino acid profile)
- Fat: 24-28 grams (mostly from beef, cheese, and butter; includes saturated and monounsaturated)
- Carbohydrates: 42-45 grams (from bread; includes 1-2 grams of fiber)
- Sodium: 880-950 milligrams (from Worcestershire sauce, seasoning salt, and cheese)
- Iron: 3.8 mg (40% of daily value for adult women; 48% for adult men)
- B12: 1.8 mcg (30% of daily value)
This nutritional profile makes the cheesesteak a legitimate protein-forward lunch that supports muscle maintenance and satiety. The carbohydrates are moderate enough that pairing with a lower-carb side dish (like an air fryer carrot recipe or simple salad) creates a balanced meal under 700 total calories. The sodium is moderate compared to most restaurant sandwiches, which often exceed 1,200 milligrams.
What Can I Serve With Cheesesteak Shaved Steak Recipe?
A cheesesteak is rich, savory, and warming—so your sides should provide textural and flavor contrast. The science here is about palate cleansing: acidic foods (salads, pickles) and light vegetables balance the fat-forward main dish, allowing you to enjoy the sandwich without the heavy feeling.
- A simple green salad with vinaigrette – The acid in vinegar cuts through the richness of melted cheese and beef fat, refreshing your palate between bites. Toss greens with olive oil and vinegar for a 2:1 ratio, which provides brightness without overwhelming the sandwich. An affordable salad recipe works perfectly here—even just iceberg lettuce with basic vinaigrette provides the palate cleansing benefit.
- Dill pickle spears or pickled vegetables – Fermented foods provide probiotics plus acidity, and the strong flavor creates a palate-cleansing effect. The high sodium in pickles does add to your overall salt intake, so this pairing is more about occasional enjoyment than everyday nutrition.
- Roasted or air-fried vegetables – Carrots, bell peppers, or brussels sprouts roasted at high heat develop their own Maillard reaction, adding savory depth without competing with the sandwich. Try my air fryer carrot recipe for a quick side that adds fiber and sweetness.
- Baked beans or bean salad – Legumes provide fiber and additional plant-based protein, extending satiety. My baked beans recipe on the stovetop or even a 3 bean recipe salad pairs beautifully, especially for a picnic or casual meal.
- Coleslaw with acidic dressing – The raw vegetables provide textural contrast, and the acidic dressing (vinegar-based) balances richness. The fiber in raw cabbage aids digestion, which is helpful when eating a rich main dish.
Expert’s Nutritional Tip: Budget Protein Strategy
As a registered dietitian, I see families struggling to get enough protein without breaking their food budget. Here’s what I tell them: shaved beef is often cheaper per pound than ground beef, especially when you compare price per ounce of usable protein. The thin slicing means you need less beef to feel satisfied because the thin pieces distribute throughout the sandwich, creating the impression of abundance. Additionally, the Worcestershire sauce and cheese add protein (cheese has 7 grams of protein per ounce), so your total protein in one sandwich is higher than it appears on the menu. This is strategic nutrition: you’re using complementary ingredients to boost protein while controlling costs. A $3-4 cheesesteak provides more protein per dollar than many restaurant meals, which is why understanding cooking chemistry matters for your family budget.
Make-Ahead Guide
I developed this guide specifically for busy families trying to balance nutrition with convenience:
Sunday Prep (30 minutes): Cook the beef mixture and caramelized onions through Step 5 (before adding cheese). Cool completely and store in an airtight container in the refrigerator. On serving days, reheat this mixture gently while you toast fresh rolls, then add fresh cheese and assemble. This takes just 5 minutes on weeknight evenings.
Bulk Freezing: Double the beef mixture recipe and freeze half in 2-cup portions. Label clearly with the date. Thaw overnight and reheat for quick cheesesteak lunches that require no food safety concern and minimal cooking time. This is how I solve the “healthy lunch” problem for families who default to takeout.
Ingredient Prep: Slice onions and beef 1 day ahead, storing them separately in airtight containers. This eliminates the prep bottleneck when you’re actually cooking. Pat beef dry again right before cooking to remove any moisture that accumulated during storage.
Common Mistakes to Avoid
- Overcrowding the pan with beef: When you add too much beef at once, it steams rather than browns. The moisture released by touching pieces creates a humid microclimate that prevents the Maillard reaction. Work in batches if needed. This is one of the most common mistakes I see home cooks make, and it’s the difference between a mediocre sandwich and an excellent one.
- Cooking the beef too long: Many home cooks nervously overcook thin shaved beef, worried about food safety. At just 1-2 minutes per side, you’re creating a crust while keeping the center rare. This seems wrong, but it’s correct. The beef will continue cooking as you add warm sauce and cover it. Overcooking creates rubbery, dry meat that no amount of sauce can fix.
- Skipping the onion caramelization step: Some recipes suggest quick-cooking onions over high heat to save time. This creates soft but bland onions—you miss the complex sweetness that slow caramelization develops. This step takes less than 10 minutes and makes the entire sandwich better. Don’t skip it for speed.
- Adding cheese before the sauce: If you add melted cheese without the Worcestershire sauce underneath, the cheese won’t emulsify properly and will sit in a slick layer rather than creating a unified sauce. Always add sauce first, then cheese, then cover briefly.
Seasonal Variations
Summer Version: Add fresh sautéed bell peppers and mushrooms to the beef mixture (Step 4, before adding cheese). Serve on slightly larger rolls with extra crispy exterior for textural contrast. The vegetables add volume and fiber while keeping calories moderate. Pair with a bright vinegar-based slaw instead of creamy coleslaw.
Fall/Winter Version: Increase Worcestershire sauce to ¾ cup and add 1 tablespoon of ketchup or tomato paste for deeper, more complex sweetness. Add sautéed mushrooms for earthiness. Serve on toasted rolls with a side of warm gravy or French onion soup for a hearty cold-weather meal.
Spring Version: Keep the traditional preparation but add fresh watercress or arugula on top of the cheese before closing the sandwich. The peppery greens add brightness and vitamin K without heaviness. Serve alongside spring vegetables like peas or asparagus.

Cheesesteak Shaved Steak Recipe
Ingredients
Method
- Heat a large skillet to medium heat (not medium-high yet—patience here creates better results) and melt 4 tablespoons of butter. Add your thinly sliced onion and stir frequently. This step takes 6 to 10 minutes, and you're looking for the onions to transform from raw and white to deeply golden and soft. The onions should look almost caramel-colored, and they'll smell sweet and complex rather than pungent. This isn't rushed cooking—low and slow allows the natural sugars to caramelize rather than burn. When they reach this stage, remove them to a clean plate and set aside. This critical first step cannot be hurried.
- If your beef isn't already sliced paper-thin, slice it as thinly as possible now (a sharp knife or partially frozen beef makes this easier). Pat the beef dry with paper towels—this removes surface moisture that would prevent browning through steam. Sprinkle seasoning salt lightly across all surfaces, using a gentle hand. You're seasoning the exterior, not creating a salt crust. Remember, Worcestershire sauce adds significant saltiness, so you don't need heavy seasoning here.
- Increase your skillet heat to medium-high and add the remaining butter plus 2 teaspoons of olive oil. Wait for the butter to foam slightly and the pan to reach proper temperature—you'll know because a single drop of water will sizzle and evaporate immediately. Add the beef in a single layer if possible (work in batches if needed—overcrowding prevents browning). This is critical: cook for only 1 to 2 minutes per side. You're not cooking it through; you're creating a golden crust. The beef will appear slightly underdone when you flip it, and that's exactly right. It will continue cooking when you add the sauce and cover it later. If you cook it fully now, it will be tough and dry by the time you assemble the sandwich.
- Once the beef is browned but still slightly pink in the center, pour in ½ cup of Worcestershire sauce and 1 to 2 tablespoons of hot sauce if using. Stir constantly for about 60 seconds. You're doing two things: dissolving the flavorful browned bits (called fond) stuck to the pan bottom, and coating the beef with sauce. The acid in Worcestershire begins breaking down beef proteins slightly, which keeps them tender rather than firm.
- Return your caramelized onions to the pan and stir everything together, making sure the onions distribute evenly through the beef. Now place your cheese slices directly on top of the mixture. Cover the skillet with a lid or even foil for about 60 to 90 seconds. The residual heat plus the covered environment creates a steamy microclimate that melts the cheese perfectly. The cheese should be completely melted and starting to get glossy—this is the point where the fat emulsifies with the sauce and creates that classic cheesesteak texture. If you prefer extra-cheesy sandwiches, add a second layer of cheese and re-cover for another 30 seconds.
- While the cheese is melting, heat a separate griddle or skillet to medium-high heat. Spread a thin but visible layer of butter on the cut side of each roll. Place them butter-side down on the hot griddle and toast until they're golden brown and crispy, about 2 to 3 minutes. The butter creates a protective barrier that keeps the bread from absorbing too much of the mixture's moisture, which would make the sandwich soggy. This toasting step is why your homemade version will be better than many restaurant versions—most places don't toast their rolls properly.
- Place each toasted roll on a serving plate, open-side up. Spoon the cheesesteak mixture generously onto each roll, making sure to include the melted cheese and sauce. Serve immediately while the heat keeps everything melty and the roll is still crispy. The contrast between the crispy exterior and creamy interior is part of what makes this sandwich special.
Notes
FAQs
Can I use frozen beef slices directly from the freezer?
Yes, absolutely. In fact, frozen beef often works better because the ice crystals help keep the pieces separated and prevent them from clumping together. The caveat is that frozen beef releases more moisture as it thaws, so pat it especially dry before cooking. Add the frozen beef directly to your hot pan—the temperature difference creates even better browning because the heat rises sharply when the cold beef hits the hot surface.
What’s the difference between cheesesteak and a Philly cheesesteak?
Technically, a “cheesesteak” and a “Philly cheesesteak” are the same thing—the term refers to the iconic sandwich from Philadelphia. However, some regional variations exist. Traditional Philadelphia versions often use Cheez Whiz (a processed cheese product), while modern restaurants often use real cheese. For this recipe, I give you the option to use either. Cheez Whiz melts more smoothly and creates a glossier sauce, while real cheese provides better flavor complexity. Neither is “wrong”—it depends on your preference and budget.
Why does my cheesesteak mixture separate in the pan rather than staying cohesive?
This usually means one of two things: either the pan temperature is too low (preventing proper emulsification), or you’re not adding the cheese while the mixture is still hot enough. The cheese’s fat acts as an emulsifier between the beef’s rendered fats and the Worcestershire sauce. If the mixture cools before you add cheese, the fat hardens and won’t emulsify properly. Keep your pan at medium-high, and add cheese while the mixture is visibly steaming.
Can I make this recipe without Worcestershire sauce?
You can, but the sandwich will taste noticeably flatter. Worcestershire provides umami (savory depth), acid (brightness), and subtle sweetness—three flavor elements that are hard to replicate with one substitute. If you must avoid Worcestershire, combine 2 tablespoons soy sauce, 1 tablespoon balsamic vinegar, 1 tablespoon ketchup, and 2 teaspoons Worcestershire-free hot sauce. This approximates the flavor profile, though it won’t be identical.
Is this recipe safe if I like my beef rare?
This is where shaved beef differs from thick steaks. Shaved beef has more surface area exposed to bacteria, so it needs slightly more thorough cooking than a steak you’d sear and serve rare. The 1-2 minute per side cooking, plus the warm sauce, brings the internal temperature to roughly 140-145°F, which is on the lower end of safe but acceptable if the beef comes from a reputable source and is handled carefully. To be safest, aim for 145°F minimum (medium-rare) and use beef from a trusted butcher who follows proper food safety protocols.
More Recipes You’ll Love
- my weeknight pasta – A budget-friendly way to transform leftover pasta into a protein-packed meal
- Baked Beans Recipe on the Stovetop – The perfect side dish that doubles as a make-ahead lunch component
- Affordable Salad Recipe – A simple vinaigrette-based salad that pairs perfectly with hearty sandwiches
When you master a cheesesteak shaved steak recipe, you’re not just learning to make a sandwich—you’re learning the foundational techniques that make you a confident cook. You understand how heat, timing, and ingredient interaction create restaurant-quality results in your own kitchen. You’ve learned that affordable eating and excellent food aren’t opposing forces; they’re partners when you understand the chemistry behind what you’re cooking. That’s the skill set I’ve spent my career building for families: the confidence to know that home-cooked meals don’t require expensive ingredients or complicated techniques, just understanding and care. Try this recipe this week, taste what happens when science meets simplicity, and don’t forget to mention @affordablefoodideas if you try it. I’d love to hear how your version turns out!