This post contains affiliate links. As an Amazon Associate I earn from qualifying purchases.
I still remember the Tuesday night my mom came home exhausted from her shift at the hospital. She had about fifteen minutes before my younger brother’s soccer practice, and our refrigerator looked like it had given up on life. A half-pound of ground beef, some pasta she’d bought on sale, a lonely onion. She opened a can of tomato sauce, grabbed what I now know was her instinct for flavor balance, and thirty minutes later, we were passing a skillet around the table with more enthusiasm than we’d shown for homemade food in months.
That’s the magic of this cheeseburger pasta recipe—it tastes like you’ve been in the kitchen for hours, but you’re actually finished before anyone’s complained about being hungry. And here’s what I’ve learned as a registered dietitian: it costs less than ordering takeout, teaches you a fundamental cooking technique, and delivers real protein and comfort without the guilt.
I’ve spent years helping families in the Waltham area stretch their food budgets, and this recipe keeps showing up on the “make this every week” lists. Let me show you exactly how to make it foolproof.
Every time I tried to make a one-skillet pasta dish that actually tasted like it belonged in a restaurant, it came out either gluey, watery, or somehow both at once. The pasta would either swim in thin sauce or stick to the bottom of the pan like it had been glued there. Sound familiar? I finally realized that most recipes skip the most critical step—the one that transforms raw flour and ground beef into something that actually tastes like a proper sauce. Once I understood the why behind each technique, everything changed. I’ve also learned that those expensive ingredient swaps people recommend? Completely unnecessary. Just like my mom taught me, the best meals come from knowing what you have and using it strategically.
Why Your One-Skillet Pasta Never Turns Out Right (And How to Fix It)
I’ve sat across from countless clients who’ve given up on one-pot pasta dishes because they end up with either a starchy, clumpy disaster or a sad, underseasoned puddle. The real problem? Most recipes skip the foundational technique that makes this dish work. They either dump everything in at once or don’t build a proper sauce base first.
As a dietitian who also teaches cooking classes, I can tell you that understanding the roux technique—that moment when flour coats ground meat and vegetables—is the difference between a meal people ask for repeatedly and one they tolerate. This recipe builds that foundation properly, and I’ll walk you through every single step so you understand not just what to do, but why you’re doing it.
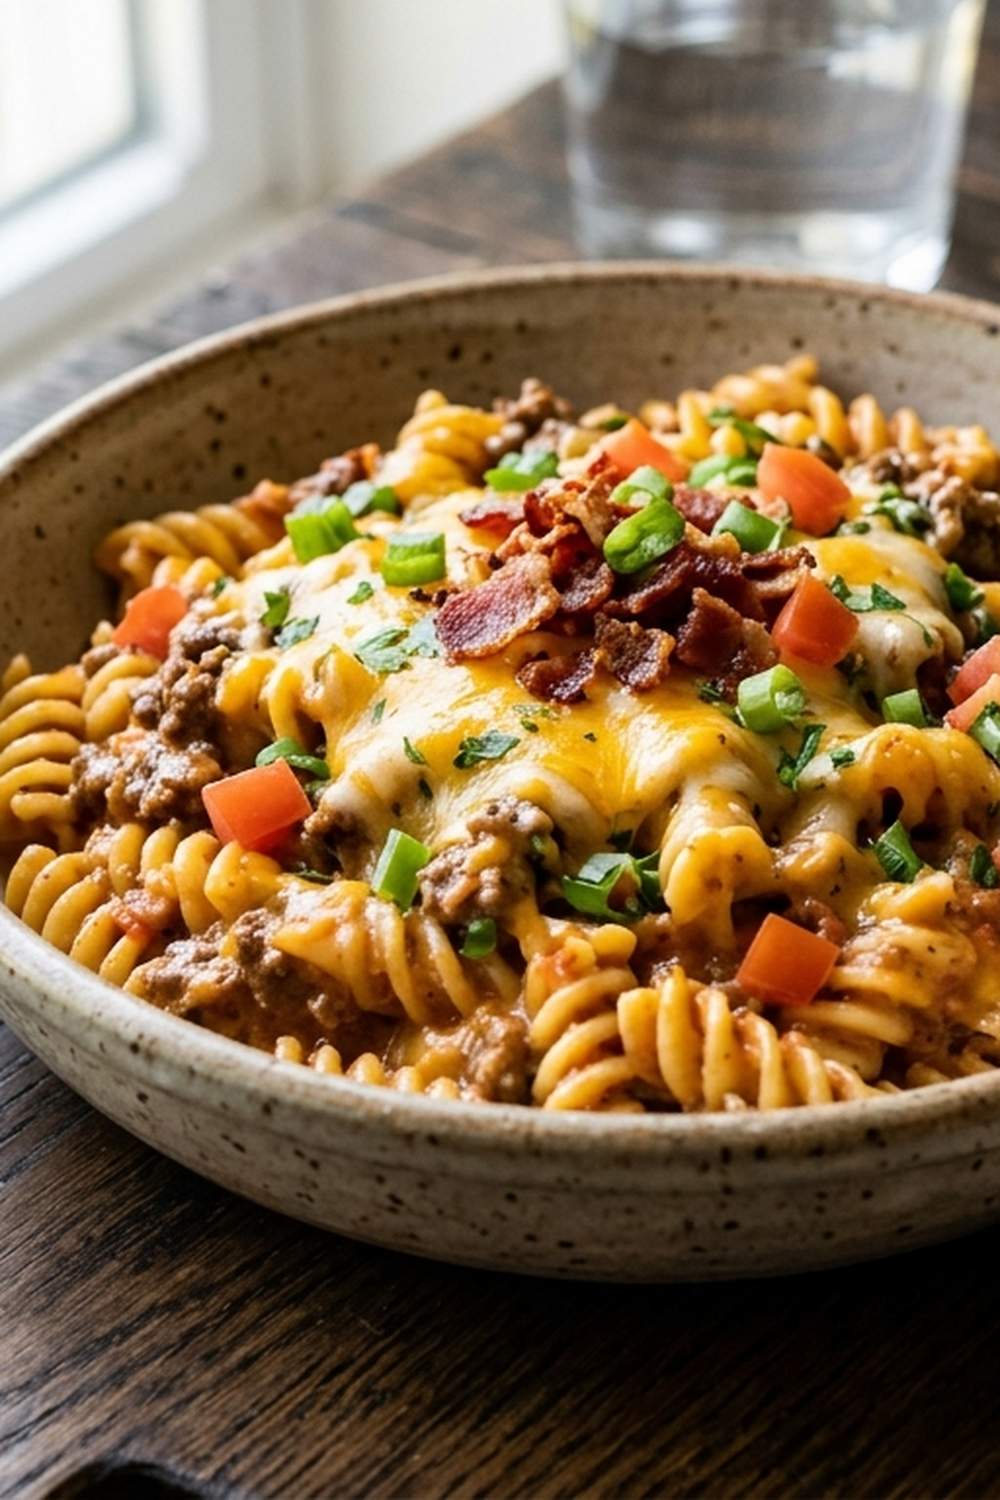
What Makes This Cheeseburger Pasta Recipe Different?
Most cheeseburger pasta recipes treat this like an afterthought—just dump pasta, sauce, and cheese together and hope for the best. This version uses the exact technique I teach in my meal-prep workshops: we create a proper sauce base before the pasta ever hits the pan.
Here’s the specific difference: when you add just 2 tablespoons of all-purpose flour to browned ground beef and sautéed onions, you’re creating what’s called a roux. When you stir this for one minute, the flour absorbs the fat and begins to gelatinize. The moment you add the tomato sauce and beef broth, this flour-fat mixture thickens everything into an actual sauce instead of watery liquid trying to cling to pasta.
This technique means your pasta finishes cooking in a sauce that actually coats it, flavor sticks around, and every bite tastes intentional. The pasta also absorbs the seasoning from the broth as it cooks, which is why people always ask what your secret ingredient is. (It’s not a secret—it’s technique.)
Before You Start: What You Need to Know
I’m going to share two pieces of knowledge that most recipes completely skip. These aren’t fancy techniques—they’re the difference between “this turned out pretty good” and “make this every week, please.”
- Your skillet size matters more than you think. This recipe needs a large, deep skillet—at least 10 to 12 inches wide. Why? Because the pasta needs to simmer in a single layer as much as possible, and you need room for the liquid to redistribute. If you use something too small, you’ll be stirring constantly and the pasta on top will cook before the pasta on bottom has absorbed any flavor.
- You cannot skip the lid. I know it seems old-fashioned, but a covered skillet is what keeps steam in and liquid from evaporating too quickly. This is the single biggest reason people end up with undercooked pasta or a sauce that’s too thick. Cover it, trust the process, and you’ll have perfectly tender pasta every single time.
The Ingredients
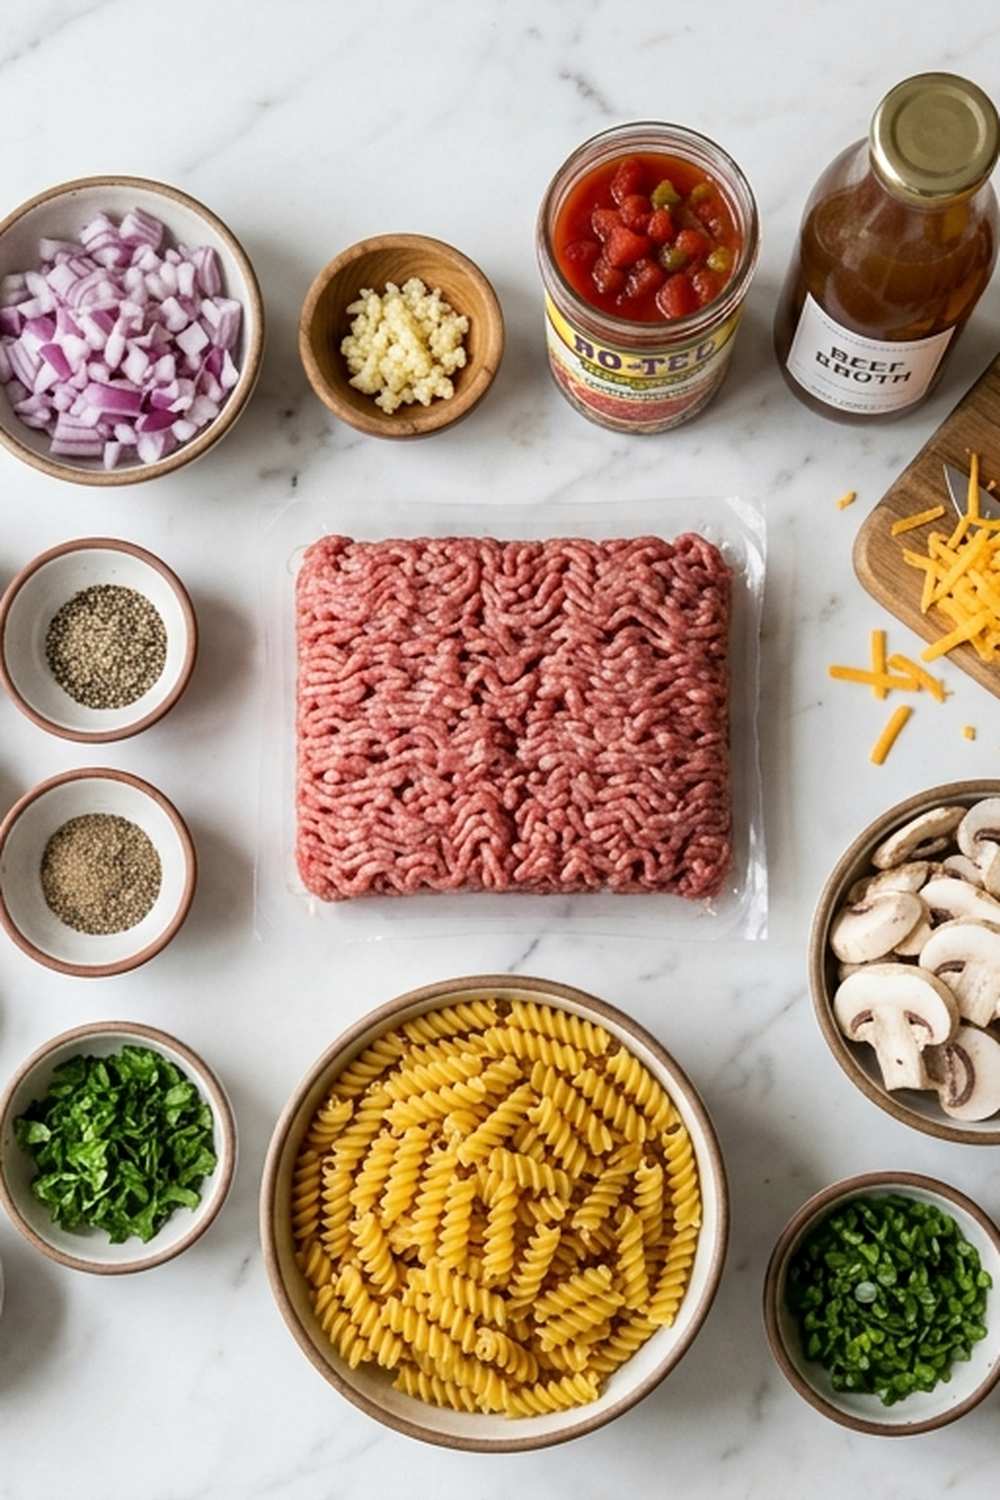
I’ve chosen these ingredients specifically because they’re affordable, they work together to build layers of flavor, and every single one serves a nutritional purpose. I’ve also included my favorite budget-friendly swaps because I never want cost to be the reason someone doesn’t eat well.
- 1 tablespoon olive oil (it’s the cooking fat that helps everything brown; you can absolutely substitute a neutral oil like canola if that’s what you have)
- 1 teaspoon salt (adjust as you go—your broth is already salted, so go easy)
- 2 tablespoons all-purpose flour (this is your thickening agent—all-purpose works perfectly; you don’t need fancy flour blends for this)
- 1 yellow onion (medium, diced—this is your flavor foundation and costs about what a fancy coffee costs)
- ½ pound ground beef (80/20 blend is your best value—it has enough fat to build flavor but won’t leave a grease puddle)
- 1 eight-ounce can tomato sauce (the unsung hero of budget cooking; buy the store brand without a second thought)
- ½ pound pasta shells, uncooked (medium shells work best because they catch sauce; a pound of store-brand pasta costs about $1, so you’re getting two meals here if you split it)
- 2 cups beef broth (this could be homemade stock if you save it, or a 14-ounce can plus ½ cup water—same result at a fraction of the cost)
- 2 green onions, sliced (optional but worth the $0.50 because they add brightness and color to every bite)
- 4 ounces sharp cheddar cheese, shredded (you can buy a block and shred it yourself for about 40 percent less money, plus it melts better)
- 2 tablespoons relish (this adds a tangy, slightly sweet element that makes people ask what you did differently—any brand works)
- ½ teaspoon black pepper (freshly cracked if you have it, but ground is fine)
Yield: This recipe makes 4 hearty servings as a main dish, or 6 servings if you’re pairing it with a salad or side vegetable. Total cost: approximately $5.09 for the whole skillet.
Step-by-Step: How to Make Cheeseburger Pasta Recipe Without Fail
I’m going to walk you through each step with the reasoning behind it. Once you understand why each moment matters, you’ll be able to troubleshoot anything that goes sideways, and you’ll feel confident making this when you’re tired or stressed—which is exactly when we need it most.
Step 1: Prep Your Onion and Set Up Your Workspace
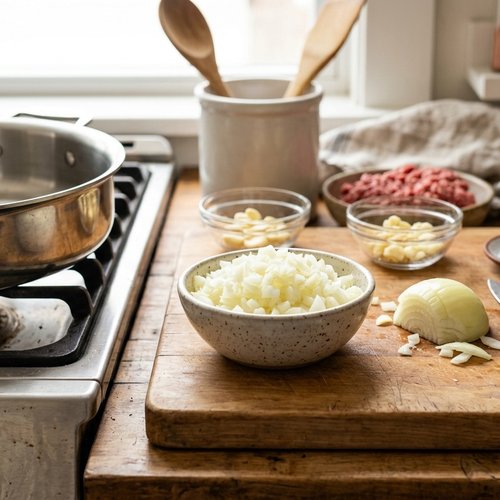
Finely dice your yellow onion into pieces about the size of a lentil. This matters more than you’d think. When onions are cut smaller, they soften faster and distribute their flavor throughout the dish more evenly. Plus, dicing takes maybe three minutes, and doing it before you start cooking means you won’t be scrambling once the ground beef hits the pan.
Grab your largest, deepest skillet—you’ll need it. Have your olive oil measured and ready. This is the moment to set yourself up for success, not to start searching for ingredients while something’s burning.
Step 2: Brown the Ground Beef and Cook the Onions
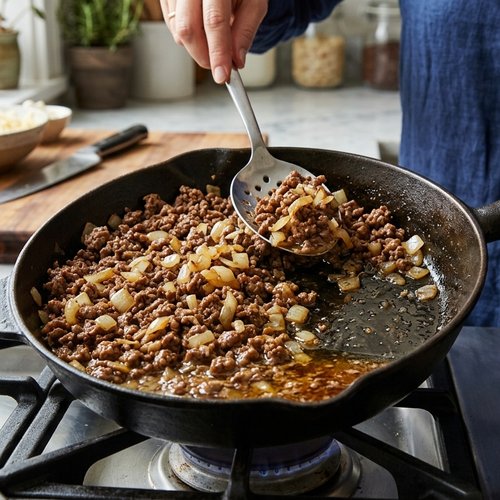
Add 1 tablespoon of olive oil to your skillet over medium heat. Once it’s warm and shimmers slightly (this takes about one minute), add your ½ pound of ground beef and your diced onion at the same time. This is important: you’re not cooking these separately. The onion’s moisture helps the meat cook gently, and the meat’s fat helps the onion soften and caramelize.
Break the ground beef into small pieces as it cooks—use a wooden spoon or spatula and keep stirring every 30 seconds or so. You’re looking for the beef to lose its pink color completely and for the onion to become soft and translucent, which usually takes about 5 to 7 minutes depending on your heat level. The mixture should smell savory and appetizing, not burnt. If the bottom of the pan seems to be browning too aggressively, turn your heat down to medium-low.
Once the beef is fully cooked and the onion is soft, take a moment to drain off any excess fat if it looks like there’s a pool of grease sitting on top. You want some fat—it carries flavor—but you don’t want so much that the final dish feels greasy. Tilt the skillet and blot the top of the meat mixture with a paper towel if needed.
Step 3: Add the Flour and Create Your Roux Base
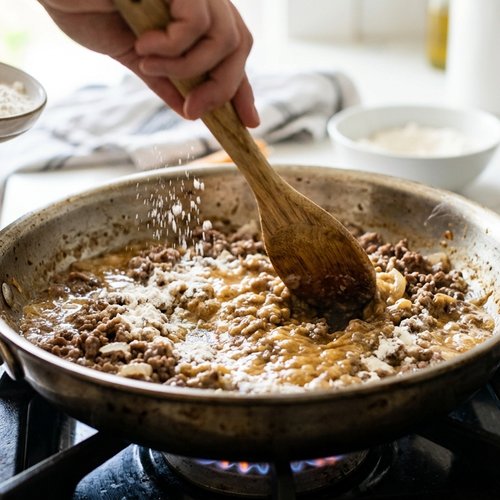
This is the critical moment that makes everything work. Add 2 tablespoons of all-purpose flour directly to the cooked beef and onion mixture. Start stirring immediately and don’t stop for one full minute. What you’re doing is coating the meat and vegetables with flour, which is absorbing the fat and starting to cook.
You’ll see the bottom of the skillet start to look lighter as the flour absorbs everything, and it might even look a bit dry. This is exactly right. The flour should smell slightly nutty and toasted—similar to the smell of warm cookies baking. If it smells acrid or burnt, you’ve gone too far, and you’ll need to start over with fresh ingredients. (This is rare, but it happens if your heat is too high.)
After one minute of constant stirring, you’ve created what’s called a roux, and this is your thickening agent for the entire dish. Everything you add from here on will thicken beautifully because this flour base is ready to do its job.
Step 4: Add the Sauce and Broth
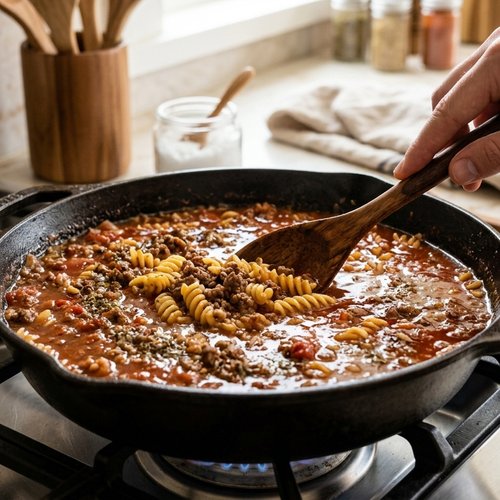
Now add your 8-ounce can of tomato sauce and your 2 cups of beef broth. The moment the liquid hits the pan, you’ll see the roux start to dissolve and the whole mixture will look thin again. This is completely normal. Keep stirring for about two minutes until the flour is completely distributed throughout the liquid and there are no visible lumps on the bottom of the skillet.
This stirring motion is doing the work of thickening. The flour particles are suspending throughout the liquid, and as the mixture heats, it’ll thicken into a proper sauce. Taste the mixture now and add a pinch of salt and pepper—remember that your broth is already salted, so go easy. You’re looking for it to taste like a savory beef broth with tomato notes, nothing fancy.
Step 5: Add the Pasta and Bring to a Boil
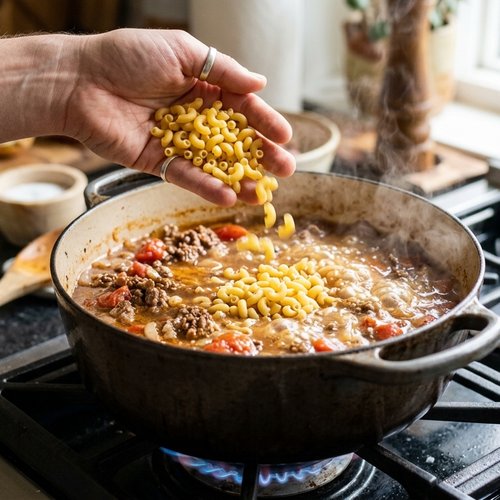
Add your ½ pound of uncooked pasta shells directly to the liquid. Stir everything together so the pasta is as submerged as possible. Don’t worry if some pasta is peeking out of the liquid—it’ll cook in steam and will fully submerge as the pasta absorbs liquid.
Now turn your heat up to medium-high. You’re waiting for the liquid to reach a boil, which usually takes 3 to 5 minutes depending on your stove. You’ll see it start to bubble around the edges first, and then larger bubbles will break across the whole surface. That’s your signal to proceed to the next step.
Step 6: Simmer Covered Until Pasta Is Tender
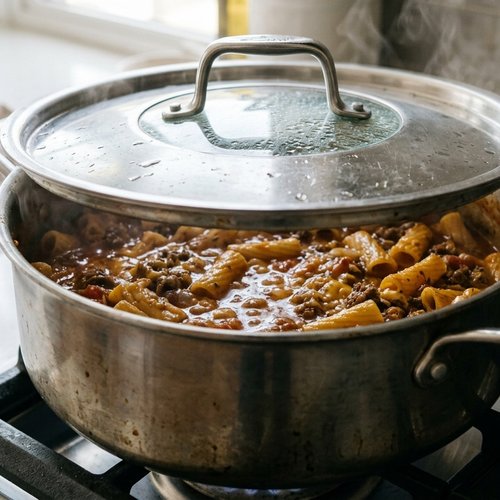
Once you reach a boil, give the pasta mixture one quick stir to loosen any pieces that might be stuck to the bottom. Then place a lid on your skillet (even a baking sheet works if you don’t have a fitted lid), turn your heat down to low, and set a timer for 10 minutes.
The covered skillet does something magical: it traps steam inside, which means the liquid cooks the pasta gently and the sauce doesn’t evaporate. The low heat means everything cooks evenly without the bottom burning. You’re essentially creating a mini oven in that skillet.
After 10 minutes, lift the lid and check your pasta. The pasta should be tender but still have a slight firmness when you bite it, and the sauce should look thick enough to coat the back of a spoon. If the pasta still seems very al dente (very firm), cover it again and give it another 2 to 3 minutes. If the sauce looks too thin, leave it uncovered for a minute or two and let some liquid evaporate.
My general rule: if you can bend the pasta without it breaking, it’s done. If you need a lot of pressure to bend it, it needs more time.
Step 7: Add the Cheese and Relish
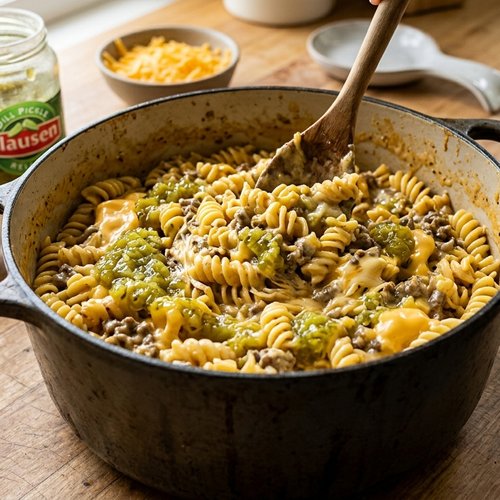
Once the pasta is tender and the sauce has thickened, turn off the heat. Pour in your 4 ounces of shredded cheddar cheese and stir constantly until every strand of cheese has melted into the sauce. This takes about 2 minutes. The residual heat in the skillet is perfect for melting cheese without it getting scorched.
Now add your 2 tablespoons of relish and stir everything together until it’s completely incorporated. The relish adds a bright, tangy sweetness that’s the secret reason people ask for this recipe. It tastes like a cheeseburger because relish is a classic burger condiment—you’re not trying to hide it, you’re celebrating it.
Step 8: Serve Immediately
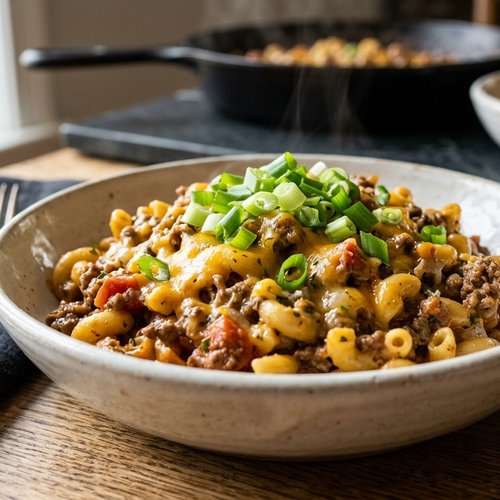
Divide the pasta into bowls or plates while it’s still hot. Top with sliced green onions if you’re using them—they add a fresh bite that contrasts beautifully with the rich, cheesy pasta. Serve immediately. This dish is best enjoyed hot, and if it sits for 20 minutes, it’ll start to thicken up as it cools.
The Most Common Mistakes (And How to Avoid Them)
- Adding pasta before the roux is fully cooked. If you skip ahead or rush the one minute of flour-stirring in Step 3, the flour won’t gelatinize properly. This means your pasta will cook in thin liquid instead of a proper sauce, and you’ll end up with something that tastes watery. Prevention: set a timer for that one minute of flour-stirring and actually watch it. The payoff is worth it.
- Not using a lid or lifting it constantly. Every time you lift the lid, you’re releasing steam and letting liquid evaporate. I’ve seen people check their pasta every 30 seconds because they’re worried. Resist the urge. Trust that the covered skillet knows what it’s doing. Prevention: set a timer and resist peeking until the timer goes off. If you’re really anxious, put the timer in another room.
- Using pre-shredded cheese instead of shredding your own. Pre-shredded cheese has anti-caking agents that prevent it from melting smoothly. You’ll end up with grainy, lumpy cheese instead of a smooth sauce. Prevention: buy a block of cheddar and use the large holes on a box grater. It takes two minutes and costs less anyway.
- Forgetting the relish or thinking it’s optional. This seems like a minor ingredient, but it’s what makes this taste like a cheeseburger instead of just cheesy pasta. The tangy sweetness is essential. Prevention: read through the entire recipe before you start, and make sure you have it on hand.
- Cooking on heat that’s too high. If your burner is still on medium-high or high when you’re supposed to be simmering, your sauce burns on the bottom and your pasta cooks unevenly. Prevention: once you turn the heat down to low in Step 6, actually turn it all the way down. If you can still feel significant heat radiating from the burner, it’s too hot.
How Do I Know When It’s Done?
Timing is only a general guide—actual doneness depends on your stove, the size of your pasta, and a hundred other variables. Here’s what you’re actually looking for: the pasta should be tender but not mushy, and you should be able to bend a piece without it breaking. Take a piece out with a fork, let it cool for 10 seconds, and taste it. If it has any hard core remaining, it needs more time.
The sauce should look thick enough to coat the back of a spoon—if you run your finger across the spoon, it should leave a trail that doesn’t immediately fill back in. If your sauce still looks thin and watery, either you need to let it cook uncovered for a minute or two longer, or you didn’t get your roux quite right. (Don’t panic—just remove the lid and let some liquid evaporate.)
The cheese should be completely melted and incorporated, with no visible stringy bits or lumps. If you can see distinct pieces of cheese, keep stirring off the heat for another minute.
Troubleshooting: When Things Go Wrong
- My sauce is too watery and the pasta is done. This usually means your roux wasn’t cooked long enough in Step 3, or your heat was too high and you evaporated less liquid than expected. Fix it: turn off the heat and let the uncovered skillet sit for 5 minutes. The residual heat will continue cooking the pasta, which absorbs more liquid. If it’s still too thin, you can mix one teaspoon of cornstarch with two tablespoons of cold water, stir it into the sauce, and let it simmer on low heat for one minute. This is a legitimate fix, not a failure.
- My pasta is still very firm but the sauce is thick. Your heat was probably too low, or you didn’t reach a boil before you turned it down. Pasta needs actual heat to cook. Fix it: turn your heat back up to medium and remove the lid. Let it simmer uncovered for 3 to 5 minutes, stirring occasionally. The higher heat will cook the pasta faster.
- The bottom of my skillet has burnt food stuck to it. This happened because your heat was too high at some point. This isn’t catastrophic, but it does mean your sauce has a burnt taste. Prevention is better: next time, use medium-low heat when you’re supposed to be simmering. For this batch, there’s no fix that makes it taste great again, but you can still eat it. Learn the lesson for next time.
- My cheese looks grainy and separated instead of smooth. You likely used pre-shredded cheese that has anti-caking agents, or your heat was too high when you added the cheese and it broke down. Fix it: there’s no great fix mid-cook, but for next time, buy a block of cheese and shred it yourself. Your sauce will be smooth and silky.
Can I Store Cheeseburger Pasta Recipe?
Yes, and it actually reheats beautifully because of that roux base we created. Store it in an airtight container in the refrigerator for up to 4 days. The sauce will thicken even more as it cools, which is perfect—it means it won’t dry out in the fridge.
To reheat, put it in a skillet with a splash of water or broth over medium heat, stirring occasionally. The pasta will absorb that liquid and come back to life. You can also reheat it in the microwave—put it in a microwave-safe bowl, add two tablespoons of water, cover it loosely, and microwave in 90-second increments, stirring between each one.
You can also freeze this dish. Let it cool completely, transfer it to a freezer container, and freeze for up to 3 months. Thaw it in the refrigerator overnight, then reheat it using the same method as fresh leftovers. The quality is excellent when frozen this way because the sauce protects the pasta from getting dry.
Nutrition Information
Per serving (if divided into 4 servings): approximately 520 calories, 24 grams of protein, 38 grams of carbohydrates, 24 grams of fat, and 4 grams of fiber. Based on USDA food database standards, this meal provides solid protein and carbohydrates for sustained energy, which makes it perfect for active families or anyone who needs to stay satisfied for hours.
Here’s what I love about this dish from a nutritional standpoint: the beef provides bioavailable iron and B vitamins that support energy and immune function. The pasta provides carbohydrates that fuel your brain and muscles. The onion and tomato sauce add fiber and phytonutrients. The cheese provides calcium for bone health. This isn’t just comfort food—it’s a genuinely balanced meal that costs a fraction of what you’d pay for takeout.
If you’re watching sodium, note that the beef broth is salted, so this dish comes in around 890 milligrams of sodium per serving. This is reasonable for a dinner meal, but if you need to monitor sodium closely, use low-sodium broth instead.
What Can I Serve With Cheeseburger Pasta Recipe?
This pasta is substantial enough to be a complete meal, but here are some options that pair beautifully and keep your budget in mind:
- A simple green salad – just lettuce, basic vinaigrette, and maybe some tomato. This adds vegetables and cuts through the richness of the cheese. Cost: about $1.
- Steamed or roasted vegetables – try broccoli, green beans, or carrots. These add nutrients and color without competing with the pasta flavor. Cost: about $0.75 to $1.50 depending on season.
- Garlic bread – if you want to lean into comfort mode, toast some store-brand bread with a bit of butter and garlic powder. This is indulgent but delicious. Cost: about $0.50.
- Steamed green beans with garlic – I love this pairing because it adds freshness and the garlic echoes the savory flavors in the pasta. Similar to my my weeknight pasta, simple vegetables let the main dish shine.
What you don’t need: any complicated sides or sauces. This pasta is delicious on its own, and adding too much around it dilutes the whole meal.
Expert’s Nutritional Tip: Why Ground Beef Matters
As a registered dietitian, I want you to understand why I specifically call for ground beef here instead of leaner proteins like ground turkey or ground chicken. Ground beef has a fat content that actually serves a purpose beyond taste: it carries fat-soluble vitamins like vitamins A, D, E, and K, and it provides conjugated linoleic acid (CLA), which research suggests may support healthy body composition.
I recommend an 80/20 blend—80 percent lean, 20 percent fat—because it has enough fat for flavor and nutrition but won’t leave you with a grease puddle. Ground turkey will work in this recipe, but it won’t have the same richness, and you might need to add a tablespoon more olive oil to get the same depth of flavor.
Don’t fall for the myth that ground beef is “bad” for you. In appropriate portions (½ pound for four people is very reasonable), it’s a nutrient-dense protein source that’s far more affordable than chicken breast or fish.
Make-Ahead Guide: Prep This Recipe Smart
I teach meal-prep workshops, and cheeseburger pasta is one of the recipes I encourage people to prepare ahead because it teaches you to think about timing.
The night before: Dice your onion and store it in a sealed container in the refrigerator. Measure out your flour, salt, and pepper into a small bowl. Shred your cheese if you haven’t already. This takes 10 minutes and means you’re literally just cooking the next day.
The morning of cooking: Measure your pasta, broth, and tomato sauce into separate containers. Have your relish opened and ready. The beauty of this is that when you get home at 5:45 p.m. and you’re exhausted, you’re not scrambling for ingredients—you’re just cooking.
Partial prep option (my favorite): Brown the ground beef and cook the onion the night before. Store this in a sealed container. The next day, you skip to Step 3 and just add the flour. This means dinner is literally 15 minutes instead of 30. I do this on Sundays for my week.
Seasonal Variations: How to Adapt This Recipe
Summer version: Replace half the pasta shells with diced zucchini or yellow squash added in Step 5. This adds vegetables, lowers the carb content slightly, and tastes fresh. Keep the same amount of broth.
Fall/winter version: Add one minced garlic clove along with the onion in Step 2, and replace the relish with 2 tablespoons of ketchup mixed with 1 teaspoon of Worcestershire sauce. This gives it a deeper, more complex flavor.
Autumn twist: Add ½ teaspoon of smoked paprika along with the flour in Step 3. This adds a subtle smokiness that makes people say, “What is that flavor?” It costs pennies and transforms the dish.
Spring lightness: Use half the cheese and add 2 tablespoons of fresh parsley in Step 8. You’ll still get the cheesy flavor, but it feels brighter and less heavy.

Cheeseburger Pasta Recipe
Ingredients
Method
- Finely dice your yellow onion into pieces about the size of a lentil. This matters more than you'd think. When onions are cut smaller, they soften faster and distribute their flavor throughout the dish more evenly. Plus, dicing takes maybe three minutes, and doing it before you start cooking means you won't be scrambling once the ground beef hits the pan. Grab your largest, deepest skillet—you'll need it. Have your olive oil measured and ready. This is the moment to set yourself up for success, not to start searching for ingredients while something's burning.
- Add 1 tablespoon of olive oil to your skillet over medium heat. Once it's warm and shimmers slightly (this takes about one minute), add your ½ pound of ground beef and your diced onion at the same time. This is important: you're not cooking these separately. The onion's moisture helps the meat cook gently, and the meat's fat helps the onion soften and caramelize. Break the ground beef into small pieces as it cooks—use a wooden spoon or spatula and keep stirring every 30 seconds or so. You're looking for the beef to lose its pink color completely and for the onion to become soft and translucent, which usually takes about 5 to 7 minutes depending on your heat level. The mixture should smell savory and appetizing, not burnt. If the bottom of the pan seems to be browning too aggressively, turn your heat down to medium-low. Once the beef is fully cooked and the onion is soft, take a moment to drain off any excess fat if it looks like there's a pool of grease sitting on top. You want some fat—it carries flavor—but you don't want so much that the final dish feels greasy. Tilt the skillet and blot the top of the meat mixture with a paper towel if needed.
- This is the critical moment that makes everything work. Add 2 tablespoons of all-purpose flour directly to the cooked beef and onion mixture. Start stirring immediately and don't stop for one full minute. What you're doing is coating the meat and vegetables with flour, which is absorbing the fat and starting to cook. You'll see the bottom of the skillet start to look lighter as the flour absorbs everything, and it might even look a bit dry. This is exactly right. The flour should smell slightly nutty and toasted—similar to the smell of warm cookies baking. If it smells acrid or burnt, you've gone too far, and you'll need to start over with fresh ingredients. (This is rare, but it happens if your heat is too high.) After one minute of constant stirring, you've created what's called a roux, and this is your thickening agent for the entire dish. Everything you add from here on will thicken beautifully because this flour base is ready to do its job.
- Now add your 8-ounce can of tomato sauce and your 2 cups of beef broth. The moment the liquid hits the pan, you'll see the roux start to dissolve and the whole mixture will look thin again. This is completely normal. Keep stirring for about two minutes until the flour is completely distributed throughout the liquid and there are no visible lumps on the bottom of the skillet. This stirring motion is doing the work of thickening. The flour particles are suspending throughout the liquid, and as the mixture heats, it'll thicken into a proper sauce. Taste the mixture now and add a pinch of salt and pepper—remember that your broth is already salted, so go easy. You're looking for it to taste like a savory beef broth with tomato notes, nothing fancy.
- Add your ½ pound of uncooked pasta shells directly to the liquid. Stir everything together so the pasta is as submerged as possible. Don't worry if some pasta is peeking out of the liquid—it'll cook in steam and will fully submerge as the pasta absorbs liquid. Now turn your heat up to medium-high. You're waiting for the liquid to reach a boil, which usually takes 3 to 5 minutes depending on your stove. You'll see it start to bubble around the edges first, and then larger bubbles will break across the whole surface. That's your signal to proceed to the next step.
- Once you reach a boil, give the pasta mixture one quick stir to loosen any pieces that might be stuck to the bottom. Then place a lid on your skillet (even a baking sheet works if you don't have a fitted lid), turn your heat down to low, and set a timer for 10 minutes. The covered skillet does something magical: it traps steam inside, which means the liquid cooks the pasta gently and the sauce doesn't evaporate. The low heat means everything cooks evenly without the bottom burning. You're essentially creating a mini oven in that skillet. After 10 minutes, lift the lid and check your pasta. The pasta should be tender but still have a slight firmness when you bite it, and the sauce should look thick enough to coat the back of a spoon. If the pasta still seems very al dente (very firm), cover it again and give it another 2 to 3 minutes. If the sauce looks too thin, leave it uncovered for a minute or two and let some liquid evaporate. My general rule: if you can bend the pasta without it breaking, it's done. If you need a lot of pressure to bend it, it needs more time.
- Once the pasta is tender and the sauce has thickened, turn off the heat. Pour in your 4 ounces of shredded cheddar cheese and stir constantly until every strand of cheese has melted into the sauce. This takes about 2 minutes. The residual heat in the skillet is perfect for melting cheese without it getting scorched. Now add your 2 tablespoons of relish and stir everything together until it's completely incorporated. The relish adds a bright, tangy sweetness that's the secret reason people ask for this recipe. It tastes like a cheeseburger because relish is a classic burger condiment—you're not trying to hide it, you're celebrating it.
- Divide the pasta into bowls or plates while it's still hot. Top with sliced green onions if you're using them—they add a fresh bite that contrasts beautifully with the rich, cheesy pasta. Serve immediately. This dish is best enjoyed hot, and if it sits for 20 minutes, it'll start to thicken up as it cools.
Notes
FAQs
Can I Use Ground Turkey or Ground Chicken Instead of Beef?
Absolutely, though the flavor profile changes. Ground turkey will work directly as a 1-to-1 swap, but add an extra tablespoon of olive oil in Step 2 because turkey is so lean it won’t create enough fat for the roux. Ground chicken should be fine too, though it’s less commonly available ground. The cooking time is the same, about 5 to 7 minutes until fully cooked. The finished dish will be leaner and slightly less rich, but it’s still delicious. I prefer beef for this specific recipe because the relish really plays off beef’s savory notes, but I’ve made this with turkey for clients who prefer lighter meals, and they love it.
What if I Don’t Have Beef Broth? Can I Use Chicken Broth?
You can, but your sauce will taste different. Chicken broth is lighter and more delicate, so the tomato and relish will be more prominent. Use the same amount (2 cups), and the cooking technique is identical. Some people actually prefer this lighter version, so try it if you have chicken broth on hand. You could also use vegetable broth, though that’ll taste even lighter. If you’re really in a pinch, you can dissolve 1 to 2 beef bouillon cubes in 2 cups of hot water—it’s not fancy, but it works.
My Pasta Always Gets Mushy. How Do I Fix This?
This is usually because your heat is too high and the pasta is cooking too fast before it can absorb the sauce properly, or because you’re cooking it too long. In Step 6, when you turn the heat down to low, actually turn it all the way down. You shouldn’t be able to see aggressive bubbles—just gentle ones. Start checking your pasta at the 8-minute mark instead of waiting the full 10 minutes. Remove a piece, cool it, and taste it. Mushy pasta can also happen if you’re using very delicate pasta shapes—stick with shells or another sturdy shape.
Can I Make This in a Dutch Oven or on the Stovetop Instead of a Skillet?
A Dutch oven works wonderfully, actually better than a skillet because it retains heat more evenly. Follow the exact same steps. A Dutch oven’s heavier bottom means less risk of burning. As for cooking on the stovetop in a pot, yes, you can—just use the same deep pot technique. The one thing you’re sacrificing is the visual element of watching it cook and the beauty of serving it family-style from the same pan. But the food will taste identical.
Is There a Dairy-Free or Cheese-Free Version?
Absolutely. If you can’t eat dairy, skip the cheese entirely and add ½ teaspoon of extra garlic powder in Step 3 for depth. The relish will provide the tangy element you’d normally get from cheese. The dish becomes more of a tomato-beef pasta, which is still delicious. If you want to simulate creaminess, you could add ¼ cup of full-fat coconut milk in Step 7 instead of cheese, but this changes the flavor significantly. Honestly, this recipe is best with cheese, but it’s still good without it.
The Relish Seems Weird in a Pasta Dish. Can I Leave It Out?
You can, but I won’t recommend it. The relish is what makes this taste like a cheeseburger pasta instead of just cheesy beef pasta. It adds a specific tangy sweetness that people can’t quite identify, and that’s part of what makes them ask for the recipe. If you really don’t have it or don’t like relish, you could replace it with ½ teaspoon of yellow mustard mixed with 1 tablespoon of ketchup, which gives you similar flavors. But give the relish a chance first.
More Recipes You’ll Love
- Beef Picadillo Recipe – another ground beef dish that’s budget-friendly and packed with flavor
- Black Chili Recipe – a hearty, one-pot meal that costs even less and freezes beautifully
- Baked Creamy Chicken Recipe – if you want to rotate proteins but maintain that comforting, creamy pasta feel
- this cozy soup – another make-ahead option that teaches you foundational cooking techniques