This post contains affiliate links. As an Amazon Associate I earn from qualifying purchases.
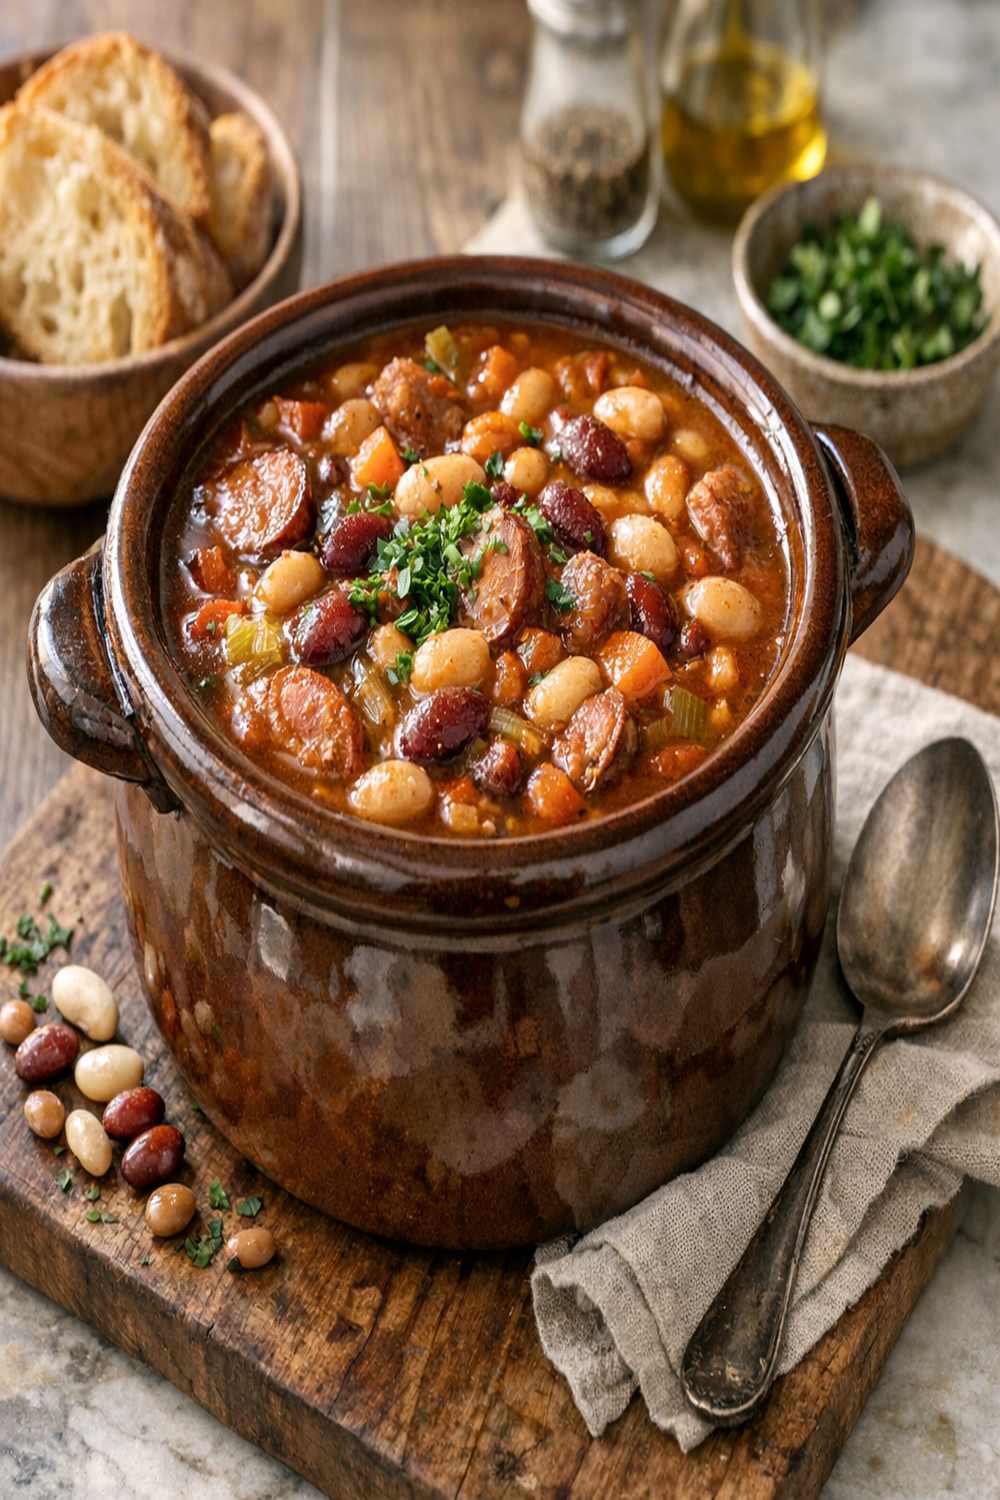
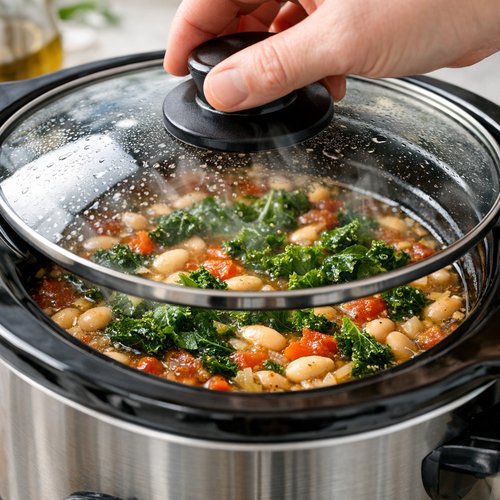
There’s something deeply comforting about a slow cooker filled with simmering beans and aromatic vegetables—the kind of meal that fills your home with warmth while you go about your day. This bean soup is perfect alongside crusty bread or paired with lighter fare like baked eggs with spinach for a complete breakfast-for-dinner experience. I’ve built this recipe around ingredients that won’t strain your grocery budget, yet deliver the nutrition and satisfaction you’re looking for.
Why I Fell in Love With Slow Cooker Bean Soups
I grew up in a small Massachusetts kitchen where my mother turned dried beans and ham bones into liquid gold. She’d start her slow cooker before heading to work, and by dinnertime, our house smelled like home—rich, savory, inviting. Back then, it wasn’t about being trendy; it was about stretching every penny and making sure we had nourishing food on the table. Those lessons stuck with me through my career as a registered dietitian, and they’ve become the foundation of how I approach affordable, real-food cooking.
The slow cooker transformed my approach to meal planning. When I realized I could prep ingredients in the morning and have a nutritionally complete dinner ready by evening, I started experimenting with different bean combinations and flavor profiles. This particular version—built on a foundation of mixed beans with savory ham, fresh vegetables, and herbs—became a fixture in my own meal rotation.
What is Bean Soup Crock Pot Recipe?
Bean soup made in a slow cooker is a traditional one-pot meal that combines dried legumes with aromatic vegetables, protein, and broth to create a hearty, naturally filling dish. The slow cooking method—typically six to eight hours on low or high heat—allows the beans to soften completely while flavors meld and deepen in ways that faster cooking methods simply can’t achieve.
What makes this version special is the combination of multiple bean varieties, which provides greater nutritional complexity. A single bean type might offer one protein profile, but a mixed-bean approach gives you varying amounts of fiber, resistant starch, and micronutrients. Add in the ham for depth, fresh kale for greens-based nutrients, and herbs for aromatic complexity, and you’ve got a meal that’s as nourishing as it is economical.
Historically, bean soups like this one come from European peasant cooking traditions—a time when people understood that humble ingredients could become something magnificent when given time and attention. The slow cooker simply modernizes an ancient method, allowing today’s busy families to enjoy that same slow-cooked magic.
Why You’ll Love This Bean Soup Crock Pot Recipe
- Minimal Active Prep Time – Once you’ve chopped your vegetables and added everything to the slow cooker, you’re done. This takes about 15 minutes. No standing over a stove, no constant monitoring. Just set it and go about your day.
- Incredibly Budget-Friendly – Dried beans cost pennies per pound, leftover ham is often available after holiday meals, and basic vegetables like onions and carrots are year-round staples. This entire pot costs less than restaurant takeout for two people.
- Packed With Plant-Based Protein and Fiber – A single serving delivers approximately 12-15 grams of protein and 8-10 grams of fiber, making it satisfying enough for lunch or dinner. The combination of legumes and added ham creates a complete amino acid profile.
- Makes Multiple Servings – This recipe yields 8-10 servings, meaning you’ll have leftovers for quick lunches throughout the week. That’s built-in meal prep without the extra cooking.
- Naturally Gluten-Free – Assuming your broth is certified gluten-free (which most are), this soup contains no wheat, barley, or rye. It’s naturally suitable for anyone following a gluten-free diet.
- Adaptable Year-Round – Whether you’re using spring vegetables, summer greens, fall root vegetables, or winter storage crops, this recipe accommodates seasonal changes beautifully.
The Ingredients
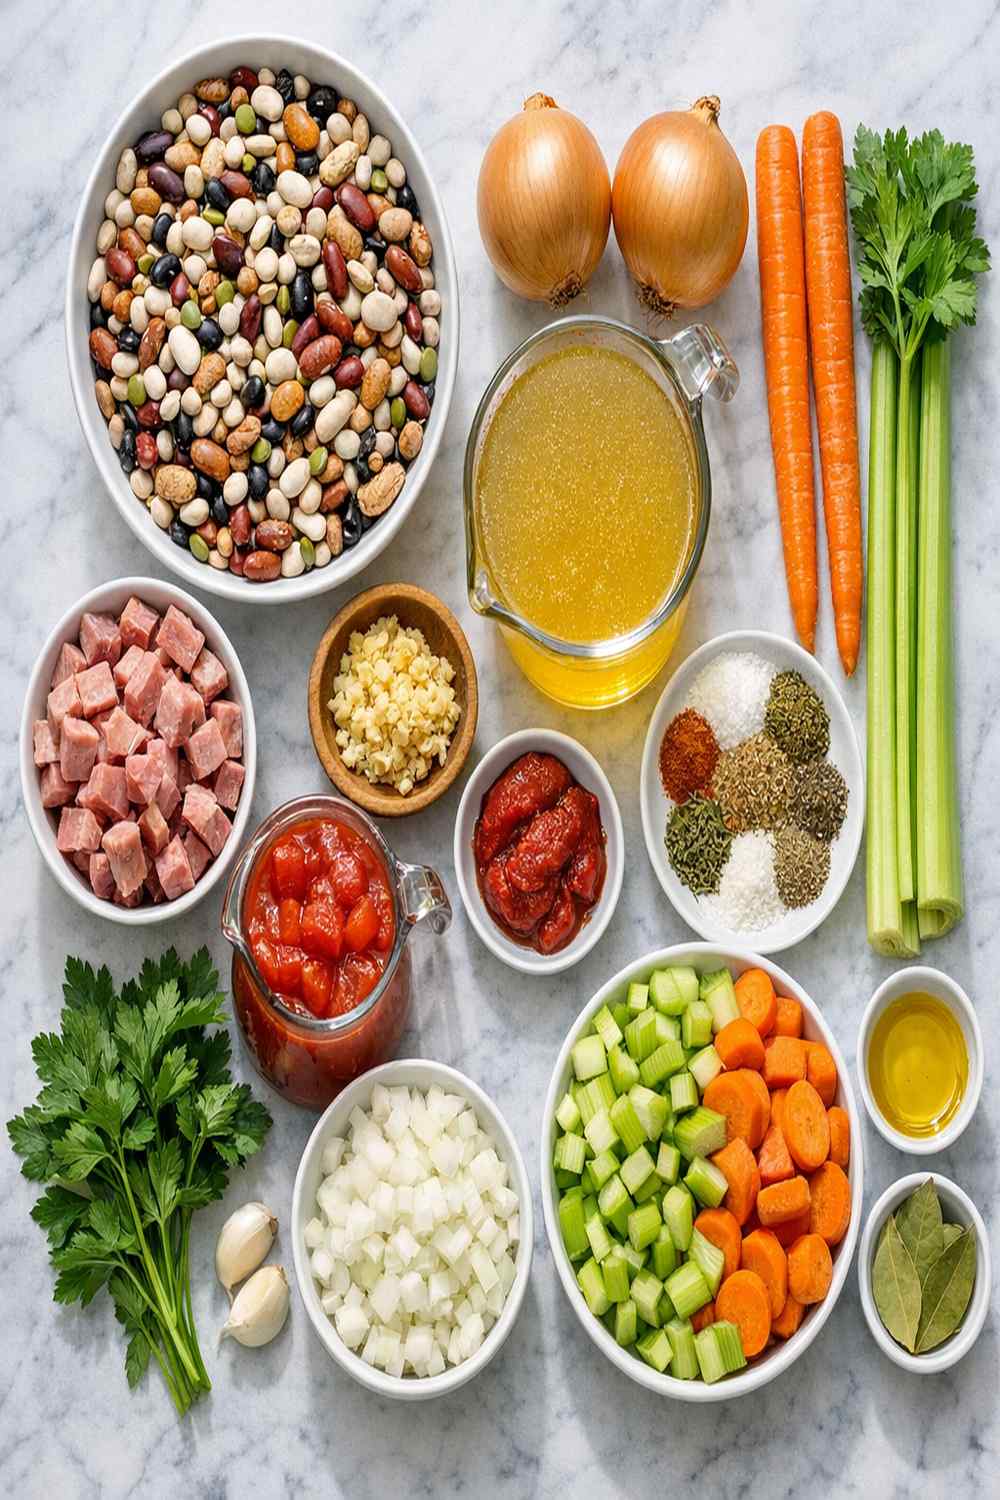
I’ve organized these ingredients to reflect how I actually use them in the slow cooker. You’ll notice I’ve included specific notes about sourcing and swaps—that’s my dietitian background meeting my practical kitchen experience. This recipe makes 8-10 generous servings, perfect for a family meal with leftovers or a week of lunch prep.
- 1 teaspoon dried thyme (oregano can substitute if needed)
- 2 cups diced ham (leftover holiday ham is perfect; rotisserie chicken works as a substitute if budget is tight)
- 1 small yellow onion (diced; white onion works similarly and costs slightly less)
- 2 teaspoons dried basil (Italian seasoning works if you don’t have basil)
- 14.5 ounces canned diced tomatoes with Italian herbs (or plain diced tomatoes plus ½ teaspoon dried Italian seasoning)
- 1 bay leaf (essential for flavor, costs mere cents per leaf)
- 20 ounces mixed dried bean blend (such as navy, pinto, black-eyed peas, kidney, and lentil combinations; the variety matters for nutrient diversity)
- 8 cups water or low-sodium chicken broth (homemade is most budget-friendly; store-bought works fine)
- 2 medium carrots (peeled and diced; baby carrots are more expensive per pound, so avoid them here)
- ½ lemon (juiced fresh; bottled lemon juice works in a pinch, though fresh is superior)
- 3 cups chopped fresh kale (lacinato or curly; frozen chopped kale works equally well and is often cheaper)
- 2 celery ribs (diced; save the leafy tops for broth-making)
- 1 teaspoon dried savory herb seasoning packet (often included with dried bean mixes; optional but adds authentic depth)
- 1 tablespoon minced garlic (fresh, jarred, or even powdered in a pinch; budget swap: use ½ teaspoon garlic powder)
How to Make Bean Soup Crock Pot Recipe?
I’m going to walk you through this step-by-step, just as I would if you were standing in my kitchen. The beauty of slow cooker cooking is that it’s forgiving—you’re not racing against time or managing high heat. You’re simply combining ingredients and letting time do the work.
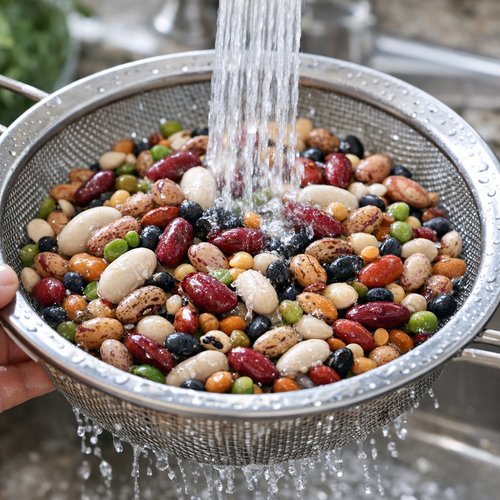
Step 1: Prepare and Sort Your Beans
Start by rinsing your dried bean blend thoroughly under cool running water. This removes dust and any debris that may have settled during storage. Spread the beans on a clean kitchen towel or a flat plate and look through them carefully, removing any discolored beans, pebbles, or broken pieces. This takes about 5 minutes and is genuinely important—it prevents unpleasant surprises while eating. I learned this lesson the hard way as a child when my mother’s sharp look told me to chew more carefully!
Once sorted, add the beans directly to your slow cooker insert. Don’t add liquid yet. This is your foundation.
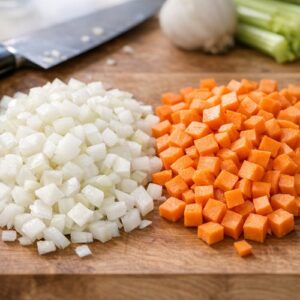
Step 2: Prepare Your Vegetables
Dice your onion into roughly quarter-inch pieces—you want them visible but not chunky. Peel and dice your carrots similarly. Remove the tough outer strings from your celery ribs with a vegetable peeler, then dice them as well. The goal is evenly sized pieces so everything cooks at the same rate. If you’re using jarred minced garlic, measure it out now; if using fresh, mince it fine.

Keep your vegetables separate from the beans for now. This gives you a moment to assess quantities and make adjustments if needed—a practical habit I developed during my early meal-planning days when I had to work with whatever was available.
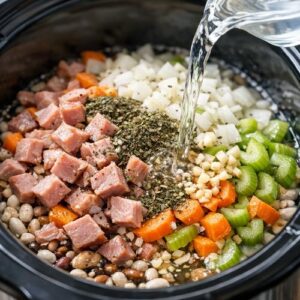
Step 3: Layer Everything Into the Slow Cooker
Add your prepared ham, onion, carrots, celery, and garlic directly on top of the beans. Sprinkle in your dried basil and thyme. Pour your water or broth over everything slowly, stirring gently to combine. The liquid should cover the beans by about two inches. Now, lay your bay leaf on top of the soup—it will float or nestle in the liquid, and it’s easy to spot and remove later.

Cover your slow cooker with its lid and set it to HIGH for 6 hours. This is important: resist the urge to lift the lid during cooking. Every time you peek, you add 15-20 minutes to the cooking time because heat escapes and moisture evaporates. Trust the process.
Step 4: Test Beans for Doneness and Add Final Ingredients
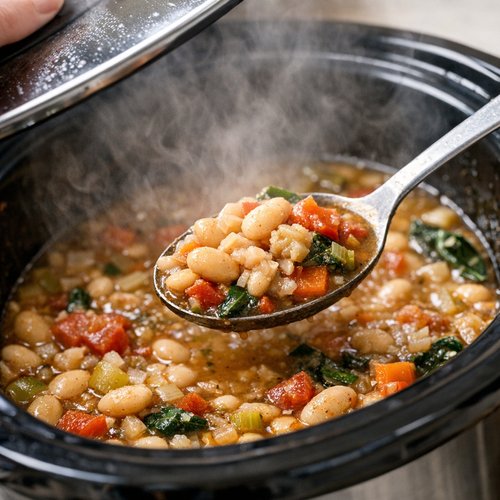
After exactly 6 hours, remove the lid carefully—steam will rise, so be cautious. The beans should be completely soft and tender, breaking apart easily when pressed against the side of the slow cooker with a spoon. If they still feel slightly firm, cook for an additional 30 minutes to 1 hour.
Once the beans are perfectly tender, remove and discard the bay leaf. Add your lemon juice, canned tomatoes with their juice, and your chopped kale. If using frozen kale, it will thaw immediately in the hot broth—no pre-thawing needed. Stir everything together thoroughly.
Step 5: Final Seasoning and Rest
Replace the lid and cook on HIGH for 20 additional minutes. This allows the kale to wilt slightly and the flavors to meld once more. In the final minutes, sprinkle in that savory seasoning packet—the one that came with your dried bean blend—and stir once more. Taste the soup and adjust seasoning with salt and pepper as needed.
Let the pot sit for 5 minutes off the heat before ladling and serving. This allows flavors to settle slightly and makes serving easier.
Expert’s Nutritional Tip
As a registered dietitian, I always emphasize the importance of combining plant-based proteins with complete proteins to maximize amino acid absorption. This recipe does exactly that: the beans provide incomplete proteins rich in lysine, while the ham provides complete proteins rich in methionine. When combined, your body receives all nine essential amino acids necessary for muscle maintenance and tissue repair. The addition of kale in the final cooking minutes preserves its heat-sensitive vitamin C content, which actually aids in iron absorption from both the beans and ham—a synergistic effect many people overlook.
Tips and Tricks
- Swap the Ham for Other Proteins – If you don’t have ham on hand, use 2 cups of diced rotisserie chicken, crumbled bacon, or even skip the meat entirely for a vegetarian version. The cooking time remains the same.
- Make a Vegetarian Version – Omit the ham and replace water with vegetable broth. Add 1 tablespoon of tomato paste and 1 teaspoon of Worcestershire sauce (or soy sauce for deeper umami) to replicate the savory depth that ham provides.
- Use a Slow Cooker Liners – These disposable liners make cleanup nearly effortless. I resisted them for years until I realized that easier cleanup means I’m more likely to cook this soup regularly. Practical wins.
- Double the Recipe – This scales beautifully to a larger slow cooker. Simply double all ingredients and extend cooking time to 7-8 hours on HIGH or 10-12 hours on LOW. You’ll have enough to serve a crowd and fill your freezer.
- Add Spice Gradually – If your family enjoys heat, add red pepper flakes, cayenne, or hot sauce at the table rather than to the pot. This gives everyone control over their own spice level without affecting the base recipe.
- Save Vegetable Scraps for Broth – Those carrot peels, celery leaves, and onion skins? Save them in your freezer for making homemade broth. It’s the opposite of wasteful cooking and costs literally nothing.
Can I Store Bean Soup Crock Pot Recipe?
Absolutely—and this is one of the recipe’s greatest strengths. Store cooled soup in airtight containers in your refrigerator for up to 5 days. The flavors actually deepen after a day or two as the beans continue to absorb the broth.
For longer storage, freeze portions in freezer-safe containers or bags for up to 3 months. I recommend freezing in individual portions using an ice cube tray for the first few hours, then transferring the cubes to freezer bags. This saves space and lets you thaw only what you need.
To reheat: thaw overnight in the refrigerator, then warm gently on the stovetop over medium heat, adding a splash of broth or water if the soup seems too thick. You can also reheat frozen soup directly in a pot over low heat, stirring occasionally. The slow reheating preserves the delicate flavor profile you’ve spent all day developing.
Nutrition Information
Based on USDA nutritional database standards for dried beans, ham, and fresh vegetables, a single 1.5-cup serving of this soup contains approximately 285 calories, 15 grams of protein, 42 grams of carbohydrates, 8 grams of fiber, and 6 grams of fat. The sodium content is approximately 820 milligrams per serving if using low-sodium broth; this increases to about 1,200 mg if using standard broth or if ham is particularly salty.
The standout nutritional feature is the fiber content—those 8 grams per serving represent approximately 30% of the daily recommended intake. Fiber supports digestive health, promotes satiety, and helps maintain stable blood sugar levels throughout the day. The combination of soluble fiber from beans and insoluble fiber from kale creates an ideal mix for gastrointestinal health.
The iron content is particularly notable: beans and ham together provide approximately 4.2 milligrams of iron per serving, or about 23% of the daily value for adult women and 53% for adult men. The vitamin C from the kale and tomatoes enhances iron absorption significantly.
What Can I Serve With Bean Soup Crock Pot Recipe?
This soup is wonderfully versatile as a main course, but it also pairs beautifully with complementary foods. I often serve mine with crusty bread for soaking up every last drop of broth, or alongside a simple salad for texture contrast. If you’re looking for heartier accompaniments, consider pairing it with baked creamy chicken for a surf-and-turf inspired meal, or try a one-pot vegan minestrone as a contrasting vegetable-forward side.
- Crusty Sourdough or Whole Grain Bread – Toasted with just a touch of olive oil and garlic, this becomes more than an accompaniment; it becomes part of the experience. Break off pieces and dip into the broth.
- Simple Green Salad – A peppery arugula salad with lemon vinaigrette provides brightness and leafy texture that contrasts beautifully with the hearty soup.
- Crispy Cornbread – The sweetness of cornbread plays against the savory, herbed soup in unexpected ways. Make it from scratch using budget-friendly cornmeal.
- Roasted Vegetables – Roasted Brussels sprouts, broccoli, or root vegetables add textural interest and additional nutrients.
- Cheese and Crackers – A sharp aged cheddar or aged gouda with whole grain crackers makes the meal feel more substantial without requiring additional cooking.
- Pickled Vegetables – Pickled carrots, onions, or peppers add acidic brightness that cleanses the palate between spoonfuls.
Substitutes
- Beans – Use Single-Variety Beans – If you can only find individual bean types, choose kidney beans, navy beans, or black beans. Cook time remains the same, though nutritional profiles will shift slightly. The single-bean version will be less nutritionally complex but equally delicious.
- Ham – Substitute Rotisserie Chicken – Shred 2 cups of store-bought rotisserie chicken and add it during the final 20 minutes of cooking. This keeps costs low while providing similar protein content. The flavor profile will be lighter and less smoky.
- Ham – Use Bacon – Cook 8-10 slices of bacon until crispy, then crumble and add during the final cooking step. This creates a deeper, smokier flavor. This option is often slightly more expensive per ounce but adds dramatic flavor.
- Fresh Kale – Use Frozen Spinach – Three cups of frozen spinach (thawed and excess moisture squeezed out) works beautifully. The flavor is slightly milder, but the nutrition remains excellent and costs are often lower.
- Fresh Kale – Use Collard Greens – These are often cheaper than kale and provide similar nutritional profiles. They’ll need an extra 5 minutes of cooking time to soften completely.
- Canned Tomatoes – Use Fresh – During peak tomato season, use 2 cups of fresh diced tomatoes instead. This reduces cost and provides superior fresh flavor. The soup will be slightly less thick.
- Chicken Broth – Make Your Own – Save chicken bones and vegetable scraps in your freezer, then simmer them with water for 2-3 hours. This costs pennies and produces superior flavor compared to store-bought broth.
- Lemon Juice – Use Vinegar – If lemon isn’t available, substitute 1 tablespoon of apple cider vinegar or white vinegar for brightness. The flavor profile changes slightly but remains balanced.
Make-Ahead Guide
I developed this make-ahead strategy during my busiest weeks as a registered dietitian when meal planning felt overwhelming but eating well was non-negotiable.
Overnight Prep (Best Practice): Combine all your dry ingredients—sorted beans, dried basil, thyme, and bay leaf—in a freezer bag the night before. Store any other prepared ingredients (diced ham, chopped vegetables, minced garlic) in separate containers in your refrigerator. In the morning, combine everything in your slow cooker and set it going. This takes 5 minutes and ensures your meal is ready by dinner.
Two-Day Advance Prep: Wash, peel, and dice all vegetables two days ahead. Store them in separate containers (onion, carrots, celery). This works best if you’re planning to cook on day three—prepared vegetables begin losing nutrition and developing off-flavors after about 48 hours of storage.
Weekend Batch Cooking: Make a double batch on Sunday, portion it into individual containers, and you’ll have grab-and-go lunches for four days. This is the approach I recommend most strongly for busy families or individuals managing multiple work schedules.
Freezing Prepared Beans: If your schedule is extremely tight, prepare dried beans in your slow cooker on a day when you have extra time, cool them completely, and freeze them in portions. Later, thaw and combine with remaining ingredients for a faster overall cooking time. This takes advance planning but creates true convenience.
Common Mistakes to Avoid
- Mistake #1: Opening the Slow Cooker Lid Too Often – This is the most common issue I see. Each time you lift the lid, heat escapes and moisture evaporates, adding 15-20 minutes to cooking time and potentially drying out your soup. Set the timer, trust the process, and resist the urge to peek. I promise the soup is cooking even though you can’t see it.
- Mistake #2: Skipping the Bean-Sorting Step – I’ve heard so many stories of diners encountering small stones or debris in their bean soups. Take 5 minutes to sort your beans properly. This small step prevents unpleasant surprises and protects your slow cooker’s heating element.
- Mistake #3: Adding Acidic Ingredients Too Early – The lemon juice and tomatoes should be added only in the final 20 minutes of cooking. Adding them early can prevent beans from softening properly because acid slows the breakdown of the bean’s outer skin. This is a chemistry lesson I learned the hard way during my dietetics education.
- Mistake #4: Using Only One Type of Bean – While not a “mistake” per se, the beauty of this recipe is the combination of different bean varieties, which creates nutritional complexity and textural interest. If you must use one type, choose kidney beans for their hearty texture.
- Mistake #5: Overcrowding the Slow Cooker – Don’t fill your slow cooker more than three-quarters full. Overfilling prevents proper heat circulation and results in unevenly cooked soup. Beans at the bottom might be mushy while those at the top remain firm.
Seasonal Variations
Spring Variation: Replace the standard kale with fresh asparagus, chopped and added in the final 5 minutes. Add fresh dill (1 teaspoon) in place of some of the basil. Spring peas (fresh or frozen) add sweetness and nutritional variety. The overall flavor becomes lighter and more herbaceous.
Summer Variation: Use summer squash (zucchini or yellow squash) instead of some of the carrots. Add fresh basil from your garden rather than dried, stirring it in during the final 10 minutes to preserve its delicate flavor. Fresh corn kernels (1 cup) add sweetness. This version feels bright and seasonal.
Fall Variation: Add cubed butternut squash or sweet potato (1 to 1.5 cups) during cooking for 15 minutes to account for longer cooking time needed for these harder vegetables. Increase thyme and add 1 teaspoon of sage. The soup becomes naturally sweeter and more warming. This version serves beautifully alongside Thanksgiving meals.
Winter Variation: Add root vegetables like parsnips, turnips, or rutabaga for earthy depth. Include 1 teaspoon of smoked paprika for smokiness. A splash of apple cider vinegar instead of lemon juice adds seasonal warmth. The flavor profile becomes deeper and more grounding—perfect for cold weather comfort.
Bean Soup Crock Pot Recipe
Ingredients
Method
- Start by rinsing your dried bean blend thoroughly under cool running water. This removes dust and any debris that may have settled during storage. Spread the beans on a clean kitchen towel or a flat plate and look through them carefully, removing any discolored beans, pebbles, or broken pieces. This takes about 5 minutes and is genuinely important—it prevents unpleasant surprises while eating. I learned this lesson the hard way as a child when my mother's sharp look told me to chew more carefully! Once sorted, add the beans directly to your slow cooker insert. Don't add liquid yet. This is your foundation.

- Dice your onion into roughly quarter-inch pieces—you want them visible but not chunky. Peel and dice your carrots similarly. Remove the tough outer strings from your celery ribs with a vegetable peeler, then dice them as well. The goal is evenly sized pieces so everything cooks at the same rate. If you're using jarred minced garlic, measure it out now; if using fresh, mince it fine. Keep your vegetables separate from the beans for now. This gives you a moment to assess quantities and make adjustments if needed—a practical habit I developed during my early meal-planning days when I had to work with whatever was available.
- Add your prepared ham, onion, carrots, celery, and garlic directly on top of the beans. Sprinkle in your dried basil and thyme. Pour your water or broth over everything slowly, stirring gently to combine. The liquid should cover the beans by about two inches. Now, lay your bay leaf on top of the soup—it will float or nestle in the liquid, and it's easy to spot and remove later. Cover your slow cooker with its lid and set it to HIGH for 6 hours. This is important: resist the urge to lift the lid during cooking. Every time you peek, you add 15-20 minutes to the cooking time because heat escapes and moisture evaporates. Trust the process.
- After exactly 6 hours, remove the lid carefully—steam will rise, so be cautious. The beans should be completely soft and tender, breaking apart easily when pressed against the side of the slow cooker with a spoon. If they still feel slightly firm, cook for an additional 30 minutes to 1 hour. Once the beans are perfectly tender, remove and discard the bay leaf. Add your lemon juice, canned tomatoes with their juice, and your chopped kale. If using frozen kale, it will thaw immediately in the hot broth—no pre-thawing needed. Stir everything together thoroughly.

- Replace the lid and cook on HIGH for 20 additional minutes. This allows the kale to wilt slightly and the flavors to meld once more. In the final minutes, sprinkle in that savory seasoning packet—the one that came with your dried bean blend—and stir once more. Taste the soup and adjust seasoning with salt and pepper as needed. Let the pot sit for 5 minutes off the heat before ladling and serving. This allows flavors to settle slightly and makes serving easier.

Notes
FAQs
Can I Make This Recipe on Low Instead of High Heat?
Yes, absolutely. Set your slow cooker to LOW and cook for 10-12 hours instead of 6 hours on HIGH. The result will be equally good—some argue even better because the slower cooking allows flavors to develop more gradually. The final 20-minute step remains the same. This is perfect if you’re starting the soup in the evening for the next day’s dinner, or in the early morning for a later meal. The timing flexibility is one of the slow cooker’s greatest advantages.
What If My Beans Are Still Hard After 6 Hours?
Hard beans after the full cooking time usually indicates one of three issues: your beans are very old (dried beans lose cooking ability over time—use beans within one year of purchase if possible), your water quality is very hard (high mineral content can slow bean softening), or your slow cooker may not be heating properly. Try cooking for an additional 1-2 hours. If beans still don’t soften, they’re likely too old and should be replaced. When purchasing beans, look for even color and avoid packages with many broken pieces, which indicate age.
Can I Use Canned Beans Instead of Dried?
You can, though I don’t recommend it from both nutritional and budgetary perspectives. Canned beans cost three to four times more per pound than dried beans. They also contain added sodium and have already lost some nutritional value during processing. If you must use canned beans, use 6 to 7 cans (about 48 ounces drained), skip the initial 6-hour cooking time, and add everything together, cooking on HIGH for just 45 minutes to 1 hour to allow flavors to blend. The texture will be softer and the broth less developed, but it will still be edible.
How Much Does This Recipe Cost Per Serving?
This is my favorite question because it gets to the heart of affordable cooking. Assuming you’re buying beans in bulk at approximately $1.50-2.00 per pound, carrots at $0.50 per pound, celery at $1.50 per bunch, onions at $0.30 each, and ham at sale prices ($3-5 per pound), your total ingredient cost for the entire pot is approximately $12-16. Divided among 8-10 servings, you’re looking at $1.50-2.00 per serving. This includes the protein, vegetables, seasonings, and broth—a complete, nutritious meal. Compare that to restaurant takeout (typically $12-15 per entree) and you understand why this recipe has been a cornerstone of budget-conscious cooking for generations.
What Is the Shelf Life of Dried Beans?
Dried beans keep well in a cool, dry pantry for up to one year. After that, they begin losing moisture and can become increasingly difficult to soften during cooking. Store them in airtight containers away from direct sunlight, moisture, and temperature fluctuations. I keep mine in glass jars with tight-fitting lids on my pantry shelf. If you buy beans in bulk, consider marking the purchase date on the container so you know when they were purchased. Using older beans requires slightly longer cooking time, which is why sorted, fresh beans are worthwhile.
Can This Soup Be Made in an Instant Pot or Pressure Cooker?
Yes, though the cooking method changes significantly. Use the high pressure setting for 30-35 minutes after bringing the pot to pressure. You’ll need to skip the initial bean-only cooking step. Combine all ingredients except the kale, lemon, and tomatoes, lock the lid, and set the timer. Once cooking is complete, allow natural pressure release for 10 minutes before manually releasing remaining pressure. Then add the kale, tomatoes, and lemon juice, and let it sit for 5 minutes. The pressure cooker method saves hours but produces slightly less developed flavor—the slow method is superior if you have time.
More Recipes You’ll Love
- Baked Beans Recipe on the Stovetop – Another budget-friendly bean dish that celebrates legumes as the star ingredient, perfect for potlucks and side dishes.
- Aglio And Olio Recipe – A simple, pasta-based dish that proves you don’t need expensive ingredients to create restaurant-quality food at home.
- Baked Chimichangas Recipe – Another slow-cooker friendly meal that combines beans with affordable proteins and creates delicious leftovers.
- This Cozy Homemade Soup – Worth adding to your recipe collection.
I hope this recipe becomes part of your regular rotation the way it’s become part of mine. There’s real magic in the patience required for slow-cooker cooking—a lesson my mother taught me all those years ago in our small Massachusetts kitchen. When you commit to six hours of gentle heat and aromatic patience, you’re not just making dinner; you’re creating nourishment, building memories, and teaching yourself that wholesome, affordable food is absolutely within reach.
Don’t forget to mention @affordablefoodideas if you try this recipe! I’d love to see how you’ve adapted it, which seasonal variations you’ve tried, and how this soup has earned its place at your table. Thank you for being part of this journey toward more affordable, more nourishing, more joyful eating.