This post contains affiliate links. As an Amazon Associate I earn from qualifying purchases.
There’s nothing quite like biting into a perfectly saucy chicken sandwich loaded with creamy slaw—especially when you know you’ve kept dinner under budget. Whether you’re planning a casual weeknight meal or prepping ahead for a busy week, this recipe delivers restaurant-quality flavor without the price tag. Pair it with baked beans made on the stovetop or an affordable salad for a complete meal that costs just pennies per person.
How a Small-Town Kitchen Taught Me to Love Affordable Comfort Food
Growing up in rural Massachusetts, my family didn’t have much money, but we had something better: a kitchen where wholesome meals happened every single day. I remember my mother standing at the stove on a Friday evening, transforming inexpensive chicken thighs into something that made my siblings and I gather around the table like we’d just won the lottery.
She taught me that the best meals aren’t about fancy ingredients or trendy techniques—they’re about choosing affordable proteins, building flavor with spices you already have on hand, and adding personality with toppings that make people feel cared for. That philosophy hasn’t changed since I became a registered dietitian. If anything, it’s gotten stronger.
This BBQ chicken sandwich is exactly that kind of meal. It’s the kind of dish my mother would’ve made, and it’s the kind I encourage every person I work with to master. Because when you can create something this delicious for under $2 per serving, you’re not just saving money—you’re reclaiming the joy of feeding yourself and your family well.
What Is This BBQ Chicken Sandwich?
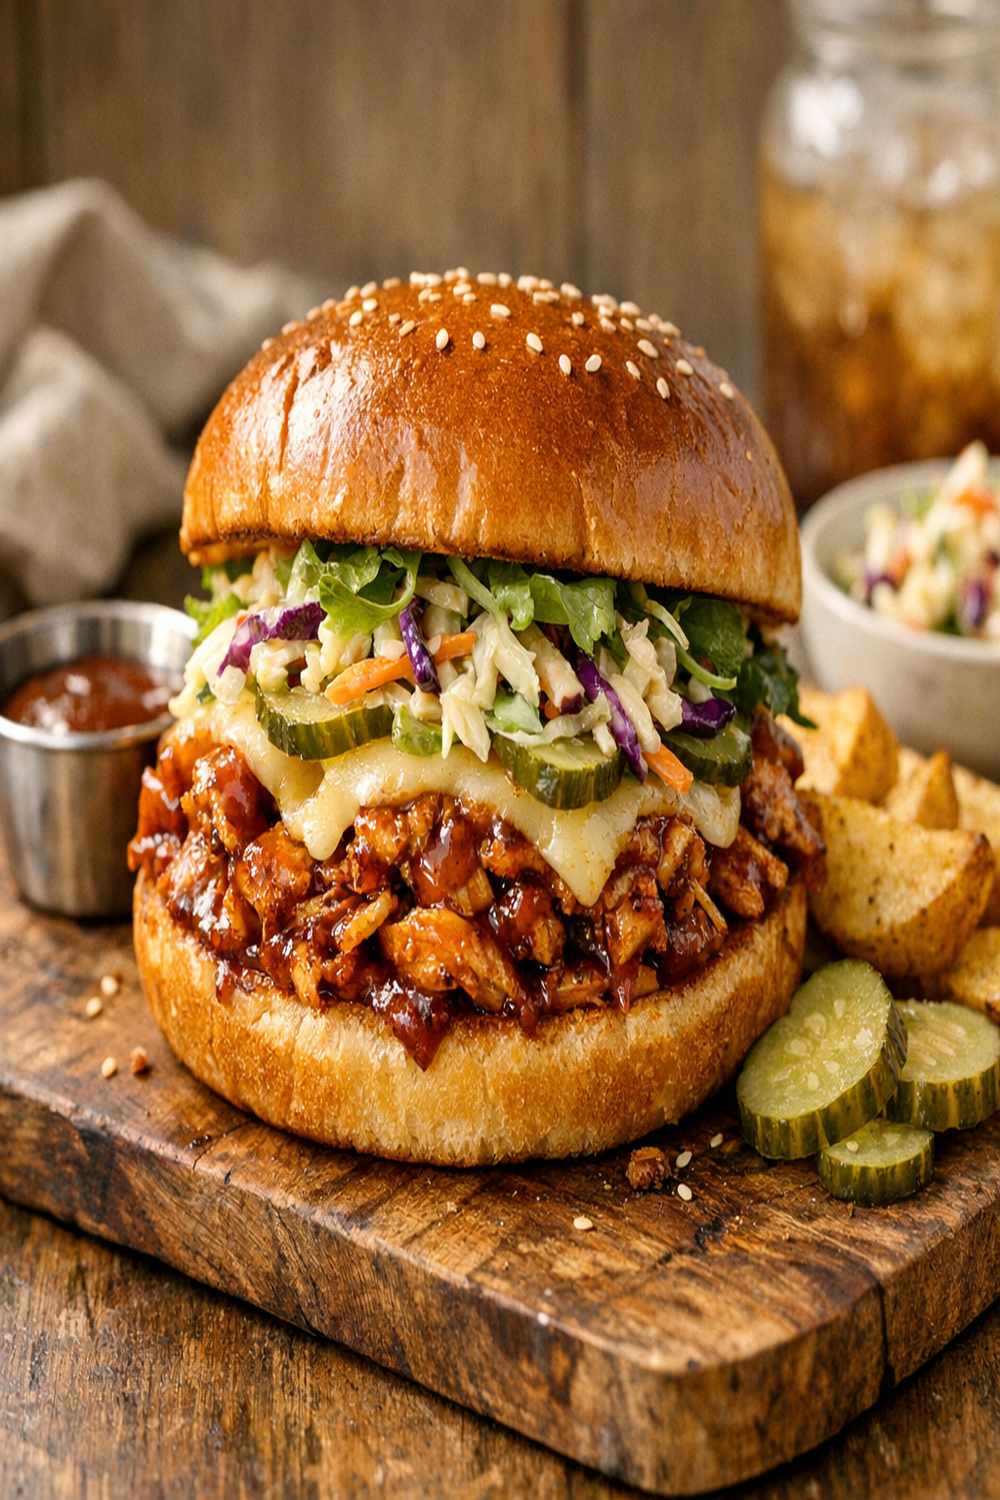
At its heart, this is a simple sandwich built on a foundation of seasoned, pan-seared chicken topped with a tangy-sweet sauce and finished with a cooling ranch-dressed slaw. The beauty lies in the contrast: warm, slightly charred chicken meets cool, crisp vegetables. Smoky spices meet creamy dressing. It’s comfort food that happens to be genuinely affordable.
The sandwich draws inspiration from Southern barbecue traditions, but it’s executed in a way that works for weeknight cooking. Rather than smoking chicken for hours or using expensive specialty sauces, we’re building layers of flavor quickly using pantry staples and a single skillet.
What makes this version special is how the ranch-dressed slaw transforms ordinary coleslaw mix into something that feels almost luxurious—a creamy, flavorful counterpoint that prevents the sandwich from becoming one-dimensional or too heavy. It’s the kind of detail that separates a good sandwich from one you’ll crave all week.
Why You’ll Love This BBQ Chicken Sandwich Recipe
- Budget-friendly proteins – Chicken thighs cost significantly less than breasts while offering superior flavor and moisture. At roughly $3.48 per pound, you’re getting four generous sandwich portions from a single package.
- Genuine weeknight timing – From pantry to plate in under 25 minutes. No marinating. No special equipment. Just a skillet and confidence in what you’re doing.
- Naturally protein-rich – As a dietitian, I’m excited about the nutritional profile here. One sandwich delivers approximately 28 grams of lean protein, making it genuinely filling and satisfying even for larger appetites.
- Complete flavor experience – Smoky, tangy, creamy, and fresh all in one bite. You’re getting complexity without complexity in your cooking process.
- Naturally adaptable – Whether you’re feeding picky eaters, managing dietary restrictions, or working with whatever’s in your pantry, this sandwich bends without breaking.
- Make-ahead friendly – Cook the chicken and prepare the slaw hours in advance. Assembly is literally 60 seconds before serving.
The Ingredients
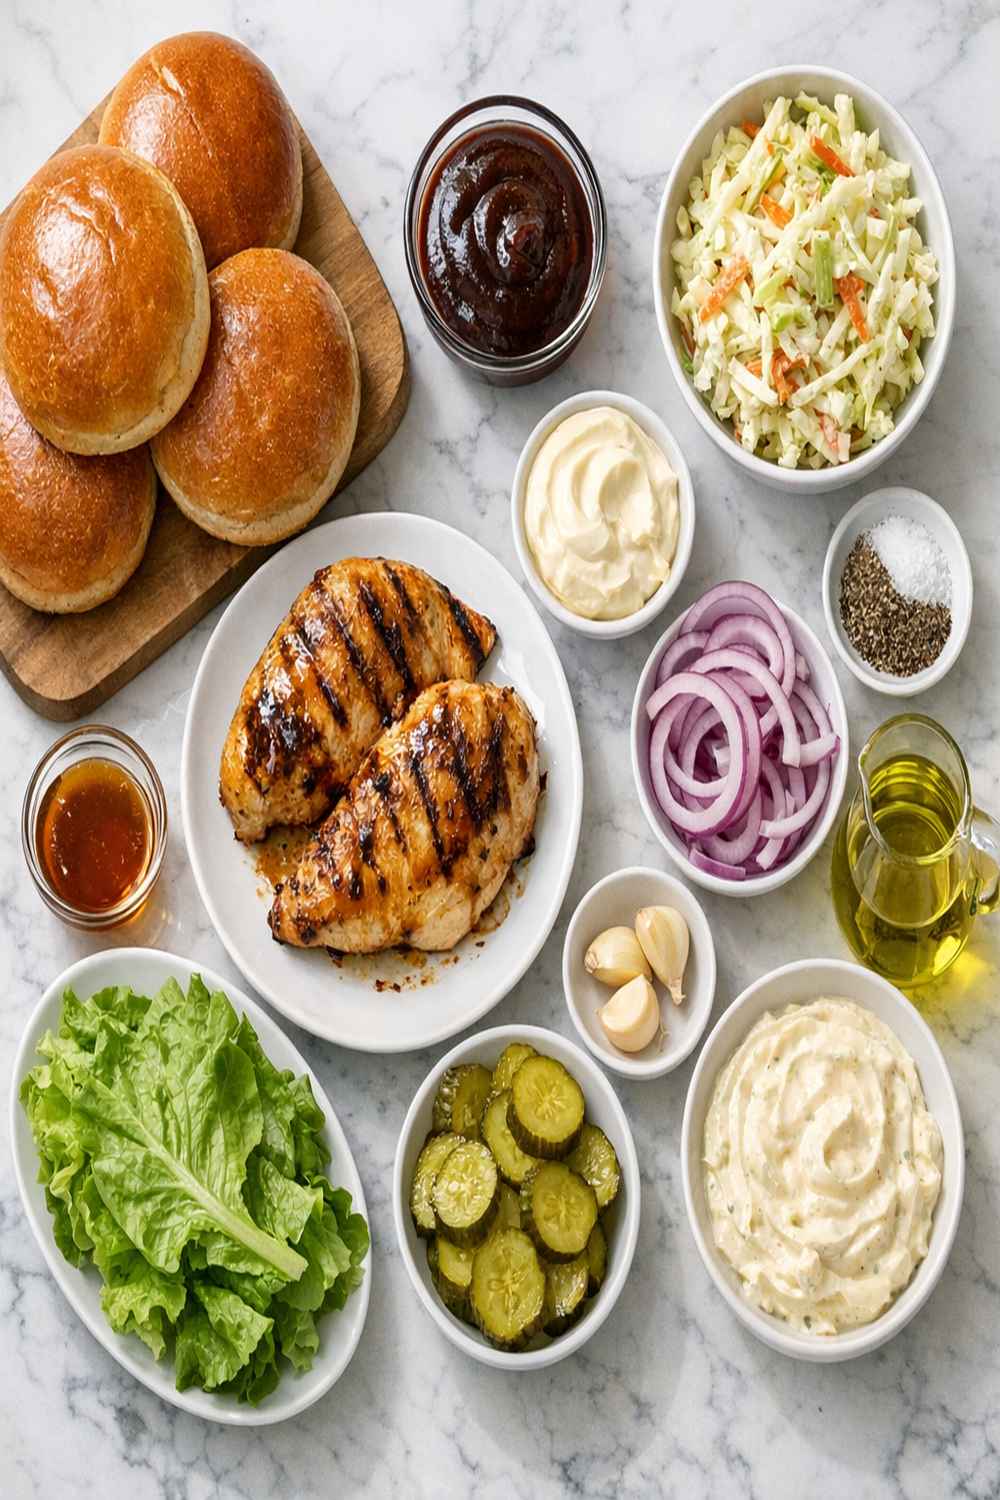
I’ve designed this ingredient list around what most home cooks already have in their pantries. If you’re missing something, I’ve included smart substitutions below. This recipe makes 4 generous sandwiches and costs approximately $7.97 total—less than $2 per serving.
- ¼ teaspoon salt (sea salt or table salt, your choice)
- 1 tablespoon cooking oil (vegetable or canola works perfectly)
- 1 pound boneless, skinless chicken thighs (4-5 thighs, left mostly whole with larger pieces halved)
- ½ teaspoon garlic powder (not garlic salt—we’re controlling sodium)
- ¼ teaspoon black pepper (freshly ground if you have it)
- ¼ cup ranch dressing (store-bought or homemade from a packet)
- 7 ounces coleslaw mix (pre-shredded cabbage and carrots, saves prep time)
- 1 teaspoon smoked paprika (adds depth without heat)
- 2 green onions (sliced thin, adds fresh onion bite)
- ¼ cup barbecue sauce (use whatever brand fits your budget)
- 4 sandwich buns (soft, sturdy buns work best—avoid thin hot dog rolls)
How to Make This BBQ Chicken Sandwich
I’m walking you through each step with the kind of detail I’d use in my own kitchen. Pay attention to sensory cues—how the chicken sounds, how it looks—because your senses are more reliable than any timer.
Step 1: Build Your Spice Blend and Prepare the Chicken
In a small bowl, combine your smoked paprika, garlic powder, salt, and black pepper. Stir them together with a small spoon so everything is evenly distributed. This takes about one minute, but it matters—uneven seasoning creates uneven flavor.
Pat your chicken thighs dry with a paper towel. This step isn’t optional if you want proper browning. Moisture on the surface of the chicken creates steam, and steam prevents that beautiful golden crust we’re after. If any of your thighs are particularly thick (more than an inch), cut them in half lengthwise so you end up with four pieces total that are roughly similar in size. This ensures even cooking.
Sprinkle your spice mixture generously on both sides of each chicken piece, using your fingers to rub it into the meat gently. You want every inch of surface seasoned, not just the top.

Step 2: Sear the Chicken Until Golden and Cooked Through
Place your skillet over medium heat and add the cooking oil. Give it about 90 seconds to heat up. You’ll know it’s ready when a small piece of chicken placed in the oil sizzles immediately—not violently, but a confident, purposeful sizzle.
Carefully add your seasoned chicken to the hot oil, skin-side down if your thighs still have skin, or just any side down if they’re skinless. Do not move them. Resist the urge. Let them sit undisturbed for 5 to 7 minutes. Listen for that gentle sizzle to continue. The chicken will release naturally from the pan when it’s ready.
After 5-7 minutes, check the bottom with a spatula. It should be deep golden brown with some caramelization at the edges. Flip each piece and cook the other side for another 5 to 7 minutes. The second side typically cooks slightly faster because your pan is now at optimal temperature.
Check for doneness by pressing the thickest part of a thigh gently. It should feel firm, not soft and yielding. If you have a meat thermometer (which I recommend for confidence), you’re looking for an internal temperature of 165°F. The total cooking time should be 10 to 14 minutes.

Step 3: Add the BBQ Sauce and Build Flavor
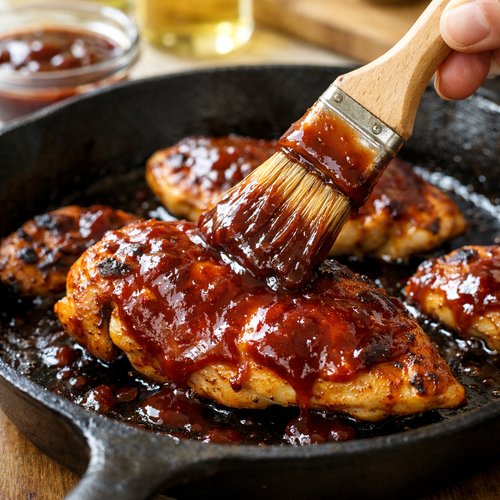
Once your chicken is cooked through, reduce heat to low. Working with one piece at a time, brush both sides generously with your barbecue sauce. I use a small pastry brush, but honestly, a spoon works fine too. You want about one tablespoon total per piece—enough to coat fully but not so much it drips everywhere.
Let the sauced chicken sit in the warm pan for just about 30 seconds on each side. This allows the sauce to caramelize slightly and adhere to the meat rather than sliding right off when you build your sandwich. Then transfer the chicken to a clean plate and set aside while you make the slaw.
Step 4: Make the Creamy Ranch Slaw
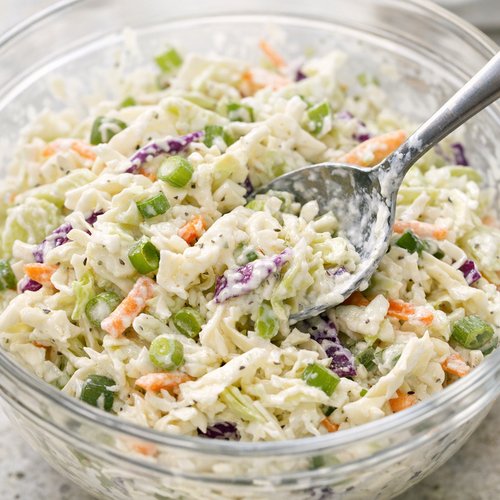
In a medium bowl, combine your pre-shredded coleslaw mix, sliced green onions, and ranch dressing. Using a sturdy spoon or fork, toss everything together until the vegetables are evenly coated. The slaw should look creamy and cohesive, not dry. If it seems too thick, add another tablespoon of dressing.
Taste a small spoonful. You want to notice the tang of the dressing, the sweetness of the carrots, and the fresh bite of the green onions. Adjust seasoning if needed—a tiny pinch of salt or pepper can brighten the whole thing.
You can make this slaw up to 4 hours ahead of serving. It actually tastes better with a little time for flavors to meld, though it may release some liquid. Simply drain any excess before building your sandwiches.
Step 5: Build and Serve Your Sandwiches
Lightly toast your buns if you’d like (this prevents them from getting soggy and adds a subtle textural contrast), or serve them as-is if toasting isn’t your style. Place one piece of sauced chicken on the bottom bun of each sandwich.
Top each piece of chicken with a generous scoop—about ¼ cup—of the ranch slaw. The slaw should mound slightly above the sandwich, creating visual appeal and ensuring every bite includes that creamy vegetable component.
Place the top bun gently on top and serve immediately. Have napkins ready. These sandwiches are meant to be eaten fresh while the chicken is still warm and the slaw is still cool and crisp.

Expert’s Nutritional Tip: Why Chicken Thighs Are Smarter Than You Think
I want to address something directly because I see this mistake constantly in budget cooking. Many people choose chicken breasts thinking they’re the “healthier” option, but that assumption often leads them to either overspend or end up with dry, disappointing meals.
Chicken thighs contain more fat than breasts, yes—but that fat carries flavor and keeps the meat moist during cooking. For a busy home cook, this means more forgiving cooking and better results. From a nutritional standpoint, the fat in chicken thighs is primarily unsaturated fat, which supports heart health. Plus, thighs contain higher levels of zinc, iron, and B vitamins than breasts.
At roughly $3.48 per pound versus $5-7 per pound for breasts, you’re getting superior nutrition, superior flavor, and superior affordability in one package. This is the kind of strategic choice that makes healthy eating sustainable for families living on real budgets.
Tips and Tricks for Perfect Results Every Time
- Don’t skip the paper towel step – Dry chicken browns better. Wet chicken steams. Steam is the enemy of the crispy exterior you’re after. This single step is why your sandwich will look restaurant-quality.
- Use your nose as a cooking guide – When the chicken releases a rich, meaty aroma (especially once the spices hit the hot oil), you know your heat is right. If you smell burning, your temperature is too high.
- Choose quality coleslaw mix – Some pre-shredded varieties are older and have lost crispness. Look for packages that feel light and don’t have visible moisture. If your local store’s coleslaw mix disappoints, shred ½ small head of cabbage and one carrot yourself—it takes 5 minutes with a box grater.
- Make the slaw ahead but assemble last-minute – The slaw is delicious when prepared hours ahead (flavors meld beautifully), but building the sandwich at the last second ensures the slaw stays crisp and cold against the warm chicken.
- Toast your buns if they’re soft or thin – Sturdy buns can handle the moisture from the slaw and sauce, but delicate buns benefit from a quick toast to prevent sogginess.
- Brush sauce onto warm chicken, not hot – If the chicken is too hot, the sauce will slide right off. If it’s cooled completely, the sauce won’t adhere. Warm is the sweet spot.
Make-Ahead Guide: Meal Prep Like a Registered Dietitian
One of my favorite things about this recipe is how naturally it accommodates busy schedules. Here’s exactly how I’d prep this for a family eating throughout the week:
The Night Before: Cook all four pieces of chicken, season and sear them fully, but hold the barbecue sauce. Store the cooked, unsauced chicken in an airtight container in the refrigerator. It keeps perfectly for up to 3 days.
2 Hours Before Serving: Make your ranch slaw (without the buns and without the sauce on the chicken). The slaw actually tastes better with 2-4 hours for flavors to integrate. Store it separately in an airtight container so it doesn’t wilt the chicken.
15 Minutes Before Eating: Gently reheat your chicken pieces either in a warm skillet over low heat (2-3 minutes per side) or in a 300°F oven (5 minutes). Brush with barbecue sauce. Assemble sandwiches and serve.
This approach means you can have homemade sandwiches on busy weeknights without any real cooking happening in the moment. It’s the difference between ordering takeout and cooking from home—just with better timing.
Common Mistakes to Avoid
- Using chicken that’s too wet – Skip the paper towel step and you’ll end up with steamed chicken instead of seared chicken. The texture and flavor suffer dramatically. Dry the meat.
- Overcrowding the pan – Don’t try to cook all four pieces simultaneously if they don’t fit comfortably in one layer. Crowded chicken steams. Cook in batches if needed, keeping the first batch warm in a 200°F oven while you finish the second.
- Moving the chicken too early – I know it’s tempting to flip and check constantly, but you’ll tear the exterior and prevent browning. Trust the timing. Let it sit undisturbed for the full 5-7 minutes.
- Making the slaw too far ahead – While the slaw keeps for days, it begins releasing liquid after about 6 hours. If prepping more than 6 hours ahead, make everything except the slaw, then combine the slaw components about 2 hours before serving.
Seasonal Variations: Adapting This Recipe Year-Round
Spring/Summer: Add fresh herbs to your slaw—thinly sliced fresh cilantro or basil brightens everything beautifully. Add thin slices of fresh tomato between the chicken and slaw. Consider a lighter dressing like a lemon-herb mix instead of traditional ranch.
Fall: Swap your regular coleslaw for a purple cabbage slaw (adds color and nutrients). Try a maple-bourbon barbecue sauce for deeper, warmer notes. A touch of apple cider vinegar in your dressing adds subtle sweetness.
Winter: Lean into creamy dressings and root vegetables. Add shredded apple or pear to your coleslaw for natural sweetness. Consider a spicier rub if you want more heat and warming spices.
Can I Store This BBQ Chicken Sandwich?
Storage depends on whether you’re storing components or assembled sandwiches:
Cooked chicken alone: Keeps perfectly for up to 3 days in an airtight container in the refrigerator. Reheat gently before serving to maintain texture. Frozen cooked chicken keeps for up to 3 months.
Ranch slaw: Keeps for up to 5 days in an airtight container, though it’s best consumed within 2 days for optimal crispness. If liquid accumulates, drain before using.
Assembled sandwiches: Best eaten within 2 hours of assembly. The bun will absorb moisture from the slaw and sauce, leading to sogginess. If you must make sandwiches ahead, wrap them tightly in foil and refrigerate, then unwrap and let sit at room temperature for 10 minutes before eating.
Barbecue sauce-coated chicken: If you’ve already brushed the sauce on the chicken, use within 1 day. The sauce can become sticky or develop off-flavors after longer storage.
Nutrition Information
Based on USDA nutritional databases and standard serving assumptions (one sandwich = one piece of chicken plus approximately ¼ cup slaw on one bun), here’s what you’re getting per serving:
Calories: approximately 385 calories
Protein: 28 grams (59% of daily value for a 2,000 calorie diet)
Fat: 12 grams (primarily from the chicken’s natural fat and the dressing)
Carbohydrates: 38 grams (mostly from the bun)
Fiber: 2 grams (from the vegetables in the slaw)
Sodium: 680 milligrams (approximately 30% of daily recommended intake)
As a registered dietitian, I’m genuinely pleased with this nutritional profile. You’re getting substantial protein that keeps you satisfied, reasonable calories that fit into most dietary approaches, and genuine vegetables contributing fiber and micronutrients. The fat content comes primarily from the chicken (unsaturated fat with nutritional benefits) and the dressing, and neither is excessive.
This is the kind of sandwich that satisfies both nutritionally and practically. You could eat this every week without nutritional concern, and your body would thank you for the quality protein and vegetable content.
What Can I Serve With This BBQ Chicken Sandwich?
While this sandwich is complete on its own, pairing it with the right sides transforms the meal into something restaurant-worthy. I’m particularly drawn to sides that either echo the barbecue theme or provide textural contrast.
Classic barbecue pairings: Nothing says “I planned this meal” like homemade baked beans made on the stovetop. They complement the smoked spices beautifully and cost just pennies to make. If you want something lighter, try an affordable salad with a tangy vinaigrette to cut through the richness of the sandwich.
- Crispy oven fries – Cut potatoes into thin fries, toss with a bit of oil and salt, roast at 425°F for 20-25 minutes. They echo the crispy exterior of the chicken.
- Pickled vegetables – Quick-pickled cucumber or watermelon radish adds bright acidity and crunch. Make them ahead in a simple vinegar and salt brine.
- Corn on the cob – A nod to traditional barbecue. Grill it, boil it, or roast it—the sweetness balances the savory sandwich perfectly.
- Creamy coleslaw (different from our sandwich topping) – If you want slaw on the side too, make a traditional cabbage slaw with a thicker dressing. The contrast between textures is satisfying.
- Watermelon slices – A refreshing, hydrating counterpoint. Particularly lovely on warm evenings.
- Grilled vegetables – Zucchini, bell peppers, or eggplant brushed with oil and grilled add sophisticated flavor without adding cooking complexity.
Substitutes: Making This Recipe Work With What You Have
- Can’t find coleslaw mix? – Use ½ small head of green cabbage shredded with a box grater plus one grated carrot. Takes about 5 minutes and costs roughly the same. Or use any combination of shredded raw vegetables—beets, radish, apple all work beautifully.
- No ranch dressing available? – Mix ¼ cup mayonnaise with 1 tablespoon lemon juice, ½ teaspoon garlic powder, and a pinch of herbs (dried or fresh). You’ve just made ranch from scratch for about the same cost.
- Different protein preference? – This recipe adapts beautifully to turkey thighs (slightly leaner), pork shoulder (richer), or even firm tofu (for vegetarian versions). Cooking times may vary slightly, but the seasoning and slaw approach remains exactly the same.
- Prefer homemade barbecue sauce? – Mix ¼ cup ketchup, 2 tablespoons molasses, 1 tablespoon apple cider vinegar, ½ teaspoon smoked paprika, ¼ teaspoon garlic powder, and a pinch of salt. Adjust to taste. This homemade version costs less than a dollar per batch.
- Different spice profile? – Not into smoked paprika? Try chili powder, cumin, or even a pinch of cayenne for heat. The formula stays the same—you’re just changing which flavors lead the dish.
- Want more vegetables in the slaw? – Add diced apple, shredded beets, or thinly sliced radish to your coleslaw mix. Each adds distinct flavor and textural interest without changing the cooking method.
- No specific bun preference? – This works equally well on brioche buns (richer), whole wheat buns (earthier), Hawaiian rolls (sweeter), or even lettuce wraps if you prefer low-carb. The sandwich’s success doesn’t depend on a specific bun.
- Budget running tight? – Skip the green onions and use the money you save toward better quality chicken. Or swap the pre-made coleslaw for shredded cabbage (even cheaper per serving).
Bbq Chicken Sandwich Recipe
Ingredients
Method
- In a small bowl, combine your smoked paprika, garlic powder, salt, and black pepper. Stir them together with a small spoon so everything is evenly distributed. This takes about one minute, but it matters—uneven seasoning creates uneven flavor. Pat your chicken thighs dry with a paper towel. This step isn't optional if you want proper browning. Moisture on the surface of the chicken creates steam, and steam prevents that beautiful golden crust we're after. If any of your thighs are particularly thick (more than an inch), cut them in half lengthwise so you end up with four pieces total that are roughly similar in size. This ensures even cooking. Sprinkle your spice mixture generously on both sides of each chicken piece, using your fingers to rub it into the meat gently. You want every inch of surface seasoned, not just the top.

- Place your skillet over medium heat and add the cooking oil. Give it about 90 seconds to heat up. You'll know it's ready when a small piece of chicken placed in the oil sizzles immediately—not violently, but a confident, purposeful sizzle. Carefully add your seasoned chicken to the hot oil, skin-side down if your thighs still have skin, or just any side down if they're skinless. Do not move them. Resist the urge. Let them sit undisturbed for 5 to 7 minutes. Listen for that gentle sizzle to continue. The chicken will release naturally from the pan when it's ready. After 5-7 minutes, check the bottom with a spatula. It should be deep golden brown with some caramelization at the edges. Flip each piece and cook the other side for another 5 to 7 minutes. The second side typically cooks slightly faster because your pan is now at optimal temperature. Check for doneness by pressing the thickest part of a thigh gently. It should feel firm, not soft and yielding. If you have a meat thermometer (which I recommend for confidence), you're looking for an internal temperature of 165°F. The total cooking time should be 10 to 14 minutes.

- Once your chicken is cooked through, reduce heat to low. Working with one piece at a time, brush both sides generously with your barbecue sauce. I use a small pastry brush, but honestly, a spoon works fine too. You want about one tablespoon total per piece—enough to coat fully but not so much it drips everywhere. Let the sauced chicken sit in the warm pan for just about 30 seconds on each side. This allows the sauce to caramelize slightly and adhere to the meat rather than sliding right off when you build your sandwich. Then transfer the chicken to a clean plate and set aside while you make the slaw.

- In a medium bowl, combine your pre-shredded coleslaw mix, sliced green onions, and ranch dressing. Using a sturdy spoon or fork, toss everything together until the vegetables are evenly coated. The slaw should look creamy and cohesive, not dry. If it seems too thick, add another tablespoon of dressing. Taste a small spoonful. You want to notice the tang of the dressing, the sweetness of the carrots, and the fresh bite of the green onions. Adjust seasoning if needed—a tiny pinch of salt or pepper can brighten the whole thing. You can make this slaw up to 4 hours ahead of serving. It actually tastes better with a little time for flavors to meld, though it may release some liquid. Simply drain any excess before building your sandwiches.

- Lightly toast your buns if you'd like (this prevents them from getting soggy and adds a subtle textural contrast), or serve them as-is if toasting isn't your style. Place one piece of sauced chicken on the bottom bun of each sandwich. Top each piece of chicken with a generous scoop—about ¼ cup—of the ranch slaw. The slaw should mound slightly above the sandwich, creating visual appeal and ensuring every bite includes that creamy vegetable component. Place the top bun gently on top and serve immediately. Have napkins ready. These sandwiches are meant to be eaten fresh while the chicken is still warm and the slaw is still cool and crisp.

Notes
FAQs
Can I make this sandwich without a stovetop using a slow cooker or Instant Pot instead?
Absolutely. If you’re using a slow cooker, place seasoned chicken thighs in the insert with ¼ cup liquid (water or broth), cover, and cook on low for 4-5 hours or high for 2-3 hours. The chicken will be tender, though you’ll miss the beautiful seared exterior. Transfer to a plate, brush with barbecue sauce, and proceed with sandwich assembly.
For an Instant Pot (pressure cooker), add ½ cup liquid, season the chicken, cook at high pressure for 12 minutes per pound (about 12 minutes total for this recipe), then quick release. Again, searing is sacrificed, but the convenience is real. If you want that seared texture, use the sauté function before pressure cooking to brown the chicken first—this takes about 5 minutes and elevates the entire dish.
What’s the difference between chicken thighs and chicken breasts nutritionally, and why do you specifically recommend thighs for this recipe?
This is something I discuss constantly with clients because it’s genuinely misunderstood. Chicken thighs contain approximately 9 grams of fat per 3-ounce serving compared to 3 grams in breast meat. However, most of that fat in thighs is unsaturated fat—the heart-healthy kind. Thighs are also richer in selenium (immune support), phosphorus (bone health), and B vitamins (energy metabolism).
For this specific recipe, thighs are superior because: (1) they’re more forgiving—you’re less likely to dry them out, (2) they cost significantly less, (3) their natural fat carries the smoky spice flavors better, and (4) they maintain better texture through reheating if you’re meal prepping.
If you genuinely prefer breast meat, use it—just add an extra tablespoon of oil to the pan and watch carefully to avoid overcooking. Breasts need 4-5 minutes per side rather than 5-7, and they dry out quickly if overcooked.
Can I grill these chicken pieces instead of using a stovetop skillet?
Yes, and I’d actually encourage it during warm months. Preheat your grill to medium heat (about 400°F). Season the chicken identically, then grill over direct heat for 6-8 minutes per side depending on thickness. You’ll get beautiful grill marks and a slightly smokier flavor profile that complements the barbecue sauce beautifully.
Watch for flare-ups if you’re applying barbecue sauce to thighs over high heat—the sugars in the sauce can burn quickly. Apply the sauce during the last minute of cooking on each side rather than at the beginning. Everything else about assembly and serving remains identical.
Is there a way to make this lower in sodium for someone watching salt intake?
Absolutely. The primary sodium sources in this recipe are the barbecue sauce and the ranch dressing—not the chicken itself. To reduce sodium: (1) choose a low-sodium or reduced-sodium barbecue sauce (brands vary widely in sodium content—check labels), (2) make your slaw dressing from scratch using mayonnaise and lemon juice instead of store-bought ranch, and (3) reduce the salt in the spice rub to ⅛ teaspoon or omit it entirely.
Using these adjustments, you can reduce sodium to approximately 400 milligrams per sandwich instead of the current 680 milligrams—a meaningful reduction for someone managing blood pressure. The flavor remains excellent because the smoked paprika and garlic powder carry plenty of taste even without added salt.
How do I know when the chicken is actually done, besides using a thermometer?
Good question, especially if you don’t have a thermometer handy. The most reliable method is the firmness test: press the thickest part of the thigh gently with your finger. Undercooked chicken feels soft and yielding, like pressing into a water balloon. Perfectly cooked chicken feels firm but not hard—similar to the fleshy part of your hand between thumb and forefinger when your hand is relaxed.
You can also slice into the thickest part—it should show no pink and no liquid should run out (any liquid should be clear, not pink or bloody). Finally, the juices should run clear when the meat is pierced with a fork or skewer.
If you’re uncomfortable relying on these visual and tactile cues, invest in an instant-read thermometer (they cost $15-20 and last years). The 165°F internal temperature is the safe standard, and knowing this removes all guesswork from chicken cooking forever.
More Recipes You’ll Love
- Baked Creamy Chicken Recipe – A stovetop-free approach using the oven, perfect for when you want hands-off cooking with similarly affordable chicken
- Baked Chimichangas Recipe – Extends your leftover cooked chicken into an entirely new meal using budget-friendly tortillas and common pantry ingredients
- my favorite salad – The perfect cool-weather side that pairs beautifully with barbecued items and keeps for days
- Grillable Veggie Burger – If you’re looking to alternate protein sources or accommodate vegetarian family members alongside these sandwiches
- This Homemade Beef Recipe – Worth adding to your recipe collection.
- My Weeknight Chicken Recipe – Worth adding to your recipe collection.
This BBQ chicken sandwich has become a staple in my own kitchen because it respects both my budget and my commitment to feeding my family well. It’s the kind of recipe that works whether you’re stressed and need dinner in 20 minutes or meal prepping calmly on Sunday afternoon.
I hope you’ll make this soon and discover what I already know—that affordable doesn’t mean compromising on flavor or nutrition. It just means being intentional about your choices. Please don’t forget to mention @affordablefoodideas if you try this recipe. I genuinely love seeing how people in our community adapt these dishes for their families.