This post contains affiliate links. As an Amazon Associate I earn from qualifying purchases.
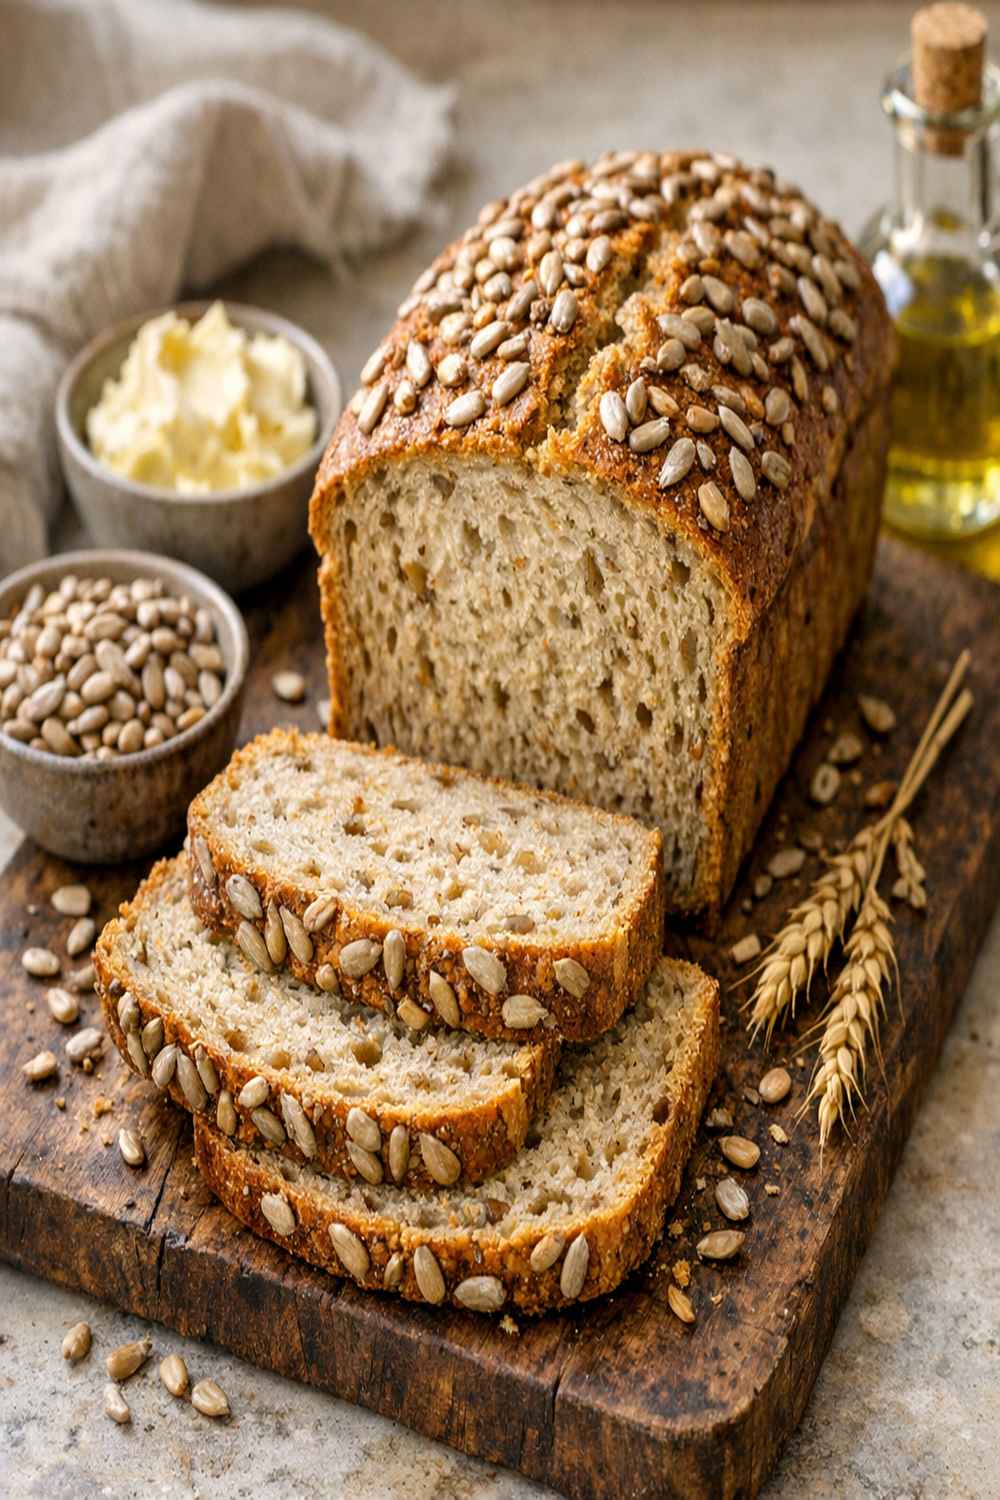
There’s something deeply satisfying about pulling a warm loaf of homemade bread from the oven—especially when you’ve made it yourself for just pennies per slice. This sunflower seed bread pairs beautifully with baked eggs with spinach for breakfast, or alongside baked creamy chicken for dinner. What I love most is how this recipe transforms simple pantry staples into something that tastes bakery-fresh without the bakery price tag.
Why I Started Baking My Own Bread
I grew up in a small town where my grandmother baked bread every single week. I remember standing on a wooden stool next to her mixing bowl, watching her hands work the dough—she never used a recipe, just her intuition and touch. Those loaves fed our entire family for under a dollar, and they tasted infinitely better than anything at the store.
Years later, when I became a registered dietitian, I realized that baking bread isn’t just about nostalgia or saving money—it’s one of the most practical ways to control exactly what goes into your family’s food. No mysterious additives, no preservatives, no inflated prices. Just flour, water, yeast, and seeds. That’s it.
This sunflower seed bread recipe is my modern interpretation of those childhood memories, designed for busy lives and tight budgets. It’s become my go-to when I want to feel accomplished without spending hours in the kitchen or draining my wallet.
What is Bread With Sunflower Seeds Recipe?
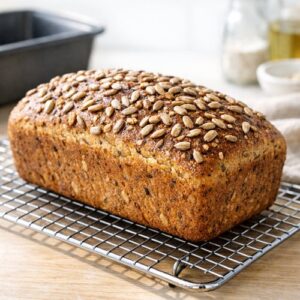
Sunflower seed bread is a rustic, nutrient-dense loaf that combines whole grains with protein-rich seeds for both flavor and nutrition. The sunflower seeds add a subtle nuttiness and beautiful texture throughout, while also boosting the bread’s nutritional profile significantly.
What makes this particular recipe special is the blend of all-purpose flour with wholemeal spelt flour. Spelt is an ancient grain that offers a slightly sweet, complex flavor profile while providing more protein and minerals than standard whole wheat. The combination creates a loaf that’s hearty enough to feel substantial, yet light and airy when baked properly.
Sunflower seeds themselves have been cultivated for thousands of years and are prized not just for taste but for their nutritional density. They’re one of the most economical seeds to buy in bulk, making them perfect for budget-conscious home bakers who don’t want to sacrifice quality.
Why You’ll Love This Bread With Sunflower Seeds Recipe
- Incredibly budget-friendly – At roughly 35-45 cents per slice when using bulk ingredients, this bread costs less than a single store-bought slice while tasting exponentially better.
- Full of plant-based protein and healthy fats – Sunflower seeds provide selenium, vitamin E, and omega-6 fatty acids that support heart health and cellular function.
- Genuinely simple to make – No special equipment needed, no complex techniques. If you can mix and knead, you can make this bread successfully.
- Perfect for meal prep – One batch yields multiple servings, and the bread keeps beautifully throughout the week or freezes for months.
- Customizable to your preferences – Swap seeds, adjust flour ratios, add herbs—this recipe is a foundation you can build on.
- Teaches valuable kitchen skills – Making yeast bread from scratch builds confidence in the kitchen and connects you to food preparation in a meaningful way.
The Ingredients
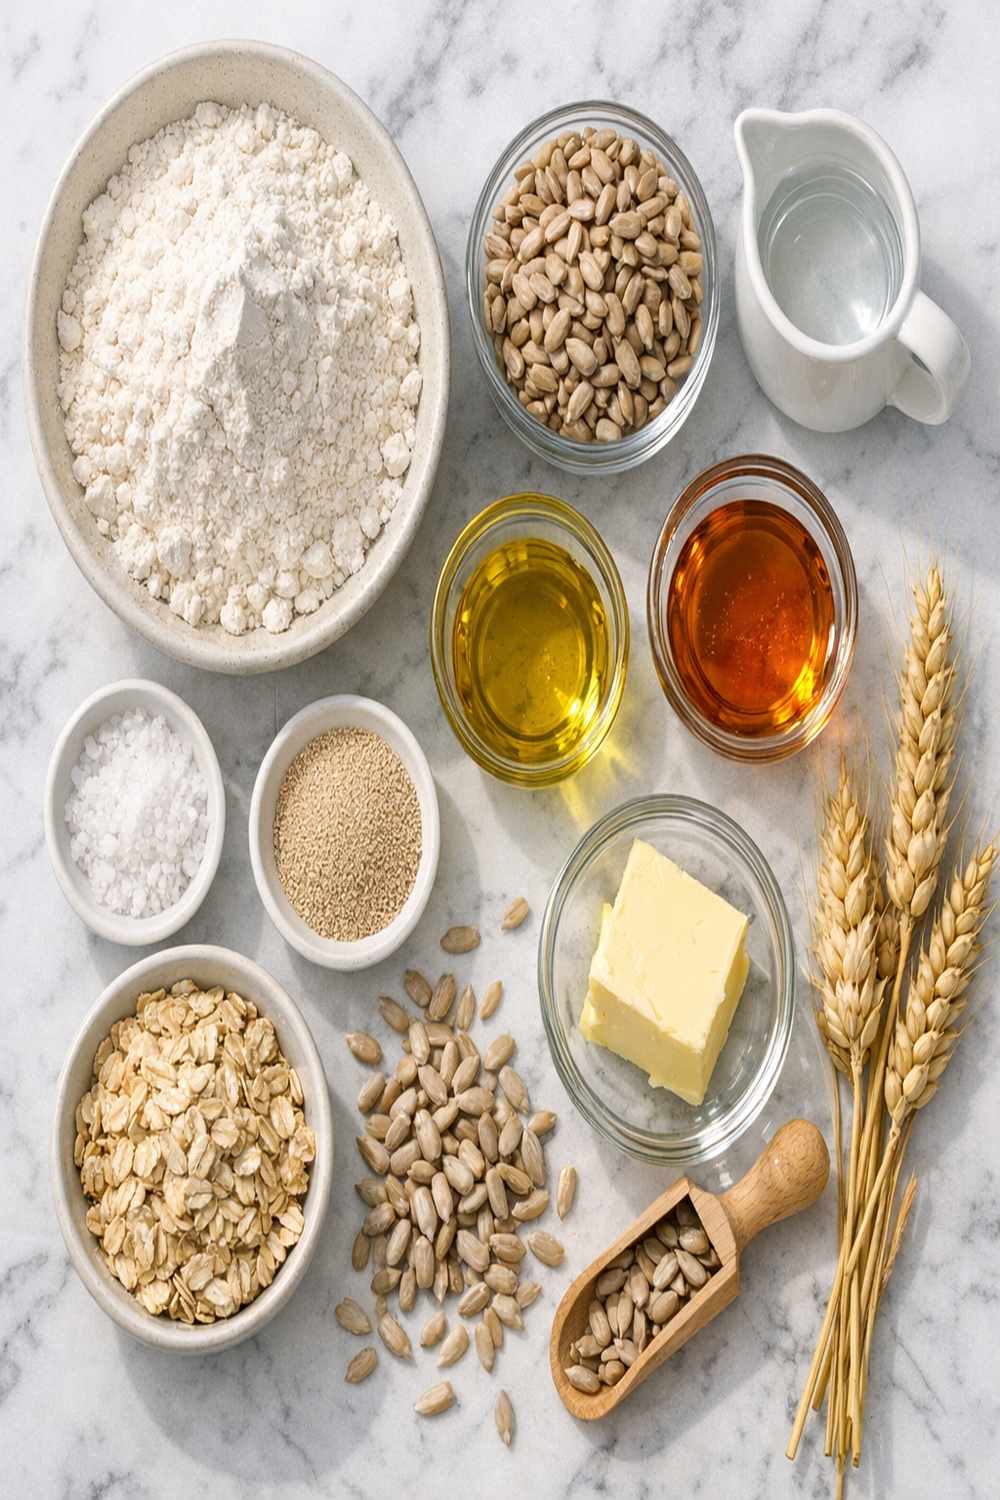
I’ve chosen these ingredients specifically because they’re affordable staples you can find at any grocery store, and they perform beautifully together. Everything here serves a purpose—there’s nothing fancy or hard-to-source. If you buy your yeast, flour, and seeds in bulk, your costs drop even further.
- 1 cup all-purpose flour, spooned and leveled (never packed, as this affects hydration)
- 3 tablespoons sunflower oil, divided (or use vegetable oil as a 1:1 substitute to save 20-30 cents)
- ¾ cup warm water (110-115°F is ideal; use a thermometer or test with your inner wrist)
- ½ teaspoon fine sea salt (or table salt; enhances flavor and strengthens gluten structure)
- ¾ cup wholemeal spelt flour (or use whole wheat flour as a budget-friendly alternative)
- ½ cup raw sunflower seeds (unsalted, from bulk bins if possible—typically 50% cheaper than packaged)
- 1 tablespoon granulated sugar (feeds the yeast and adds slight sweetness without being noticeable)
- additional all-purpose flour for dusting (as needed during kneading)
- 1 tablespoon active dry yeast (standard baking yeast, not instant—it’s more forgiving for beginners)
Yield: Makes 1 loaf (approximately 12-14 slices)
How to Make Bread With Sunflower Seeds Recipe?
This recipe is broken into manageable steps that take roughly 75 minutes total, most of which is passive rising time. You’ll be hands-on for about 15 minutes. Read through all steps before starting so you understand the rhythm of the process.
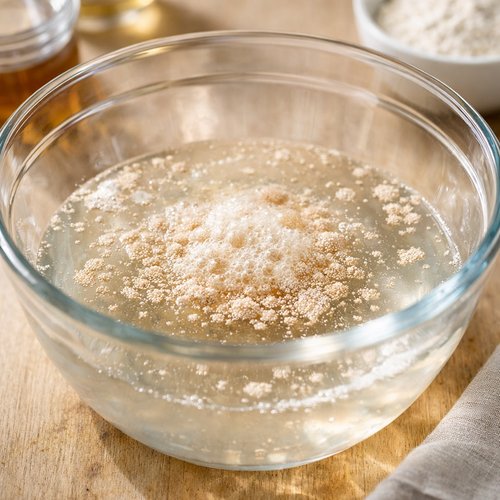
Step 1: Activate Your Yeast
Pour your warm water into a large mixing bowl—it should feel slightly warmer than body temperature, around 110-115°F. Add the active dry yeast and let it sit undisturbed for 1-2 minutes. Then sprinkle the sugar over top and gently stir with a wooden spoon until combined.
Wait 5-7 minutes and you should see the mixture begin to foam slightly on the surface. This foam is your proof that the yeast is alive and ready to work. If nothing happens, your yeast may be expired or your water was the wrong temperature—start over with fresh yeast and properly heated water. This step is your insurance policy against disappointment.
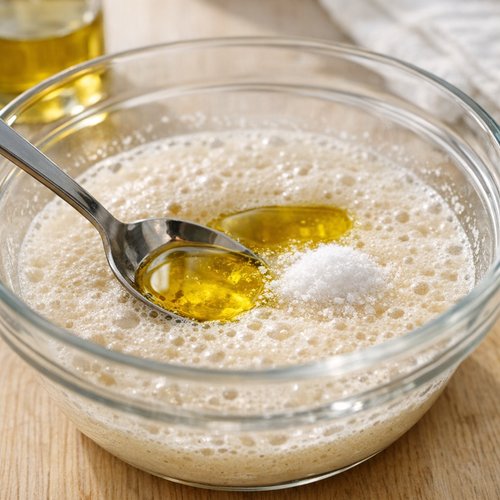
Step 2: Build Your Dough Base
Add the salt and 2 tablespoons of sunflower oil to your yeast mixture, stirring gently to combine. The oil will float on top initially—that’s fine. Now add both the all-purpose flour and wholemeal spelt flour at the same time, stirring with a wooden spoon until everything comes together into a shaggy, sticky mass.
At this point, your dough will look rough and unpromising. This is completely normal. Don’t panic or add extra flour. You’re about to transform this into something beautiful through the magic of kneading. The mixture should be soft and slightly sticky—you want to feel some resistance but not have it stick to your fingers excessively.
Step 3: Knead Until Smooth and Elastic
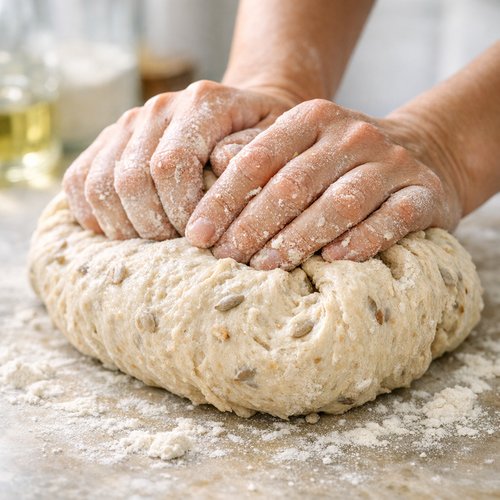
Turn your shaggy dough out onto a lightly floured surface—use just enough flour to prevent sticking, as over-flouring creates a dense loaf. Begin kneading by pushing the dough away from you with the heel of your hand, folding it back over itself, turning it a quarter turn, and repeating.
Dust with additional flour as needed—and I mean as needed, not preemptively. Your dough should remain slightly tacky but manageable. Continue kneading for the full 10 minutes. I know this feels long, but those 10 minutes are developing gluten strands that create structure and lift.
You’ll feel the transformation happening: the dough becomes smoother, more elastic, and less sticky. By minute 8-10, you should be able to stretch a small piece and see light through it without tearing—this is the “windowpane test” that indicates proper gluten development. The dough should feel soft, smooth, and slightly resilient.
Step 4: First Rise
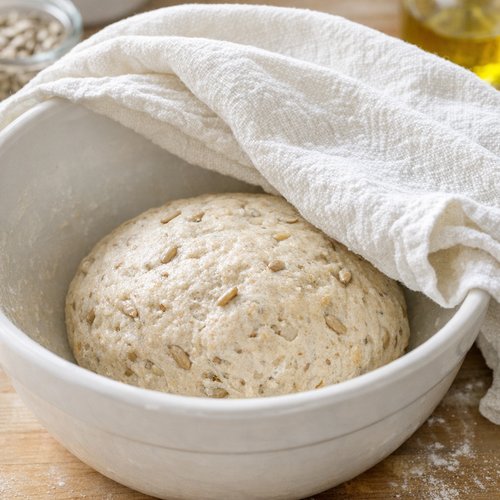
Shape your kneaded dough into a loose ball and place it in a clean bowl (you can use the same one you mixed in). Cover the bowl with a damp kitchen towel or plastic wrap to prevent the surface from drying out. Place the bowl somewhere warm and undisturbed—an oven with the light on, a warm corner of your kitchen, or even a cooler filled with warm water works perfectly.
Let the dough rise undisturbed for approximately 30 minutes, until it has roughly doubled in size. You can test this by gently poking the dough with a floured finger—if the indentation springs back slowly but doesn’t completely disappear, it’s ready. If it springs back immediately, give it more time.
Step 5: Incorporate the Sunflower Seeds
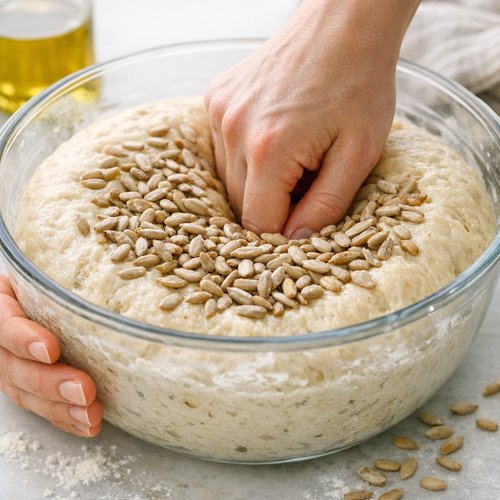
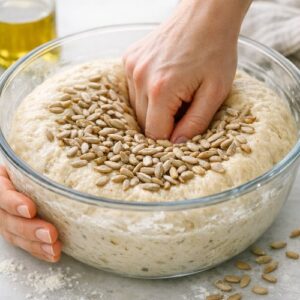
Once your dough has doubled, gently punch it down to release excess gas—don’t be aggressive, just a gentle deflation. Sprinkle all but 1 tablespoon of your sunflower seeds over the dough and knead them in by hand for about 2-3 minutes. This second kneading will temporarily make the dough feel slightly deflated, but the seeds distribute evenly throughout.
The seeds should be distributed fairly evenly throughout the dough. You’ll see little flecks of yellow and green throughout when you break open a finished slice. Reserve that 1 tablespoon of sunflower seeds for the top of your loaf.
Step 6: Shape and Second Rise
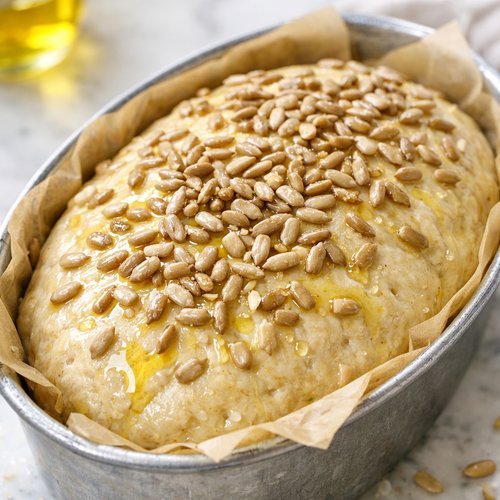
Lightly oil a 5×9-inch loaf pan with a thin coating of sunflower oil (just a light wiping with a folded paper towel is sufficient). Transfer your seeded dough to the pan and press it firmly into the corners, pushing out any large air pockets but not deflating the entire loaf. The dough should fill about two-thirds of the pan.
Cover the pan loosely with a damp towel or plastic wrap and let it rise again in a warm spot for approximately 30 minutes, until the dough rises above the rim of the pan and looks puffy and ready to bake. Meanwhile, preheat your oven to 375°F. Position your oven rack in the middle position so the bread bakes evenly.
Step 7: Finish and Bake
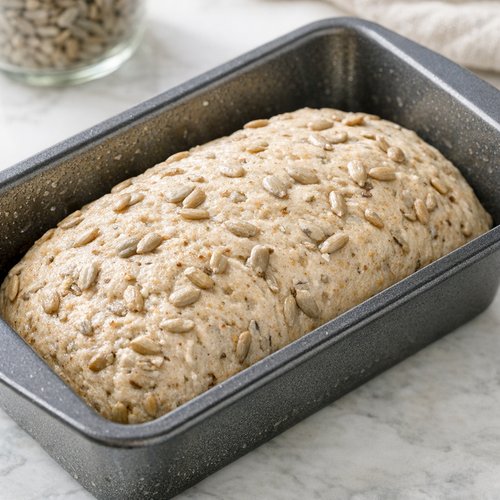
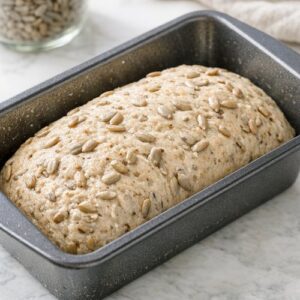
Just before baking, drizzle the top of your risen dough with the remaining 1 tablespoon of sunflower oil, then sprinkle the reserved 1 tablespoon of sunflower seeds over top, pressing them down gently so they adhere. This creates a beautiful, nutty finish and adds visual appeal.
Place the loaf pan in your preheated oven and bake for 60 minutes. Midway through baking (around minute 30), you might notice the top is browning too quickly. If so, loosely place a piece of aluminum foil over the top without pressing it down. This prevents the crust from burning while the interior continues cooking.
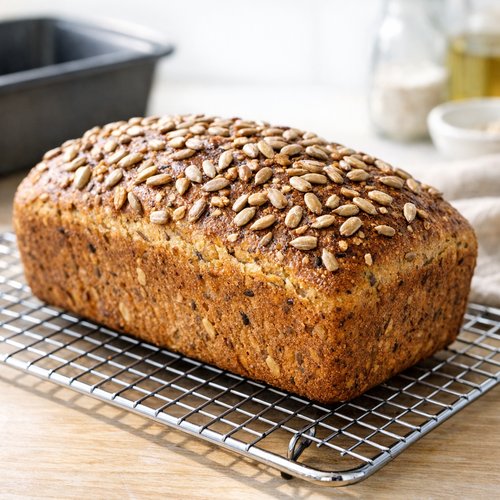
The loaf is finished when it’s well-risen and deep golden brown on top, and sounds hollow when you tap the bottom (carefully remove it from the pan to test). The internal temperature should reach 205-210°F if you have an instant-read thermometer.
Step 8: Cool Before Slicing
Remove the baked loaf from the pan and place it on a wire cooling rack. This is crucial—leaving the bread in the hot pan continues cooking the bottom and sides, potentially creating a dense, tough crust. Let it cool at room temperature for at least 30-45 minutes before slicing.
I know it’s tempting to slice into warm bread, and I won’t stop you, but the crumb structure continues setting as it cools. Slicing too early results in a gummy, compressed texture. If you can wait until completely cool, you’ll have perfectly defined slices with an open crumb structure.
Tips and Tricks
- Water temperature is everything – Too hot and you’ll kill your yeast; too cold and nothing happens. Invest in a cheap instant-read thermometer (around $6) and use it every time until you develop an intuition for proper warmth.
- Embrace a slightly wet dough – Bread dough should feel slightly sticky to touch, not dry and stiff. More hydration creates a more open crumb structure and a lighter loaf. Resist the urge to add flour unless absolutely necessary.
- Let the dough tell you when it’s ready – Rising times vary based on room temperature, humidity, and yeast activity. Rather than following time strictly, look for visual cues: the dough should roughly double in size and feel puffy and alive.
- Create a warm rising environment affordably – Fill a cooler or large plastic bin with warm (not hot) water, place your covered bowl inside, and close the lid. This maintains warmth for hours at zero cost and works better than an oven in many homes.
- Score the top before baking for rustic appeal – Optional: use a sharp knife to make a shallow slash across the top of your dough before baking. This is purely aesthetic but creates a professional-looking result and allows controlled expansion during baking.
- Use a Dutch oven for even better crust – If you own a Dutch oven, place it in the oven while preheating, carefully transfer your loaf pan into it (or transfer dough to the hot Dutch oven), and bake covered for the first 20 minutes, then uncovered for the remaining 40. This traps steam and creates an incredibly crispy, bakery-style crust. This step is entirely optional.
- Save your yeast investment – Buy active dry yeast in bulk from restaurant supply stores or online. A pound of yeast costs about $8-12 and provides roughly 50+ loaves of bread worth of yeast. Store it in an airtight container in the freezer and it stays viable for years.
Expert’s Nutritional Tip
As a registered dietitian, I want to highlight something crucial about sunflower seeds that most recipes overlook: they’re exceptionally rich in selenium and vitamin E, two nutrients that work synergistically as powerful antioxidants. One half-cup of sunflower seeds provides approximately 85% of your daily selenium needs and 37% of your daily vitamin E.
What this means for you is that a single slice of this bread contributes meaningfully to your antioxidant intake, supporting immune function and reducing oxidative stress in your body. This isn’t just “healthier bread”—this is functional food that actually supports your cellular health. When combined with whole grain flour, you’re looking at a complete carbohydrate source with adequate protein, healthy fats, and minerals. That’s exactly why I recommend this bread as a nutritious foundation for breakfast, lunch, or dinner.
Can I Store Bread With Sunflower Seeds Recipe?
Proper storage dramatically extends the life of your homemade bread. Once completely cooled, wrap your loaf tightly in plastic wrap or place it in a bread bag. Store at room temperature for 3-4 days maximum. Homemade bread contains no preservatives, so it will gradually dry out and potentially develop mold.
For longer storage, freeze your completely cooled loaf wrapped tightly in plastic wrap and then aluminum foil (the double wrapping prevents freezer burn). Your bread will keep beautifully in the freezer for up to 3 months. Thaw at room temperature in its wrapping for 2-3 hours, or slice directly from frozen and toast for immediate enjoyment.
Individual slices freeze exceptionally well too. Once cooled, slice the bread, wrap individual slices in plastic wrap, place them in a freezer bag with the air removed, and label with the date. Frozen slices toast directly without thawing, making grab-and-go breakfasts incredibly convenient on busy mornings.
I also love lightly toasting day-old slices in the oven at 325°F for 5-7 minutes to refresh them. This revives the crust and makes the bread taste almost fresh-baked. It’s a simple technique that extends the window of optimal eating quality.
Make-Ahead Guide
One of my favorite things about this bread recipe is how well it adapts to advance preparation. Here’s my professional approach to making this bread fit seamlessly into busy weeks:
Full Advance Method: Complete steps 1-3 (activation through first kneading), then place your kneaded dough in an oiled container in the refrigerator for up to 24 hours. The cold slows fermentation dramatically. When you’re ready to bake, remove the dough and let it come to room temperature for 30-45 minutes, then proceed with the remaining steps. Cold fermentation actually improves flavor complexity as yeast develops slowly.
Partial Advance Method: Complete the first rise, knead in seeds, shape into the loaf pan, wrap tightly, and refrigerate for up to 12 hours. In the morning, remove from the fridge and let it complete its second rise at room temperature while you shower and have coffee, then bake. This is my favorite approach for weekday mornings.
Frozen Dough Method: After the first rise and before adding seeds, shape your dough into a ball, wrap it extremely tightly in plastic wrap and aluminum foil, and freeze for up to 1 month. When ready to use, thaw overnight in the refrigerator, then allow room temperature rise before adding seeds and shaping. This requires more time but offers incredible flexibility.
Common Mistakes to Avoid
- Using water that’s too hot or too cold – This is the #1 reason homemade bread fails. Water that’s too hot (above 120°F) kills yeast; water that’s too cold doesn’t activate it. Invest in an instant-read thermometer and use it consistently until you develop an intuition. Aim for exactly 110-115°F.
- Cutting into warm bread – I understand the temptation, but slicing before the loaf completely cools causes compression and gumminess. The crumb structure needs time to set. Resist for at least 45 minutes. You’ll be rewarded with perfect slices versus mush.
- Over-flouring during kneading – Adding too much flour creates a dense, dry loaf. Your dough should feel slightly tacky. Add flour only when absolutely necessary to prevent sticking, not preemptively. This is one of the most common beginner mistakes and directly impacts your finished product.
- Inconsistent rising temperature – Yeast is temperature-sensitive. If your kitchen is cold (below 65°F), rising will take twice as long. Rather than giving up, create a warm spot using the methods mentioned in Tips and Tricks. Consistent warmth means consistent, predictable results.
Seasonal Variations
Spring & Summer (Warm Season): Your dough will rise faster in warm months—potentially in 20-25 minutes instead of 30. Check frequently rather than relying on time. The faster fermentation is actually beneficial as it can reduce slightly sour notes and increase digestibility. You might also add fresh herbs like rosemary or thyme at the seed-incorporation step for a seasonal twist.
Fall (Cooling Temperatures): As temperatures drop, rising times extend to 35-40 minutes. Plan accordingly. This is the perfect season to experiment with adding pumpkin seeds alongside or instead of sunflower seeds, or a tablespoon of pumpkin puree for autumn flavor.
Winter (Cold Season): Cold kitchens dramatically slow fermentation. This is when my warm water bath technique becomes essential. Rising may take 45-60 minutes, but the extended fermentation develops deeper flavor. Consider adding a teaspoon of whole grain mustard or nutritional yeast for depth. The slower fermentation actually makes bread more digestible for some people.
Nutrition Information
Based on USDA nutritional databases, one slice (approximately 1/12 of loaf) contains approximately 165 calories, 6g protein, 27g carbohydrates, 5g fat, and 3g dietary fiber. The protein and fiber content makes this significantly more nutritious than standard white bread.
The sunflower seeds contribute most of the mineral density: one slice provides roughly 35% of daily selenium, 15% of daily magnesium, 12% of daily phosphorus, and 10% of daily zinc. These minerals support bone health, immune function, and metabolic processes.
The wholemeal spelt flour adds B vitamins, particularly thiamin and niacin, which support energy metabolism. Combined, this is a complete carbohydrate source with adequate protein (making it suitable for vegetarian and vegan diets), healthy unsaturated fats, and substantial micronutrient density. One slice is genuinely satisfying and supports stable blood sugar when paired with protein or healthy fats.
What Can I Serve With Bread With Sunflower Seeds Recipe?
This bread is genuinely versatile and works beautifully at any meal. Its subtle nuttiness and hearty texture complement both savory and slightly sweet applications. Here are my favorite pairings from my kitchen:
- Breakfast with baked eggs and spinach – Toast a slice and serve alongside baked eggs with spinach for a complete, protein-rich morning. The nutty seeds enhance the earthiness of spinach beautifully.
- Lunch with creamy chicken – Pair with baked creamy chicken for a comforting, satisfying lunch. The bread’s texture is substantial enough to handle creamy sauces without falling apart.
- Simple avocado toast – Toast a slice, spread with mashed avocado, squeeze of lemon, and sea salt. The nutty undertones of the bread complement the richness of avocado perfectly.
- Soups and stews – Slice this bread and serve alongside hearty vegetable soups or bean-based stews. It’s sturdy enough to dip without disintegrating and absorbs flavorful broths beautifully.
- Cheese and cured meats – This bread makes an excellent base for simple charcuterie boards. The seeds add visual interest and textural contrast to cheese and quality meats.
- Nut butter and jam – Toast a slice and top with your favorite nut butter and fruit preserve. The whole grains and seeds make this feel like an intentional snack rather than empty carbs.
- Savory spreads – Hummus, olive tapenade, or mashed white beans become memorable when spread on this bread. The texture and flavor are substantial enough to showcase quality spreads.
Substitutes
- Vegetable oil or olive oil instead of sunflower oil – Both work excellently as 1:1 substitutes. Olive oil adds a slightly fruity note; vegetable oil is neutral. This swap saves approximately 20-30 cents if you already have oil on hand.
- Whole wheat flour instead of spelt flour – Use the same amount (¾ cup). Whole wheat is typically 20-30% cheaper and creates a slightly earthier, denser crumb. The bread will be equally delicious with different flavor notes.
- Pumpkin seeds instead of sunflower seeds – Use the same quantity (½ cup). Pumpkin seeds are slightly earthier and create a beautiful green interior. Cost is typically similar but varies seasonally.
- A mix of seeds – Combine sunflower seeds with sesame seeds, flax seeds, or even chopped walnuts at a 1:1 ratio. This adds complexity and uses up whatever seeds you have available.
- Honey or maple syrup instead of sugar – Use 1½ teaspoons (slightly more than granulated sugar since liquid sweeteners are denser). This adds subtle depth and creates slightly softer crust. Most people don’t notice the flavor difference.
- Sea salt or kosher salt instead of table salt – Use the same amount. Kosher salt is chunkier so you might use slightly less. The difference in final product is minimal.
- Instant yeast instead of active dry yeast – Use the same amount. Instant yeast ferments slightly faster, so check for readiness at 25-27 minutes instead of 30. Results are essentially identical.
- Instant milk powder for added nutrition – Add 2 tablespoons (optional) to boost calcium and protein content. This adds roughly 5-10 cents per loaf and increases creaminess of crumb slightly. Dissolve it in your warm water before adding yeast.
Bread With Sunflower Seeds Recipe
Ingredients
Method
- Pour your warm water into a large mixing bowl—it should feel slightly warmer than body temperature, around 110-115°F. Add the active dry yeast and let it sit undisturbed for 1-2 minutes. Then sprinkle the sugar over top and gently stir with a wooden spoon until combined. Wait 5-7 minutes and you should see the mixture begin to foam slightly on the surface. This foam is your proof that the yeast is alive and ready to work. If nothing happens, your yeast may be expired or your water was the wrong temperature—start over with fresh yeast and properly heated water. This step is your insurance policy against disappointment.

- Add the salt and 2 tablespoons of sunflower oil to your yeast mixture, stirring gently to combine. The oil will float on top initially—that's fine. Now add both the all-purpose flour and wholemeal spelt flour at the same time, stirring with a wooden spoon until everything comes together into a shaggy, sticky mass. At this point, your dough will look rough and unpromising. This is completely normal. Don't panic or add extra flour. You're about to transform this into something beautiful through the magic of kneading. The mixture should be soft and slightly sticky—you want to feel some resistance but not have it stick to your fingers excessively.

- Turn your shaggy dough out onto a lightly floured surface—use just enough flour to prevent sticking, as over-flouring creates a dense loaf. Begin kneading by pushing the dough away from you with the heel of your hand, folding it back over itself, turning it a quarter turn, and repeating. Dust with additional flour as needed—and I mean as needed, not preemptively. Your dough should remain slightly tacky but manageable. Continue kneading for the full 10 minutes. I know this feels long, but those 10 minutes are developing gluten strands that create structure and lift. You'll feel the transformation happening: the dough becomes smoother, more elastic, and less sticky. By minute 8-10, you should be able to stretch a small piece and see light through it without tearing—this is the "windowpane test" that indicates proper gluten development. The dough should feel soft, smooth, and slightly resilient.

- Shape your kneaded dough into a loose ball and place it in a clean bowl (you can use the same one you mixed in). Cover the bowl with a damp kitchen towel or plastic wrap to prevent the surface from drying out. Place the bowl somewhere warm and undisturbed—an oven with the light on, a warm corner of your kitchen, or even a cooler filled with warm water works perfectly. Let the dough rise undisturbed for approximately 30 minutes, until it has roughly doubled in size. You can test this by gently poking the dough with a floured finger—if the indentation springs back slowly but doesn't completely disappear, it's ready. If it springs back immediately, give it more time.

- Once your dough has doubled, gently punch it down to release excess gas—don't be aggressive, just a gentle deflation. Sprinkle all but 1 tablespoon of your sunflower seeds over the dough and knead them in by hand for about 2-3 minutes. This second kneading will temporarily make the dough feel slightly deflated, but the seeds distribute evenly throughout. The seeds should be distributed fairly evenly throughout the dough. You'll see little flecks of yellow and green throughout when you break open a finished slice. Reserve that 1 tablespoon of sunflower seeds for the top of your loaf.
- Lightly oil a 5x9-inch loaf pan with a thin coating of sunflower oil (just a light wiping with a folded paper towel is sufficient). Transfer your seeded dough to the pan and press it firmly into the corners, pushing out any large air pockets but not deflating the entire loaf. The dough should fill about two-thirds of the pan. Cover the pan loosely with a damp towel or plastic wrap and let it rise again in a warm spot for approximately 30 minutes, until the dough rises above the rim of the pan and looks puffy and ready to bake. Meanwhile, preheat your oven to 375°F. Position your oven rack in the middle position so the bread bakes evenly.
- Just before baking, drizzle the top of your risen dough with the remaining 1 tablespoon of sunflower oil, then sprinkle the reserved 1 tablespoon of sunflower seeds over top, pressing them down gently so they adhere. This creates a beautiful, nutty finish and adds visual appeal. Place the loaf pan in your preheated oven and bake for 60 minutes. Midway through baking (around minute 30), you might notice the top is browning too quickly. If so, loosely place a piece of aluminum foil over the top without pressing it down. This prevents the crust from burning while the interior continues cooking. The loaf is finished when it's well-risen and deep golden brown on top, and sounds hollow when you tap the bottom (carefully remove it from the pan to test). The internal temperature should reach 205-210°F if you have an instant-read thermometer.

- Remove the baked loaf from the pan and place it on a wire cooling rack. This is crucial—leaving the bread in the hot pan continues cooking the bottom and sides, potentially creating a dense, tough crust. Let it cool at room temperature for at least 30-45 minutes before slicing. I know it's tempting to slice into warm bread, and I won't stop you, but the crumb structure continues setting as it cools. Slicing too early results in a gummy, compressed texture. If you can wait until completely cool, you'll have perfectly defined slices with an open crumb structure.
Notes
FAQs
Why didn’t my bread rise?
The most common culprit is water temperature. If your water wasn’t warm enough (below 105°F), yeast activation suffers. If it was too hot (above 120°F), yeast dies entirely. Always use an instant-read thermometer. Secondary causes include expired yeast (check your package date—yeast loses potency over time) or a kitchen that’s too cold. If your kitchen is below 65°F, create a warm environment using my cooler method mentioned in Tips and Tricks.
Can I make this bread without a loaf pan?
Absolutely! You can shape the dough into a round boule (ball) and bake it directly on a parchment-lined baking sheet. It will spread slightly wider and bake in roughly the same time. You can also shape it into a long batard (oval). The only difference is final shape—the flavor and texture remain identical. Free-form shaping also creates more crust surface area, which some people prefer.
My bread turned out dense. What happened?
A dense crumb usually indicates under-development of gluten (not kneading long enough), over-flouring (which creates a stiff dough), or inadequate rising time. In your next attempt, commit fully to the 10-minute kneading period—set a timer and don’t shortcut it. Add flour sparingly during kneading. Allow dough to visibly double before proceeding. Dense bread is still delicious and makes excellent toast, but these adjustments will improve your texture.
Is this bread suitable for people with gluten sensitivity?
This recipe contains gluten from both wheat flours, so it’s not suitable for people with celiac disease. However, for those with non-celiac gluten sensitivity, the combination of whole grains and extended fermentation can improve digestibility somewhat. For a truly gluten-free version, you’d need to use a gluten-free flour blend with xanthan gum and adjust hydration significantly—it’s a different recipe entirely. I’d recommend consulting a recipe specifically developed for gluten-free bread if that’s your need.
Can I add herbs or other flavors to this recipe?
Absolutely! This bread is beautifully versatile. Try adding 1-2 teaspoons of dried herbs (rosemary, thyme, oregano) mixed into the flour at step 2. You can add ½ teaspoon of garlic powder or onion powder for savory depth. Some people add ½ teaspoon of fennel seeds or caraway seeds alongside the sunflower seeds for complexity. Start conservatively with additions since you’re working with a relatively small amount of dough. You can always experiment more freely on your next bake.
How do I know when the bread is truly finished baking?
The loaf should be deep golden brown on top. Tap the bottom of the loaf (carefully remove it from the pan)—it should sound hollow, not dull. An instant-read thermometer inserted into the center should read 205-210°F. If you have any doubt, bake an additional 5 minutes and check again. Over-baked bread is still edible; under-baked bread has a gummy center and isn’t pleasant to eat. It’s always better to bake slightly longer than shorter.
More Recipes You’ll Love
- my go-to banana bread – Another budget-friendly baked good that uses simple ingredients you probably have on hand, perfect for using overripe bananas.
- Baked Beans Recipe on the Stovetop – A hearty, protein-rich side dish that pairs beautifully with sliced homemade bread for complete, satisfying meals.
- Banana Baked Oats Recipe – Another wholesome baked recipe that uses whole grains and natural sweetness, equally budget-friendly and nutritious.
I genuinely hope you bake this sunflower seed bread soon and experience the joy of pulling a homemade loaf from your own oven. There’s something transformative about making your own bread—it connects you to history, to tradition, and to the knowledge that you can feed yourself and your family with simple, affordable ingredients and your own hands.
The first time you slice into your loaf and see those beautiful sunflower seeds distributed throughout, you’ll understand why I’m so passionate about teaching people to bake. This isn’t a luxury or an indulgence—it’s an attainable skill that saves money while creating something objectively superior to commercial equivalents.
Please make this recipe and let me know how it turns out. Better yet, don’t forget to mention @affordablefoodideas if you try this recipe! Your feedback genuinely helps me create recipes that work for real families with real budgets and real kitchens. I’m rooting for your baking success.