This post contains affiliate links. As an Amazon Associate I earn from qualifying purchases.
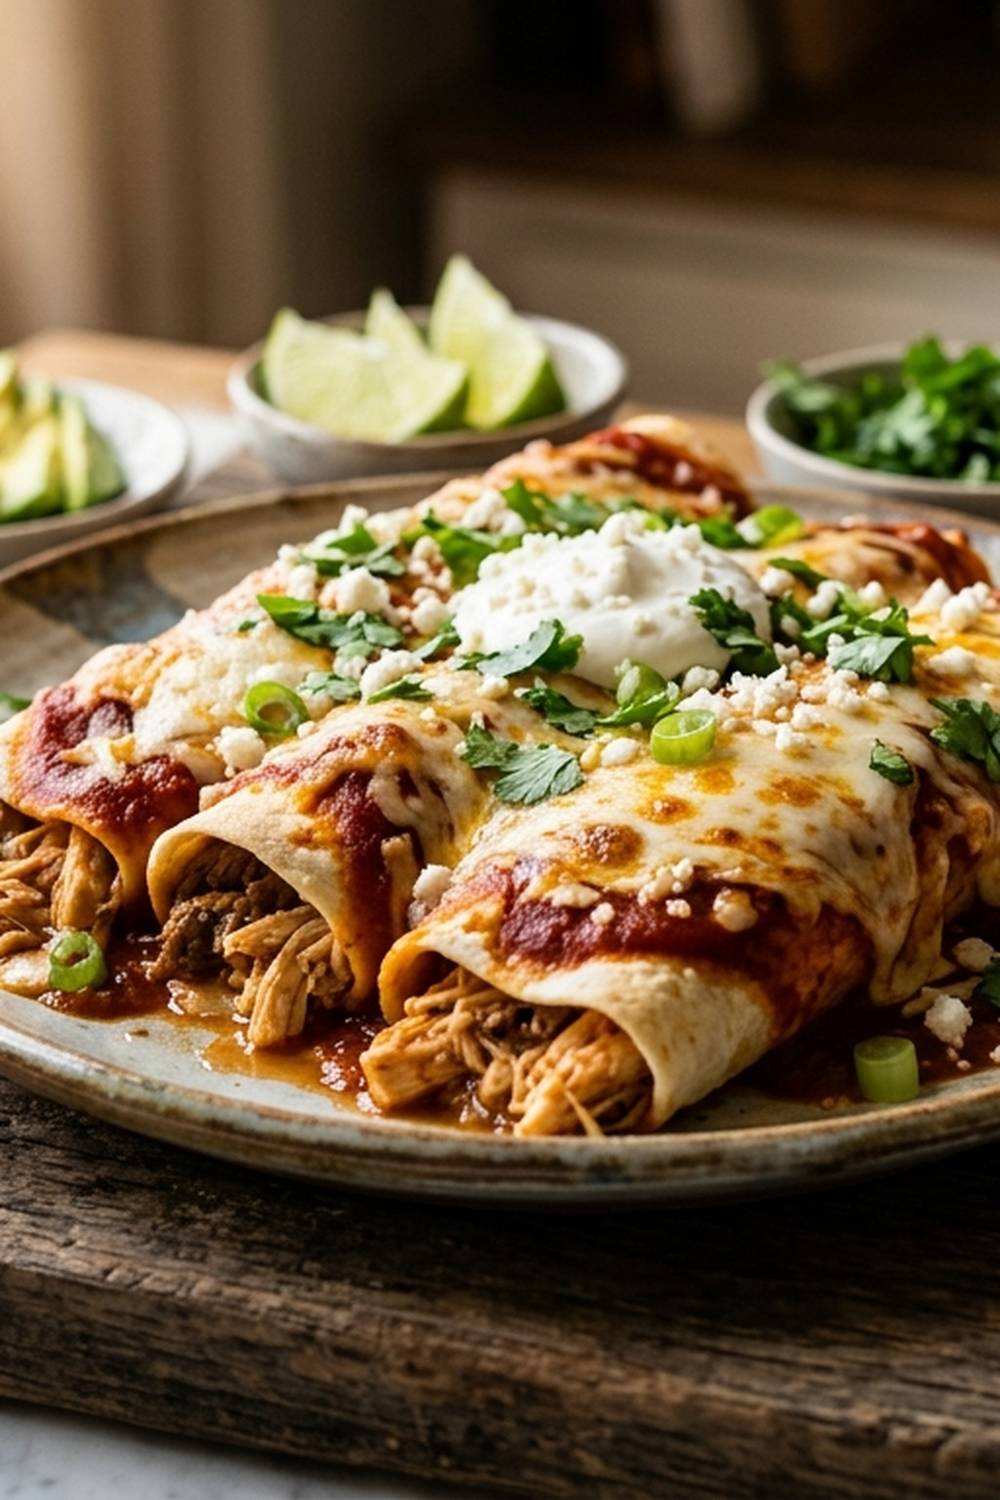
I still remember the evening my neighbor Maria invited our whole block over for dinner during a sweltering August night. She emerged from her kitchen with a bubbling casserole of golden enchiladas, steam rising from the melted cheese on top, and suddenly the outdoor temperature didn’t matter anymore. Everyone gathered around the table, and I watched my kids devour these with pure joy. That night, Maria whispered her secret: she’d made them on a shoestring budget but served them with such pride that nobody would have guessed. Years later, as a registered dietitian, I’ve perfected my own version that costs just about ten dollars to feed eight people—and I’m sharing it with you today. This is the kind of recipe that brings people together without breaking the bank, whether you’re planning a casual weeknight dinner or a weekend gathering.
Cheesy Enchilada Recipe That Steals the Show at Your Next Dinner Party
I grew up watching my mother stretch our grocery budget by turning simple ingredients into meals that felt luxurious. One of the first dishes she taught me to make was enchiladas. She’d pan-toast the tortillas while my siblings and I watched from the kitchen counter, and the smell alone made everyone gather around. What stuck with me wasn’t just the taste—it was how something so affordable could feel so special. Every time I make these now, I’m transported back to that small-town kitchen, and I realize that’s exactly what food should do: create a moment worth remembering without demanding a fancy price tag.
When to Make Cheesy Enchilada Recipe
This dish is incredibly versatile, and I’ve found that it shows up at my table for so many different reasons throughout the year. It’s the kind of recipe that works whether you’re feeding your immediate family on a Tuesday night or hosting a celebration where you want everyone to feel truly welcome.
- Weekend family dinners – when you want something that feels restaurant-quality but won’t keep you in the kitchen for hours
- Potluck gatherings and community events – it travels beautifully in a casserole dish and reheats perfectly, making it ideal for sharing meals with neighbors
- Back-to-school season – a hearty, budget-conscious meal that satisfies hungry teenagers and picky eaters alike
- Holiday entertaining – whether it’s Cinco de Mayo or Christmas dinner, these enchiladas add genuine flavor without pretension
- Budget meal planning weeks – when groceries need to stretch and you still want everyone to feel nourished and satisfied
What Makes This Cheesy Enchilada Recipe Special
What elevates this dish above everyday cooking isn’t fancy ingredients or complicated techniques—it’s the thoughtfulness behind every choice. I’ve designed this recipe specifically for people who care about both nutrition and their wallet. The pan-toasting step, which takes just seconds per tortilla, makes them pliable and adds a subtle toasted flavor that canned enchiladas simply can’t match. The filling combines sour cream with the cheese, which keeps everything moist and prevents that dry, separated filling you sometimes get with baked cheese dishes.
From a nutritional perspective, this recipe delivers complete protein from the dairy while the green chiles add vitamin C and beneficial capsaicin. The corn tortillas provide fiber and essential minerals like manganese. I always tell clients that affordable cooking doesn’t mean sacrificing nutrition—it means being strategic about where your money goes. This recipe is proof of that philosophy.
Scaling for Your Crowd
One of my favorite things about this recipe is how easily it adapts. Whether you’re cooking for two on a quiet evening or preparing for a gathering of fifteen, the same approach works. Here’s how I adjust based on crowd size:
- For 2-3 people – use 4 small corn tortillas, 4 ounces shredded cheese, and scale all other ingredients down by one-third. Bake in a small 8-inch square baking dish for about 15 minutes—watch carefully since smaller portions heat through faster
- For 4-6 people – use half the recipe (6 tortillas, 6 ounces cheese) and bake for 18-20 minutes in a standard 9×9 baking dish
- For 8-10 people – use the full recipe with a standard 9×13 baking dish and plan for the full 20 minutes of baking time
- For 15+ people – double everything completely, use two standard 9×13 baking dishes, and increase baking time to 25 minutes. You can bake both simultaneously on different racks, rotating them halfway through for even cooking
The Ingredients
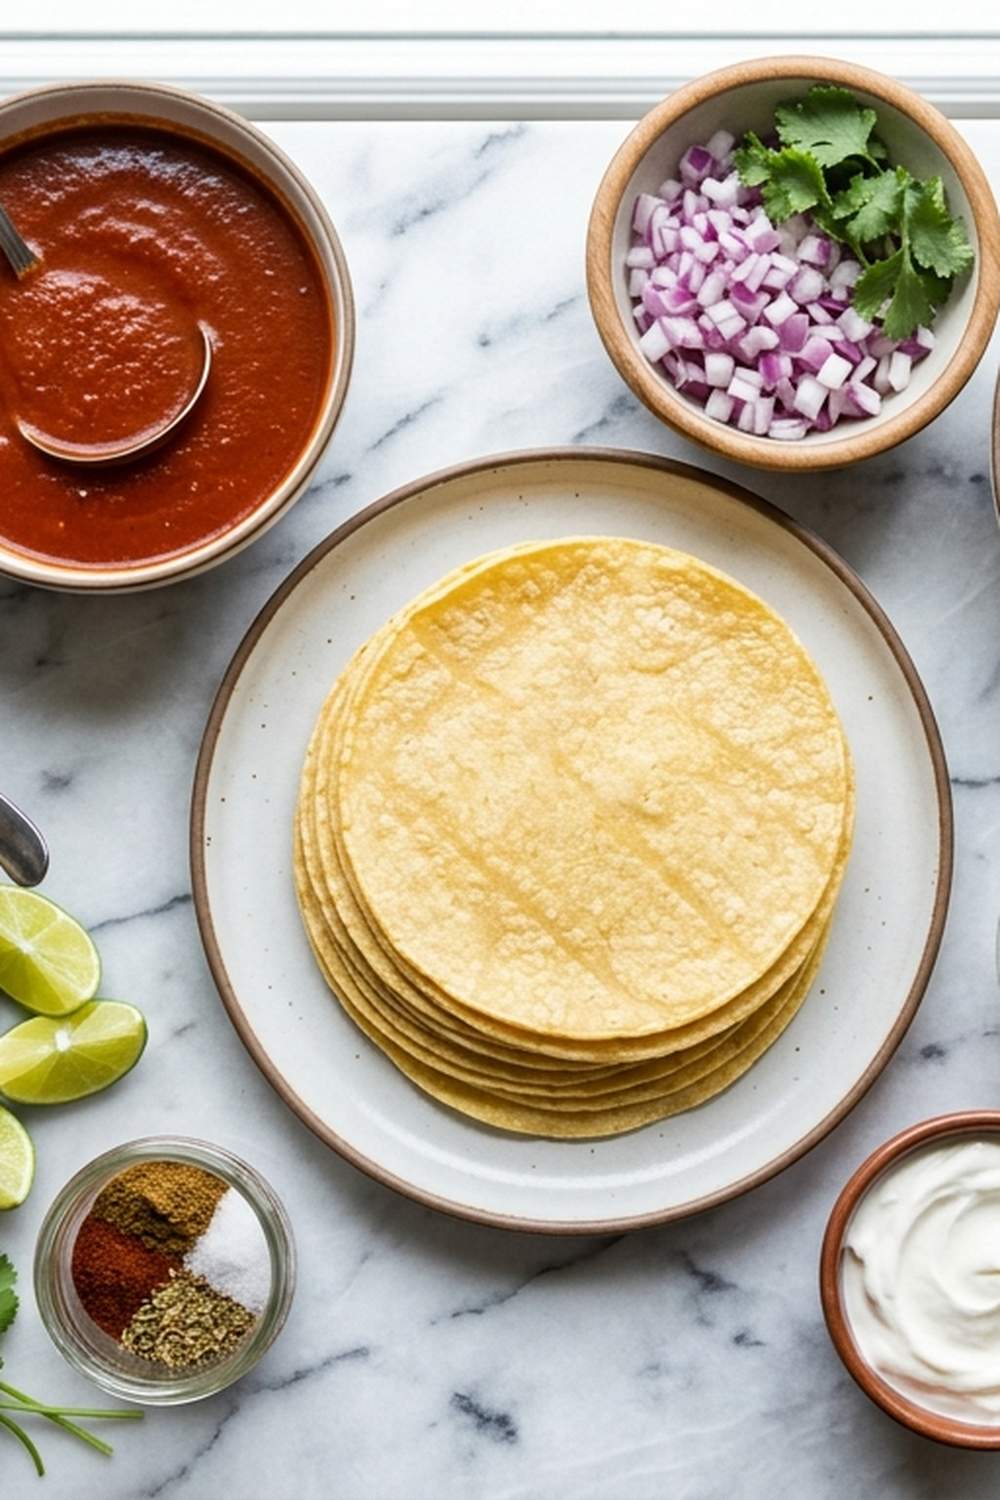
Here’s everything you need for an impressive spread that costs less than a typical restaurant entree for two:
- 1 can (4 ounces) diced green chiles, drained (these add authentic flavor and genuine heat without any extra cost)
- 1/4 teaspoon garlic powder (or substitute 1/2 teaspoon minced fresh garlic if you have it on hand)
- 1/4 cup sour cream (this keeps the filling creamy as it bakes and prevents separation)
- 1 tablespoon fresh cilantro, chopped (optional but adds brightness, or substitute fresh parsley)
- 12 ounces shredded cheese (a combination of Monterey Jack and sharp cheddar gives the best flavor, but standard cheddar works beautifully)
- 12 small corn tortillas (look for these in the international aisle—they’re typically cheaper than flour tortillas and naturally gluten-free)
- 1/2 cup diced onion (white or yellow, adds texture and authentic flavor to the filling)
- 1/8 teaspoon salt (adjust to taste based on your cheese saltiness)
- 1/4 teaspoon ground cumin (the secret ingredient that makes everything taste homemade and authentic)
- 1.5 cups enchilada sauce (homemade or canned—both work equally well for budget cooking)
Makes 12 enchiladas (serves 4-6 as a main course, or 8 as part of a larger spread)
How to Make Cheesy Enchilada Recipe for Your Occasion
I’ve broken this down into simple, achievable steps that anyone can follow—whether you’re cooking for your first time or you’re an experienced home cook. The beautiful part is that this feels like an impressive showstopper, but the technique is straightforward and forgiving. Let’s get started.
Step 1: Toast Your Tortillas for Maximum Flavor
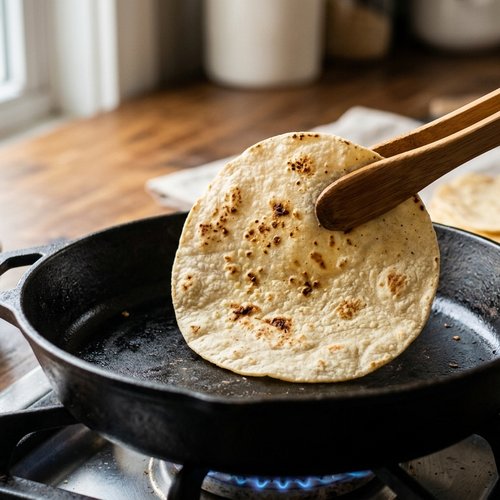
Heat a dry skillet (cast iron works beautifully here) over medium-high heat. Working with one tortilla at a time, place it directly on the hot surface for just a few seconds on each side. You’re not trying to cook them fully—just enough to warm them and make them pliable. This step is crucial because it adds a subtle toasted flavor and makes the tortillas flexible enough to roll without cracking. If you skip this step, your tortillas will likely tear when you try to roll them, so don’t rush through it. Stack your finished tortillas on a plate and cover them with a clean kitchen towel to keep them warm and soft while you prepare the filling.
Step 2: Build Your Filling with Care
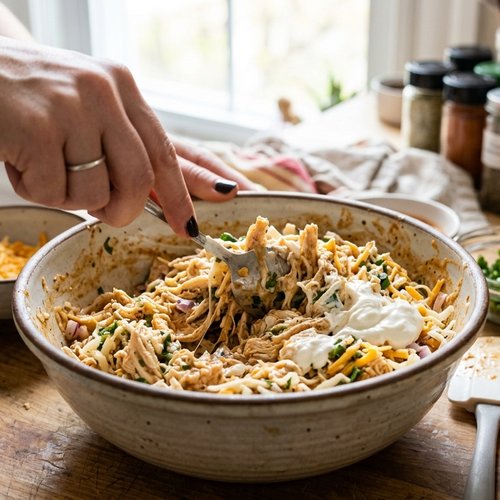
In a medium mixing bowl, combine three-quarters of your shredded cheese (save the remaining quarter for topping). Add your drained green chiles, sour cream, garlic powder, cumin, salt, diced onion, and cilantro if using. Stir everything together until you have a smooth, cohesive filling. The sour cream is what keeps this mixture from drying out during baking, so don’t skip it even if you’re trying to cut costs. This filling can be made up to one day in advance and refrigerated, which makes this recipe perfect for entertaining—just let it come back to room temperature before assembling.
Step 3: Prepare Your Baking Vessel
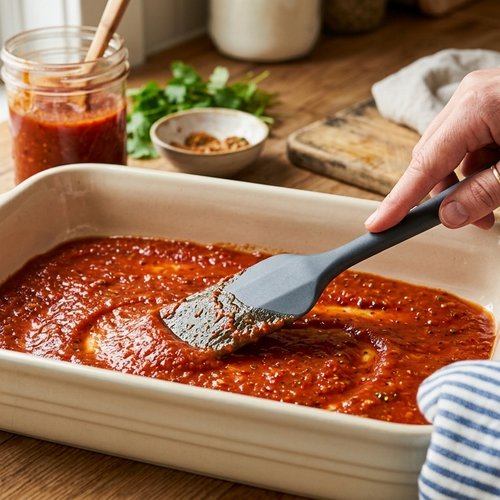
Preheat your oven to 350°F. Pour about half a cup of your enchilada sauce into the bottom of a large 9×13-inch casserole dish and spread it evenly to coat the surface. This layer prevents sticking and ensures the bottoms of your enchiladas stay moist and delicious. If you don’t have enough sauce to cover the bottom completely, that’s fine—just do your best to distribute what you have. The sauce will spread more as the enchiladas bake.
Step 4: Roll with Confidence
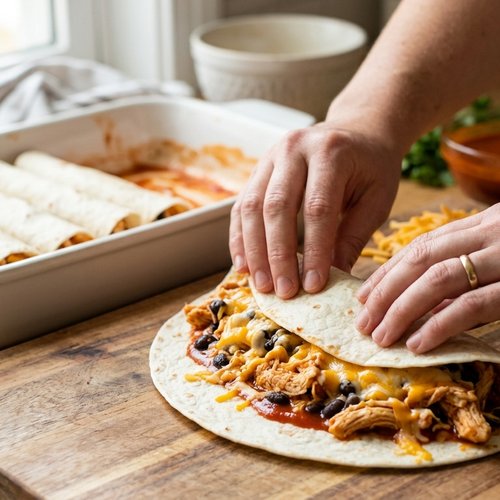
Working with one warm tortilla at a time, place it on a clean work surface. Spoon about 3 tablespoons of your cheese filling down the center of the tortilla. Don’t overfill—this is the most common mistake I see, and it makes rolling difficult. Roll the tortilla tightly from one side to the other, creating a compact cylinder. Place it seam-side down in your prepared baking dish. Continue this process with all twelve tortillas, arranging them side by side in the dish. They should fit snugly but not be packed so tightly that they can’t expand slightly as they bake.
Step 5: Top with Sauce and Remaining Cheese
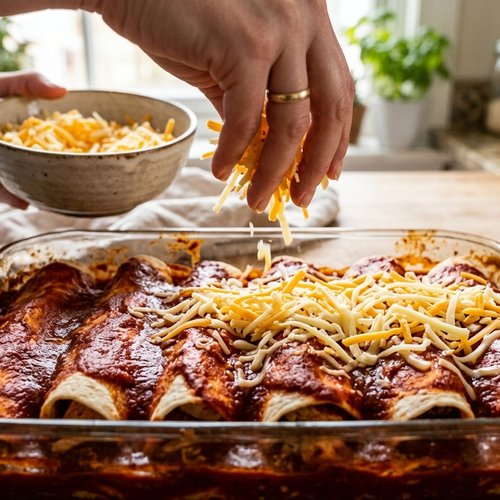
Pour the remaining cup of enchilada sauce evenly over all the rolled tortillas. Make sure every enchilada gets a good coating of sauce—this keeps them moist and prevents the edges from drying out. Then sprinkle your reserved cheese over the top. You can be generous here since the cheese is what creates that beautiful golden, bubbly presentation that makes people excited to eat.
Step 6: Bake Until Melty and Perfect
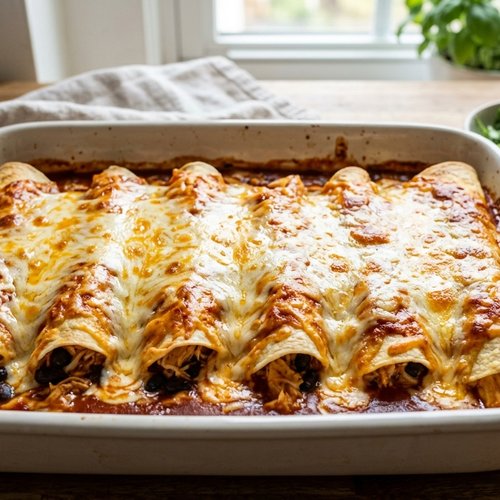
Place your casserole dish in the preheated 350°F oven and bake for exactly 20 minutes, or just until the cheese is completely melted and the sauce is bubbling around the edges. Don’t overbake beyond this point, as extended heat can cause the cheese and filling to separate slightly, creating an unpleasant grainy texture. You want to pull these out while everything is still cohesive and creamy. If your kitchen runs cool or your oven bakes unevenly (many do), check around the 18-minute mark to see how things are progressing.
Step 7: Rest Before Serving
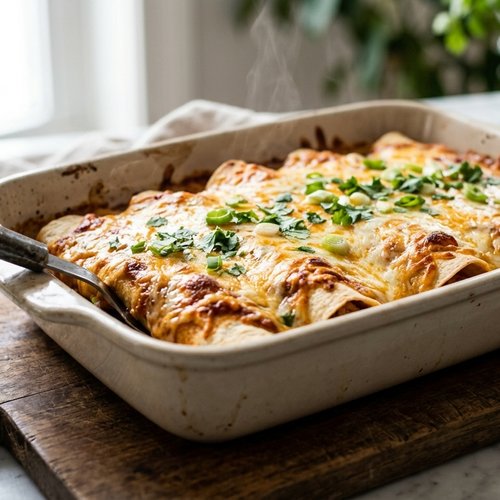
Let your enchiladas rest for 2-3 minutes straight from the oven before plating. This allows the filling to set slightly and makes serving cleaner and easier. During this time, the residual heat finishes gently cooking the filling without continuing to bake the tortillas.
Make-Ahead Timeline
As a busy professional and mother, I’ve perfected the art of breaking this recipe into manageable pieces. Here’s exactly how to time everything if you’re planning ahead:
- 3 days before – shop for your ingredients and do a quick inventory of your pantry. Check your enchilada sauce and tortillas to ensure they’re fresh
- 1 day before – prepare the cheese and chile filling completely. Cover it tightly with plastic wrap and refrigerate. This saves you genuine time on the day you’re serving, and the flavors actually develop and meld overnight
- Morning of – assemble the entire casserole (tortillas filled, sauce added, cheese topped). Cover it tightly with foil and refrigerate. It will keep perfectly for 8 hours this way
- 1 hour before serving – remove the covered casserole from the refrigerator and let it sit at room temperature for 15-20 minutes. This means it won’t need extra baking time. Preheat your oven to 350°F
- 20 minutes before serving – remove the foil and bake as directed. Your timing stays exactly the same whether you assembled yesterday or this morning
How to Present and Plate Cheesy Enchilada Recipe
The presentation of this dish is part of what makes it feel special. When you serve it directly from the casserole with all that melted cheese visible, people immediately sense that something thoughtful happened in your kitchen. Here’s how I plate these to make maximum impact:
- Serve directly from the casserole – use a wide spatula to carefully lift one or two enchiladas onto each plate, making sure to include some of the sauce and cheese from the top. This creates a full, abundant-looking plate
- Garnish generously – add a sprinkle of fresh cilantro, a dollop of sour cream, and perhaps a few sliced radishes or lime wedges on the side. These small touches signal that you put care into this meal
- Serve hot in warm bowls – if you have the time, warm your serving bowls or plates for 2 minutes in the oven before plating. This keeps the enchiladas at perfect temperature longer
Seasonal Variations
One of my favorite things about this recipe is how it adapts to what’s in season and what your family loves. Here are my favorite variations:
- Spring/Summer version – add 1/2 cup of fresh corn kernels and 1/4 cup of diced bell pepper (red or yellow) to the filling. Fresh herbs like cilantro and epazote make this feel bright and seasonal. Serve with a crisp lime crema made from sour cream thinned with lime juice
- Fall/Winter version – stir in 1/2 cup of roasted, diced butternut squash and add a pinch of cinnamon to the filling for warmth and depth. Increase the cumin to 1/2 teaspoon for a deeper, earthier flavor that feels cozy and substantial
- Vegetarian celebration version – add 3/4 cup of cooked black beans and 1/2 cup of roasted poblano peppers to the filling for incredible protein and authentic Mexican flavor
What to Serve Alongside Cheesy Enchilada Recipe
While these enchiladas are substantial enough to be the star of your table, I always build a complete menu around them. Here’s what I’ve found works beautifully to create a balanced, satisfying meal that feels complete. If you’re looking for more sides, check out my black bean nacho recipe, which is both budget-friendly and pairs perfectly with Mexican-inspired dinners.
- Cilantro lime rice – cook white or brown rice and stir in fresh lime juice, chopped cilantro, and a touch of salt. This simple side adds brightness without competing with the enchiladas
- Black beans – warm a can of black beans with a pinch of cumin and garlic. They add protein, fiber, and a comforting earthiness that makes the meal feel more complete
- Simple green salad – crisp lettuce with lime vinaigrette cuts through the richness of the cheese and cleanses your palate between bites
- Charred vegetables – try my air fryer carrot recipe for a quick, colorful side that adds nutrition and visual appeal
- Warm flour tortillas – just in case anyone wants to make additional tacos or use them for scooping sauce
- Pickled vegetables or fresh salsa – these add acid, crunch, and brightness that balance the creamy, cheesy main dish
Can I Store Cheesy Enchilada Recipe?
Yes, and this is one of the reasons I love making this dish when I’m meal planning for a busy week. Refrigerate leftovers in an airtight container for up to 4 days. The flavors actually deepen slightly as the components meld together overnight. To reheat, cover loosely with foil and warm in a 350°F oven for about 15 minutes, or until heated through. If the top cheese looks dry after refrigeration, add a splash of sauce or a sprinkle of extra cheese before reheating.
You can also freeze the complete unbaked casserole for up to 3 months. Just assemble it as instructed, cover tightly with plastic wrap and then foil, and label with the date. When you’re ready to bake, there’s no need to thaw—simply add about 10-15 minutes to the baking time and check for doneness. This makes it perfect for preparing ahead for a party or for stocking your freezer with ready-to-bake dinners during busy seasons.
Nutrition Information
Each serving of these enchiladas contains approximately 310 calories, 18 grams of protein, 22 grams of carbohydrates, and 16 grams of fat (per USDA nutrition database standards). The protein content is particularly impressive for a vegetarian main dish, coming primarily from the cheese and tortillas. The corn tortillas provide fiber (about 2 grams per serving) and essential minerals including manganese and phosphorus. The green chiles contribute vitamin C and beneficial plant compounds.
What I appreciate most about this recipe from a nutritional standpoint is that it delivers genuine nutrition without requiring premium ingredients or complicated preparation. The sour cream provides probiotics if you’re using a live-culture variety, and the cheese supplies calcium and vitamin A. This is the kind of meal I feel completely comfortable serving my family regularly.

Cheesy Enchilada Recipe
Ingredients
Method
- Heat a dry skillet (cast iron works beautifully here) over medium-high heat. Working with one tortilla at a time, place it directly on the hot surface for just a few seconds on each side. You're not trying to cook them fully—just enough to warm them and make them pliable. This step is crucial because it adds a subtle toasted flavor and makes the tortillas flexible enough to roll without cracking. If you skip this step, your tortillas will likely tear when you try to roll them, so don't rush through it. Stack your finished tortillas on a plate and cover them with a clean kitchen towel to keep them warm and soft while you prepare the filling.
- In a medium mixing bowl, combine three-quarters of your shredded cheese (save the remaining quarter for topping). Add your drained green chiles, sour cream, garlic powder, cumin, salt, diced onion, and cilantro if using. Stir everything together until you have a smooth, cohesive filling. The sour cream is what keeps this mixture from drying out during baking, so don't skip it even if you're trying to cut costs. This filling can be made up to one day in advance and refrigerated, which makes this recipe perfect for entertaining—just let it come back to room temperature before assembling.
- Preheat your oven to 350°F. Pour about half a cup of your enchilada sauce into the bottom of a large 9x13-inch casserole dish and spread it evenly to coat the surface. This layer prevents sticking and ensures the bottoms of your enchiladas stay moist and delicious. If you don't have enough sauce to cover the bottom completely, that's fine—just do your best to distribute what you have. The sauce will spread more as the enchiladas bake.
- Working with one warm tortilla at a time, place it on a clean work surface. Spoon about 3 tablespoons of your cheese filling down the center of the tortilla. Don't overfill—this is the most common mistake I see, and it makes rolling difficult. Roll the tortilla tightly from one side to the other, creating a compact cylinder. Place it seam-side down in your prepared baking dish. Continue this process with all twelve tortillas, arranging them side by side in the dish. They should fit snugly but not be packed so tightly that they can't expand slightly as they bake.
- Pour the remaining cup of enchilada sauce evenly over all the rolled tortillas. Make sure every enchilada gets a good coating of sauce—this keeps them moist and prevents the edges from drying out. Then sprinkle your reserved cheese over the top. You can be generous here since the cheese is what creates that beautiful golden, bubbly presentation that makes people excited to eat.
- Place your casserole dish in the preheated 350°F oven and bake for exactly 20 minutes, or just until the cheese is completely melted and the sauce is bubbling around the edges. Don't overbake beyond this point, as extended heat can cause the cheese and filling to separate slightly, creating an unpleasant grainy texture. You want to pull these out while everything is still cohesive and creamy. If your kitchen runs cool or your oven bakes unevenly (many do), check around the 18-minute mark to see how things are progressing.
- Let your enchiladas rest for 2-3 minutes straight from the oven before plating. This allows the filling to set slightly and makes serving cleaner and easier. During this time, the residual heat finishes gently cooking the filling without continuing to bake the tortillas.
FAQs
Can I make these enchiladas without dairy for a vegan crowd?
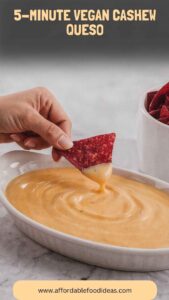
Absolutely. Replace the shredded cheese with a high-quality vegan cheese blend (I recommend checking that it melts well, as some brands perform better than others). Substitute the sour cream with coconut cream or a cashew-based sour cream. My 5-minute vegan cashew queso actually works beautifully as a filling base if you want to get creative. The baking time and temperature stay exactly the same, and nobody will feel like they’re eating a compromise version of the meal.
What if I don’t have enchilada sauce on hand?
Make a quick sauce by combining 1 cup of tomato sauce, 1/2 cup of water or broth, 1 teaspoon of chili powder, 1/2 teaspoon of cumin, and 1/4 teaspoon of garlic powder. Heat it together for 5 minutes and use it exactly as you would canned sauce. This is actually how many traditional recipes work, and it’s completely authentic. You can also use salsa in a pinch, though the flavor profile will be slightly different.
How do I prevent my enchiladas from being dry?
The most critical step is coating them generously with sauce on top—don’t be shy. Make sure your filling includes the sour cream, which creates moisture that releases during baking. Don’t overbake; 20 minutes is usually perfect. If you’re making these ahead and refrigerating, add an extra splash of sauce before baking since some absorption happens during storage.
Can I make these with flour tortillas instead of corn?
Yes, though corn tortillas are more traditional and slightly more budget-friendly. Flour tortillas will work perfectly fine and actually roll more easily if you’re nervous about tearing. Use the same amount and follow the same toasting and rolling technique. The baking time stays the same.
What’s the best way to reheat these for a party?
If you’re reheating a large batch for entertaining, cover the entire casserole loosely with foil and warm in a 325°F oven for about 20-25 minutes. This gentle heat prevents the cheese from separating while ensuring everything reaches serving temperature. Remove the foil for the last 5 minutes if you want the top to look freshly baked and appetizing.
More Recipes for Your Table
- Black Chili Recipe – a hearty, budget-friendly option that feeds a crowd and actually tastes better the next day
- Squash Casserole Recipe – a vegetable-forward side dish that complements any Mexican-inspired meal beautifully
- Bacon Quiche Recipe Crustless – for when you want another cheesy, crowd-pleasing dish that’s just as budget-conscious
Expert’s Nutritional Tip from a Registered Dietitian
One thing I want to share from my professional perspective: the combination of cheese and sour cream in this recipe actually enhances nutrient absorption. The fat-soluble vitamins in the cheese (particularly vitamins A, D, E, and K) are better absorbed when consumed with dietary fat, which both cheese and sour cream provide. This means your body is actually getting more nutritional benefit from these ingredients than if you tried to cut them out to lower fat content. Sometimes, traditional cooking methods get things right from a nutritional standpoint, even if modern diet culture makes us second-guess them.
Common Mistakes to Avoid
- Overfilling the tortillas – this is the number one issue I see. Three tablespoons of filling per tortilla is the sweet spot. Too much and they split when you roll them, creating a mess both visually and in your casserole dish
- Skipping the tortilla toasting step – I understand the temptation to save time, but those few seconds of heat make the difference between tortillas that tear and tortillas that roll beautifully. It’s worth doing
- Overbaking beyond 20 minutes – this is when separation happens. Pull them out when the cheese is bubbly and melted, not when it’s starting to brown. Your enchiladas should be creamy, not crispy
- Using all the sauce on top instead of layering it – put that half cup on the bottom of the pan first. This prevents sticking and ensures even moisture distribution throughout the casserole
Making these cheesy enchiladas isn’t just about putting dinner on the table—it’s about creating a moment where people feel cared for and nourished. That’s what drew me to dietitian nutrition in the first place: the understanding that food is about so much more than calories and macronutrients. It’s about belonging, tradition, and abundance.
I genuinely hope you make this recipe soon and that it becomes one of those dishes your family asks for regularly. The beauty of it is that it improves your finances while improving your table. You’ll spend less than ten dollars and serve something that tastes like you spent all day in the kitchen. That’s the kind of win I live for.
Don’t forget to mention @affordablefoodideas if you try this recipe! I’d love to see your table and hear about the memories you make around these enchiladas.