This post contains affiliate links. As an Amazon Associate I earn from qualifying purchases.
If you’ve always wanted to make chicken and dumplings from scratch but felt intimidated, this is your starting point. I’m here to tell you that this beloved comfort dish is not some complicated restaurant mystery. It’s actually one of the most forgiving meals you can make at home, and it costs a fraction of what you’d pay anywhere else. When you make it yourself, you control every ingredient, skip the unnecessary additives, and end up with something that tastes like it came from your grandmother’s kitchen. If you want more affordable comfort food ideas, check out my bean soup crock pot recipe for other budget-friendly options.
How to Make Chicken and Dumplings From Scratch for the First Time (You’ve Got This)
I’ll never forget the first time I attempted homemade dumplings. I was living in a small apartment near Boston, stretching every dollar, and my neighbor Margaret—who’d grown up in rural Vermont—mentioned her grandmother’s dumpling recipe in passing. I became obsessed. That Sunday, I spent the afternoon in my tiny kitchen, flour everywhere, convinced I was going to ruin everything. My dumplings came out dense and heavy. My chicken was slightly overcooked. But you know what? My roommate took one bite and asked when I was making it again. That failure taught me something crucial: this recipe is forgiving. The bones of it work beautifully even when you’re learning. Today, I make this at least twice a month, and it’s become one of my go-to meals when I want to feed people well without spending much money.
What to Expect Before You Start
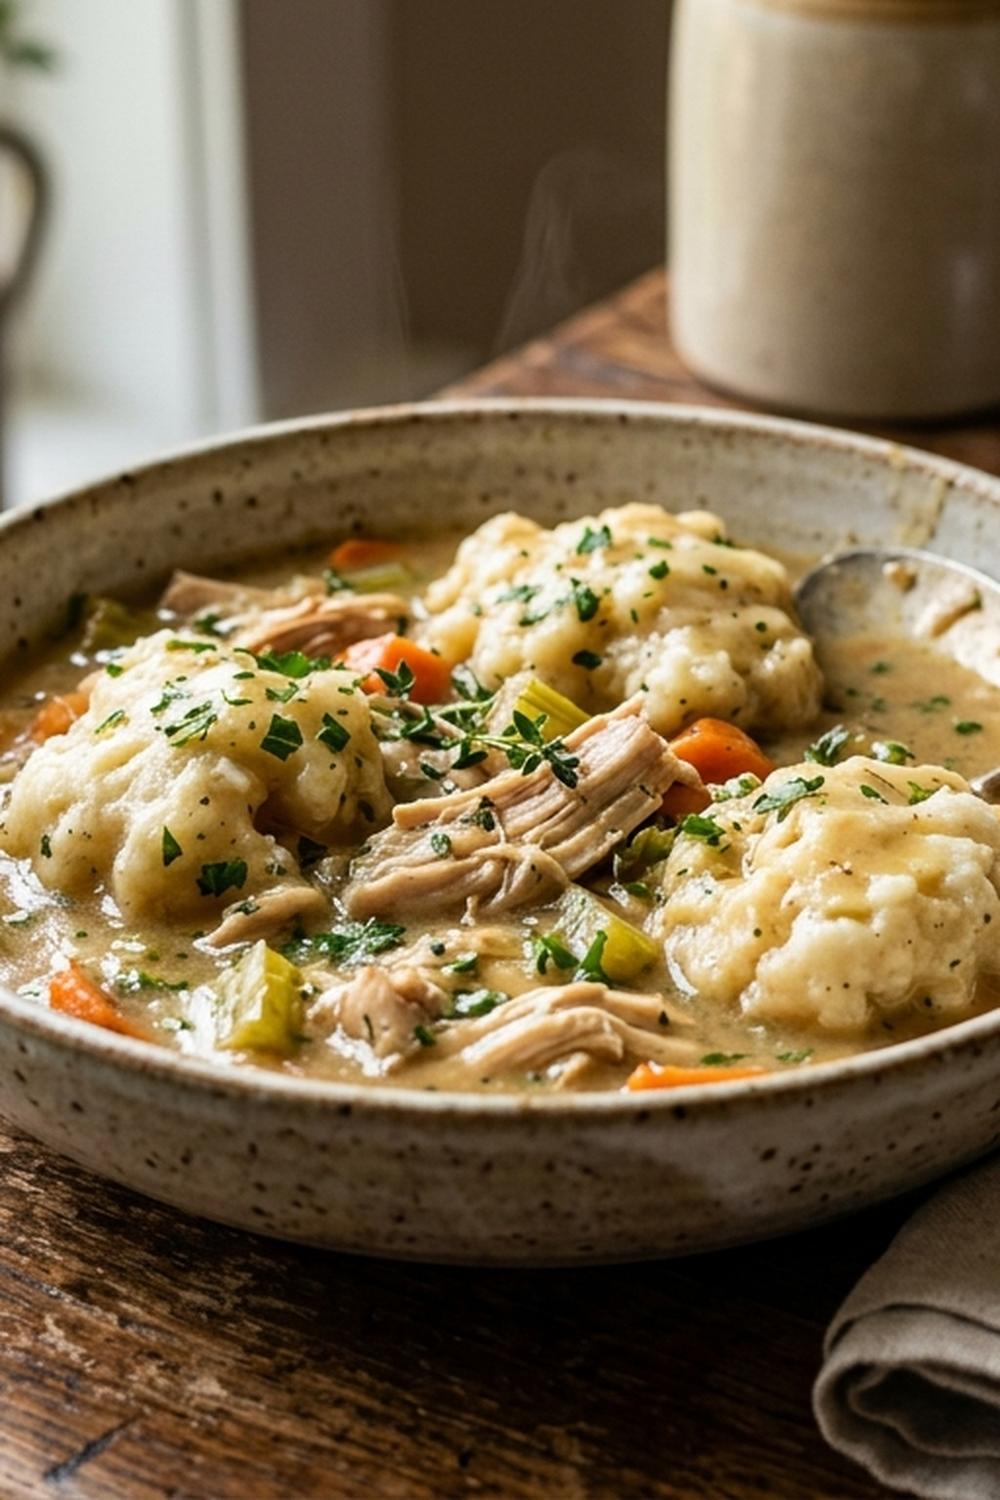
Before you begin, let’s set realistic expectations so you feel confident the whole way through. This recipe takes about 45 minutes total—roughly 15 minutes of prep work and 30 minutes of cooking. You don’t need any fancy equipment, and the difficulty level is beginner-friendly. Success looks like creamy broth, tender chicken, and dumplings that are fluffy (not dense) and have cooked through completely. Most people feel nervous about two things: getting the dumplings right and knowing when the chicken is done. I’m going to walk you through both so thoroughly that you’ll wonder why you ever worried.
- The broth-making part is actually the easiest step. You’re just sautéing vegetables, making a simple roux, and simmering everything together. This is genuinely hard to mess up, and even if your timing is slightly off, the flavors will still be delicious.
- The dumplings seem scary but they’re actually very forgiving. Unlike bread dough, you want to under-mix your dumpling batter. Even if you overmix slightly, they’ll still taste good—just potentially a bit denser. Don’t stress about perfection here.
Equipment You’ll Need (And What You Can Skip)
You probably already own everything required for this recipe. I’m not going to suggest you buy specialty tools. Here’s what matters:
- One large pot (at least 5-quart capacity) – This is where everything happens. A heavy-bottomed pot is ideal because it distributes heat evenly and prevents scorching, but any large pot you have at home will work beautifully. I use the same pot I’ve owned for fifteen years.
- A cutting board and sharp knife – These make vegetable prep faster and safer. If your knife is dull, that’s when accidents happen. You don’t need expensive; you need sharp.
- A whisk – Essential for mixing the flour into the oil and butter without lumps. A fork works in a pinch, but a whisk takes 30 seconds and makes life easier.
- A wooden spoon or regular spoon for stirring – Something you already have. Wooden spoons are nice because they don’t conduct heat, but any spoon works.
- Measuring cups and spoons – Standard kitchen tools. Get these measurements right and your recipe succeeds.
- A small spoon for dropping dumplings – A regular teaspoon from your flatware drawer is perfect. Some people use two small spoons to drop the dough; either method works.
- A cutting board for the cooked chicken – You’ll shred or chop the chicken once it’s cooked. Having a dedicated board keeps things organized.
The Ingredients – A Beginner’s Shopping Guide
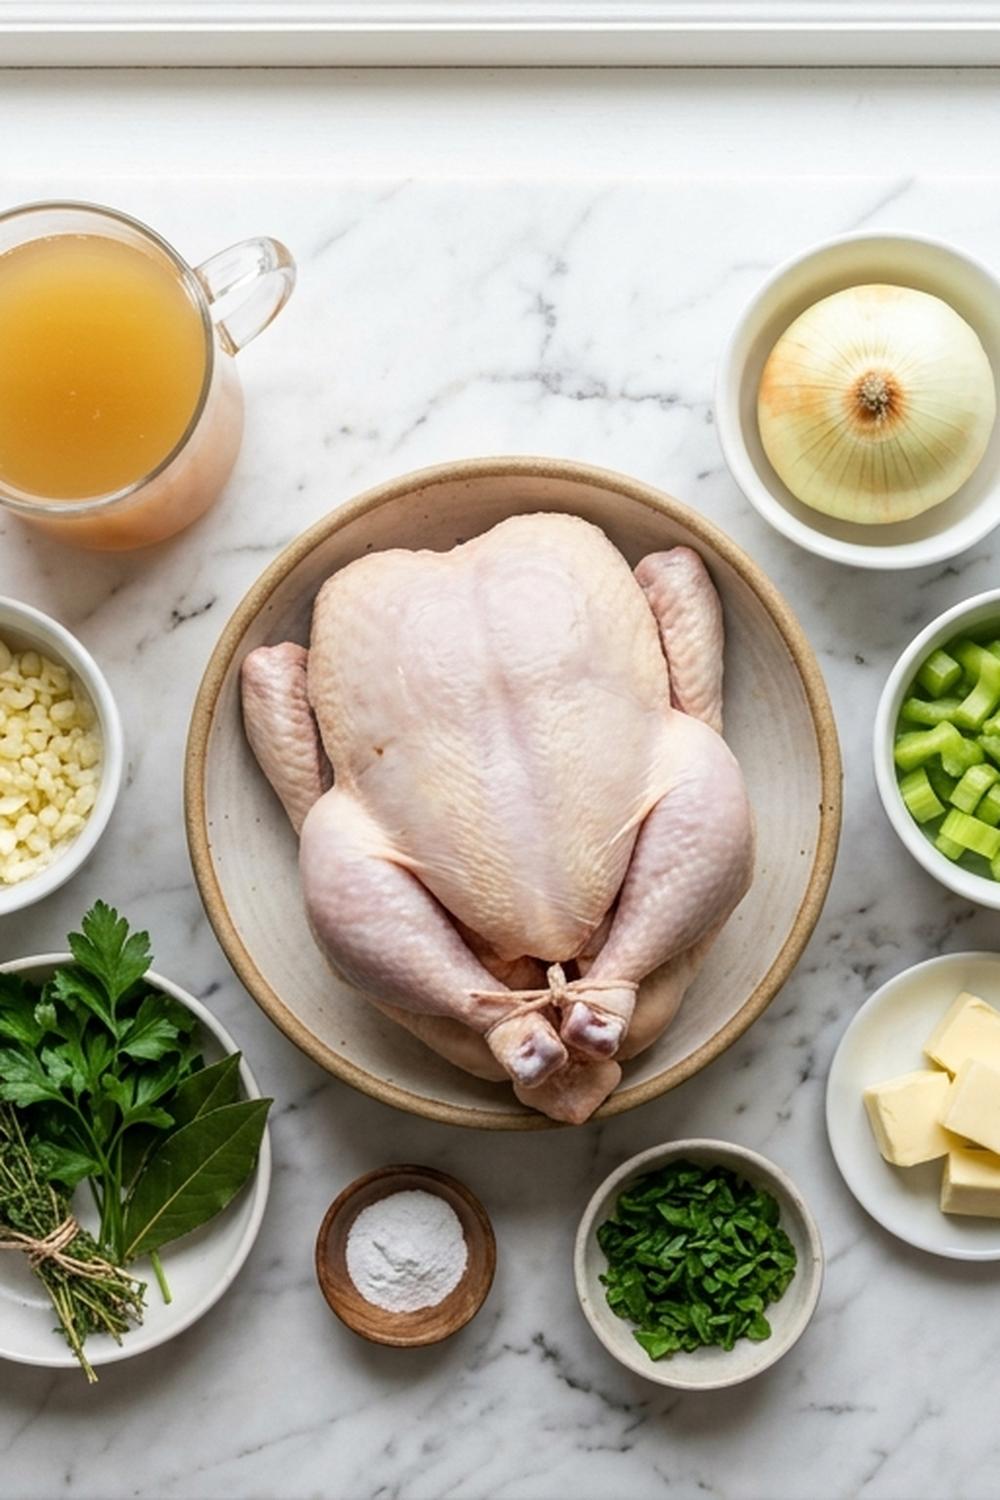
Let me walk you through each ingredient and where to find it. I’m also including budget-friendly swaps because that’s who I am. Shopping smart means you don’t sacrifice quality or nutrition for price.
For the Broth and Base
- 4 teaspoons chicken bouillon paste (this adds concentrated flavor; if you can’t find it, use 4 bouillon cubes crushed into powder)
- 5 tablespoons unsalted butter (or use salted butter and reduce the added salt slightly if that’s what you have)
- ¼ teaspoon dried sage (a little goes a long way here)
- ⅓ cup all-purpose flour (spooned and leveled, never packed down)
- ¼ teaspoon dried rosemary (optional but recommended; it deepens the flavor significantly)
- ¼ teaspoon dried thyme (from the spice aisle, check the expiration date)
- 2 tablespoons extra-virgin olive oil (use a mid-range brand; premium oil isn’t necessary for cooking)
- 1 teaspoon kosher salt (Diamond Crystal brand is affordable and dissolves beautifully)
- ½ teaspoon freshly ground black pepper (fresh-cracked is worth it; pre-ground loses flavor quickly)
- 6 cups low-sodium chicken broth (store-brand works perfectly; avoid broth with added sugars)
For the Chicken and Vegetables
- 1½ pounds boneless, skinless chicken breasts or thighs (thighs are cheaper and stay more moist; breasts are leaner—either works)
- ½ cup frozen peas (frozen is cheaper than fresh and has excellent nutrition)
- 2 large carrots, diced (buy loose carrots from the produce section rather than pre-packaged)
- 2 ribs of celery, diced (one bunch lasts weeks in the crisper drawer)
- 12 ounces evaporated milk (canned, found in the baking aisle—this creates creaminess without heavy cream)
- 1 medium yellow onion, chopped (any yellow onion works; they’re always affordable)
- 1 clove garlic, minced (fresh garlic costs less than pre-minced and tastes better)
For the Dumplings (Makes enough for 6 servings)
- ½ teaspoon kosher salt (same salt as the broth)
- Fresh chopped parsley for garnish (optional but makes it pretty)
- 1⅔ cups all-purpose flour (standard grocery store flour, nothing special needed)
- ¾ cup whole milk (full-fat creates better texture, but 2% works if that’s your budget choice)
- 2 tablespoons butter, melted and slightly cooled (leftover from the pot works)
- 1 tablespoon baking powder (check your pantry; you might already have this)
- ¼ cup sour cream (adds tang and tenderness; plain Greek yogurt is a decent swap)
Budget-Saving Ingredient Swaps: If fresh garlic seems expensive, jarred minced garlic works fine (use ½ teaspoon). If you can’t find chicken bouillon paste, use four crushed bouillon cubes. If sour cream is too pricey this week, substitute it with plain yogurt or skip it entirely (the dumplings will be slightly less tender but still delicious). Store-brand versions of every single ingredient here work as well as name brands.
Step-by-Step: Your First Chicken and Dumplings From Scratch Recipe
I want you to feel completely confident before you start cooking. I’m going to break this down into manageable pieces. Read through each step completely before you begin. This recipe builds logically: broth first, then dumplings, then you bring them together. You’ve got this.
Step 1: Prep Your Vegetables (The Foundation of Flavor)
Before you turn on the heat, prepare all your vegetables. Dice your two large carrots into small pieces—I aim for roughly ½-inch cubes, but exact size doesn’t matter. Chop your two celery ribs into similar-sized pieces. Peel and chop your onion into roughly ¼-inch pieces. Mince your garlic clove finely (or use ½ teaspoon jarred). This is called mise en place in French, and it simply means having everything ready before you cook. Having your vegetables prepped means you won’t scramble or burn anything while chopping.
Why this matters for beginners: When you have everything ready, you can focus entirely on technique rather than juggling multiple tasks. You’ll cook better and feel calmer.
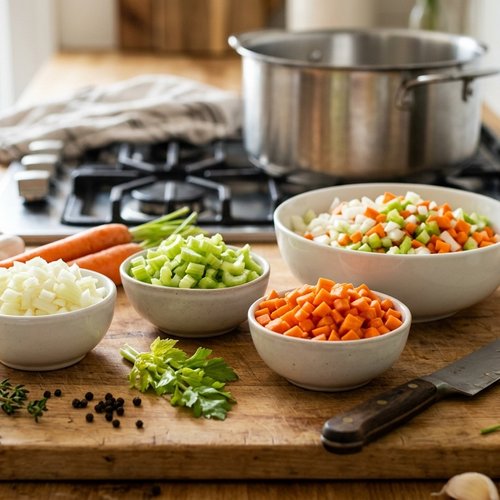
Step 2: Build the Flavor Base (The Roux)
Place your large pot on the stove over medium heat. Pour in 2 tablespoons of olive oil. Wait about 1 minute for the oil to heat through—you’ll notice it becomes more fluid and shiny. This is the right time to add vegetables. Add your diced carrots, celery, and onion to the hot oil. You should hear a gentle sizzle. Stir occasionally for about 3 minutes. Your vegetables should soften slightly and become fragrant. The onion will begin turning translucent at the edges.
After 3 minutes, add your minced garlic and stir constantly for about 30 seconds. Garlic burns easily, so we’re not leaving it alone—just 30 seconds of constant stirring. Your kitchen will smell absolutely amazing at this point.
Now add 5 tablespoons of unsalted butter to the pot. Let it melt completely into the oil. Once melted, add your ⅓ cup of all-purpose flour. This is crucial: whisk it constantly for 1 full minute. You’re creating what’s called a roux (pronounced “roo”), which is the thickening agent for your broth. Whisking prevents lumps. What you’re making is a smooth paste that coats the vegetables. It should smell toasty and smell like cooking butter—that’s exactly right.
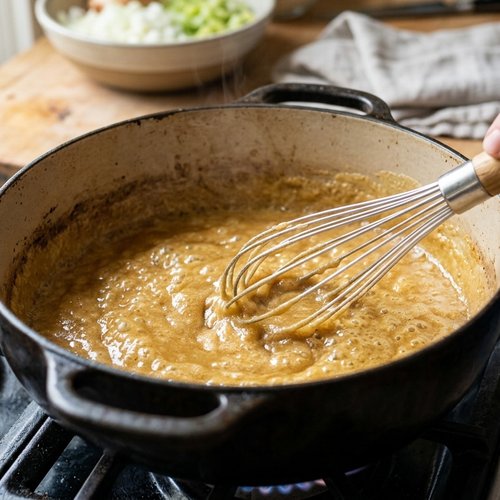
Step 3: Add Broth and Seasonings (The Scary Part That’s Not Actually Scary)
Here’s where people often get nervous: adding broth to flour. The key is doing it slowly and stirring constantly. Pour your 6 cups of low-sodium chicken broth into the pot very gradually—not all at once. Start with maybe 1 cup, stirring constantly as you pour. The broth will initially look like you’re making a thick paste. Keep stirring. Once that first cup is incorporated smoothly, add the next cup. Continue this process until all broth is added. This slow method prevents lumps. If you dump it all at once, you’ll have flour clumps that won’t dissolve, and the texture suffers.
Once the broth is incorporated and looks smooth (it should be thin and soupy at this point), add 4 teaspoons of chicken bouillon paste. If using bouillon cubes instead, crush them into powder form first. Stir until completely dissolved. Now add your dried seasonings: ¼ teaspoon thyme, ¼ teaspoon sage, ¼ teaspoon rosemary, 1 teaspoon kosher salt, and ½ teaspoon black pepper. Stir well. The broth should smell herbaceous and welcoming.
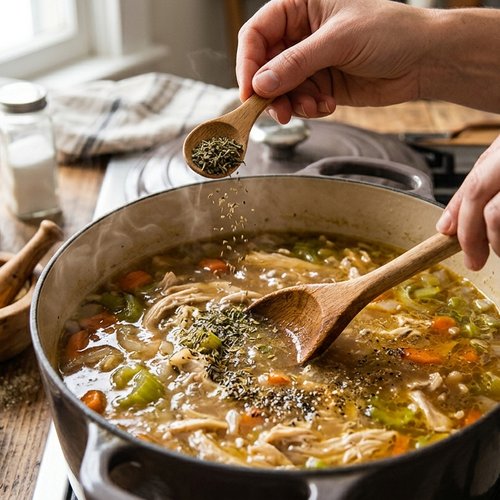
Step 4: Cook the Chicken (The Critical Timing)
Add your 1½ pounds of chicken (breasts or thighs) directly to the broth. You can add it as one piece or cut it into two pieces—it doesn’t matter. Bring the broth to a gentle boil. You’ll see bigger bubbles rapidly breaking the surface. Once it reaches a boil, reduce the heat to medium-low and place a lid on the pot. Simmer for 10 minutes.
At the 10-minute mark, carefully remove the chicken to a clean cutting board. Check for doneness: cut into the thickest part with a knife. If you see pink, cook it 2-3 minutes more. If it’s white throughout, it’s done. The chicken will continue cooking even after you remove it, so don’t overcook it at this stage. You want it tender and moist for when you shred it later.
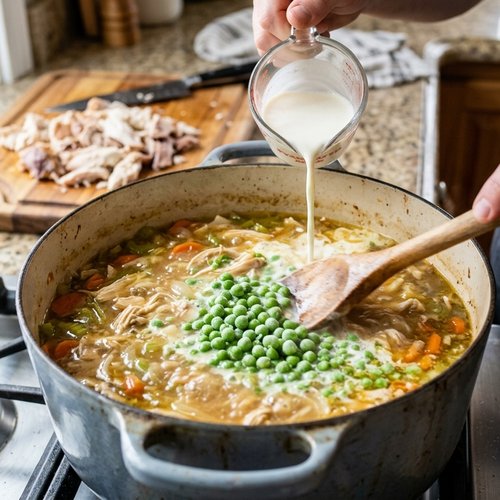
Once the chicken is cooked and on the cutting board, stir your 12 ounces of evaporated milk and ½ cup frozen peas into the broth. Stir well. The broth should look creamy and beautiful. Taste it and adjust salt and pepper if needed—this is your chance to get the seasoning exactly how you like it.
Step 5: Make the Dumpling Batter (Simpler Than You Think)
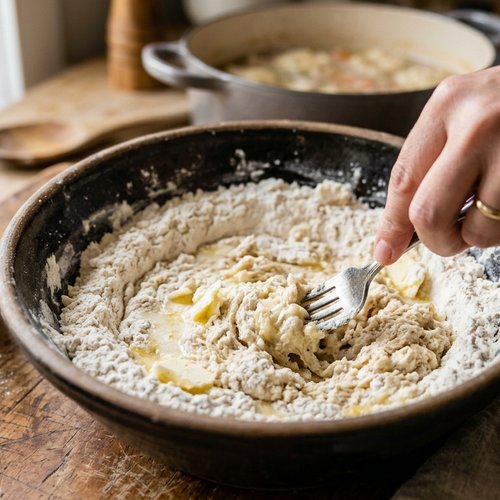
While the broth is simmering, make your dumplings. In a separate medium bowl, combine 1⅔ cups all-purpose flour, 1 tablespoon baking powder, and ½ teaspoon kosher salt. Stir these dry ingredients together with a fork or whisk until evenly mixed. The baking powder should be distributed throughout the flour.
Make a small well (indent) in the center of the flour mixture. Pour ¾ cup milk, ¼ cup sour cream, and 2 tablespoons melted butter into the well. Using a fork, stir gently until everything is just combined. This is the most important dumpling rule: do not overmix. The batter should look shaggy and lumpy. Some unmixed flour should be visible. If you overwork it, the dumplings become tough. Lumpy is good. Lumpy is correct.
Step 6: Drop the Dumplings Into Simmering Broth
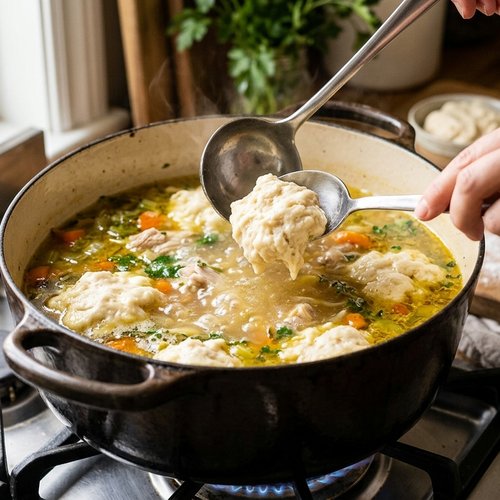
Bring your broth and pea mixture to a gentle simmer (smaller bubbles, not a rolling boil). Using a small spoon (a regular teaspoon works perfectly), scoop up teaspoon-sized amounts of dumpling batter. You can use a second small spoon to help push the batter off the first spoon directly into the broth. Drop the dumplings all over the surface of the simmering broth. You should have enough batter for roughly 30-36 small dumplings.
Once you’ve dropped all the dumplings, cover the pot with a lid immediately and reduce the heat to low-medium (just enough to maintain a gentle simmer). Now walk away. Set a timer for 12 minutes. This covered cooking is crucial—steam cooks the dumplings from above while they’re surrounded by broth below. They’ll expand to roughly double their size.
Step 7: Finish and Serve
After 12-15 minutes, carefully remove the lid (watch for steam). The dumplings should have puffed up and look cooked on the surface. Gently stir the broth to break up the dumplings slightly and distribute them throughout. Scoop out one dumpling with a spoon and let it cool for 10 seconds, then taste it. If it’s still doughy in the very center, cover and cook 2-3 minutes more. If it’s tender all the way through, you’re done.
Shred or chop your cooked chicken into bite-sized pieces and add it back to the pot. Stir gently to combine. Taste and adjust salt and pepper one final time. Ladle into bowls, sprinkle with fresh chopped parsley if you have it, and serve immediately while steaming hot.
How to Tell If You Did It Right
Success in this recipe has specific signs. When you’re checking your work, look for these indicators that everything is progressing beautifully.
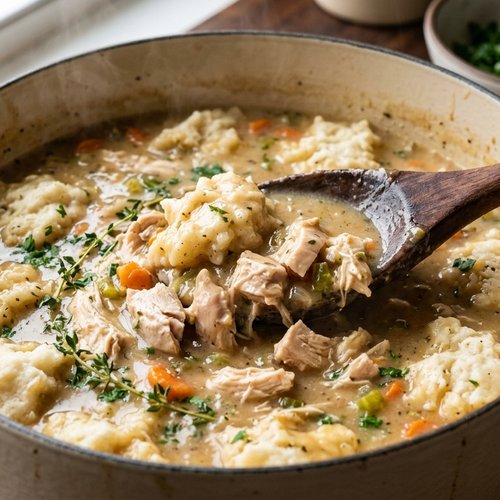
- The broth should be creamy and smooth, not grainy or lumpy. If you see flour specks floating, you didn’t whisk long enough when adding broth. The color should be a rich, pale cream or light tan. It should smell herbaceous and savory—your mouth will water.
- The chicken should shred easily with a fork. If it’s rubbery or tough, it cooked too long. If it’s still pink inside, it needs more time. The goal is tender and moist, which happens at exactly 10 minutes for most pots.
- The dumplings should be light and fluffy, not dense and bread-like. A perfectly cooked dumpling should be tender on the outside and have a slightly airy crumb inside. If it’s dense throughout, you overmixed the batter. The next batch will be better because you’ll know what to expect.
- The entire pot should smell inviting and homey. This isn’t a test, exactly, but trust your nose. If something smells wrong, investigate. If it smells like comfort, you’re on track.
What Went Wrong? Beginner Fixes
These are the mistakes I see most often, and I’ve made all of them myself. Here’s how to prevent or fix them:
- Lumpy broth that never smooths out. This happens when you add broth too quickly to the flour mixture. Prevention: add broth gradually and stir constantly. Fix (if it’s already lumpy): pour the entire mixture through a fine-mesh strainer into a clean pot, pressing gently on the lumps. It’s not ideal, but it works. Next time, you’ll do the slow method and it won’t happen.
- Dumplings that are dense and bread-like instead of fluffy. This is 100% caused by overmixing the dumpling batter. You stirred too much. Prevention: mix just until combined and stop. You should see lumps. Fix: unfortunately, if they’re already cooked dense, they’re dense. But here’s the good news—they still taste delicious and taste better than any store-bought dumpling. Next batch will be perfect because now you understand the rule.
- Chicken that’s overcooked and dry. This means it simmered longer than 10 minutes. Prevention: set a timer and check at exactly 10 minutes. Fix: it’s already cooked, but here’s the thing—it’s still edible and still tastes good. The evaporated milk and broth keep it from being horribly dry. The next time you make this, you’ll nail it.
- Dumplings that didn’t rise or stayed on the bottom of the pot. This usually means the lid wasn’t on the entire time or the heat was too low. Prevention: cover immediately after dropping dumplings and maintain a gentle simmer (not a weak simmer, but not a rolling boil). The steam is essential. Fix: if some sank, they probably still cooked; they’re just not fluffy. Still tasty.
- Broth that’s too salty or not salty enough. Prevention: taste before adding all the salt, and remember that broth and bouillon add salt too. Fix: if too salty, stir in more milk or unsalted broth (if you have extra). If not salty enough, add salt a pinch at a time and taste frequently.
Expert’s Nutritional Tip
As a registered dietitian, I want to point out something important about evaporated milk. Many people think it’s unhealthy because it’s canned, but here’s what I know clinically: evaporated milk is simply regular milk with water removed. It’s not full of additives. What makes this recipe work nutritionally is that you’re using less total fat than traditional chicken and dumplings made with cream or heavy cream. The evaporated milk provides that luxurious creaminess while keeping calories moderate. One cup of this finished recipe contains roughly 280-300 calories, 18 grams of protein (from the chicken), and about 8 grams of fat. It’s genuinely balanced nutrition in a comforting package. That’s the whole point of this recipe—you get restaurant-quality comfort food that actually fits into a healthy eating pattern. You don’t sacrifice one for the other.
Make-Ahead Guide
This is where chicken and dumplings truly shine for meal planning. You have several options:
Make the complete recipe, then store: This is my favorite approach. Make the entire pot, let it cool to room temperature, then refrigerate. The dumplings absorb broth and become even more tender (in a good way). Reheat gently on the stove over medium heat, stirring occasionally, until steaming hot. This takes about 10-15 minutes. You can store it this way for 3 days in the refrigerator or up to 3 months in the freezer. If freezing, let it cool completely, then transfer to freezer containers, leaving an inch of headspace for expansion.
Make the broth, don’t add dumplings, then add them later: Prepare the entire broth base (everything through step 4), refrigerate it separately for up to 3 days, then reheat and add fresh dumpling batter when you’re ready to serve. This gives you fresh-cooked dumplings without the full cooking time on serving day.
Prepare dumpling batter in advance: Mix the dry ingredients for dumplings (flour, baking powder, salt) and store in a bag in your pantry. On cooking day, mix only the wet ingredients and combine them. This saves maybe 2 minutes, but it’s one fewer bowl to wash.
I typically batch-cook this on Sunday and eat portions throughout the week. Day 1 is fresh and perfect. Day 2-3 is actually better because flavors meld. I freeze two portions and have quick meals waiting for busy weeknights.
Seasonal Variations
This recipe is flexible enough to change with seasons. Here’s how I adapt it:
Spring and Summer: Add fresh herbs instead of dried. Use fresh thyme, fresh sage, and fresh rosemary (use triple the amount of fresh versus dried). Add fresh corn kernels instead of peas. Add fresh diced zucchini. The broth becomes lighter and fresher-tasting.
Fall and Winter: Add diced root vegetables—turnips, parsnips, or additional carrots. Add fresh spinach at the very end (it wilts into the hot broth). Add a splash of apple cider vinegar for depth. Use chicken thighs instead of breasts; they’re richer and more flavorful in cooler months. Add an extra ⅛ teaspoon of sage and thyme.
Year-round additions I love: A handful of fresh spinach added at the end tastes restaurant-quality. Mushrooms sautéed with the initial vegetables add earthiness. A tablespoon of lemon juice or apple cider vinegar at the very end brightens everything.
Your Next Steps After Mastering This
Once you’ve made this recipe and felt successful (and you will), you’ve learned three crucial cooking skills that transfer everywhere: making a roux, building a broth, and working with dumpling dough. With these skills, you can now make creamy soups of any kind. Try a potato-leek soup using the same roux technique. You can make dumplings for Asian-style broths. You can make biscuits using nearly the same dough (skip the sour cream and milk, add butter and buttermilk instead). This recipe is genuinely a gateway to confidence in the kitchen. I’ve watched people make this once and suddenly feel comfortable attempting dishes they previously thought were impossible. That’s what good foundational recipes do.
Can I Store Chicken and Dumplings From Scratch Recipe?
Yes, and it stores beautifully. Refrigerator storage: 3-4 days in an airtight container. The dumplings continue to absorb broth and become even softer (which I actually prefer). Reheat gently on the stove over medium heat with a lid on, stirring occasionally, until steaming throughout. Add a splash of milk if it’s thickened too much during storage.
Freezer storage: up to 3 months. Let the cooked recipe cool completely before freezing. Transfer to freezer-safe containers, leaving an inch of headspace at the top. Thaw overnight in the refrigerator, then reheat as you would with refrigerated leftovers. The dumplings hold their texture well. If you’re in a hurry, reheat directly from frozen on the stove, covered, over medium-low heat (it just takes longer, roughly 25-30 minutes).
Pro tip from my own kitchen: I often make a double batch and freeze it in portions. This way, I have emergency comfort food ready whenever I need it. On busy weeks, I’m so grateful for my past self’s planning.
Nutrition Information
Per serving (approximately 1 cup, serves 6):
Calories: 285 | Protein: 22g | Carbohydrates: 28g | Fat: 8g | Saturated Fat: 4g | Sodium: 785mg | Fiber: 1g | Sugar: 2g
This nutritional data is based on USDA standards for the ingredients listed. The protein comes primarily from the chicken, making this a genuinely satisfying meal. The carbohydrates come from the dumplings and vegetables, which provide lasting energy. Compared to store-bought frozen chicken and dumplings, this version has significantly less sodium (we use low-sodium broth) and no artificial ingredients. From a registered dietitian’s perspective, this meal is well-balanced enough to serve as a complete dinner—you don’t need much additional side dishes. If you want vegetables, the recipe itself contains carrots, celery, and peas, which cover your vegetable servings nicely.
What Can I Serve With Chicken and Dumplings From Scratch Recipe?
Chicken and dumplings is a complete meal, but here are some accompaniments that pair beautifully:
- A simple green salad with lemon vinaigrette – Cuts through the richness and provides fresh vegetables. This is my go-to pairing when I want something lighter.
- Steamed or roasted green beans – Adds color and crunch without making you overly full.
- Cornbread or biscuits on the side – Soak up extra broth and feel celebratory. Store-bought is totally acceptable here.
- Roasted root vegetables – Carrots, parsnips, or sweet potatoes roasted with oil and salt taste incredible alongside this.
- Coleslaw – A tangy slaw made with vinegar-based dressing provides brightness and balance.
My personal favorite pairing is a simple salad and nothing else. The dumplings and broth are rich enough that you don’t need carbs on the side. But if you want side dishes, any of these work beautifully. Also, if you’re looking for other comforting soups, check out my black chili recipe for another budget-friendly option.

Chicken And Dumplings From Scratch Recipe
Ingredients
Equipment
Method
- Before you turn on the heat, prepare all your vegetables. Dice your two large carrots into small pieces—I aim for roughly ½-inch cubes, but exact size doesn't matter. Chop your two celery ribs into similar-sized pieces. Peel and chop your onion into roughly ¼-inch pieces. Mince your garlic clove finely (or use ½ teaspoon jarred). This is called mise en place in French, and it simply means having everything ready before you cook. Having your vegetables prepped means you won't scramble or burn anything while chopping. Why this matters for beginners: When you have everything ready, you can focus entirely on technique rather than juggling multiple tasks. You'll cook better and feel calmer.
- Place your large pot on the stove over medium heat. Pour in 2 tablespoons of olive oil. Wait about 1 minute for the oil to heat through—you'll notice it becomes more fluid and shiny. This is the right time to add vegetables. Add your diced carrots, celery, and onion to the hot oil. You should hear a gentle sizzle. Stir occasionally for about 3 minutes. Your vegetables should soften slightly and become fragrant. The onion will begin turning translucent at the edges. After 3 minutes, add your minced garlic and stir constantly for about 30 seconds. Garlic burns easily, so we're not leaving it alone—just 30 seconds of constant stirring. Your kitchen will smell absolutely amazing at this point. Now add 5 tablespoons of unsalted butter to the pot. Let it melt completely into the oil. Once melted, add your ⅓ cup of all-purpose flour. This is crucial: whisk it constantly for 1 full minute. You're creating what's called a roux (pronounced "roo"), which is the thickening agent for your broth. Whisking prevents lumps. What you're making is a smooth paste that coats the vegetables. It should smell toasty and smell like cooking butter—that's exactly right.
- Here's where people often get nervous: adding broth to flour. The key is doing it slowly and stirring constantly. Pour your 6 cups of low-sodium chicken broth into the pot very gradually—not all at once. Start with maybe 1 cup, stirring constantly as you pour. The broth will initially look like you're making a thick paste. Keep stirring. Once that first cup is incorporated smoothly, add the next cup. Continue this process until all broth is added. This slow method prevents lumps. If you dump it all at once, you'll have flour clumps that won't dissolve, and the texture suffers. Once the broth is incorporated and looks smooth (it should be thin and soupy at this point), add 4 teaspoons of chicken bouillon paste. If using bouillon cubes instead, crush them into powder form first. Stir until completely dissolved. Now add your dried seasonings: ¼ teaspoon thyme, ¼ teaspoon sage, ¼ teaspoon rosemary, 1 teaspoon kosher salt, and ½ teaspoon black pepper. Stir well. The broth should smell herbaceous and welcoming.
- Add your 1½ pounds of chicken (breasts or thighs) directly to the broth. You can add it as one piece or cut it into two pieces—it doesn't matter. Bring the broth to a gentle boil. You'll see bigger bubbles rapidly breaking the surface. Once it reaches a boil, reduce the heat to medium-low and place a lid on the pot. Simmer for 10 minutes. At the 10-minute mark, carefully remove the chicken to a clean cutting board. Check for doneness: cut into the thickest part with a knife. If you see pink, cook it 2-3 minutes more. If it's white throughout, it's done. The chicken will continue cooking even after you remove it, so don't overcook it at this stage. You want it tender and moist for when you shred it later. Once the chicken is cooked and on the cutting board, stir your 12 ounces of evaporated milk and ½ cup frozen peas into the broth. Stir well. The broth should look creamy and beautiful. Taste it and adjust salt and pepper if needed—this is your chance to get the seasoning exactly how you like it.
- While the broth is simmering, make your dumplings. In a separate medium bowl, combine 1⅔ cups all-purpose flour, 1 tablespoon baking powder, and ½ teaspoon kosher salt. Stir these dry ingredients together with a fork or whisk until evenly mixed. The baking powder should be distributed throughout the flour. Make a small well (indent) in the center of the flour mixture. Pour ¾ cup milk, ¼ cup sour cream, and 2 tablespoons melted butter into the well. Using a fork, stir gently until everything is just combined. This is the most important dumpling rule: do not overmix. The batter should look shaggy and lumpy. Some unmixed flour should be visible. If you overwork it, the dumplings become tough. Lumpy is good. Lumpy is correct.
- Bring your broth and pea mixture to a gentle simmer (smaller bubbles, not a rolling boil). Using a small spoon (a regular teaspoon works perfectly), scoop up teaspoon-sized amounts of dumpling batter. You can use a second small spoon to help push the batter off the first spoon directly into the broth. Drop the dumplings all over the surface of the simmering broth. You should have enough batter for roughly 30-36 small dumplings. Once you've dropped all the dumplings, cover the pot with a lid immediately and reduce the heat to low-medium (just enough to maintain a gentle simmer). Now walk away. Set a timer for 12 minutes. This covered cooking is crucial—steam cooks the dumplings from above while they're surrounded by broth below. They'll expand to roughly double their size.
- After 12-15 minutes, carefully remove the lid (watch for steam). The dumplings should have puffed up and look cooked on the surface. Gently stir the broth to break up the dumplings slightly and distribute them throughout. Scoop out one dumpling with a spoon and let it cool for 10 seconds, then taste it. If it's still doughy in the very center, cover and cook 2-3 minutes more. If it's tender all the way through, you're done. Shred or chop your cooked chicken into bite-sized pieces and add it back to the pot. Stir gently to combine. Taste and adjust salt and pepper one final time. Ladle into bowls, sprinkle with fresh chopped parsley if you have it, and serve immediately while steaming hot.
Notes
FAQs
Can I use rotisserie chicken from the grocery store instead of cooking chicken from scratch?
Absolutely, yes. Shred the rotisserie chicken and add it to the broth after the dumplings finish cooking (at the very end). This cuts your cooking time down to roughly 25 minutes total instead of 45 minutes. Use the equivalent of 1½ pounds of shredded rotisserie chicken. The flavor is still wonderful, and honestly, on nights when I’m exhausted, I do this every time. There’s no shame in using convenience foods that are genuinely healthy. You’re still making this from scratch in every other way.
What if I don’t have evaporated milk?
You have several options. Heavy cream works beautifully (use ¾ cup instead of ¾ cup evaporated milk plus ¼ cup milk). Whole milk works if you add an extra tablespoon of butter to increase richness. Greek yogurt works if you stir it in at the very end and don’t boil the broth after adding it (yogurt can curdle with high heat). Coconut milk creates an interesting flavor variation. Any of these will work. The evaporated milk is my choice because it’s affordable and stable, but creamy results are possible with other options.
Can I make this in a slow cooker?
Yes, but with modifications. Brown the vegetables and make the roux in a pot on the stove first, then transfer everything to the slow cooker. Add the broth, bouillon, and seasonings. Cook on low for 4 hours with the chicken in the pot. Remove the chicken, shred it, and return it to the slow cooker. In the last 30 minutes of cooking, increase the heat to high, add your peas and evaporated milk, and then drop the dumpling batter on top (you can do this without a lid, just let them steam). It works, but the stovetop method is faster and gives you more control.
Is this recipe gluten-free?
The broth base itself is naturally gluten-free, but the dumplings contain all-purpose flour. To make gluten-free dumplings, substitute equal parts gluten-free all-purpose flour blend (make sure it contains xanthan gum or add ¼ teaspoon of xanthan gum to the flour blend). The results are slightly different in texture but still delicious. For the broth roux, use cornstarch or rice flour instead of all-purpose flour (use ¼ cup of either instead of ⅓ cup all-purpose flour). The broth may be slightly less thick, so add ½ teaspoon xanthan gum to thicken it. This requires more fussing, but it’s definitely possible.
Can I use chicken thighs instead of breasts?
Yes, and I actually prefer it. Chicken thighs are more flavorful, stay moist more easily, and are usually cheaper per pound. They take the same amount of time (10 minutes)