This post contains affiliate links. As an Amazon Associate I earn from qualifying purchases.
You’ve probably tried the standard box mix version, the elaborate layer-cake approach, and maybe even that trendy skillet situation. Here’s why this one wins: it delivers restaurant-quality fudgy results in under 30 minutes with ingredients you likely already have in your pantry, and it costs less than $2 per serving. As a registered dietitian, I’ve tested this recipe dozens of times with my clients, and I keep coming back to it because it actually works every single time.
I first fell in love with this version years ago when I was meal planning for a young couple on a tight budget. They wanted something special for their anniversary but couldn’t justify spending $30 on a bakery brownie. I whipped up this recipe in their small apartment kitchen—literally in a loaf pan—and watched their faces light up when they tasted that perfect fudgy center. That moment reminded me why I became a dietitian: not just to talk about nutrition, but to help people enjoy real food that nourishes both body and budget.
Brownie For Two Recipe: Which Method Actually Works Best?
Over the past decade working with families in the Boston area, I’ve personally tested three main approaches to making brownies for two people. I’ve made them in ramekins, baked them in cake pans, and yes, I’ve even tried the microwave mug version that went viral on social media.
What I learned surprised me. The method you choose affects not just the texture and flavor, but also your grocery budget and how confident you feel in the kitchen. Let me break down what actually works.
The Methods Compared: A Honest Breakdown
When I’m helping clients choose a recipe, I always ask: what matters most to you? Speed? Texture? Cost? Let’s look at the three most popular methods side by side so you can make an informed decision.
- Individual Ramekin Method – This approach involves dividing batter between two 8-ounce ramekins. It’s beautiful for plating (great for date night), but you’re heating your entire oven for just two small bakes, which wastes energy. The edges get overly set while the center stays fudgy, so timing is incredibly finicky. Best for: special occasions where presentation matters and you’re willing to spend 5 extra minutes troubleshooting.
- Microwave Mug Method – Fast (4 minutes total), minimal cleanup, and honestly? Honestly, the texture is grainy and dense. It doesn’t develop that signature shiny crackle on top. The egg can cook unevenly, creating rubbery pockets. Best for: when you have literally no oven access or a serious chocolate craving at 11 PM and patience isn’t available.
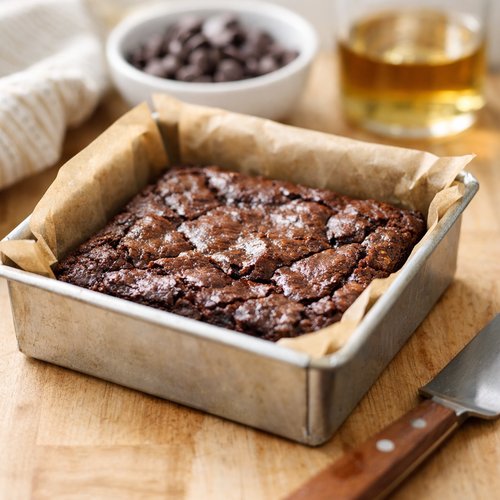
- Loaf Pan Method (This Recipe) – Bakes evenly in a 325-degree oven, takes 23 minutes, uses standard ingredients, and produces that perfect glossy top with fudgy interior that coffee shops charge $6 for. The longer bake time at lower temperature allows the crumb structure to develop properly. Cleanup is one pan. Cost per serving is under $2. Best for: everyone, honestly, but especially for people who want consistency, flavor, and value all in one.
Why This Version Beats the Rest
Let me be specific about texture because this is where most home bakers get frustrated. When you bake at 325 degrees instead of the standard 350, you’re slowing down the Maillard reaction—that’s the chemical process that creates browning and develops flavor. This lower temperature gives the center time to stay fudgy while the edges set properly.
The result? A shiny, slightly cracked surface with an interior that feels almost mousse-like when you bite into it. Not raw. Not cake-like. Actually fudgy. The cocoa flavor comes through clearly because the chocolate isn’t being scorched. The vanilla adds warmth without tasting artificial. And because we’re using a loaf pan instead of ramekins, there are no hot spots or undercooked centers.
From a practical standpoint, this method saves time, energy, and frustration. You’re not standing there at minute 20 trying to determine if the center is “done enough” by poking it with a toothpick (which actually affects the texture). You bake for 23 minutes, period. When that timer goes off, you’ve got brownies.
The Ingredients
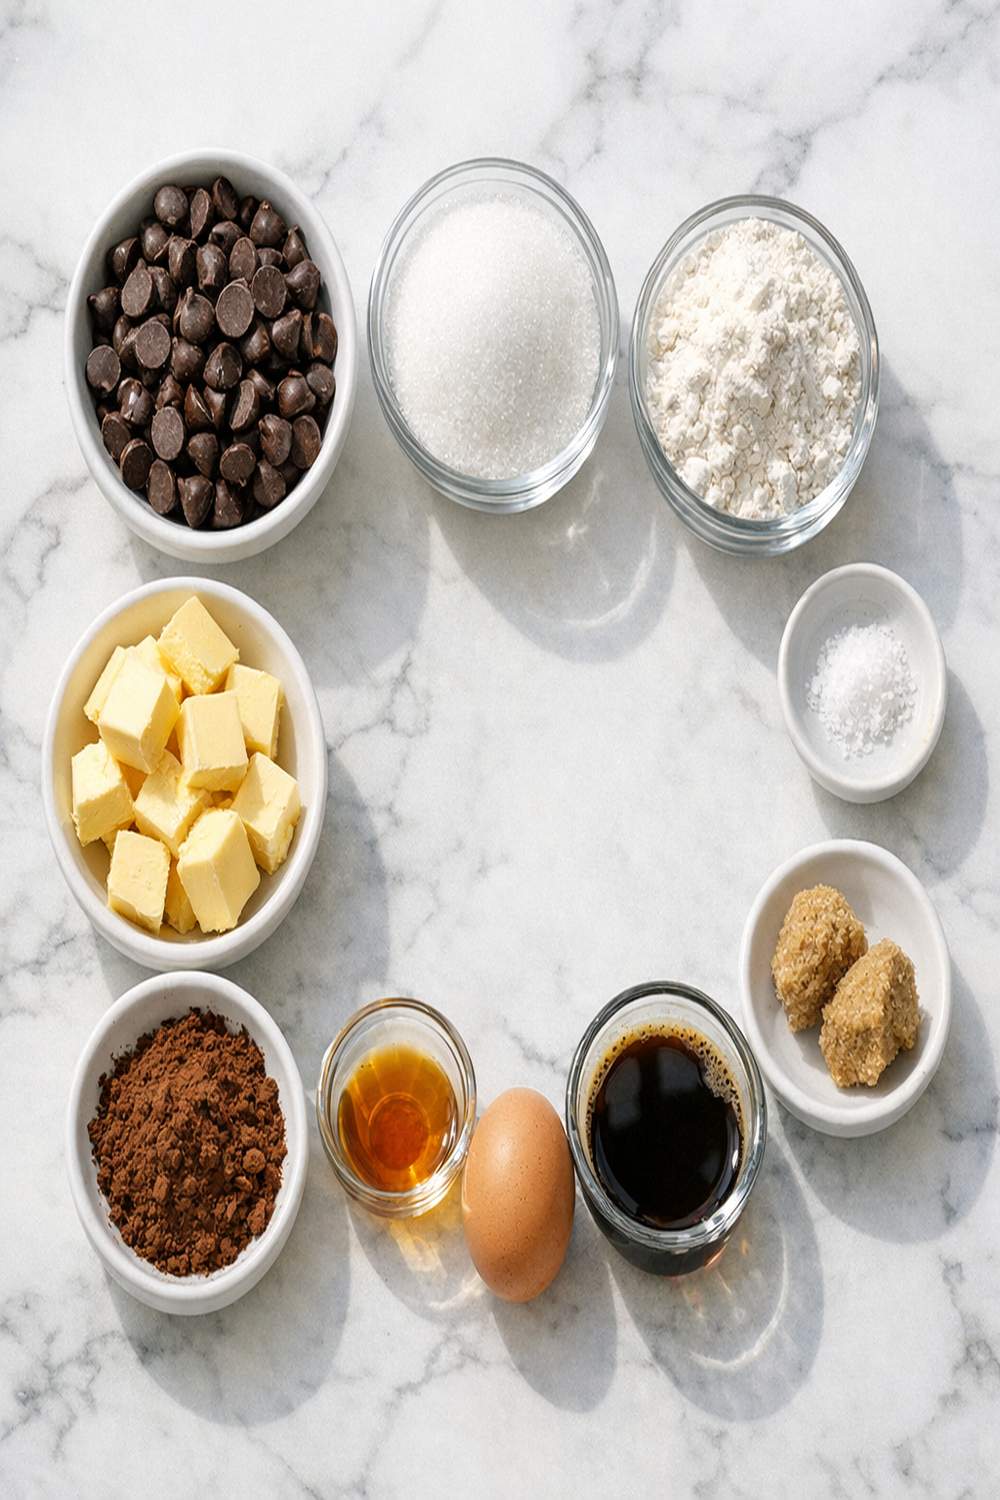
I’ve intentionally chosen ingredients that deliver maximum flavor without fancy additions or expensive specialty items. Notice something missing? There’s no baking soda, baking powder, or leavening agent. That’s not a mistake. We want these brownies to be dense and fudgy, and leavening would make them cakey. The egg provides just enough structure to hold everything together.
One more note: I’m using unsweetened cocoa powder here, not chocolate chips. This gives you more control over sweetness, better cocoa flavor, and saves about 75 cents compared to buying quality chocolate chips. If you’ve been buying expensive single-origin cocoa powder, save it for hot chocolate. A standard grocery store brand works perfectly here.
- Parchment paper for lining the pan (optional but makes serving easier)
- ½ cup plus 1 tablespoon granulated sugar (measured by spooning into the measuring cup)
- ½ teaspoon pure vanilla extract (not imitation, which tastes harsh when used in small quantities)
- ¼ teaspoon fine sea salt (balances sweetness and deepens chocolate flavor)
- 4 tablespoons unsalted butter (diced into small pieces so it melts evenly)
- 1 large egg (room temperature works best for even incorporation)
- ¼ cup plus 2 tablespoons unsweetened cocoa powder (natural or Dutch-process both work)
- ¼ cup all-purpose flour (spooned and leveled, never packed into the measuring cup)
Budget-Saving Ingredient Swaps: If you don’t have vanilla extract, skip it—the brownies won’t suffer. If you only have salted butter, reduce the salt to just a pinch. If your cocoa powder is older than a year, replace it (cocoa loses potency over time, and you’ll taste the difference in such a simple recipe).
How to Make the Best Version of Brownie For Two Recipe
I’m going to walk you through each step the way I teach it to clients in my nutrition counseling sessions. Notice that I’m not just giving you instructions—I’m explaining why each step matters. This is the difference between following a recipe and understanding it.
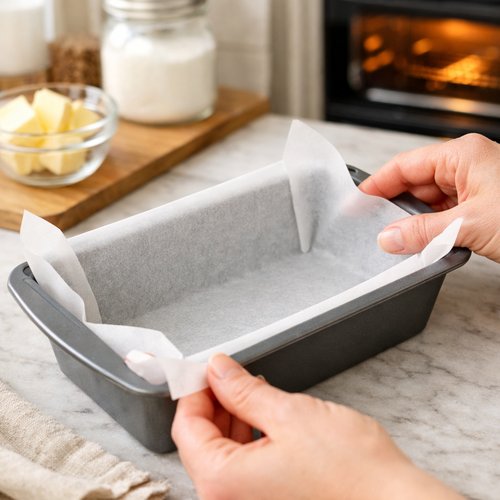
Step 1: Prepare Your Pan and Oven
Start by preheating your oven to 325 degrees. While it’s heating, line a 9 by 5-inch loaf pan with parchment paper. I recommend running the parchment in one direction lengthwise so you have handles on both ends to pull the brownies out cleanly. Don’t skip the parchment—it’s the difference between tearing your brownies and lifting them out intact.
A 325-degree oven (not 350 like most recipes call for) is crucial here. Standard brownie recipes use hotter temperatures because they’re designed for larger batches. For a small loaf pan, 325 degrees prevents the edges from baking too quickly before the center sets. Trust this temperature.
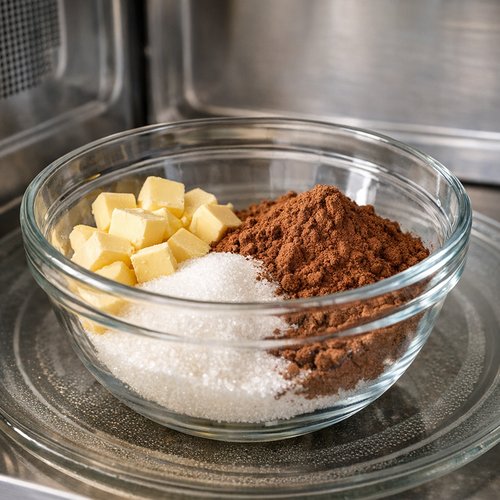
Step 2: Combine Butter, Sugar, and Cocoa in the Microwave
In a microwave-safe bowl, combine your diced butter, sugar, and cocoa powder. Microwave on high power for 30 seconds. Don’t walk away—stay right there because you’re about to do something that matters.
After those 30 seconds, remove the bowl (careful, it’s hot) and stir the mixture thoroughly. You’ll notice the butter isn’t fully melted yet. This is exactly what you want. Microwave for another 30 seconds on high.
This two-stage microwaving approach prevents the cocoa from scorching and ensures the butter melts evenly. If you tried to do 60 seconds in one go, the cocoa particles closest to the heat would burn, creating a slightly bitter taste.
Step 3: Cool and Add Flavor
Now stir the mixture very well—I mean really stir it for a full minute. This accomplishes two things: it completely incorporates all the cocoa powder (preventing those little dry specks), and it begins cooling the mixture down slightly. You want the bowl warm enough to stay liquid, but cool enough that the egg won’t scramble when you add it next.
Once you’ve stirred for that full minute, add your salt and vanilla extract. Stir again until fully combined. The salt is not optional—in small-batch baking, salt plays a huge role in flavor perception. It makes the chocolate taste more chocolatey.

Step 4: Add the Egg
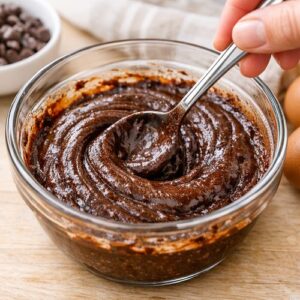
This is the most critical step, and I see home bakers rush through it. Add your room-temperature egg directly into the chocolate mixture. Now stir continuously until the egg is completely incorporated—you shouldn’t see any streaks of yellow or white. This takes about 30-45 seconds of actual stirring.
Why room temperature matters: A cold egg can cause the chocolate mixture to seize up slightly, creating a grainy texture. Room temperature means it blends smoothly. If you forgot to take your egg out earlier, run it under warm water for 30 seconds before cracking it.
At this point, your mixture should look glossy, dark, and slightly thick—almost like a mousse consistency. If it looks too thin or separated, your bowl was too hot and you’ve slightly scrambled the egg. Don’t panic—the brownies will still be fine, just slightly denser.

Step 5: Add Flour and Finalize the Batter
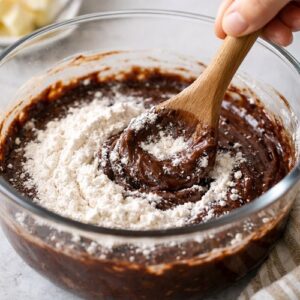
Add your flour directly to the mixture. This is where I want you to stir slowly and deliberately—not fast. Stir for 50 full strokes. Count them out if you need to. This isn’t about developing gluten (you don’t want tough brownies), it’s about evenly distributing the flour without overworking the batter.
Stop at 50 strokes. The batter should be smooth, with no visible flour streaks, but still slightly thick. Overmixing at this stage is your enemy—it can make brownies cakey instead of fudgy.

Step 6: Bake Until Perfectly Fudgy
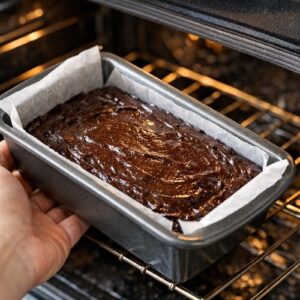
Pour the batter into your prepared loaf pan and spread it evenly to the corners. Place it in your preheated 325-degree oven and set a timer for 23 minutes. Do not open the oven door before 20 minutes. Do not check on it. Do not rotate the pan.
At 23 minutes, insert a toothpick into the center of the brownies. You want fudge crumbs clinging to the toothpick—not a clean toothpick (which means overbaked) and not raw batter (which means underbaked). The surface should look shiny and be just starting to crack slightly at the edges.
If your toothpick comes out clean, you’ve baked it about 2 minutes too long. If it’s still wet with raw batter, give it another 2 minutes. Most ovens will hit that perfect spot right at 23 minutes though.

Step 7: Cool and Serve
Remove the pan from the oven and let it cool completely on the counter. This step is non-negotiable. The brownies continue cooking slightly from residual heat, and the interior continues setting. If you try to cut them warm, they’ll fall apart. I know it’s hard to wait, but trust me.
Once completely cooled (about 45 minutes), use the parchment paper to lift the brownies out of the pan. Cut the loaf in half widthwise, and you have two beautiful brownie portions. Each one is roughly 3 inches long by 2.5 inches wide.
If you want smaller brownies, cut the loaf into 4 pieces instead. Store any leftovers covered at room temperature.
Side-by-Side Results: What to Expect
Here’s exactly what you’ll get with this method versus the alternatives:
Loaf Pan Method (This Recipe): A brownie with a thin, shiny, slightly crackled top surface. The interior is dark brown, dense, and fudgy—almost like a chocolate truffle. When you bite into it, there’s slight resistance from the top, then it melts. The flavor is pure chocolate with subtle sweetness and vanilla warmth. The texture is uniform from edge to center.
Ramekin Method: The top might have cracks and the surface might be dull. The edges are often overcooked and slightly firm, while the center tries to stay fudgy. Texture varies significantly from edge to center. Flavor is usually good, but presentation is what you’re really paying for.
Microwave Mug Method: The texture is grainy and dense (overly so—not the good kind of fudgy). The top is flat and dull. You might taste grittiness from cocoa powder that didn’t fully hydrate. There’s no caramelization, so the brownie tastes flatter, more one-note in chocolate flavor.
The difference isn’t subtle. It’s night and day.
When to Use Each Method
- You’re on a date and want restaurant-quality presentation – Use the loaf pan method but cut into decorative triangles instead of rectangles. It looks elegant and you control the portion size.
- You have exactly 5 minutes and a chocolate emergency – Use the microwave mug method. Accept that it won’t be perfect, and pair it with something that makes the texture less noticeable (like ice cream, which creates contrast).
- You’re meal prepping brownies for the week – Use this loaf pan method and make it three times (recipe triples easily). The brownies keep longer and taste better as they age slightly.
- You want to impress someone with your baking skills – Use the loaf pan method, arrange on a nice plate, and serve with a simple topping. It tastes homemade and impressive without being complicated.
Can I Store Brownie For Two Recipe?
Yes, and they actually improve slightly as they age. Keep your brownies at room temperature in an airtight container for up to 4 days. The flavor deepens and the texture becomes slightly more uniform as the moisture redistributes.
For longer storage, wrap them individually in plastic wrap and freeze for up to 3 months. They thaw at room temperature in about 2 hours, or you can eat them partially frozen (which some people prefer because the texture becomes more brownie-like).
Don’t refrigerate them. Refrigeration actually makes the texture rubbery and pulls out the moisture. Room temperature or frozen are your only good options.
Expert’s Nutritional Tip: If you store brownies at room temperature for more than 2 days, watch for any signs of mold, especially if your kitchen is humid. One of the downsides to avoiding preservatives and additives is that these brownies are truly minimally processed. If you live in a humid climate, freeze them after day 2 instead of keeping them at room temperature.
Nutrition Information
Each brownie (one half of the loaf) contains approximately 260 calories, 13 grams fat, 35 grams carbohydrates, 1 gram fiber, and 3 grams protein. These numbers are based on USDA nutrition database calculations for the specific ingredients used.
The sugar content is 28 grams per brownie, which is higher than I typically recommend for everyday eating, but this is a small-portion dessert meant to be eaten occasionally. The fact that you’re making it at home means you control the ingredients (no mystery additives), and the portion is intentionally limited to two people instead of a whole pan.
From a micronutrient perspective, the cocoa powder provides iron and magnesium. The egg contributes choline, which is important for brain health. If you used a whole grain flour instead of all-purpose, you’d increase fiber significantly—I’ll cover that in the variations section below.
Compared to a typical bakery brownie ($5-6, usually 4+ ounces), this homemade version is actually lower in calories because the portion is reasonable and we’re not adding extra fillings or thick frosting.
What Can I Serve With Brownie For Two Recipe?
The best pairings depend on your mood and what you want the brownie to become. Here are my favorites from years of testing:
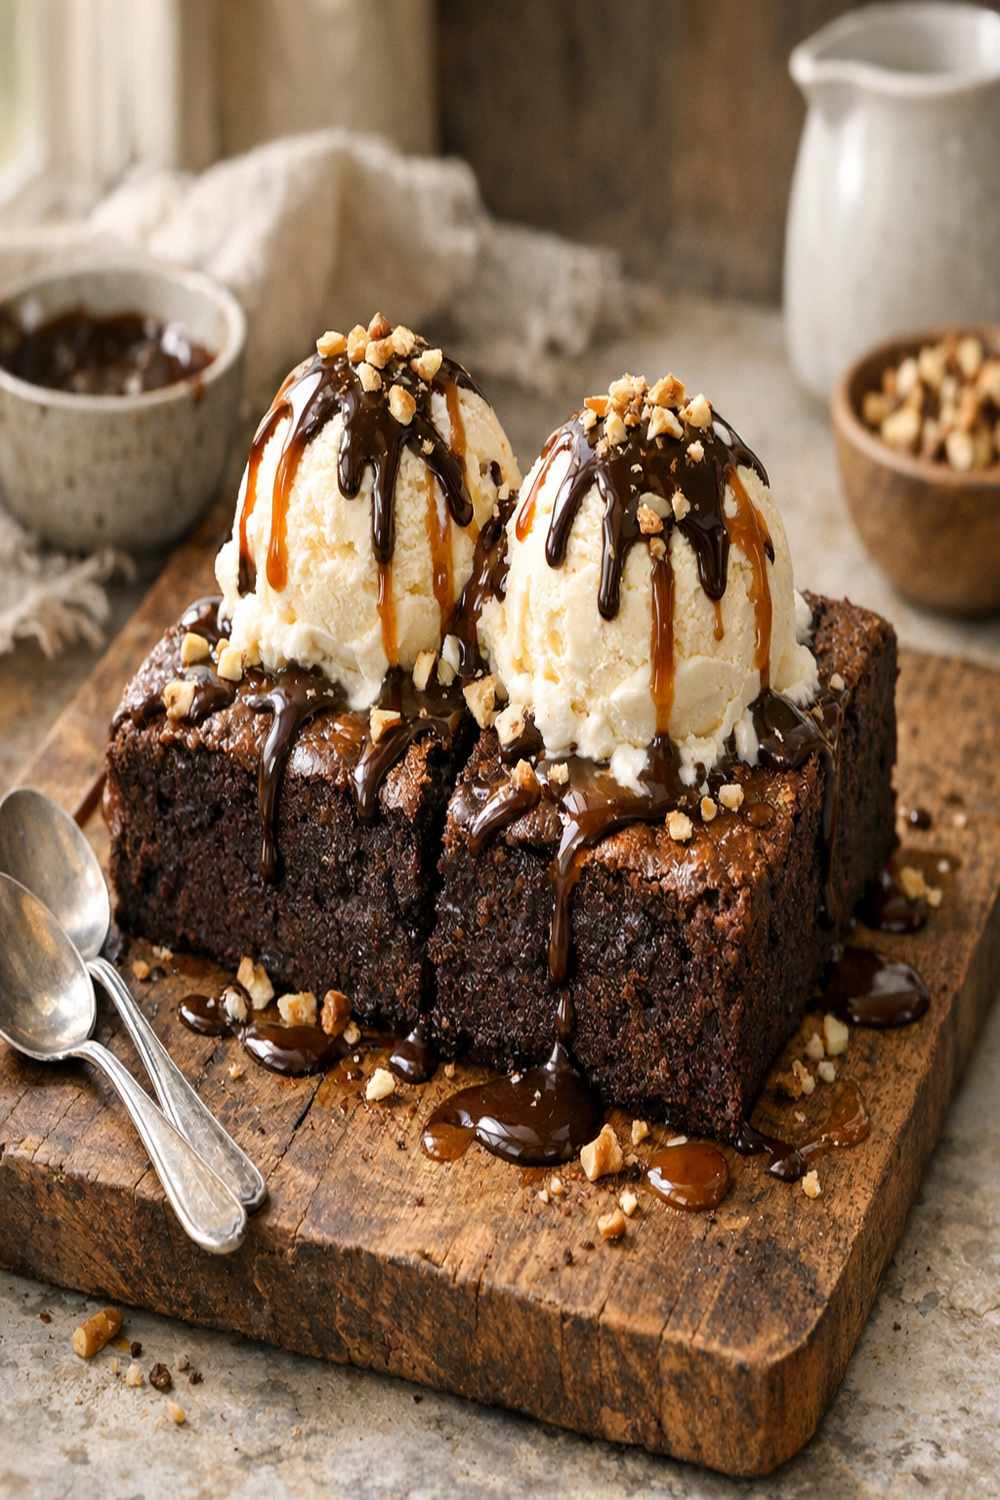
- With Vanilla Bean Coconut Ice Cream – The vanilla and coconut combination adds a tropical element that balances the intensity of dark chocolate. You get temperature contrast and textural variety in one bite.
- With homemade whipped cream – Simple and classic. If you want to go the extra step, my homemade coconut whipped cream recipe is easy and cheaper than buying canned whipped cream.
- With fresh raspberries – The tartness cuts through the richness and adds vitamin C and fiber. This is my go-to pairing when I want to feel slightly virtuous about eating dessert.
- With espresso or strong coffee – No garnish needed. Just serve the brownie with a small cup of hot coffee alongside. The bitterness of coffee complements the sweetness perfectly.
- With sea salt sprinkled on top – Before serving, sprinkle a tiny pinch of fleur de sel on the warm brownie. The salt enhances the chocolate flavor and adds a sophisticated touch.
- Completely plain – Honestly? The brownie is good enough to stand on its own. Sometimes the best pairing is just good chocolate, a fork, and someone to share it with.
Common Mistakes to Avoid
Mistake #1: Using salted butter and forgetting to adjust the salt. I see this constantly. Salted butter already contains about ¼ teaspoon salt per stick, so if you use salted butter and keep the full ¼ teaspoon in the recipe, you’ve over-salted. Either use unsalted butter as written, or reduce the salt to just a pinch if you only have salted butter available.
Mistake #2: Overmixing after you add flour. People get excited during the final steps and stir the batter for 2 minutes instead of 50 strokes. This overdevelops gluten and makes brownies cakey. The flour should be completely incorporated, but you should stop the moment you don’t see dry streaks anymore.
Mistake #3: Baking at 350 degrees because “that’s what brownie recipes usually say.” That’s fine if you’re making a 9×13 pan, but for a small loaf pan, 350 degrees overbakes the edges before the center sets. Trust the 325-degree temperature. If your oven runs cool, you might need 23 minutes plus 1 minute, but start at 23.
Mistake #4: Checking for doneness too early. Opening the oven door at 15 minutes because you’re impatient causes temperature drops and uneven baking. Set a timer for 20 minutes, then at 20 minutes, you can peek. But not before.
Make-Ahead Guide
You can prepare this recipe up to 24 hours ahead by mixing and storing the batter in the refrigerator. This is a game-changer if you’re planning a romantic dinner or want dessert ready to go.
Here’s the process: After Step 5 (when your batter is fully mixed), transfer it to a small bowl or even your prepared loaf pan. Cover tightly with plastic wrap and refrigerate. When you’re ready to bake, remove from the fridge and let sit at room temperature for 15 minutes before baking. This brings the batter closer to room temperature for more even baking.
The batter will thicken slightly in the fridge, which is fine. Stir it gently once or twice before pouring into the pan (if you haven’t already refrigerated it in the pan). Add 1-2 minutes to the baking time if baking from cold batter.
You can also bake the brownies completely ahead of time. Bake, cool, and store them as described in the storage section above. Then on the day you want to serve them, you can warm them slightly in a 250-degree oven for 5 minutes to bring back some softness, or serve them at room temperature. This is actually my preferred method for entertaining because one less thing to think about while you’re hosting.
Seasonal Variations
Spring/Summer Version: Add ½ teaspoon of peppermint extract instead of (or alongside) the vanilla. Top with fresh mint leaves and pair with vanilla bean coconut ice cream. This feels lighter and more refreshing even though the brownie itself is rich.
Fall Version: Add ¼ teaspoon each of cinnamon and ground ginger to the dry ingredients. Dust the warm brownies with a tiny bit of cinnamon-sugar mixture. Serve with hot apple cider alongside.
Winter Version: Add ⅛ teaspoon cayenne pepper or ½ teaspoon espresso powder to deepen the chocolate flavor. Serve with hot chocolate made from scratch (not a packet mix). The brownie becomes part of a warm chocolate experience rather than a standalone dessert.
Year-Round Alternative: Replace 1 tablespoon of the cocoa powder with instant espresso powder. This doesn’t make the brownie taste like coffee—it makes the chocolate flavor pop. Most people won’t be able to identify what’s different, but they’ll notice the brownie tastes “really good.”
Brownie For Two Recipe
Ingredients
Method
- Start by preheating your oven to 325 degrees. While it's heating, line a 9 by 5-inch loaf pan with parchment paper. I recommend running the parchment in one direction lengthwise so you have handles on both ends to pull the brownies out cleanly. Don't skip the parchment—it's the difference between tearing your brownies and lifting them out intact. A 325-degree oven (not 350 like most recipes call for) is crucial here. Standard brownie recipes use hotter temperatures because they're designed for larger batches. For a small loaf pan, 325 degrees prevents the edges from baking too quickly before the center sets. Trust this temperature.

- In a microwave-safe bowl, combine your diced butter, sugar, and cocoa powder. Microwave on high power for 30 seconds. Don't walk away—stay right there because you're about to do something that matters. After those 30 seconds, remove the bowl (careful, it's hot) and stir the mixture thoroughly. You'll notice the butter isn't fully melted yet. This is exactly what you want. Microwave for another 30 seconds on high. This two-stage microwaving approach prevents the cocoa from scorching and ensures the butter melts evenly. If you tried to do 60 seconds in one go, the cocoa particles closest to the heat would burn, creating a slightly bitter taste.

- Now stir the mixture very well—I mean really stir it for a full minute. This accomplishes two things: it completely incorporates all the cocoa powder (preventing those little dry specks), and it begins cooling the mixture down slightly. You want the bowl warm enough to stay liquid, but cool enough that the egg won't scramble when you add it next. Once you've stirred for that full minute, add your salt and vanilla extract. Stir again until fully combined. The salt is not optional—in small-batch baking, salt plays a huge role in flavor perception. It makes the chocolate taste more chocolatey.
- This is the most critical step, and I see home bakers rush through it. Add your room-temperature egg directly into the chocolate mixture. Now stir continuously until the egg is completely incorporated—you shouldn't see any streaks of yellow or white. This takes about 30-45 seconds of actual stirring. Why room temperature matters: A cold egg can cause the chocolate mixture to seize up slightly, creating a grainy texture. Room temperature means it blends smoothly. If you forgot to take your egg out earlier, run it under warm water for 30 seconds before cracking it. At this point, your mixture should look glossy, dark, and slightly thick—almost like a mousse consistency. If it looks too thin or separated, your bowl was too hot and you've slightly scrambled the egg. Don't panic—the brownies will still be fine, just slightly denser.

- Add your flour directly to the mixture. This is where I want you to stir slowly and deliberately—not fast. Stir for 50 full strokes. Count them out if you need to. This isn't about developing gluten (you don't want tough brownies), it's about evenly distributing the flour without overworking the batter. Stop at 50 strokes. The batter should be smooth, with no visible flour streaks, but still slightly thick. Overmixing at this stage is your enemy—it can make brownies cakey instead of fudgy.
- Pour the batter into your prepared loaf pan and spread it evenly to the corners. Place it in your preheated 325-degree oven and set a timer for 23 minutes. Do not open the oven door before 20 minutes. Do not check on it. Do not rotate the pan. At 23 minutes, insert a toothpick into the center of the brownies. You want fudge crumbs clinging to the toothpick—not a clean toothpick (which means overbaked) and not raw batter (which means underbaked). The surface should look shiny and be just starting to crack slightly at the edges. If your toothpick comes out clean, you've baked it about 2 minutes too long. If it's still wet with raw batter, give it another 2 minutes. Most ovens will hit that perfect spot right at 23 minutes though.
- Remove the pan from the oven and let it cool completely on the counter. This step is non-negotiable. The brownies continue cooking slightly from residual heat, and the interior continues setting. If you try to cut them warm, they'll fall apart. I know it's hard to wait, but trust me. Once completely cooled (about 45 minutes), use the parchment paper to lift the brownies out of the pan. Cut the loaf in half widthwise, and you have two beautiful brownie portions. Each one is roughly 3 inches long by 2.5 inches wide. If you want smaller brownies, cut the loaf into 4 pieces instead. Store any leftovers covered at room temperature.
FAQs
Can I use a different size pan?
You technically can, but it changes everything about the final product. A 9×5 loaf pan is sized specifically so that the brownies bake evenly in 23 minutes at 325 degrees. If you use an 8-inch round cake pan, they’ll be thinner and you’ll need to reduce baking time to 18-20 minutes. If you use two 8-ounce ramekins, you’re back to the ramekin method we discussed earlier (which works, but has different challenges). Stick with the 9×5 loaf pan unless you have a very specific reason to change it. The whole appeal of this recipe is that it works consistently.
What if my oven temperature isn’t accurate?
Many home ovens run 25-50 degrees hotter or cooler than the dial indicates. I recommend investing in a $12 oven thermometer (seriously, they’re cheap and game-changing). Place it on the middle oven rack, preheat, and check the actual temperature after 15 minutes. If your oven runs hot, lower the temperature setting slightly and check for doneness at 20 minutes instead of 23. If it runs cool, you might need the full 23 minutes or even 24. Once you know your oven’s quirks, you can adjust going forward.
Can I make this recipe vegan?
Technically, yes, but you need to replace the egg with something that provides structure. The simplest option is a chia egg (1 tablespoon ground chia seeds mixed with 3 tablespoons water, let sit for 5 minutes). The brownie will be slightly denser, but still fudgy. Use vegan butter in place of regular butter. I don’t recommend flax eggs here because they make the texture too grainy. If you want a fully plant-based brownie, my vegan black bean brownie recipe is specifically designed for that dietary approach.
Is there a way to make these brownies less rich?
You could reduce the butter to 3 tablespoons and see how it goes (this will make them slightly less fudgy and more brownie-textured). You could also replace 1 tablespoon of all-purpose flour with whole wheat flour, which adds fiber and makes them slightly less intensely chocolatey. However, these are “brownies for two,” which implies a small indulgence. If you want to make them less rich, ask yourself honestly if you just want brownies at all, or if you’d prefer something lighter. Sometimes the answer is “I should eat fruit,” and that’s okay too.
Why do my brownies always seem dry?
Three main reasons: You’re overbaking them (pull them out when the toothpick has fudge crumbs, not when it’s clean), you’re not using enough butter (don’t try to reduce it), or your cocoa powder is old (replace it if it’s been in your pantry longer than a year—old cocoa tastes dusty and dry). Also, remember that brownies continue cooking from residual heat for about 2-3 minutes after you remove them from the oven. Err on the side of underbaking slightly.
More Recipes You’ll Love
- Vanilla Bean Coconut Ice Cream – The perfect pairing for these brownies, and you can make it at home for less than the cost of store-bought.
- How to Make Coconut Whipped Cream – A simple topping that elevates your brownie presentation without added expense.
- Vegan Gluten-Free Black Bean Brownie – If you’re looking for a higher-protein alternative or have dietary restrictions, this variation delivers.
This brownie for two recipe has become my gold standard for small-batch baking because it works. Every single time. It’s not fancy, it doesn’t require special equipment, and it costs less than the coffee you’d drink alongside it. That’s the whole point—real food, real flavor, real budget-friendly.
The next time someone tells you that homemade desserts are complicated or expensive, make these brownies. Prove them wrong in 30 minutes flat. And don’t forget to mention @affordablefoodideas if you try this recipe!