This post contains affiliate links. As an Amazon Associate I earn from qualifying purchases.
I still remember sitting at my grandmother’s kitchen table in rural New Hampshire, watching her transform a bag of brown rice and whatever vegetables she had on hand into something that fed our entire family for under five dollars. That lesson stuck with me through dietitian school and into my practice here near Waltham—wholesome, filling meals don’t require a fancy grocery budget or complicated techniques. This broccoli and rice stir-fry is exactly that kind of dish. It’s naturally gluten-free when you use tamari, packed with fiber and plant-based protein, and comes together faster than ordering takeout. Pair it with air fryer drumsticks for a complete protein-forward meal, or enjoy it as a satisfying vegetarian main course.
How My Grandmother’s Rice Bowls Became My Kitchen Staple
Growing up, I watched my grandmother shop the bulk bins and farmer’s markets with intention. She never wasted a vegetable, and she understood intuitively what I later learned as a registered dietitian: that whole grains paired with colorful vegetables create complete, satisfying meals that keep you full for hours. This broccoli and rice recipe is my modern interpretation of those Sunday suppers, adapted for the busy schedules we all keep today.
What makes this dish special isn’t just the affordability—though that matters tremendously. It’s the flexibility. You can meal prep it on Sunday and enjoy it throughout the week. You can stretch it further with additional vegetables or proteins. You can make it dairy-free, egg-free, or add any protein you’re working with. That adaptability is what real, sustainable eating looks like.
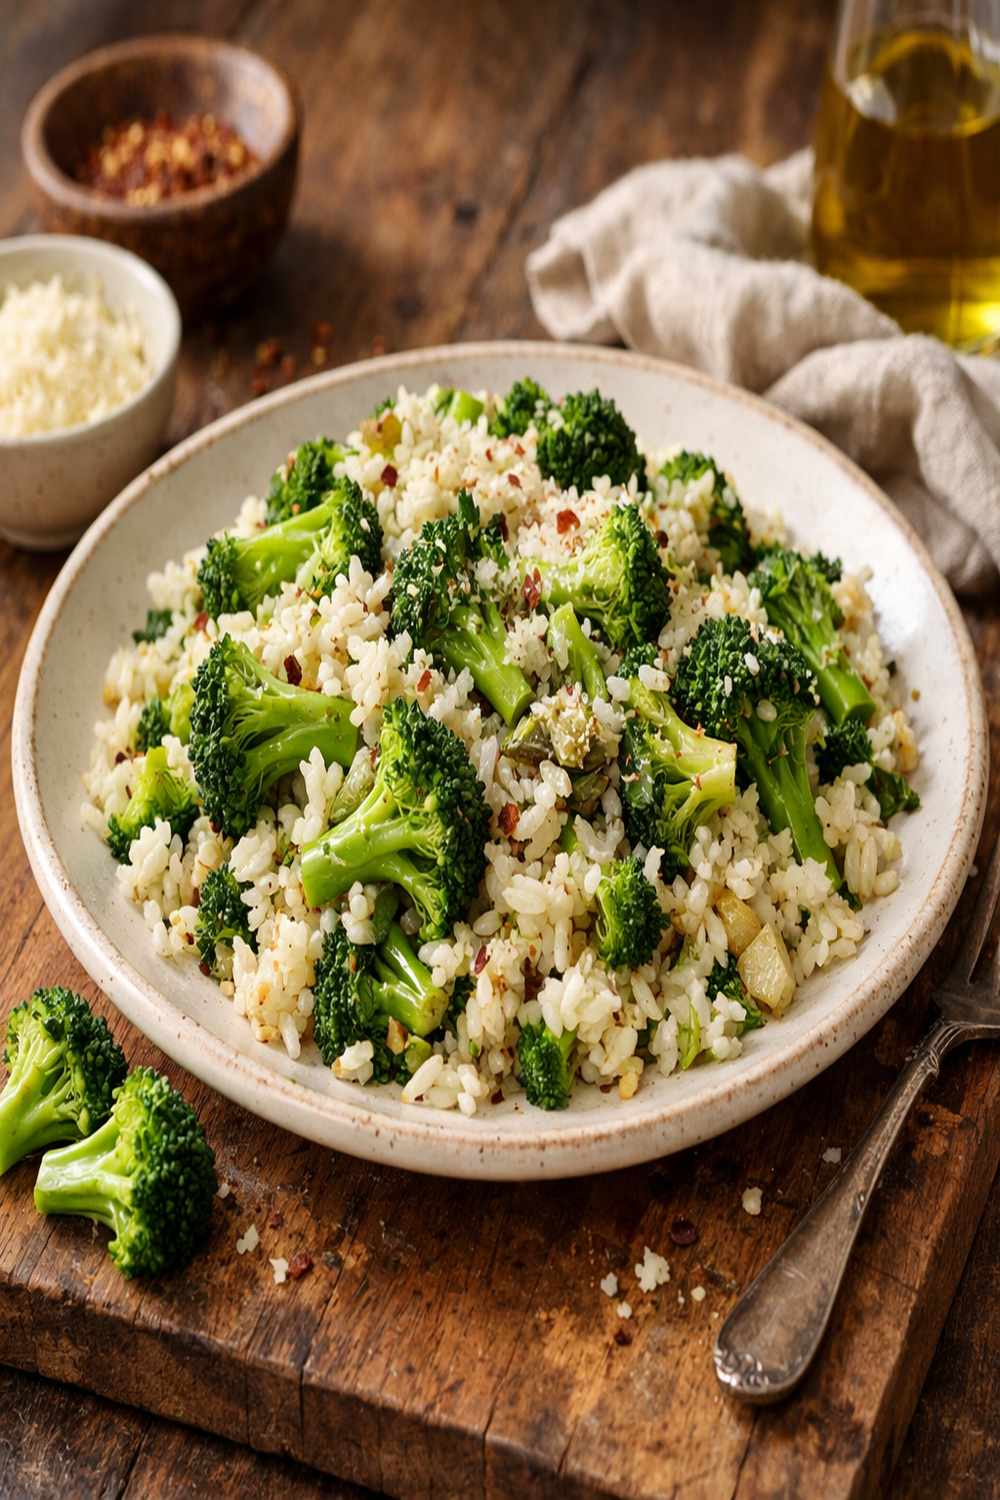
What is Broccoli And Rice Stir-Fry?
Stir-frying is one of the oldest, most efficient cooking techniques, originating from Asian cuisines where home cooks needed to stretch ingredients and minimize fuel usage. In this recipe, we’re using that same principle: fresh broccoli, cooked grains, aromatic vegetables, and a light sauce all come together in a single pan in under twenty minutes.
The magic happens when you pulse raw broccoli into rice-sized pieces—a technique that increases the vegetable’s volume without adding cost, stretches your grains further, and creates a texture that mimics traditional fried rice. Combined with the savory umami of soy sauce and the richness of a scrambled egg, you get a complete meal that’s both nutritionally balanced and deeply satisfying.
This isn’t fancy restaurant cooking. It’s resourceful, practical home cooking that any budget can accommodate. And honestly, that’s where the best food comes from.
Why You’ll Love This Broccoli And Rice Stir-Fry Recipe
- Ready in under 20 minutes – From ingredient prep to plated dinner, you’re looking at roughly 15-18 minutes of active cooking time. Perfect for weeknights when you’re tired and hungry.
- Cost-effective and stretches your grocery dollars – At roughly $2-3 per serving depending on your local prices, this delivers serious nutritional value without the price tag of takeout.
- Naturally nutrient-dense – You’re getting fiber from brown rice and broccoli, vitamin C from both, potassium from multiple vegetables, and protein from the egg. As a dietitian, I love recipes that don’t require supplements to be complete.
- Endlessly customizable – Swap vegetables seasonally, add leftover proteins, adjust sodium levels. This recipe is a framework, not a rigid formula.
- Makes excellent leftovers – Unlike some stir-fries that get soggy, this one actually improves after a day in the refrigerator as flavors meld together.
- Requires minimal equipment – One large skillet or wok, one cutting board, one knife. No special tools needed.
The Ingredients
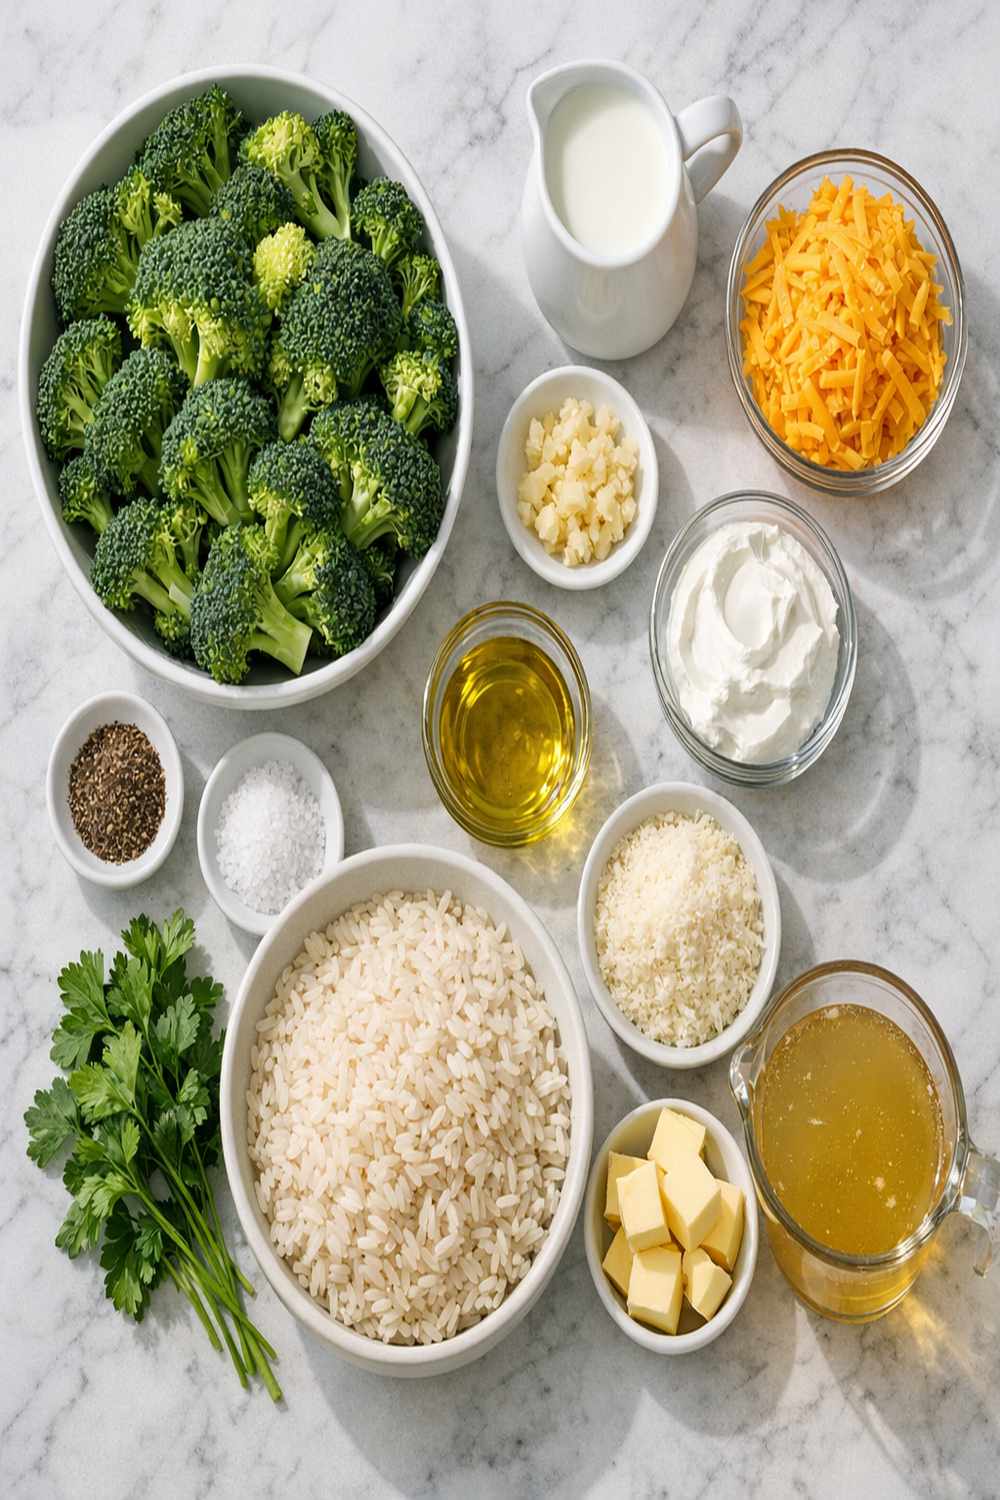
I’ve grouped these ingredients by function so you can understand how each component works together. Many of these items should already be in your pantry—the real investment is the fresh vegetables, which I’ve chosen for their nutrient density and year-round affordability.
- 2 tablespoons sesame oil (divided; this is worth the investment for flavor)
- 3 tablespoons low-sodium soy sauce or tamari (use tamari for gluten-free option)
- ½ teaspoon garlic powder (optional but deepens flavor)
- 1 large egg (room temperature)
- 2 large garlic cloves (minced fine, or ½ teaspoon garlic powder if fresh isn’t available)
- ½ teaspoon ground ginger (optional but recommended)
- ½ cup yellow onion (finely chopped)
- 3 cups fresh broccoli florets (chopped into bite-sized pieces, about one medium crown)
- 3 cups cooked brown rice (cooled completely; day-old rice from the refrigerator works beautifully)
- ½ cup green onion (sliced thin, white and light green parts)
- ¼ teaspoon red pepper flakes (optional, for gentle heat)
- 1 cup shredded or chopped carrots (about 2-3 medium carrots)
Serves 4 as a main course or 6 as a side dish. Makes approximately 5 cups total.
Budget-Friendly Ingredient Swaps
Here’s where my small-town shopping roots come in handy. I’ve made this recipe work with every constraint imaginable, and I want you to know you have options.
- Sesame oil swap: If sesame oil feels like a luxury purchase, use 1.5 tablespoons of it (for flavor) plus 0.5 tablespoon of neutral oil like canola. You’ll still get the characteristic taste without doubling the cost.
- Fresh garlic swap: One tablespoon of minced garlic from a jar (keep in the refrigerator) equals roughly 3 fresh cloves. It’s not quite as vibrant, but it’s reliable and actually lasts longer.
- Soy sauce swap: Coconut aminos taste similar with less sodium, though they cost more. Worcestershire sauce works in a pinch if that’s what’s in your cabinet.
- Brown rice swap: White rice, millet, or even farro work beautifully. The cooking time changes slightly, so refer to package directions. Quinoa adds more protein if that’s your priority.
How to Make Broccoli And Rice Stir-Fry?
I’m going to walk you through this step-by-step, but I want you to understand the why behind each step. Stir-frying is about controlling temperature and timing—keeping everything moving so nothing sticks or burns, but staying long enough for flavors to develop. Think of it as a gentle dance, not a frantic scramble.
Step 1: Prep Your Broccoli Into Rice-Sized Pieces
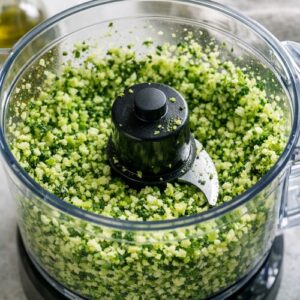
Take your fresh broccoli florets and place them in a food processor. Pulse—and this is crucial—pulse rather than blend. You’re aiming for pieces that roughly resemble grains of rice, not a fine powder or paste. This usually takes about 8-10 pulses. The texture matters because oversized pieces won’t cook through quickly, and too-fine pieces turn mushy. If you don’t have a food processor, finely chop by hand with a sharp knife. It takes longer but works perfectly.
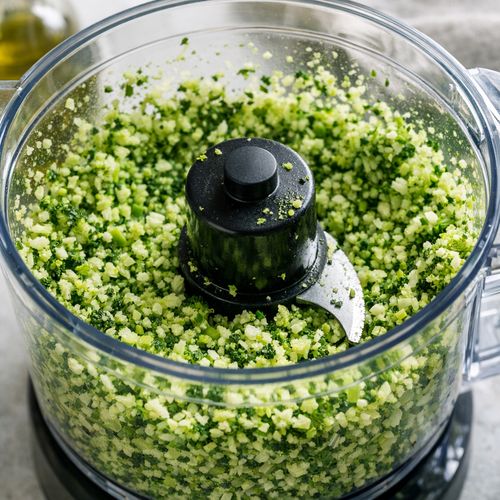
Measure out your 3 cups of pulsed broccoli and set aside. This is one of my favorite tricks for stretching rice dishes further—you’re adding volume and nutrition without adding calories or cost.
Step 2: Prep All Remaining Ingredients
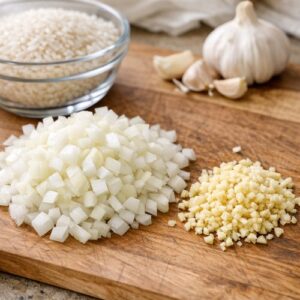
Chop your yellow onion into small, uniform pieces. Mince your garlic cloves very fine—small pieces cook faster and distribute flavor more evenly. Shred or chop your carrots (I use the shredding disc on my food processor for speed). Slice your green onions, keeping the white and light green parts separate from the darker green tops (you’ll add the darker parts at the very end for color and freshness).
Crack your egg into a small bowl and whisk it lightly with a fork. Have your soy sauce and seasonings measured and within reach. This is called mise en place in French cooking, and it’s absolutely non-negotiable for successful stir-frying. Once your pan is hot, everything needs to happen quickly.
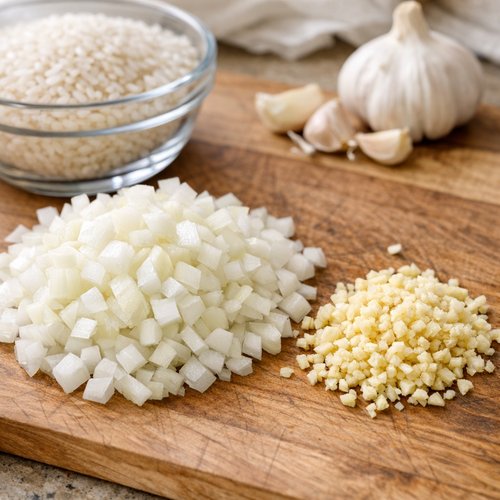
Step 3: Heat Your Pan and Cook the Aromatics
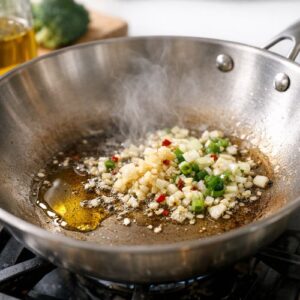
Place a large skillet or wok over high heat. Let it preheat for about one minute—you want it genuinely hot. Add 2 teaspoons of your sesame oil. You’ll know it’s ready when it shimmers and moves easily across the pan, roughly 30-45 seconds.
Immediately add your chopped onion, minced garlic, and shredded carrots. Use a wooden spoon to stir constantly, moving everything around the pan. You’re listening and smelling for fragrance—this should take about 45 seconds to 1 minute. Don’t walk away. The garlic should be aromatic but not brown. If it starts browning, your heat is too high.
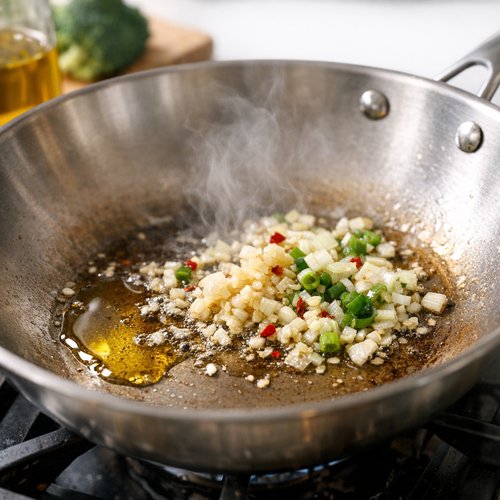
Step 4: Add the Broccoli and Second Round of Oil
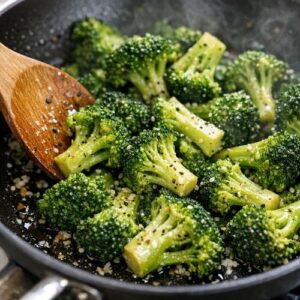
Add another 2 teaspoons of sesame oil to the pan, then add your prepared broccoli. Season lightly with salt and pepper. Continue stirring constantly with your wooden spoon, keeping everything moving. The broccoli will begin to brighten in color and soften—this takes about 3-4 minutes. You want some of the broccoli to develop slight browning on the edges, which creates deeper flavor.
The broccoli should still have a bit of firmness when you taste it—it will soften further during the remaining cooking steps. This is not the place to make it tender. Tender comes later.
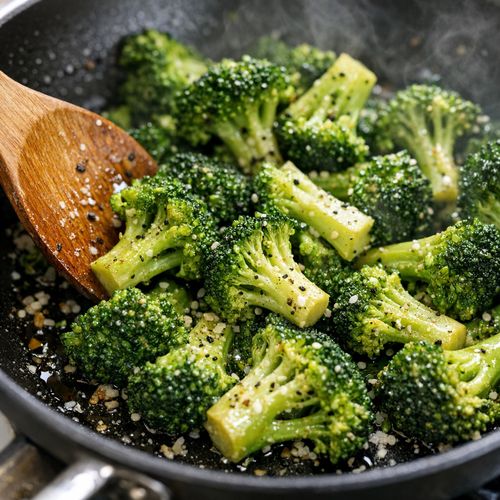
Step 5: Add Your Cooled Rice and Final Oil
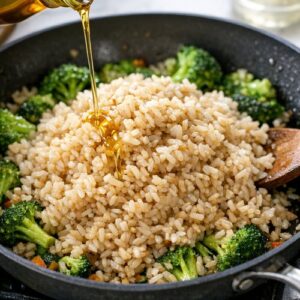
Add your remaining 2 teaspoons of sesame oil to the pan, then add your 3 cups of cooled brown rice. Here’s an important detail: cold rice works better than warm rice because it doesn’t clump together. If your rice is warm, spread it on a plate for five minutes to cool slightly.
Stir constantly, breaking up any clumps gently with the back of your wooden spoon. You want the rice to separate into individual grains and distribute evenly with the vegetables. This takes about 2 minutes. Everything should be heated through and starting to combine.
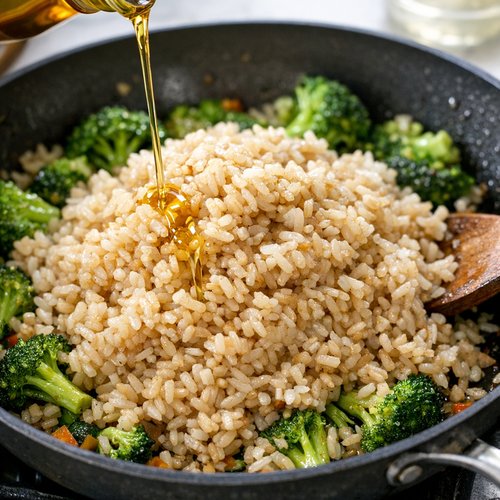
Step 6: Build Flavor With Soy Sauce and Seasonings
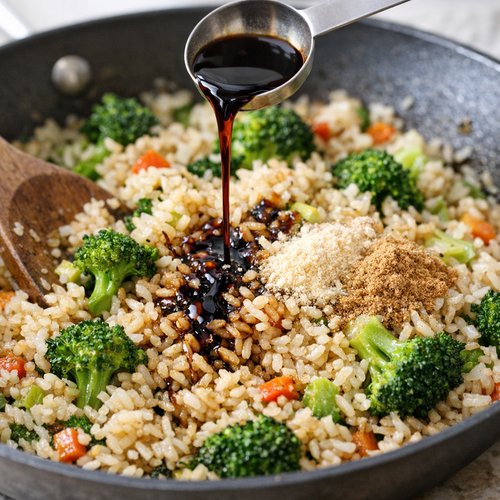
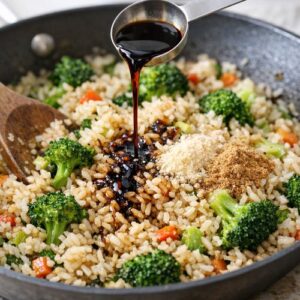
Drizzle your 3 tablespoons of soy sauce over the rice mixture. Add your ½ teaspoon of garlic powder (if using) and the optional ½ teaspoon of ground ginger. Stir constantly for another 2-3 minutes until the soy sauce has coated everything evenly and the liquid has mostly absorbed into the rice.
At this point, taste a small spoonful. Is there enough salt? Remember that soy sauce is salty, so go easy with additional salt. Does it taste balanced? You should detect onion, garlic, the earthiness of the brown rice, and a savory depth from the soy. Adjust as needed.
Step 7: Create a Well and Scramble Your Egg
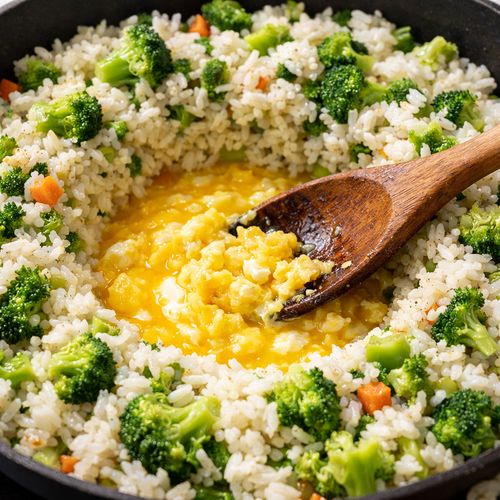
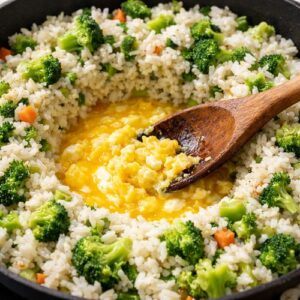
Reduce your heat to medium. Using your wooden spoon, create a small well or crater in the center of your rice mixture, pushing everything toward the sides of the pan slightly. Crack your whisked egg into this well. Don’t stir immediately—let it sit for about 10-15 seconds so the egg sets slightly on the bottom.
Then, use your wooden spoon to gently scramble the egg, breaking it into small pieces and distributing it throughout the rice and vegetables. This takes about 1-2 minutes total. The egg shouldn’t be dry—aim for soft, creamy scrambled eggs that coat the rice.
Step 8: Finish With Green Onions and Serve
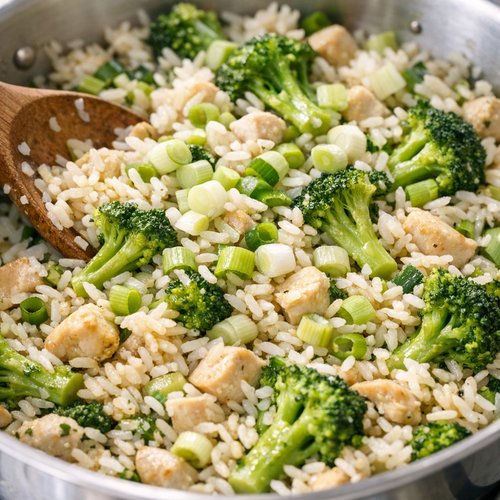
Remove from heat. Add the white and light green parts of your sliced green onions (save the dark green for garnish). Toss everything together gently. Taste again and adjust seasonings with salt, pepper, or additional soy sauce if desired.
Transfer to serving bowls or plates. Top with the reserved dark green parts of the green onions for color and a fresh, sharp bite. Serve immediately while everything is hot. If you prefer a bit of heat, sprinkle with red pepper flakes at the table.
Tips and Tricks
- Use day-old rice – Freshly cooked rice is too moist and will clump. Refrigerated rice that’s been sitting overnight is ideal. If you’re cooking rice specifically for this dish, spread it on a baking sheet to cool completely, then refrigerate for at least two hours.
- Don’t skip the high heat – Stir-frying relies on high heat to quickly cook vegetables while keeping them slightly crisp and developing flavor. Medium heat creates steamed vegetables, not stir-fried ones.
- Keep everything moving – Constant stirring prevents sticking and burning. Use a wooden spoon because it won’t scratch your pan and distributes force evenly.
- Mince your garlic small – Larger garlic pieces don’t cook fast enough and can taste raw. Small pieces cook through in the 45 seconds you have and distribute their flavor evenly.
- Taste as you go – This isn’t a baking recipe where you follow exact measurements and hope for the best. Stir-frying is forgiving. Taste at the end and adjust salt, soy sauce, or seasoning to your preference.
- Add protein strategically – If you’re adding leftover cooked chicken, shrimp, or tofu, add it in step 5 when you add the rice, so it heats through without overcooking.
Expert’s Nutritional Tip
As a registered dietitian, I want to highlight something important about the broccoli in this recipe. When broccoli is chopped finely and cooked quickly at high heat—exactly what we’re doing here—it preserves more of its heat-sensitive vitamin C compared to longer cooking methods. You’re getting roughly 85-90% retention of this nutrient. Additionally, the oil in this dish (particularly the sesame oil) improves absorption of broccoli’s fat-soluble vitamins A and K. This is why cooking methods matter nutritionally, not just for taste.
Make-Ahead Guide
Prep the night before: Chop all vegetables and store in separate containers in your refrigerator. Cook and cool your brown rice. Measure your soy sauce and seasonings into a small bowl. In the morning, you’ll have only the actual cooking—about 10 minutes—to do.
Meal prep for the week: Make a double batch of this recipe and portion into four glass containers. Keep refrigerated for up to four days. When reheating, add the rice and vegetables to a skillet over medium heat with a splash of water or additional soy sauce to restore moisture. Stir gently for 2-3 minutes until heated through. Note: The egg will be slightly firmer after refrigeration, which some people prefer and others don’t. If you’re meal prepping, you might consider making the egg fresh on serving day instead.
Freezing option: This recipe freezes reasonably well for up to two months, though the broccoli texture softens slightly upon thawing. Skip the egg, let the finished dish cool completely, and freeze in airtight containers. Thaw overnight in the refrigerator and reheat gently, adding a scrambled egg fresh at serving time if you’d like.
Common Mistakes to Avoid
- Using warm or wet rice: This creates a mushy, clumpy dish rather than individual grain separation. Take 30 seconds to cool your rice properly.
- Overcrowding the pan: If you’re doubling this recipe, use two pans or work in batches. Overcrowding lowers the temperature and creates steaming rather than stir-frying.
- Medium heat instead of high: The entire point of stir-frying is the speed and high heat combination. Medium heat changes the texture and cooking time significantly.
- Adding wet vegetables: If your carrots or onions are wet from washing, pat them dry first. Extra moisture extends cooking time and causes splattering.
Seasonal Variations
Spring: Replace carrots with asparagus, add fresh peas, and use more green onion. The vegetables are tender and need less cooking time—reduce step 4 to about 2 minutes.
Summer: Incorporate zucchini, summer squash, and fresh bell peppers. Add fresh basil instead of green onions. The vegetable variety is at its peak and most affordable.
Fall: Use the base recipe but add diced sweet potato (which needs slightly longer cooking—about 5 minutes in step 4). Kale or Swiss chard work beautifully too. Add a pinch of cinnamon for warmth.
Winter: Stick with hardy vegetables like broccoli, carrots, and cabbage. Add thinly sliced Brussels sprouts. These vegetables last longer in storage and are often cheaper than summer produce.
Can I Store Broccoli And Rice Stir-Fry?
Absolutely, and this is one of the reasons I love this recipe for busy people. Store leftovers in an airtight glass container in your refrigerator for up to 4 days. The flavors actually deepen slightly as the ingredients sit together, which isn’t common with stir-fried dishes.
Reheat gently in a skillet over medium heat with a splash of water or additional soy sauce (2-3 minutes, stirring occasionally) to restore the texture. You can also microwave it, though I find the skillet method preserves texture better. Add 30-second intervals in the microwave, stirring between each interval, until heated through.
For freezing, let the dish cool completely, transfer to freezer-safe containers, and freeze for up to 2 months. Thaw overnight in the refrigerator before reheating. The broccoli will be slightly softer after freezing, but the dish remains tasty.
Nutrition Information
According to USDA nutrition data, one serving (approximately 1.25 cups) provides roughly 285 calories, 8 grams of protein, 52 grams of carbohydrates, 6 grams of fiber, and 8 grams of fat. The sodium content is approximately 480 mg per serving (about 21% of the daily recommended value), which comes primarily from the soy sauce.
This is a nutrient-dense meal that provides sustained energy from the complex carbohydrates in brown rice, vegetable-based vitamins and minerals from the broccoli and carrots, and protein from both the egg and the rice itself. The fat content comes primarily from heart-healthy sesame oil, which contains compounds with mild anti-inflammatory properties.
The fiber content supports digestive health and satiety—you’ll feel satisfied for several hours after eating this. If you’re watching sodium intake, reduce the soy sauce to 2 tablespoons, which brings sodium to about 320 mg per serving.
What Can I Serve With Broccoli And Rice Stir-Fry?
This dish is hearty enough to stand alone as a complete meal, but here are some thoughtful accompaniments that balance the flavors without adding significant cost or prep time. Think about what proteins or lighter elements would complement the savory depth of this rice bowl.
- Grilled or baked protein: Add crispy air fryer drumsticks for a traditional protein pairing, or leftover rotisserie chicken (shredded and stirred in during reheating). Baked tofu works beautifully for vegetarian protein.
- Fresh garnishes: A squeeze of fresh lime juice brightens everything. Sliced cucumber or fresh cilantro add cooling contrast to the warm, savory rice.
- Pickled vegetables: Quick-pickled vegetables like daikon radish or cucumber add sharp acidity that balances the richness of the egg and oil.
- Simple green salad: A handful of mixed greens with a light vinaigrette serves as a fresh, crunchy counterpoint.
- Soup starter: A small bowl of simple vegetable or miso broth alongside turns this into a more complete meal with Asian-inspired feel.
If you’re thinking about protein, you might also explore General Tso’s tofu as a complementary dish, which shares similar flavor profiles and cooking techniques.
Substitutes
- Broccoli substitute: Cauliflower, cabbage, kale, or Brussels sprouts work similarly. Adjust cooking times slightly—cauliflower needs about the same time as broccoli, while tougher greens need closer to 4-5 minutes. You could also use frozen broccoli (thawed and drained well) in a pinch, though fresh delivers better texture.
- Brown rice substitute: White rice, farro, barley, millet, or even leftover cooked quinoa work beautifully. Each brings slightly different nutrition and flavor profiles. White rice cooks faster if you’re starting from scratch (about 15 minutes instead of 45), so plan accordingly.
- Sesame oil substitute: Peanut oil or a neutral oil like vegetable oil works, though you lose the distinctive sesame flavor. If using a substitute, add ½ teaspoon of sesame seeds toasted in a dry pan and sprinkled on at the end for authentic flavor.
- Soy sauce substitute: Tamari (gluten-free soy sauce), coconut aminos, or even a combination of Worcestershire sauce and a bit of salt work in a pinch. Liquid smoke adds depth if you’re feeling creative.
- Egg substitute: Skip it entirely for a vegan version, or use silken tofu crumbled in and stirred through for richness and protein. The texture changes slightly, but the dish remains excellent.

Broccoli And Rice Recipe
Ingredients
Method
- Take your fresh broccoli florets and place them in a food processor. Pulse—and this is crucial—pulse rather than blend. You're aiming for pieces that roughly resemble grains of rice, not a fine powder or paste. This usually takes about 8-10 pulses. The texture matters because oversized pieces won't cook through quickly, and too-fine pieces turn mushy. If you don't have a food processor, finely chop by hand with a sharp knife. It takes longer but works perfectly. Measure out your 3 cups of pulsed broccoli and set aside. This is one of my favorite tricks for stretching rice dishes further—you're adding volume and nutrition without adding calories or cost.
- Chop your yellow onion into small, uniform pieces. Mince your garlic cloves very fine—small pieces cook faster and distribute flavor more evenly. Shred or chop your carrots (I use the shredding disc on my food processor for speed). Slice your green onions, keeping the white and light green parts separate from the darker green tops (you'll add the darker parts at the very end for color and freshness). Crack your egg into a small bowl and whisk it lightly with a fork. Have your soy sauce and seasonings measured and within reach. This is called mise en place in French cooking, and it's absolutely non-negotiable for successful stir-frying. Once your pan is hot, everything needs to happen quickly.
- Place a large skillet or wok over high heat. Let it preheat for about one minute—you want it genuinely hot. Add 2 teaspoons of your sesame oil. You'll know it's ready when it shimmers and moves easily across the pan, roughly 30-45 seconds. Immediately add your chopped onion, minced garlic, and shredded carrots. Use a wooden spoon to stir constantly, moving everything around the pan. You're listening and smelling for fragrance—this should take about 45 seconds to 1 minute. Don't walk away. The garlic should be aromatic but not brown. If it starts browning, your heat is too high.
- Add another 2 teaspoons of sesame oil to the pan, then add your prepared broccoli. Season lightly with salt and pepper. Continue stirring constantly with your wooden spoon, keeping everything moving. The broccoli will begin to brighten in color and soften—this takes about 3-4 minutes. You want some of the broccoli to develop slight browning on the edges, which creates deeper flavor. The broccoli should still have a bit of firmness when you taste it—it will soften further during the remaining cooking steps. This is not the place to make it tender. Tender comes later.
- Add your remaining 2 teaspoons of sesame oil to the pan, then add your 3 cups of cooled brown rice. Here's an important detail: cold rice works better than warm rice because it doesn't clump together. If your rice is warm, spread it on a plate for five minutes to cool slightly. Stir constantly, breaking up any clumps gently with the back of your wooden spoon. You want the rice to separate into individual grains and distribute evenly with the vegetables. This takes about 2 minutes. Everything should be heated through and starting to combine.
- Drizzle your 3 tablespoons of soy sauce over the rice mixture. Add your ½ teaspoon of garlic powder (if using) and the optional ½ teaspoon of ground ginger. Stir constantly for another 2-3 minutes until the soy sauce has coated everything evenly and the liquid has mostly absorbed into the rice. At this point, taste a small spoonful. Is there enough salt? Remember that soy sauce is salty, so go easy with additional salt. Does it taste balanced? You should detect onion, garlic, the earthiness of the brown rice, and a savory depth from the soy. Adjust as needed.
- Reduce your heat to medium. Using your wooden spoon, create a small well or crater in the center of your rice mixture, pushing everything toward the sides of the pan slightly. Crack your whisked egg into this well. Don't stir immediately—let it sit for about 10-15 seconds so the egg sets slightly on the bottom. Then, use your wooden spoon to gently scramble the egg, breaking it into small pieces and distributing it throughout the rice and vegetables. This takes about 1-2 minutes total. The egg shouldn't be dry—aim for soft, creamy scrambled eggs that coat the rice.
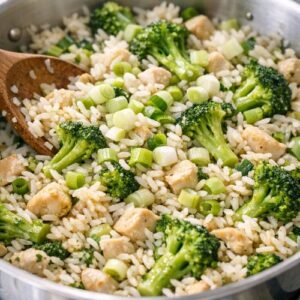
- Remove from heat. Add the white and light green parts of your sliced green onions (save the dark green for garnish). Toss everything together gently. Taste again and adjust seasonings with salt, pepper, or additional soy sauce if desired. Transfer to serving bowls or plates. Top with the reserved dark green parts of the green onions for color and a fresh, sharp bite. Serve immediately while everything is hot. If you prefer a bit of heat, sprinkle with red pepper flakes at the table.
Notes
FAQs
Can I make this recipe vegan?
Absolutely. Skip the egg or replace it with crumbled firm tofu stirred in during the final minute of cooking. Use tamari instead of soy sauce if you’re concerned about additives. Add an extra tablespoon of sesame oil or a sprinkle of sesame seeds for richness and protein. Some people add cashews or peanuts for crunch and additional protein, which works beautifully.
What if I don’t have a food processor to pulse the broccoli?
You can absolutely chop it by hand. Use a sharp chef’s knife and work methodically, cutting the florets into smaller pieces and then chopping those pieces further. It takes longer than a food processor—maybe 5 extra minutes—but produces the same result. Some people actually prefer hand-chopped texture because you have more control over piece size.
Can I use frozen broccoli instead of fresh?
Yes, but with an important caveat: frozen broccoli is already partially cooked, so it will soften faster than fresh. If using frozen, thaw it completely, drain any excess water by wrapping in paper towels and squeezing gently, then reduce the cooking time in step 4 to about 2 minutes. Skip the pulsing step—just chop the thawed broccoli into rice-sized pieces.
How can I make this less salty for a low-sodium diet?
Reduce the soy sauce from 3 tablespoons to 2 tablespoons, and add more minced garlic and ginger for flavor depth without sodium. You could also add a splash of rice vinegar (about 1 tablespoon) and a pinch of white pepper to create complexity. Taste as you go—it takes a minute to adjust, but the result is just as satisfying.
Can I add other vegetables to this recipe?
Yes, and I encourage it based on what’s in season and affordable. Quick-cooking vegetables like snap peas, green beans, mushrooms, bell peppers, and bok choy all work well. Add them in step 3 or 4 depending on how much cooking time they need. Harder vegetables like sweet potato or regular carrots need the most time (start them in step 3). Tender vegetables like spinach or chard can go in during the final minute.
More Recipes You’ll Love
- my weeknight pasta – A light, vegetable-forward pasta dish that uses similar quick-cooking techniques and budget-friendly ingredients
- Baked Creamy Chicken Recipe – A comforting protein dish that pairs beautifully with rice or grain bowls
- Baked Eggs Recipe with Spinach – Another egg-forward recipe that stretches simple ingredients into nutritious meals
Final Thoughts
This broccoli and rice stir-fry recipe represents everything I believe about food: that nourishing, delicious meals don’t require expensive ingredients or complicated techniques. They require intention, a bit of planning, and an understanding that food is one of the most powerful ways we invest in ourselves and our families.
My grandmother knew this instinctively. She built meals around whole grains and seasonal vegetables not because they were trendy, but because they were what she could afford and what kept her family healthy and satisfied. That wisdom is just as relevant today, maybe more so as we all navigate tighter budgets and busier schedules.
I hope this recipe becomes a regular part of your rotation. Make it in bulk on Sunday afternoon. Customize it based on what vegetables are on sale at your market. Teach someone you care about how to make it. Food is meant to be shared, and these simple, affordable meals are the ones that stick in memory longest.
Don’t forget to mention @affordablefoodideas if you try this recipe! I’d love to see how you’ve made it your own.