This post contains affiliate links. As an Amazon Associate I earn from qualifying purchases.
This cheese ravioli recipe doesn’t just taste incredible—it stops people in their tracks. Those perfectly pillowed pockets, glistening with sauce, the way they catch the light on the plate—this is the kind of dish that wows before anyone takes the first bite. I’ve been making ravioli since my early days as a dietitian, and I’ve learned that restaurant-quality pasta doesn’t require restaurant prices. You just need patience, good technique, and ingredients you probably already have in your kitchen.
I still remember the first time I made fresh ravioli for my neighbors back in Massachusetts. The cost? Under eight dollars for four servings. The reaction when I set those beautiful pillows on their plates? Priceless. That moment taught me that wholesome, elegant meals don’t require expensive shortcuts—they require understanding how simple ingredients transform into something extraordinary.
The Most Beautiful Cheese Ravioli Recipe You’ll Ever Make (And It’s Easier Than It Looks)
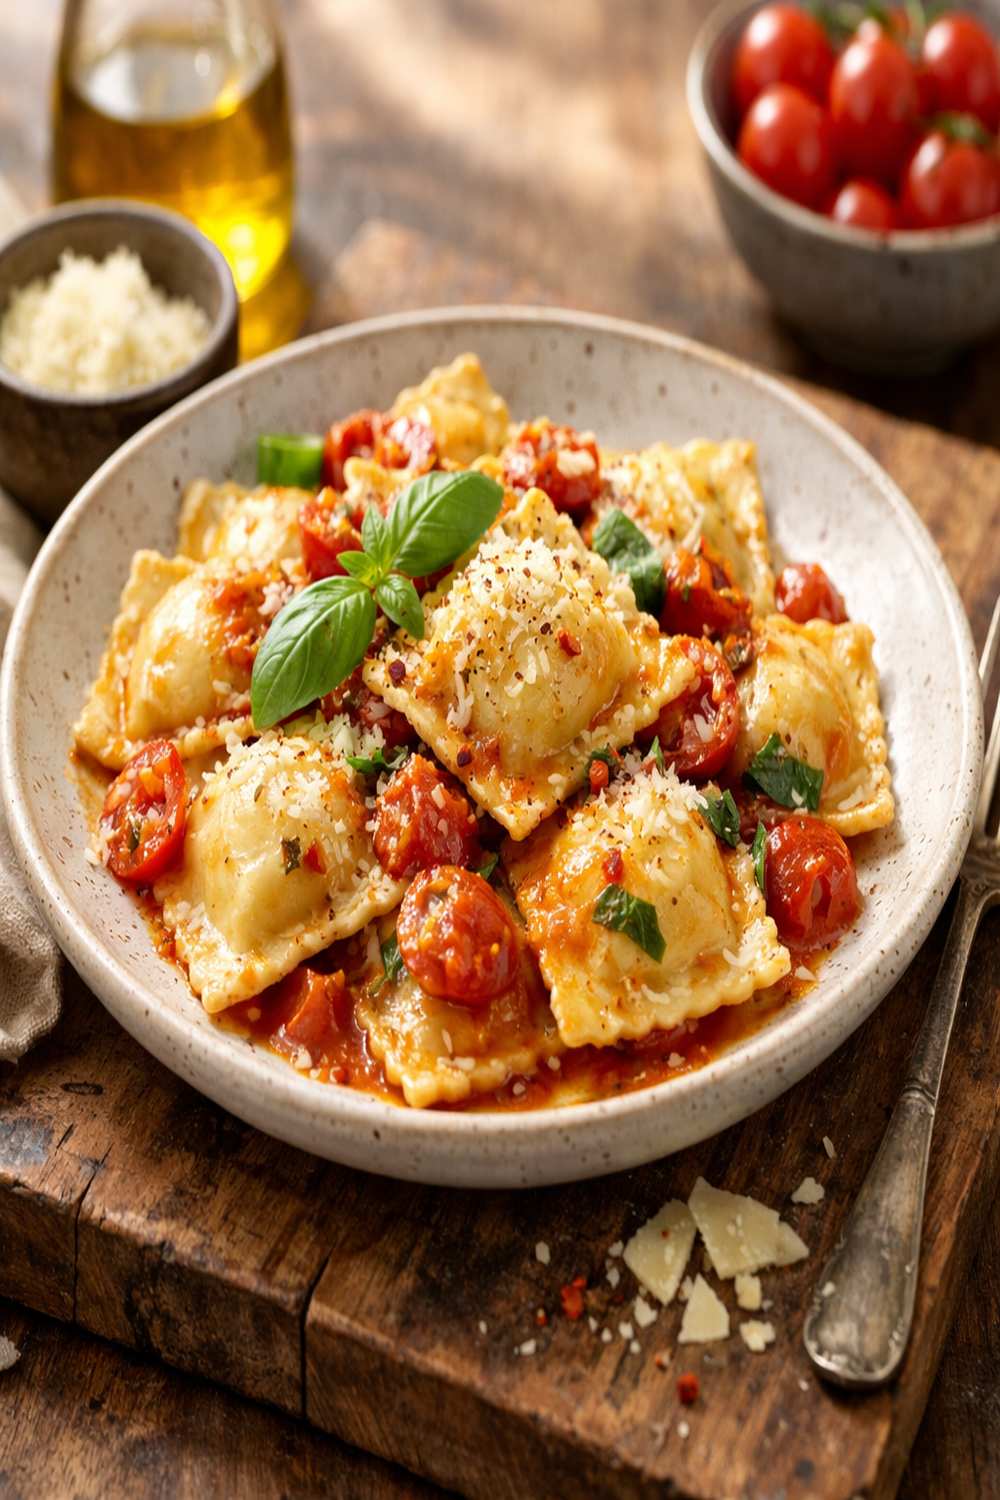
When I talk about visual impact in cooking, ravioli is my go-to example. There’s something inherently beautiful about the structure itself—those delicate, sealed pockets with their crimped edges, the way they nestle together on the plate, the contrast between the pale pasta and the deep ruby sauce pooling around them. But here’s what I’ve discovered: the visual beauty of great ravioli comes directly from technique, not luck.
The first time I truly appreciated ravioli’s presentation potential was at my grandmother’s kitchen table in a small New England town. She didn’t make ravioli often—it was reserved for special occasions—but when she did, everything stopped. The table got cleaned off. Good dishes came out. Everyone gathered close because they wanted to witness something special. That taught me that presentation isn’t about pretension; it’s about respect for the meal and the people eating it.
The Visual Elements That Make This Dish Stunning
Breaking down what makes ravioli visually compelling helps you understand how to maximize its impact every time you make it. This isn’t complicated—it’s about understanding color theory, texture contrast, and composition on the plate.
- The pale, creamy color of the pasta and filling—This creates a neutral canvas that makes the deep crimson sauce absolutely sing. The contrast between the soft ivory of the ricotta and the vibrant red of tomato sauce is one of the most naturally photogenic color combinations in cooking. When you garnish with bright green basil, you’ve created a color palette that’s basically the Italian flag, and there’s a reason that works so well visually.
- The delicate texture of thin pasta contrasted with rich filling—Ravioli’s beauty comes from this textural tension. The thin, almost translucent pasta shows off the creamy interior slightly, creating depth and visual interest. A thick, doughy pasta looks heavy; properly rolled ravioli looks refined.
- The dimensional composition from height and negative space—Unlike flat pasta, ravioli has height. When plated thoughtfully with sauce pooled around it rather than covering it, that three-dimensionality becomes visible. The sauce becomes negative space that frames each ravioli like edible artwork.
Choosing Ingredients for Maximum Visual Impact
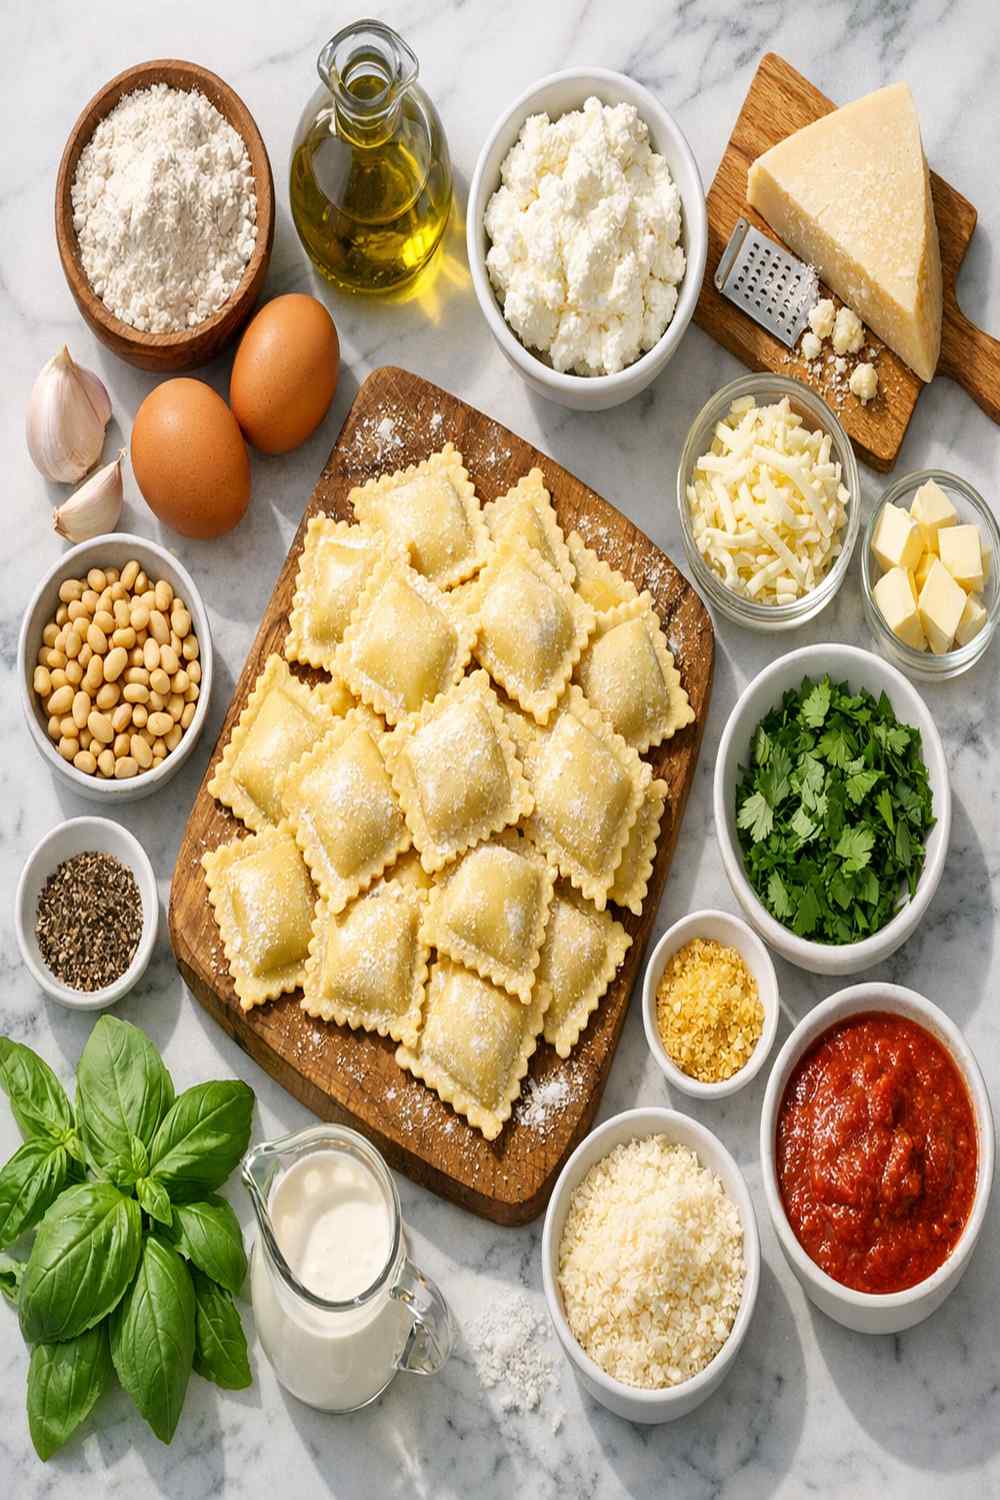
I approach ingredient selection the same way a painter chooses colors. Each component contributes to the overall visual composition, and here’s where I get specific about budget-friendly choices that don’t sacrifice beauty. You’ll notice I’ve included specific descriptions because every ingredient plays a role in how this dish looks on the plate.
For the Pasta Dough
- 1 pound fresh pasta dough (homemade using basic flour and eggs, or quality store-bought sheets work beautifully)
- 2 tablespoons semolina flour (for dusting and preventing sticking without changing texture)
For the Filling
- Salt and black pepper to taste (freshly ground pepper shows as visible specks)
- ⅛ to ¼ teaspoon lemon zest (brightens the filling and adds subtle flavor without visual impact)
- 2 teaspoons fresh basil (finely chopped, or 1 teaspoon dried if fresh isn’t available)
- Pinch of ground nutmeg (adds warmth and complexity to the filling)
- ⅓ cup parmesan cheese (freshly shredded shows better texture than pre-grated)
- 1 cup whole milk ricotta cheese (the creamiest option that creates that pale, luxurious visual)
For Serving
- 2 cups homemade tomato sauce (or your preferred sauce—the deep red color is essential to the final presentation)
- ¼ cup fresh basil leaves (for garnish, torn just before serving for the brightest green)
- 3 tablespoons freshly grated parmesan (final garnish creates texture and visual interest)
Budget-Friendly Swaps That Don’t Sacrifice Beauty: Store-bought fresh pasta sheets work just as well as homemade dough and save 30 minutes of labor. If ricotta feels pricey, mix it with Greek yogurt (1:1 ratio) to stretch it while maintaining that creamy aesthetic. Pre-shredded parmesan works in a pinch, but freshly shredded shows better texture on the final plate. For sauce, I often make my own from canned tomatoes—even more affordable and you control the final color intensity.
How to Make Picture-Perfect Cheese Ravioli
I’m framing this as creating edible art because that’s genuinely what you’re doing. Each step affects the final appearance, and I want you to understand why we’re doing things a certain way, not just following instructions blindly. This approach helps you troubleshoot when something doesn’t look quite right.
Step 1: Prepare Your Workspace and Begin Boiling Water
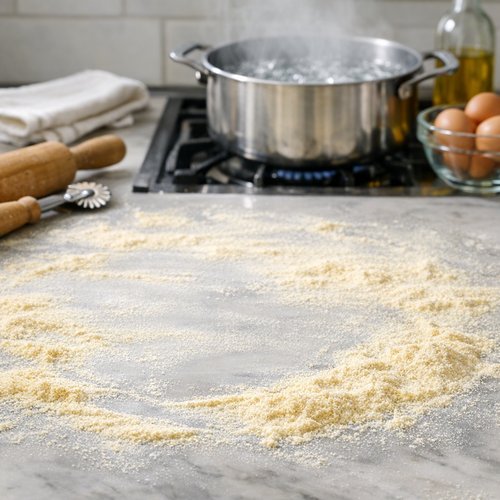
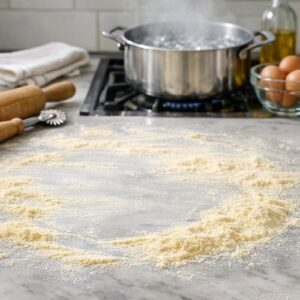
Before you touch any dough, set up your entire workspace. Dust a clean countertop generously with semolina flour—this is your canvas. Don’t skip this step thinking you’ll dust later; wet dough sticks permanently to bare counters. Prep a baking sheet by covering it with semolina as well. This step seems humble, but it’s the difference between ravioli that looks pristine and ravioli that’s torn and damaged before it even cooks.
Place a large pot of salted water on the stove and bring it to a rolling boil. I start this while I’m forming ravioli because you want the water ready exactly when your first batch is formed. The salt isn’t optional—it seasons the pasta from the inside out and prevents sticking.
Step 2: Mix the Filling and Taste It
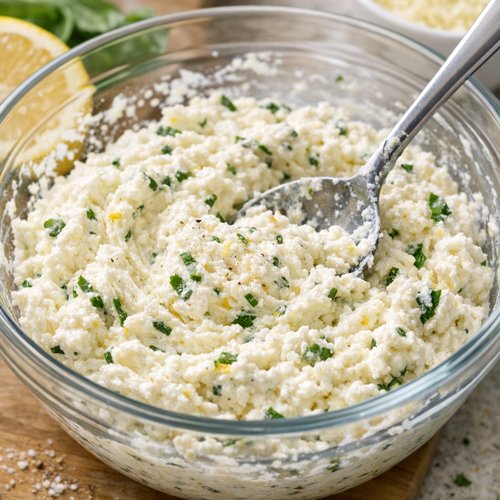
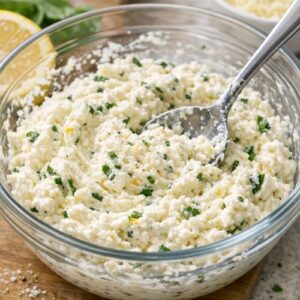
In a medium bowl, combine your ricotta, freshly shredded parmesan, lemon zest, basil, nutmeg, salt, and pepper. Stir until completely combined and uniform in color. This is where most home cooks skip a crucial step: taste it. Seriously. Dip a small spoon into the mixture and eat it. The filling should taste bright, slightly salty, and complex. If it tastes flat, add another pinch of salt. If it needs brightness, add a tiny bit more lemon zest.
This step matters because underseasons filling never recovers—you taste it raw, so you taste exactly what you’ll taste in the finished pasta. If you’re adding the filling to ravioli right away, great. If not, cover and refrigerate; cold filling actually helps when you’re shaping because it doesn’t leak out as easily.
Step 3: Roll Out the Pasta Dough
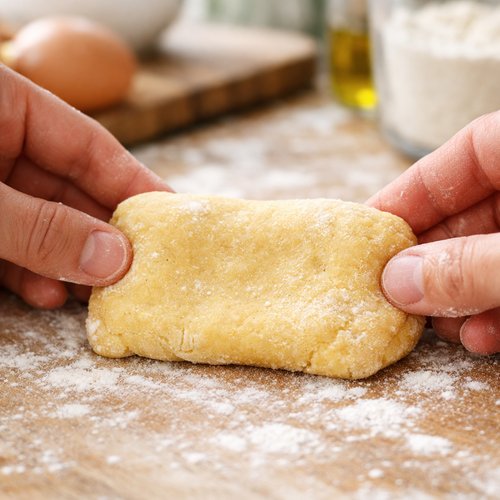
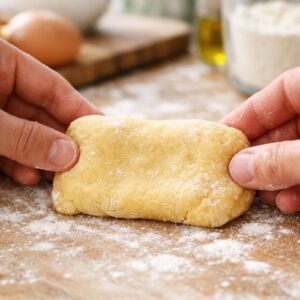
Here’s where the visual magic begins. Cut your pasta dough into quarters. Take one quarter and, using your hands, shape it into a rough rectangle—this helps the pasta machine accept it smoothly. Feed it through your pasta machine on the widest setting, then fold it in half and run it through again. Repeat this process 2-3 times until the dough is silky and uniform.
Now here’s the professional tip: run the dough through each progressively thinner setting, one setting at a time. Your goal is a thin, translucent pasta sheet that’s almost delicate. I typically go to the second-to-last setting on my machine—thin enough to be elegant but sturdy enough to handle filling and folding. Each time you roll, place the finished sheet on your semolina-dusted counter immediately. The semolina is your insurance policy against sticking.
Step 4: Fill and Fold with Precision
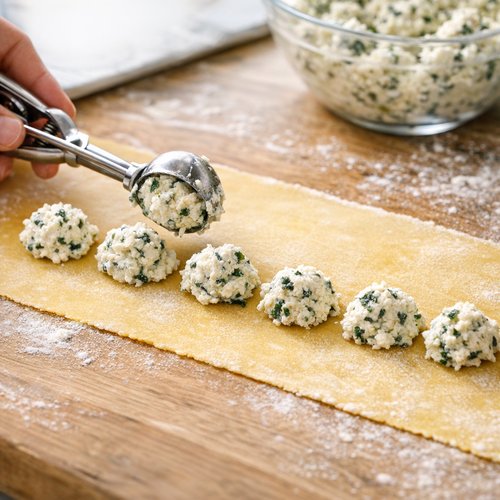
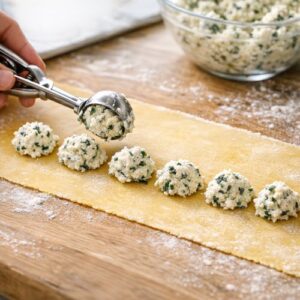
Lay your rolled pasta sheet in front of you. Using a small cookie scoop, place approximately 1½ teaspoons of filling down one half of the sheet, spacing each dollop about 1½ inches apart. The spacing is critical to how your finished ravioli looks—too close together and they’re crowded and cramped; too far apart and they look sparse.
Before you fold, here’s a professional move: dip your finger in water and lightly trace the edges of the pasta sheet. Slightly dampen pasta helps the two layers seal beautifully. Now fold the unfilled half over the filled half. Gently press around each mound of filling to create pockets, working deliberately so you don’t trap air bubbles (they create weak spots that burst during cooking).
Step 5: Cut and Seal with Intention
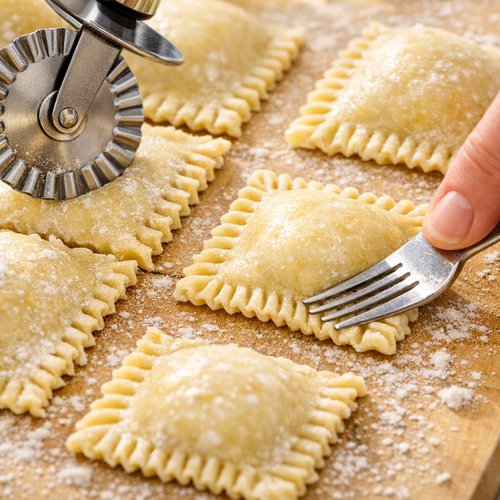
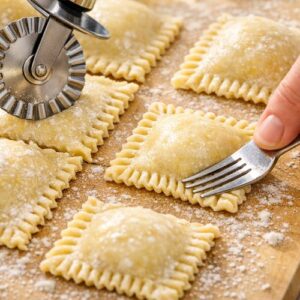
Using a pizza wheel or pasta cutter, cut between each filled pocket. Press the edges firmly with the tines of a fork to create a decorative seal and ensure they’re completely closed. This fork pattern isn’t just pretty—it’s functional. You’re creating a secondary seal that prevents the pasta from opening during cooking. Any ravioli that looks even slightly open, re-seal it immediately.
As you finish each ravioli, transfer it to your prepared baking sheet. Space them so they’re not touching. If you’re making a large batch, you can refrigerate them for up to 2 hours before cooking, which actually firms them up and makes them less likely to break during boiling.
Step 6: Cook and Transfer with Care
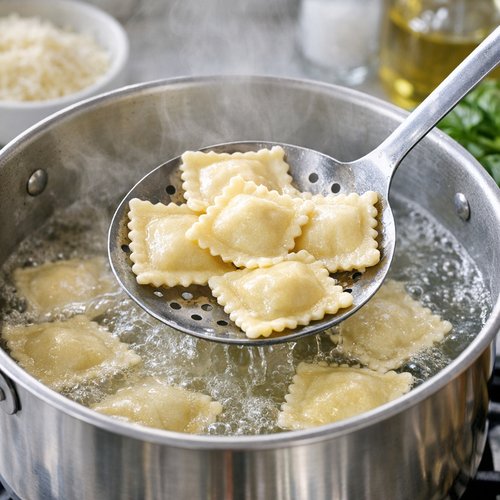
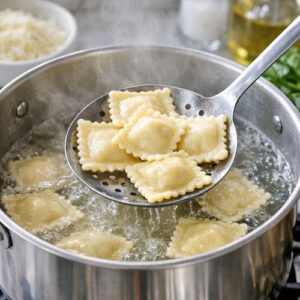
Once your water is at a rolling boil, add ravioli in batches—this is crucial. Overcrowding the pot causes them to stick together and breaks the pasta. Add about 6-8 ravioli at a time, depending on your pot size. They’ll immediately sink. Within 2-3 minutes, they’ll float to the surface, and that’s your signal they’re done. Let them float for about 30 seconds more, then carefully remove them with a slotted spoon.
Here’s the professional move that preserves their appearance: transfer the cooked ravioli directly into your warm sauce rather than setting them aside. The sauce clings to the pasta beautifully and creates that glossy, appetizing look. Never rinse them with water afterward—that strips the starch that helps sauce adhere.
The Plating Masterclass
This is where the magic you’ve created becomes visible. Plating isn’t pretentious—it’s just the final step of cooking. You wouldn’t serve a salad without arranging it on a plate, so don’t serve ravioli without considering how it’s presented. Here’s my approach, developed over years of trying to make simple food look special.
- Pool the sauce, don’t smother it—Pour sauce into the center of a warmed bowl or shallow plate, creating a small pool. Arrange 3-4 ravioli around the sauce (depending on portion size) so they’re half-submerged but their tops remain visible. This is the visual difference between “good” and “restaurant-quality.” You want to see the pasta and the filling through the translucent top, with sauce framing everything below.
- Create height and dimension with stacking—Very carefully, you can lean one ravioli against another to create height on the plate. This breaks the flatness and makes the dish feel more composed. It takes confidence, but it’s worth it.
- Garnish at the exact moment of service—Tear fresh basil leaves directly over the finished plate (never cut basil with a knife—tearing prevents oxidation and browning). Dust with freshly grated parmesan. Finish with a single crack of black pepper. These garnishes should look intentional and beautiful, not haphazard. Less is more—three basil leaves and a light shower of cheese beats a heavy-handed pile.
Photography Tips for This Dish
I’m including this section because ravioli’s visual beauty deserves to be captured and shared. Whether you’re photographing for social media, a food blog, or just to remember how beautiful your meal looked, these tips matter.
- Shoot from a 45-degree angle, not directly overhead—Ravioli’s height and the dimension you’ve created is invisible from directly above. Angle your camera from the side at about 45 degrees to capture the pockets, the sauce, and the garnish simultaneously. This angle shows off everything you’ve worked for.
- Photograph immediately after plating while the sauce still glistens—Ravioli looks most appetizing in the first 2-3 minutes after plating. The sauce is glossy, the basil is bright green, and the whole dish has that “just made” luminosity. Delay photography and you lose that visual quality.
Seasonal Color Variations
One of my favorite things about mastering ravioli is how you can shift its appearance seasonally by changing garnishes and sauce options. This keeps the dish fresh and exciting while maintaining the same core technique.
Spring Ravioli: Keep the traditional red sauce but use the brightest, most tender basil you can find. Add a whisper of lemon zest to the sauce itself. The pale ricotta filling becomes even more striking against brighter greens.
Summer Ravioli: Switch to a light, fresh tomato sauce (or even a delicate white wine butter sauce) that looks ethereal rather than heavy. Cherry tomatoes halved and scattered over the top add color and freshness. More generous fresh basil garnish.
Fall Ravioli: Deepen your sauce slightly by adding a touch of balsamic vinegar. Crispy sage leaves replace basil as garnish—their brown color against the pale pasta looks autumn-perfect. A touch of toasted breadcrumb garnish adds texture.
Winter Ravioli: A darker, richer tomato sauce works beautifully. Top with toasted pine nuts for color contrast and richness. Parmesan shavings (using a vegetable peeler) rather than grated cheese create a more elegant, winter-appropriate appearance.
Can I Store Cheese Ravioli Recipe?
Yes, and here’s where my dietitian background combines with practical home cooking. You can store ravioli at different stages depending on your needs. Uncooked, frozen ravioli lasts up to 3 months and actually becomes more stable for cooking (less likely to burst). Freeze them on the baking sheet first, then transfer to freezer bags. No thawing needed—just add a minute or two to cooking time.
Cooked ravioli in sauce lasts 3-4 days refrigerated in an airtight container. The pasta softens slightly over time (it’s inevitable), but the flavor deepens beautifully. Reheat gently in a 325°F oven for 10-12 minutes with a cover to prevent drying.
For presentation preservation: if you’re storing leftovers and plan to plate them later, keep the ravioli and sauce separate until reheating. This maintains the textural distinction between the pasta and sauce and lets you plate fresh (visually) even from leftovers.
Expert’s Nutritional Tip
As a registered dietitian, I notice something important about this recipe: the visual brightness from fresh basil and lemon isn’t just beautiful—it’s a signal of nutritional density. Fresh basil contains polyphenols that support heart health; lemon zest provides concentrated citrus compounds without the sugar of juice. The pale cream filling comes from ricotta, which offers complete protein and calcium, making this dish far more nutritionally balanced than the simple “pasta and cheese” it might appear to be.
Here’s what I tell clients: use this recipe as a teaching moment. The fact that it’s nutritionally solid (about 8 grams of protein per serving) is a bonus to how beautiful and satisfying it is. Wholesome eating doesn’t mean sacrificing elegance—they’re completely compatible.
Make-Ahead Guide for Stress-Free Entertaining
Planning to serve this to guests? Here’s my professional meal prep strategy that removes anxiety from the equation.
Two Days Before: Make your tomato sauce and refrigerate. Make the filling and refrigerate separately. Both keep beautifully and actually develop better flavor over time. This also means you’re not rushing the day-of.
One Day Before: Make the pasta dough (if not using store-bought) and refrigerate overnight. This actually improves its workability. Roll, fill, and shape all ravioli. Freeze them on a sheet tray. Once frozen solid, transfer to freezer bags. This removes the most time-consuming step from your guest day.
Day Of: All you’re doing is boiling water, cooking ravioli, and plating. That’s 15 minutes of actual hands-on work while guests enjoy aperitifs. The filled ravioli go straight from freezer to boiling water—no thawing.
During Plating: Warm your sauce, heat your bowls in a low oven, and focus on that 45-degree angle plating. This is where your stress disappears because the hardest work is already done.
Common Mistakes to Avoid
I’ve made every ravioli mistake possible (and some twice), so I’m sharing what I’ve learned so you don’t have to.
Mistake 1: Dough that’s too thick or unevenly rolled. Thick dough looks doughy and heavy on the plate. Uneven thickness means some pockets burst while others stay thick. Solution: take time with the pasta machine, making multiple passes on each setting. Check your thickness by holding the sheet up to light—you should see your hand slightly blurred through it. Test one ravioli by cooking it before finishing the entire batch.
Mistake 2: Overfilling or unevenly spacing the filling. Too much filling means it leaks out during cooking, making the filling look messy. Uneven spacing looks careless on the plate. Solution: use a small cookie scoop for consistency and measure out your teaspoons beforehand. Spend a full minute on spacing before you fold. It matters.
Mistake 3: Not sealing properly or firmly enough. Ravioli that opens during cooking look destroyed and taste waterlogged. The fork-press sealing isn’t just decoration—it’s a double seal. Solution: press with conviction. I use medium-firm pressure, which creates that beautiful fork pattern while actually sealing the pasta closed.
Mistake 4: Overcrowding the pot or cooking in insufficient water. Ravioli need room and gentle movement. Crowding them makes them stick together and breaks the pasta. Solution: use a large pot (at least 6 quarts), fill it generously with water, and cook in batches. It takes an extra 5 minutes but produces ravioli that look pristine.
What to Serve Alongside for a Complete Visual Spread
Ravioli doesn’t need much accompaniment, but the right sides create a visually cohesive, restaurant-quality meal. I think about color, texture, and how everything looks together on the table as a whole.
A simple asparagus pasta recipe makes a beautiful side because the bright green provides color contrast to your sauce-red-and-cream plate. The thin spears also add height and textural variety. Cost stays minimal, and the nutritional profile improves dramatically with the addition of vegetables.
A fresh green salad dressed simply with lemon vinaigrette adds acidity that complements the richness of the ravioli. The crisp, cold texture against warm ravioli is also important. Arugula or mixed greens work beautifully; whatever looks bright and vibrant at your market.
Crusty bread—not garlic bread, just quality bread with good crumb and crust—serves a dual purpose. It’s practical for soaking up sauce, but visually, it adds another dimension to your table spread. A bread basket with a linen napkin makes it feel like you’re serving at a proper restaurant.
Skip heavy sides. You want everything light and colorful so your ravioli remains the visual star of the meal.

Cheese Ravioli Recipe
Ingredients
Method
- Before you touch any dough, set up your entire workspace. Dust a clean countertop generously with semolina flour—this is your canvas. Don't skip this step thinking you'll dust later; wet dough sticks permanently to bare counters. Prep a baking sheet by covering it with semolina as well. This step seems humble, but it's the difference between ravioli that looks pristine and ravioli that's torn and damaged before it even cooks. Place a large pot of salted water on the stove and bring it to a rolling boil. I start this while I'm forming ravioli because you want the water ready exactly when your first batch is formed. The salt isn't optional—it seasons the pasta from the inside out and prevents sticking.
- In a medium bowl, combine your ricotta, freshly shredded parmesan, lemon zest, basil, nutmeg, salt, and pepper. Stir until completely combined and uniform in color. This is where most home cooks skip a crucial step: taste it. Seriously. Dip a small spoon into the mixture and eat it. The filling should taste bright, slightly salty, and complex. If it tastes flat, add another pinch of salt. If it needs brightness, add a tiny bit more lemon zest. This step matters because underseasons filling never recovers—you taste it raw, so you taste exactly what you'll taste in the finished pasta. If you're adding the filling to ravioli right away, great. If not, cover and refrigerate; cold filling actually helps when you're shaping because it doesn't leak out as easily.
- Here's where the visual magic begins. Cut your pasta dough into quarters. Take one quarter and, using your hands, shape it into a rough rectangle—this helps the pasta machine accept it smoothly. Feed it through your pasta machine on the widest setting, then fold it in half and run it through again. Repeat this process 2-3 times until the dough is silky and uniform. Now here's the professional tip: run the dough through each progressively thinner setting, one setting at a time. Your goal is a thin, translucent pasta sheet that's almost delicate. I typically go to the second-to-last setting on my machine—thin enough to be elegant but sturdy enough to handle filling and folding. Each time you roll, place the finished sheet on your semolina-dusted counter immediately. The semolina is your insurance policy against sticking.
- Lay your rolled pasta sheet in front of you. Using a small cookie scoop, place approximately 1½ teaspoons of filling down one half of the sheet, spacing each dollop about 1½ inches apart. The spacing is critical to how your finished ravioli looks—too close together and they're crowded and cramped; too far apart and they look sparse. Before you fold, here's a professional move: dip your finger in water and lightly trace the edges of the pasta sheet. Slightly dampen pasta helps the two layers seal beautifully. Now fold the unfilled half over the filled half. Gently press around each mound of filling to create pockets, working deliberately so you don't trap air bubbles (they create weak spots that burst during cooking).
- Using a pizza wheel or pasta cutter, cut between each filled pocket. Press the edges firmly with the tines of a fork to create a decorative seal and ensure they're completely closed. This fork pattern isn't just pretty—it's functional. You're creating a secondary seal that prevents the pasta from opening during cooking. Any ravioli that looks even slightly open, re-seal it immediately. As you finish each ravioli, transfer it to your prepared baking sheet. Space them so they're not touching. If you're making a large batch, you can refrigerate them for up to 2 hours before cooking, which actually firms them up and makes them less likely to break during boiling.
- Once your water is at a rolling boil, add ravioli in batches—this is crucial. Overcrowding the pot causes them to stick together and breaks the pasta. Add about 6-8 ravioli at a time, depending on your pot size. They'll immediately sink. Within 2-3 minutes, they'll float to the surface, and that's your signal they're done. Let them float for about 30 seconds more, then carefully remove them with a slotted spoon. Here's the professional move that preserves their appearance: transfer the cooked ravioli directly into your warm sauce rather than setting them aside. The sauce clings to the pasta beautifully and creates that glossy, appetizing look. Never rinse them with water afterward—that strips the starch that helps sauce adhere.
Notes
FAQs
Can I use store-bought pasta sheets instead of making dough from scratch?
Absolutely, and I do this frequently. Quality store-bought fresh pasta sheets save 30 minutes and produce ravioli that’s visually indistinguishable from homemade. The cost is comparable, and the reduction in stress is worth it. Fresh sheets from the refrigerated section work best (avoid dried sheets for this application). You’ll cut them to the size you want and proceed exactly as written.
What if my ravioli tears during cooking?
A few tears happen to everyone—it’s not failure, it’s normal. They’re still delicious, just not as visually perfect. Prevent future tears by ensuring your seals are truly firm (that fork pattern should be deeply pressed), by not overfilling, and by cooking in adequate water without crowding. If you’re regularly seeing tears, your dough might be too thin—try the second-thinnest setting instead of the thinnest.
Can I use frozen ravioli straight from the freezer?
Yes! Frozen ravioli don’t need to be thawed. Add them directly to boiling water and add about 1-2 minutes to the cooking time. They often cook beautifully from frozen because they stay firmer. This is why freezing them uncooked is such a great meal prep strategy.
What sauce works best visually and nutritionally?
A simple tomato-based sauce (either fresh or from good canned tomatoes) creates the most striking visual contrast with the pale pasta. A light béchamel (cream sauce) is also beautiful but heavier. I recommend a basic tomato sauce made from canned San Marzano tomatoes, garlic, olive oil, and basil—it’s affordable, vibrant red, and nutritionally clean. A 15-minute simmer develops deep flavor without requiring hours of cooking.
Why does my filling taste bland even though I added salt?
Ricotta is a delicate canvas, and its mild flavor needs strong supporting flavors to shine. Often the answer is more salt (taste and adjust), but also consider adding a tiny pinch of nutmeg (it’s surprising how much a tiny bit does), ensuring your basil is fresh (dried basil contributes texture but less flavor), and using freshly grated parmesan instead of pre-grated. Pre-grated contains anti-caking agents that mute flavor. A light touch of lemon zest also brightens everything without making it taste lemony.
More Visually Stunning Recipes
- Baked Eggs Recipe Spinach – a gorgeous brunch centerpiece with deep green vegetable contrast and creamy yellow eggs
- my oven-baked chicken – stunning color contrast and caramelized glaze that looks as impressive as it tastes
- this cozy soup – rustic and warm with beautiful color from beans and vegetables
Final Thoughts on Creating Meals That Feed Both Eyes and Hearts
After years of nutrition counseling and home cooking, I’ve learned something fundamental: the meals we remember aren’t the ones that simply filled our stomachs. They’re the ones that were beautiful, intentional, and made with care. This cheese ravioli recipe delivers on all three counts.
You don’t need expensive ingredients or restaurant training to create food that stops people in their tracks. You need patience, attention to detail, and understanding why each step matters. You need to roll your pasta thin enough to see light through it. You need to press your seals firmly. You need to plate with intention rather than rushing. These small choices compound into something extraordinary.
I came to dietitian work because I believe that nutrition is personal and that healthy food shouldn’t feel like punishment or expense. This ravioli recipe is my proof. It costs about eight dollars per serving to make (less if you make your own sauce). It’s naturally balanced with protein from ricotta, minerals from herbs, and carbohydrates from pasta. And most importantly, it’s beautiful enough to make your guests actually pause and appreciate what’s in front of them before they taste it.
That moment—when someone sets down their fork, looks at the plate, and smiles before taking the first bite—that’s the moment when you know you’ve done something right.
Don’t forget to mention @affordablefoodideas if you try this recipe!