This post contains affiliate links. As an Amazon Associate I earn from qualifying purchases.
Learning to make chicken noodle soup isn’t just about this dish—it’s about mastering a technique that unlocks dozens of other recipes. The foundation here is building flavor through proper vegetable sautéing, a skill that transforms everything from baked creamy chicken to bean soups. Once you understand how to coax maximum flavor from humble aromatics before adding your liquid, you’ll never make a bland soup again. This recipe taught me that real nutrition isn’t expensive—it’s intentional.
Master the Technique Behind Chicken Noodle Soup (And Never Struggle With Bland Broths Again)
I grew up watching my grandmother stand at the stove with a wooden spoon in one hand and a taste spoon in the other. We didn’t have much money in our small town, but our Sunday dinners were anything but forgettable. One afternoon, I watched her make what seemed like magic: she heated a tiny amount of butter, added diced vegetables, and stood there listening—actually listening—to the soft sizzle.
“April,” she said, “if your vegetables aren’t talking to you in the pan, you’re cooking too fast.” I was maybe eight years old, skeptical that vegetables could “talk,” but I leaned in anyway. What I heard was a gentle, consistent whisper of sizzle—not a aggressive pop or a complete silence. That moment taught me everything about the foundation of soups, stews, and braises.
Thirty years later, as a registered dietitian, I understand the science behind what she knew intuitively: those minutes of gentle heat break down vegetable cell walls, release aromatic compounds, and create the Maillard reaction—the chemical magic that turns pale vegetables into flavor powerhouses. This technique is the difference between soup and, well, hot water with stuff floating in it.
The Core Technique Explained
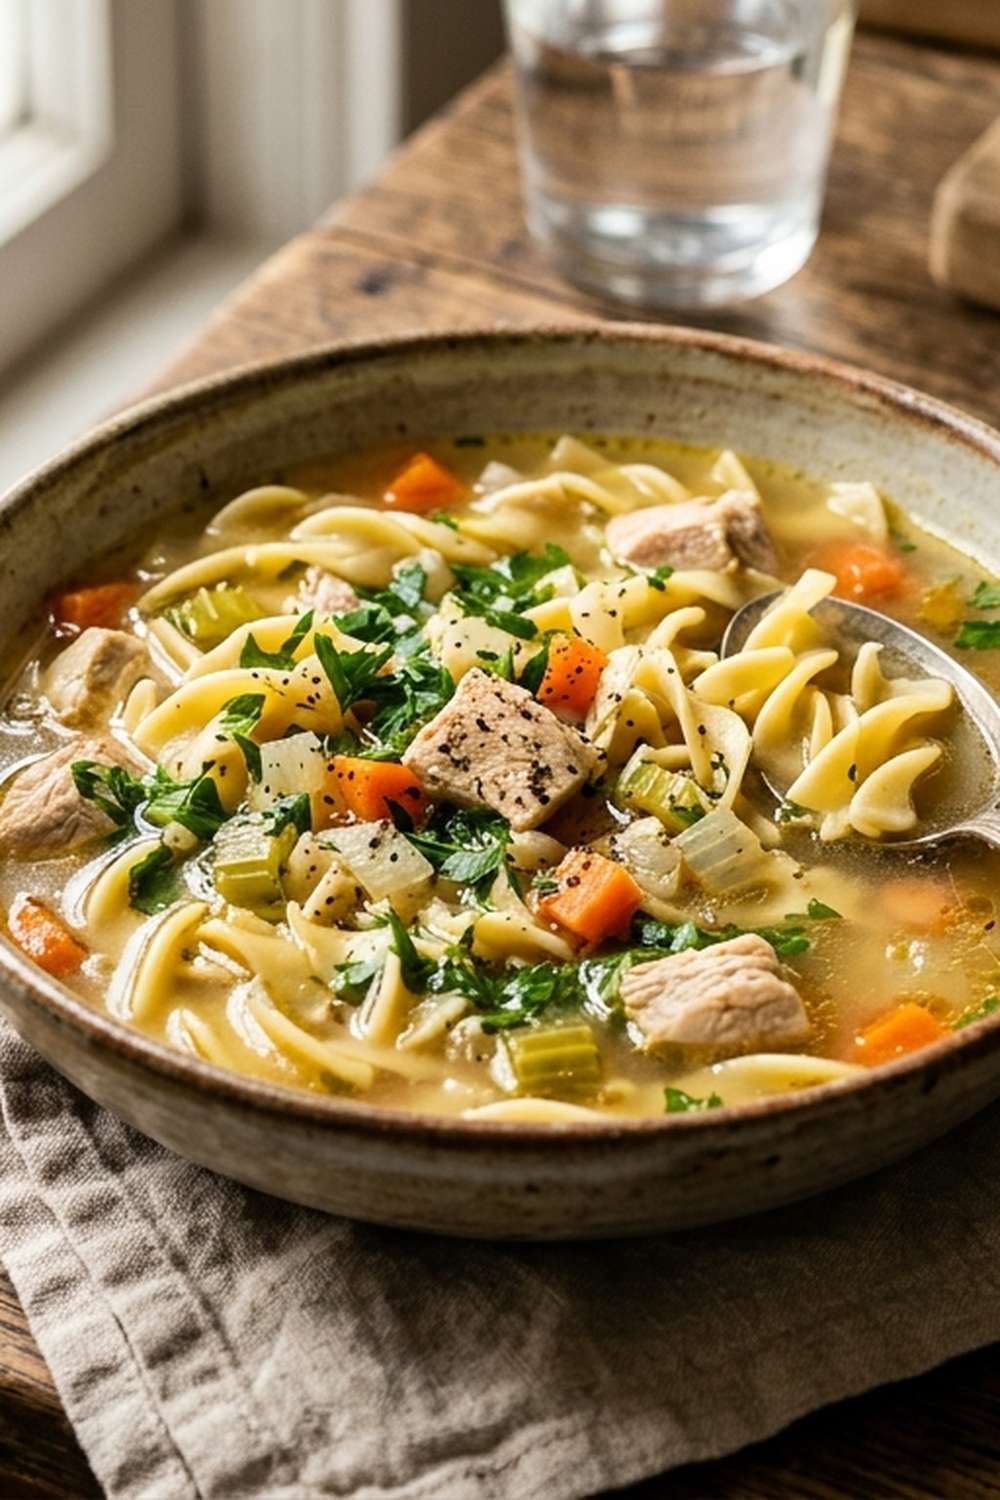
The technique here is called sweating aromatics, and it’s the foundation of French cooking’s holy trinity: celery, carrots, and onion (though we’re using garlic here too). Sweating doesn’t mean boiling or browning—it means cooking vegetables slowly over medium heat with a small amount of fat until they become very soft and release their juices.
Here’s what happens chemically: vegetables contain sugars and flavor compounds locked inside their cells. Heat and fat work together to break down the cell walls and dissolve those compounds into the surrounding fat and liquid. The magic temperature is around 225–300°F—hot enough to trigger reactions but not so hot that the exterior browns before the interior softens. This is why your grandmother (and I) listen to the sizzle. The sound tells you the heat is just right.
When you add these pre-cooked, soft vegetables to your broth, you’re not just adding flavor—you’re adding umami (that savory, satisfying taste), natural sweetness that balances salt, and aromatic compounds that make people say “it smells so good in here.” That smell? That’s your signal that the technique worked.
What This Technique Unlocks
Once you master sweating aromatics, you’ll see this technique in nearly every savory dish you make. It’s the foundation of classic cooking, and it’s how professional cooks build flavor without relying on expensive ingredients or heavy cream.
- Gravy and pan sauces – start with sautéed aromatics, then add your deglazing liquid for restaurant-quality results
- Creamy pasta dishes – like our asparagus pasta, the soft aromatics provide the flavor base before cream is added
- Slow cooker chilis and stews – this 3-minute sauté before slow cooking concentrates flavors and saves hours of cooking time
- Roasted chicken variations – aromatics in the cavity and beneath the skin distribute flavor throughout the meat
- Risotto and rice dishes – the soft aromatics create the creamy base that makes risotto so luxurious
- Ground meat sauces – from our aglio spaghetti to tacos, soft aromatics are the first step
The Ingredients—Chosen to Teach the Technique
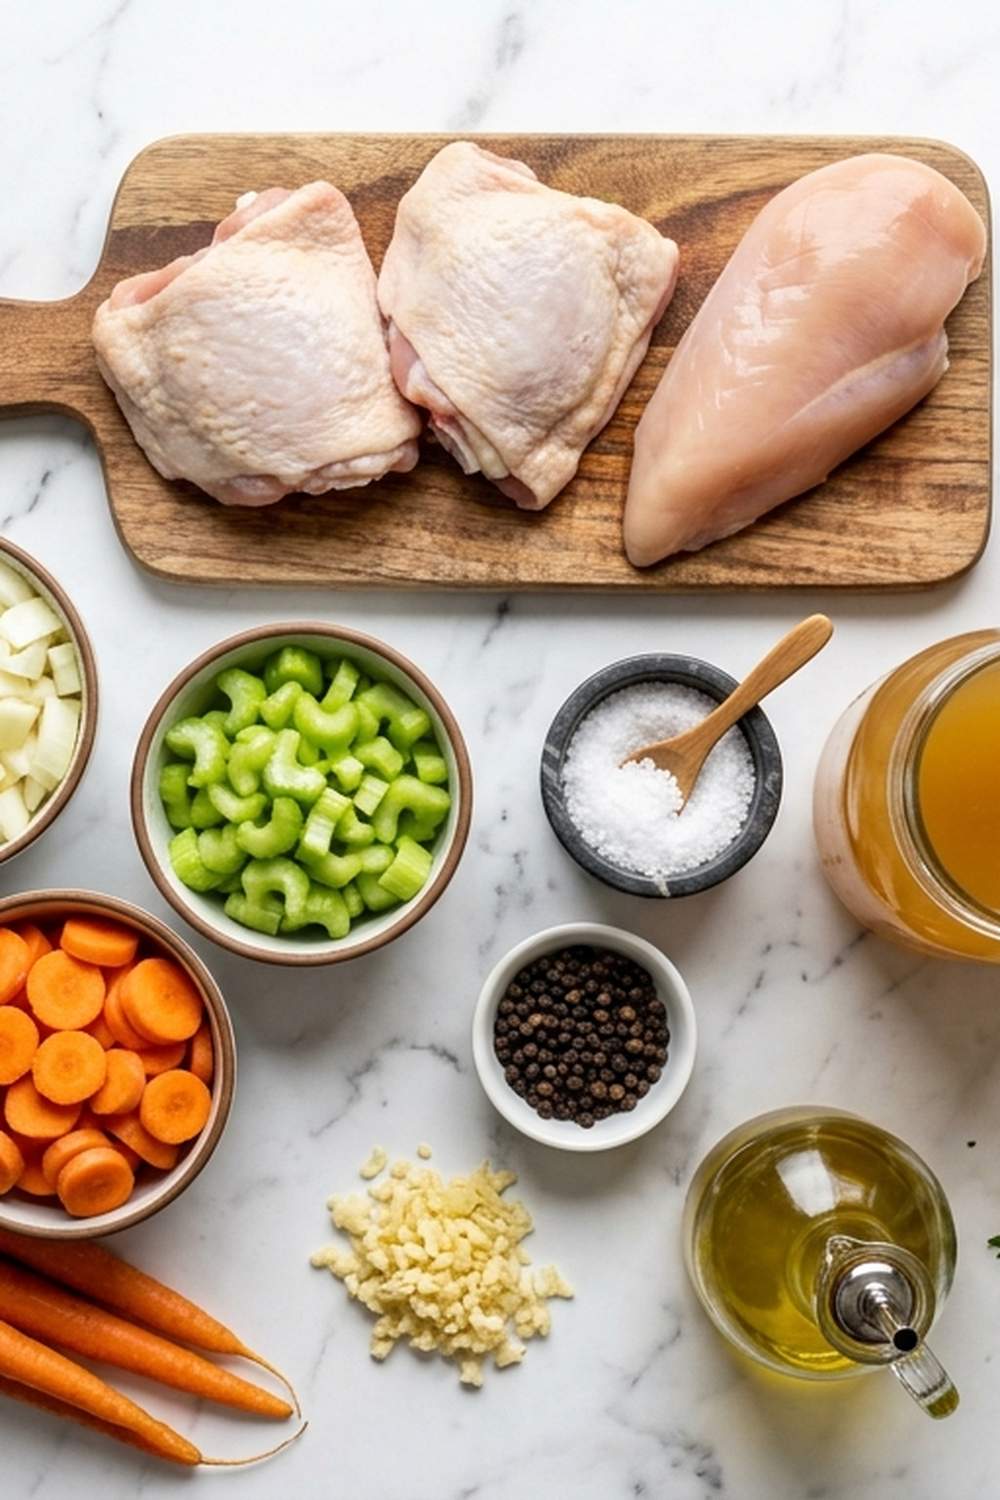
Every ingredient in this recipe was selected because it teaches a specific lesson about the sweating technique and flavor building. I’ve also included budget-conscious swaps because I believe good nutrition shouldn’t drain your bank account. This recipe makes approximately 8 generous servings, and costs roughly $1.25 per serving when using store-bought rotisserie chicken.
- 1 teaspoon fine sea salt, plus more to taste (you’ll taste multiple times, learning how seasoning works at different stages of cooking)
- 1 large garlic clove, minced (added after the celery and carrots soften to prevent burning, teaching timing within one technique)
- ½ teaspoon freshly ground black pepper (freshly ground tastes dramatically better than pre-ground and teaches why equipment matters)
- ⅛ teaspoon crushed red pepper flakes (demonstrates how a tiny amount of heat amplifies other flavors—no one should taste the heat, just feel their taste buds wake up)
- 3 cups shredded rotisserie chicken, meat only (budget swap: use leftover cooked chicken from any source, or poach chicken breasts in the broth itself—saves $2-3)
- 1 teaspoon concentrated chicken flavor base like Better Than Bouillon (optional but teaches you how to build seasoning layers throughout cooking, not all at once)
- 3 large carrots, diced small (carrots naturally contain more sugar than celery and become noticeably sweeter during sweating)
- 4 cups dry egg noodles or small pasta shapes (budget swap: broken spaghetti works just fine and often costs $0.50 less per pound)
- 3 medium celery ribs, diced small (teaches you how celery’s mild flavor becomes sweet and complex when properly sweated)
- ⅛ teaspoon dried rosemary, or fresh if you grow it (aromatic herbs added to the broth, not sautéed, to preserve their delicate oils)
- ½ tablespoon unsalted butter (the fat vehicle that carries aromatic compounds and demonstrates how little fat you actually need for flavor)
- 10 cups low-sodium chicken broth (homemade is better if you have it, but store-bought works perfectly—budget swap: save chicken carcasses in your freezer to make your own)
- ⅛ teaspoon dried thyme (pairs with rosemary to create the classic soup flavor profile)
The Masterclass: How to Make Chicken Noodle Soup
This isn’t just a recipe—it’s a guided lesson in how professionals build flavor. Pay attention to the sensory details at each step. The sounds, smells, and visual changes are your feedback system. When you learn to trust those signals, you’ll never need to follow a recipe slavishly again.
Step 1: Set Up Your Workspace and Prepare Your Vegetables
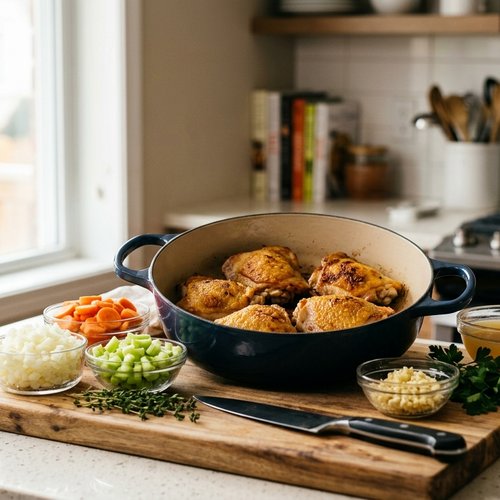
Before you turn on any heat, spend three minutes preparing everything. This is called mise en place, and it’s how professional kitchens stay calm and consistent. Dice your celery and carrots into pieces roughly the same size—about ¼ inch. This matters because uniform pieces cook at the same rate, which means everything softens evenly and flavors develop uniformly.
Mince your garlic finely. This is important: garlic has a lower burn temperature than celery and carrots, so it goes in later. If you added it now, it would brown and taste bitter instead of sweet and mellow. Have your broth measured and ready, your herbs accessible, and your salt and pepper nearby.
Step 2: Begin the Aromatic Base Over Medium-High Heat
Add your butter to a large pot—yes, just ½ tablespoon. This teaches you something crucial that restaurant kitchens know: you don’t need much fat to carry flavor. Let it melt completely over medium-high heat. This takes about 30 seconds. You’re looking for the butter to be completely melted and slightly foamy, which signals that the water content has begun evaporating.
Immediately add your diced celery and carrots. Here’s where you listen: within about 5 seconds, you should hear a gentle, consistent sizzle. Not a loud pop or aggressive sound—that means the heat is too high and you’ll end up with brown vegetables instead of sweet, soft ones. If the sizzle is too quiet, increase your heat slightly. You want that soft, steady whisper of sound.
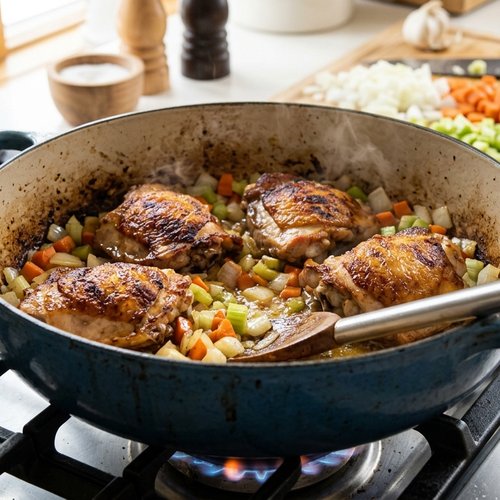
Step 3: Saute the Vegetables Until Noticeably Soft (About 3 Minutes)
This is the sweating phase, and it’s non-negotiable. Stir occasionally—every 30 seconds or so. You’re not trying to brown the vegetables; you’re trying to soften them and release their juices into the butter. After about two minutes, the pot will smell distinctly sweet and vegetal. The vegetables themselves will look slightly translucent at the edges. After three minutes, the celery and carrots should be notably softer when you press one with the back of your spoon.
This is the most important sensory checkpoint: pick up a piece of celery with your spoon and taste it. It should be quite soft, almost melting on your tongue, with a noticeably sweeter taste than raw celery. If it’s still firm and tastes the same as it did raw, you need more time. If it’s browning, your heat was too high.
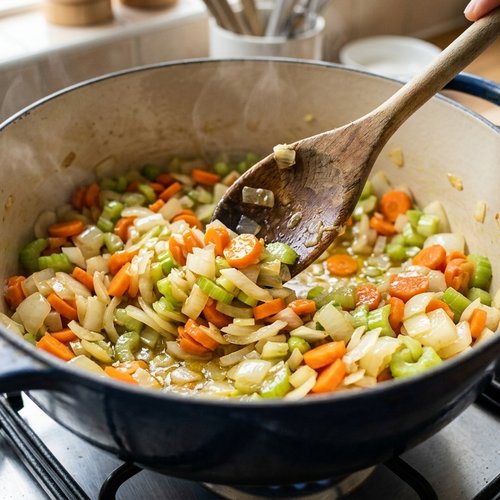
Step 4: Add Garlic and Cook 30 Seconds More
Add your minced garlic to the soft vegetables and stir constantly for exactly 30 seconds. No more, no less. The garlic will become fragrant—you’ll smell that distinctive garlicky aroma rise up from the pot. This is your cue that the garlic’s flavor compounds have released into the fat. If you cook it longer than 30 seconds, it begins to brown and bitter compounds develop. This teaches you that timing within a technique matters as much as the technique itself.
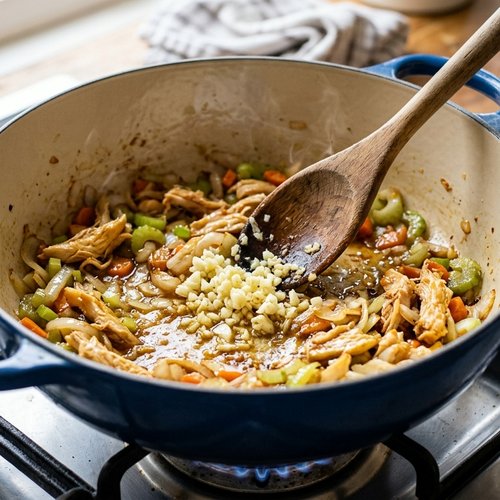
Step 5: Add Your Broth and Seasonings
Pour in all 10 cups of broth. The heat will cause the broth temperature to drop slightly—this is normal and desired. Stir gently, making sure you scrape up any flavorful bits stuck to the bottom (though with butter, there won’t be much). Add your rosemary, thyme, crushed red pepper flakes, and 1 teaspoon salt. Stir well.
Now comes the first of many taste checks. Let the broth warm for 30 seconds (it doesn’t need to boil first), then carefully taste a small spoonful. You’re checking for seasoning balance: Is it salty enough? Does it taste one-dimensional or is there complexity? Do you sense the herbs? Is there a subtle warmth from the red pepper flakes that makes your taste buds perk up without any obvious heat?
Here’s what most home cooks skip: tasting as you go is how you learn to cook by feel instead of by rigid rules. If the broth tastes flat, add another ¼ teaspoon salt and taste again. If it needs more depth, add ½ teaspoon of your concentrated chicken flavor base, stir, and taste again. You’re not guessing—you’re learning your own palate.
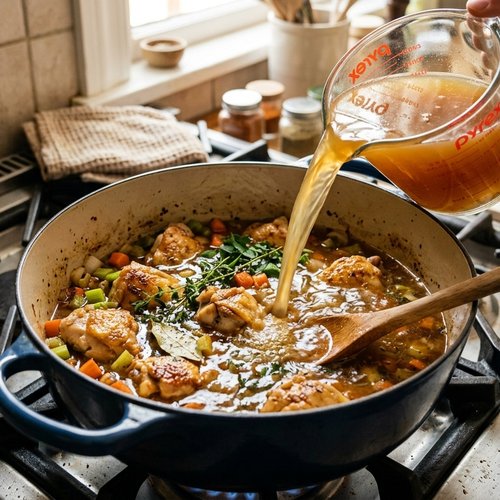
Step 6: Bring to a Rolling Boil and Add Pasta
Turn your heat up to high. The broth will begin to steam, and within 2-3 minutes, you’ll see large rolling bubbles breaking the surface—that’s your rolling boil. The moment you achieve a rolling boil, add your pasta. If you’re using homemade egg noodles, they’ll cook in 3-4 minutes. If you’re using store-bought pasta, follow the package directions but subtract about 1 minute (since the pasta will continue cooking after you remove the pot from heat).
Here’s the professional secret: pasta in soup should be slightly underdone, not al dente like pasta in a colander. It will continue cooking from residual heat for another 1-2 minutes after you remove the pot from the stove. This prevents mushy, overcooked noodles that nobody actually enjoys.
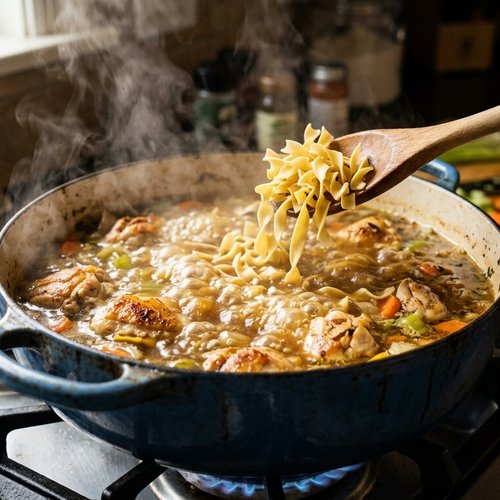
Step 7: Test Pasta Doneness and Remove From Heat
Start testing the pasta at the package’s minimum time. Fish out one noodle with a fork and bite into it. You’re looking for a tiny amount of firmness in the very center—that just-barely-tender stage. The moment you achieve that, remove the entire pot from heat. Don’t wait another minute. Don’t “just cook it a little longer.” That residual heat will finish the job perfectly.
This is where impatience ruins most home soups. Vegetables that were perfectly flavored become mushy, noodles transform from tender to mealy, and the whole dish suffers.
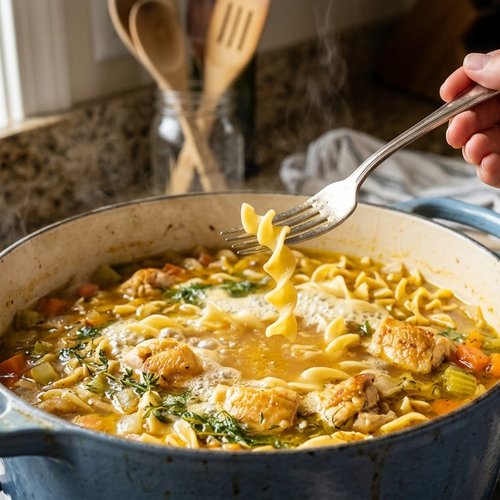
Step 8: Add Chicken and Final Taste Adjustment
Stir in your shredded rotisserie chicken. If it’s cold from the refrigerator, the residual heat will warm it gently. Stir to distribute it evenly throughout. Now taste one more time. This is your final opportunity to adjust seasoning. After adding the chicken, the flavor profile often feels slightly different—the protein adds richness. You might need a tiny amount more salt, or you might find the soup is already perfect.
This is also when you’d add more concentrated chicken flavor base if the broth still tastes underseasoned. Remember: it’s easier to add seasoning than to remove it. Add sparingly and taste before each addition.
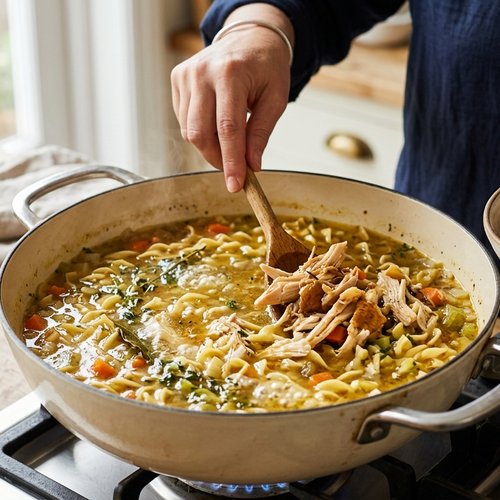
How to Know You’ve Mastered the Technique
When you’ve truly mastered sweating aromatics and building a proper soup, you’ll notice specific sensory markers that tell you everything is working correctly. These are the signs that your technique is solid.
- The vegetable-to-broth transition is seamless – when you stir, the soft vegetables break down slightly and distribute throughout the broth, creating a velvety texture and releasing residual flavors. You won’t see distinct vegetable pieces floating in clear broth; instead, the broth looks slightly creamy and rich.
- The aroma tells the whole story – from the moment the vegetables begin sweating, you smell pure, sweet vegetable aroma. Once you add broth and herbs, you smell a complex, savory depth. When the chicken is added, it becomes rounded and comforting. A soup with poor technique smells flat throughout.
- The first spoonful is flavorful enough that you don’t immediately reach for the salt shaker – properly seasoned soup tastes intentional. Your taste buds recognize salt, umami, herbs, and warmth working together. Poorly seasoned soup requires aggressive salt adjustments at the table.
- The noodles taste tender but distinct, not mushy – they’ve absorbed some broth but maintained their structure. They have a slight resistance when you bite down, not the squish of overcooked pasta.
Common Technique Mistakes and How to Fix Them
These are the most frequent errors I see in home kitchens, and how to correct them for future batches.
- Starting with too high heat and creating brown aromatics instead of sweet ones – This creates bitter flavors that permeate the entire soup. Fix: Lower your heat to medium, listen for that soft sizzle, and accept that proper technique takes the full three minutes. There are no shortcuts without sacrificing flavor. If you’ve already made this mistake, add a teaspoon of sugar to balance the bitterness (you won’t taste sweetness, just less bitterness).
- Adding all seasonings at once instead of tasting throughout – You end up with a soup that’s either underseasoned or oversalted because you can’t adjust once everything is combined. Fix: Taste after adding broth, taste again before adding pasta, and taste once more after adding chicken. Each addition changes the flavor balance slightly.
- Skipping the garlic timing and adding it during the initial sauté – Garlic burns easily and will taste acrid. Fix: Stir it in separately after the other vegetables are soft. If this happens, add a squeeze of lemon juice to mask the burned taste, but prevention is better.
- Overcooking the pasta by waiting until it’s totally soft before removing from heat – By the time the pot cools, the pasta is mushy. Fix: Learn to taste test, and understand that “al dente” doesn’t apply to soup noodles. Pull from heat earlier than feels comfortable.
Practice Variations to Build Your Skill
Mastery comes from repetition with intentional variation. Try these three versions to deepen your understanding of how the sweating technique adapts to different ingredients.
Version 1: The Basic Master Version – Make this recipe exactly as written the first time. Focus entirely on listening, smelling, and tasting at each step. Don’t try to optimize; just experience the technique.
Version 2: The Vegetable-Forward Version – This time, double your aromatics (add 6 celery ribs and 6 carrots) and reduce the broth to 8 cups. Spend 4-5 minutes sweating the vegetables instead of 3. This teaches you how changing ratios and timing affects the intensity of the flavor base. The broth will taste more vegetable-forward and require less seasoning. This is how you make soup without a rotisserie chicken—by building profound flavor through vegetables alone.
Version 3: The Herb-Infused Version – Use fresh herbs instead of dried. Add 3 sprigs fresh thyme and 1 sprig fresh rosemary to the hot broth but don’t add them at the beginning. Instead, make a sachet: wrap them in a small piece of cheesecloth and tie with kitchen twine, then add it once you add the broth. Simmer for 8-10 minutes before adding pasta. Remove the sachet before serving. This teaches you how fresh herbs need less cooking time and how to control their intensity. The soup will taste brighter and more delicate.
Expert’s Nutritional Tip: The Protein-Balanced Immunity Boost
As a registered dietitian, I want to highlight something crucial: this soup is one of the most nutritionally efficient meals you can make. The sweated vegetables create a broth rich in natural sodium and minerals—celery provides electrolytes, carrots provide beta-carotene (converted to vitamin A), and the low, slow cooking method preserves heat-sensitive vitamins like vitamin C.
The rotisserie chicken provides complete protein (all nine essential amino acids), which is essential for every cellular process in your body, especially immune function. The combination of protein, broth minerals, and aromatic compounds creates a meal that’s genuinely soothing and nutritious—not just psychologically comforting, but physiologically nourishing.
Most importantly, the cost is extraordinary: a proper homemade soup costs less per serving than a coffee shop drink and provides far more nutritional density. When you master this technique, you’re not just learning to cook—you’re learning food independence and affordable nutrition.
Can I Store Chicken Noodle Soup?
Yes, and this is where good technique saves you time. Because you sweated the aromatics properly and didn’t overcook the noodles, the soup maintains its texture through storage.
Store leftovers in airtight containers in the refrigerator for up to 5 days, depending on the freshness of your rotisserie chicken (typically the limiting factor). The noodles will absorb more broth over time, making the soup thicker; that’s normal and delicious—it’s essentially finished cooking and melding flavors.
For longer storage, freeze for up to 3 months, but freeze the broth and noodles separately from the chicken. This prevents the chicken from becoming rubbery and the noodles from turning to mush during thaw. Thaw in the refrigerator overnight, reheat gently over medium heat (never a boil), stirring occasionally.
Budget pro tip: Make a double batch and freeze half in individual containers. Grab one for lunch, thaw overnight, and you have a prepared meal ready to reheat in five minutes.
Make-Ahead Guide for Maximum Efficiency
This is where the technique truly shines for meal planning:
Day 1 (Prep Work, 10 minutes): Dice and store your celery and carrots in separate airtight containers in the refrigerator. Mince garlic and store in a small container with a tiny bit of olive oil to prevent browning. You now have a complete flavor base ready to cook any time.
Day 2 or 3 (Cook the Base, 10 minutes): When you’re ready for soup, make just the sweated aromatics base and the broth. You can stop here and refrigerate the warm broth in a container for up to 24 hours. The technique will have already happened; you’re just waiting to finish the soup.
Final Assembly (10 minutes): Reheat the broth to a simmer, add pasta, cook to just-tender, then add pre-shredded rotisserie chicken and final seasonings. This stretched timeline means you can have homemade soup with minimal effort on any night.
Nutrition Information
This data is based on USDA standards for chicken, vegetables, and pasta (per serving, approximately 1.5 cups):
Calories: 245 | Protein: 22g | Carbohydrates: 28g | Fiber: 2g | Fat: 3.5g | Sodium: 890mg | Iron: 15% daily value
This is a complete, balanced meal: roughly 35% of calories from protein, which keeps you satiated for hours; complex carbohydrates from vegetables and pasta; minimal fat because of the sweating technique (which extracts flavor without requiring additional fat); and natural sodium from the broth, which is essential for muscle function and electrolyte balance.
The key nutrient here is protein at 22 grams per serving—that’s equivalent to 3.5 ounces of chicken, which is a substantial protein portion. For comparison, most fast-food soups contain 6-8 grams of protein and twice the sodium. This soup nourishes you; it doesn’t just fill you.
What to Serve With Chicken Noodle Soup?
The beauty of this soup is that it stands alone as a complete meal, but it pairs perfectly with simple carbohydrates that let the technique and flavor shine:
- Crusty bread or dinner rolls – plain, with no butter. The bread absorbs the flavorful broth and becomes part of the meal. This is how it’s served in professional kitchens.
- Simple side salad with lemon vinaigrette – the brightness cuts through the richness of the broth. Try pairing with something like our black bean nacho appetizer for a lighter meal structure.
- Grilled cheese sandwich – the classic combination works because the warm, salty broth plays against the rich, buttery sandwich. It’s economical comfort food at its finest.
- Simple roasted vegetables or steamed broccoli – adds texture and extends the vegetable nutrition of the meal without overwhelming the delicate soup flavors.
- Nothing at all – honestly, a proper soup made with correct technique is complete and satisfying on its own. Serve it in a large bowl with good bread and feel satisfied.
Seasonal Variations
The sweating technique adapts beautifully to seasonal ingredients, teaching you how technique remains constant while ingredients celebrate the season:
Spring Version: Reduce carrots to 2 and add 1 cup fresh peas (added during the last minute of cooking to preserve their bright sweetness), plus fresh dill instead of rosemary. The soup tastes lighter and more delicate, celebrating spring’s tender vegetables.
Summer Version: Add fresh corn (cut from 2 cobs), fresh basil (stirred in at the very end, after heat is removed), and a squeeze of fresh lemon juice. The soup becomes brighter and more herbaceous, with the corn adding slight sweetness that complements warm-weather eating.
Fall Version: This is the classic. Increase the thyme slightly and add a tiny pinch of nutmeg to the broth. Some cooks add a small diced apple or parsnip instead of some of the carrots. The soup becomes earthier and more warming as temperatures cool.
Winter Version: Add root vegetables like turnips or rutabaga (diced and sautéed with the initial aromatics), increase rosemary, and add a small splash of cream or whole milk right before serving. The soup becomes richer and more substantial, designed for cold-weather eating.

Chicken Noodle Soup Recipe
Ingredients
Method
- Before you turn on any heat, spend three minutes preparing everything. This is called mise en place, and it's how professional kitchens stay calm and consistent. Dice your celery and carrots into pieces roughly the same size—about ¼ inch. This matters because uniform pieces cook at the same rate, which means everything softens evenly and flavors develop uniformly. Mince your garlic finely. This is important: garlic has a lower burn temperature than celery and carrots, so it goes in later. If you added it now, it would brown and taste bitter instead of sweet and mellow. Have your broth measured and ready, your herbs accessible, and your salt and pepper nearby.
- Add your butter to a large pot—yes, just ½ tablespoon. This teaches you something crucial that restaurant kitchens know: you don't need much fat to carry flavor. Let it melt completely over medium-high heat. This takes about 30 seconds. You're looking for the butter to be completely melted and slightly foamy, which signals that the water content has begun evaporating. Immediately add your diced celery and carrots. Here's where you listen: within about 5 seconds, you should hear a gentle, consistent sizzle. Not a loud pop or aggressive sound—that means the heat is too high and you'll end up with brown vegetables instead of sweet, soft ones. If the sizzle is too quiet, increase your heat slightly. You want that soft, steady whisper of sound.
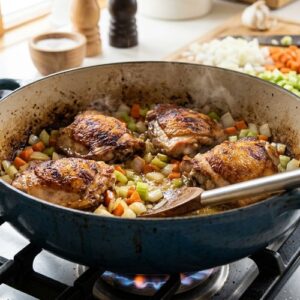
- This is the sweating phase, and it's non-negotiable. Stir occasionally—every 30 seconds or so. You're not trying to brown the vegetables; you're trying to soften them and release their juices into the butter. After about two minutes, the pot will smell distinctly sweet and vegetal. The vegetables themselves will look slightly translucent at the edges. After three minutes, the celery and carrots should be notably softer when you press one with the back of your spoon. This is the most important sensory checkpoint: pick up a piece of celery with your spoon and taste it. It should be quite soft, almost melting on your tongue, with a noticeably sweeter taste than raw celery. If it's still firm and tastes the same as it did raw, you need more time. If it's browning, your heat was too high.
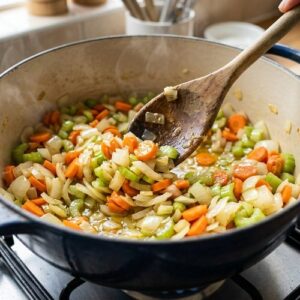
- Add your minced garlic to the soft vegetables and stir constantly for exactly 30 seconds. No more, no less. The garlic will become fragrant—you'll smell that distinctive garlicky aroma rise up from the pot. This is your cue that the garlic's flavor compounds have released into the fat. If you cook it longer than 30 seconds, it begins to brown and bitter compounds develop. This teaches you that timing within a technique matters as much as the technique itself.
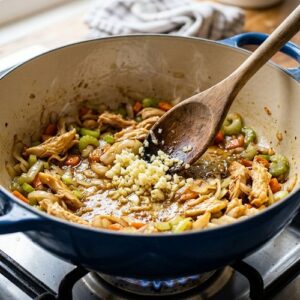
- Pour in all 10 cups of broth. The heat will cause the broth temperature to drop slightly—this is normal and desired. Stir gently, making sure you scrape up any flavorful bits stuck to the bottom (though with butter, there won't be much). Add your rosemary, thyme, crushed red pepper flakes, and 1 teaspoon salt. Stir well. Now comes the first of many taste checks. Let the broth warm for 30 seconds (it doesn't need to boil first), then carefully taste a small spoonful. You're checking for seasoning balance: Is it salty enough? Does it taste one-dimensional or is there complexity? Do you sense the herbs? Is there a subtle warmth from the red pepper flakes that makes your taste buds perk up without any obvious heat? Here's what most home cooks skip: tasting as you go is how you learn to cook by feel instead of by rigid rules. If the broth tastes flat, add another ¼ teaspoon salt and taste again. If it needs more depth, add ½ teaspoon of your concentrated chicken flavor base, stir, and taste again. You're not guessing—you're learning your own palate.
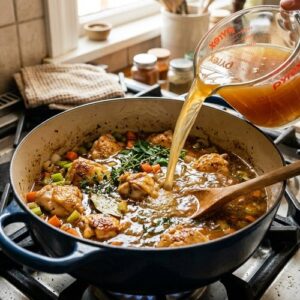
- Turn your heat up to high. The broth will begin to steam, and within 2-3 minutes, you'll see large rolling bubbles breaking the surface—that's your rolling boil. The moment you achieve a rolling boil, add your pasta. If you're using homemade egg noodles, they'll cook in 3-4 minutes. If you're using store-bought pasta, follow the package directions but subtract about 1 minute (since the pasta will continue cooking after you remove the pot from heat). Here's the professional secret: pasta in soup should be slightly underdone, not al dente like pasta in a colander. It will continue cooking from residual heat for another 1-2 minutes after you remove the pot from the stove. This prevents mushy, overcooked noodles that nobody actually enjoys.
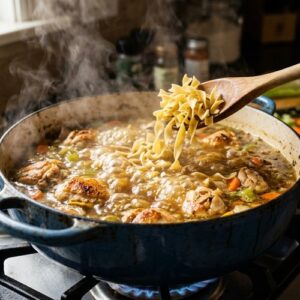
- Start testing the pasta at the package's minimum time. Fish out one noodle with a fork and bite into it. You're looking for a tiny amount of firmness in the very center—that just-barely-tender stage. The moment you achieve that, remove the entire pot from heat. Don't wait another minute. Don't "just cook it a little longer." That residual heat will finish the job perfectly. This is where impatience ruins most home soups. Vegetables that were perfectly flavored become mushy, noodles transform from tender to mealy, and the whole dish suffers.

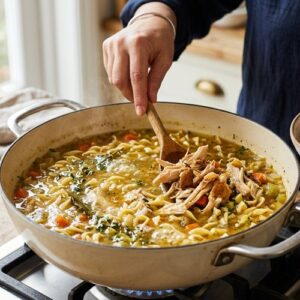
- Stir in your shredded rotisserie chicken. If it's cold from the refrigerator, the residual heat will warm it gently. Stir to distribute it evenly throughout. Now taste one more time. This is your final opportunity to adjust seasoning. After adding the chicken, the flavor profile often feels slightly different—the protein adds richness. You might need a tiny amount more salt, or you might find the soup is already perfect. This is also when you'd add more concentrated chicken flavor base if the broth still tastes underseasoned. Remember: it's easier to add seasoning than to remove it. Add sparingly and taste before each addition.
Notes
FAQs
Can I use chicken broth instead of stock?
Absolutely. The difference is technical: stock is made from bones and has more gelatin, making it slightly richer. Broth is made from meat and has lighter body. For this soup, either works perfectly. The sweated aromatics technique compensates for any difference in richness by building flavor at the beginning, so you’re not relying on stock’s gelatin for depth. This is why canned or boxed broth, when combined with proper technique, tastes remarkably good.
What if I’m using homemade broth I made myself?
Even better. Homemade broth from bones is typically less salty than commercial broth, so you’ll need more salt. Taste frequently and adjust. Also, homemade broth often has more gelatin, so your soup will have a silkier mouthfeel. You won’t need the concentrated chicken flavor base—your homemade broth already has all the depth you need.
Can I make this in a slow cooker?
You can, but you’ll sacrifice the entire point of learning this technique. The slow cooker prevents proper sweating of the aromatics—they’ll stew instead of caramelize slightly, and you’ll miss the flavor development. If you must use a slow cooker, sauté the aromatics in a skillet first, then add them to the slow cooker with broth and everything else. Cook on high for 2 hours. This extra step takes more time than making it on the stovetop, so there’s no real advantage.
My noodles turned mushy. How do I prevent this next time?
You left them in too long. Professional cooks actually taste-test pasta at the minimum time on the package and often remove it 30 seconds earlier than instructed. The residual heat finishes cooking. Also, if you’re using really thin pasta like angel hair or broken spaghetti, reduce cooking time by 1-2 minutes. Next time, try this: bring broth to boil, add pasta, and immediately set a timer for one minute less than the package says. Start tasting at that point. You’ll find the perfect moment.
Is there a lower-sodium version since this broth contains 890mg sodium per serving?
Use low-sodium broth and skip the concentrated chicken flavor base—that adds sodium. Make your own broth if you can, which allows you to control salt completely. The 890mg is still within healthy daily limits (the recommendation is under 2,300mg per day), and the sodium here is paired with potassium from vegetables, which helps your body maintain electrolyte balance. The sodium is functional and necessary for flavor and health, not excessive.
More Recipes Using This Technique
Once you’ve mastered sweating aromatics in this soup, these recipes become achievable and reveal how one technique creates endless possibilities:
- Black Chili Recipe – sweated aromatics form the flavor foundation before beans are added, teaching you how this technique scales to vegetarian proteins
- Baked Creamy Chicken Recipe – the same aromatic base creates the sauce in a completely different cooking method, showing technique versatility
- my oven-baked chicken – the pulled chicken begins with proper technique in creating flavorful cooking liquid
You’ve now learned something that separates home cooks from people who consistently make food they’re proud to serve. The sweating technique isn’t fancy or complicated—it’s intentional, it’s teachable, and it works every single time when you pay attention to the sensory signals your pan is giving you. That’s real cooking skill. That’s how you build nutrition that costs less than takeout. That’s food independence.
Make this soup, taste at every step, and pay attention to the moment when those pale vegetables transform into something fragrant and sweet. That moment is where the magic lives, and once you feel it, you’ll recognize it in every soup, stew, and braise you make for the rest of your life.
Don’t forget to mention @affordablefoodideas if you try this recipe!