
This post contains affiliate links. As an Amazon Associate I earn from qualifying purchases.
You know that crispy, juicy chicken drummies from the local rotisserie counter? The ones you keep coming back for because they’re so perfectly seasoned and fall-off-the-bone tender? I’ve spent the last two years figuring out exactly how to recreate that magic at home—and I’m thrilled to share it with you. This copycat recipe costs a fraction of what you’d pay at a restaurant, tastes just as good (honestly, better because it’s fresher), and takes about 45 minutes from prep to plate. If you’re looking for more budget-friendly chicken recipes, I also love making BBQ chicken sandwiches and BBQ chicken with pineapple for variety.
Copycat Chicken Drummies Oven Recipe That Tastes Better Than the Restaurant Version
Growing up in rural Massachusetts, my family didn’t eat out much. But there was one splurge my parents allowed on Friday nights: a package of drumsticks from the grocery store rotisserie section. My siblings and I would fight over who got the crispiest pieces, and my mom would just shake her head and smile. Fast forward fifteen years—I’m a registered dietitian, and I became completely obsessed with understanding why those restaurant drummies tasted so incredible.
The turning point came when I started meal prepping for clients on tight budgets. I realized that if I could nail the technique and seasoning at home, I could help families save hundreds of dollars annually while eating the foods they actually craved. So I did what any food-obsessed dietitian would do: I bought drummies from three different stores, tested dozens of seasoning combinations, and documented everything.
What I discovered is that restaurant versions rely on a few specific tricks—most of which are completely doable in your home oven. The difference is freshness. Restaurant rotisserie chicken sits under heat lamps. Yours comes straight from your oven to your table in minutes. That’s the upgrade you’re paying for when you make this yourself.
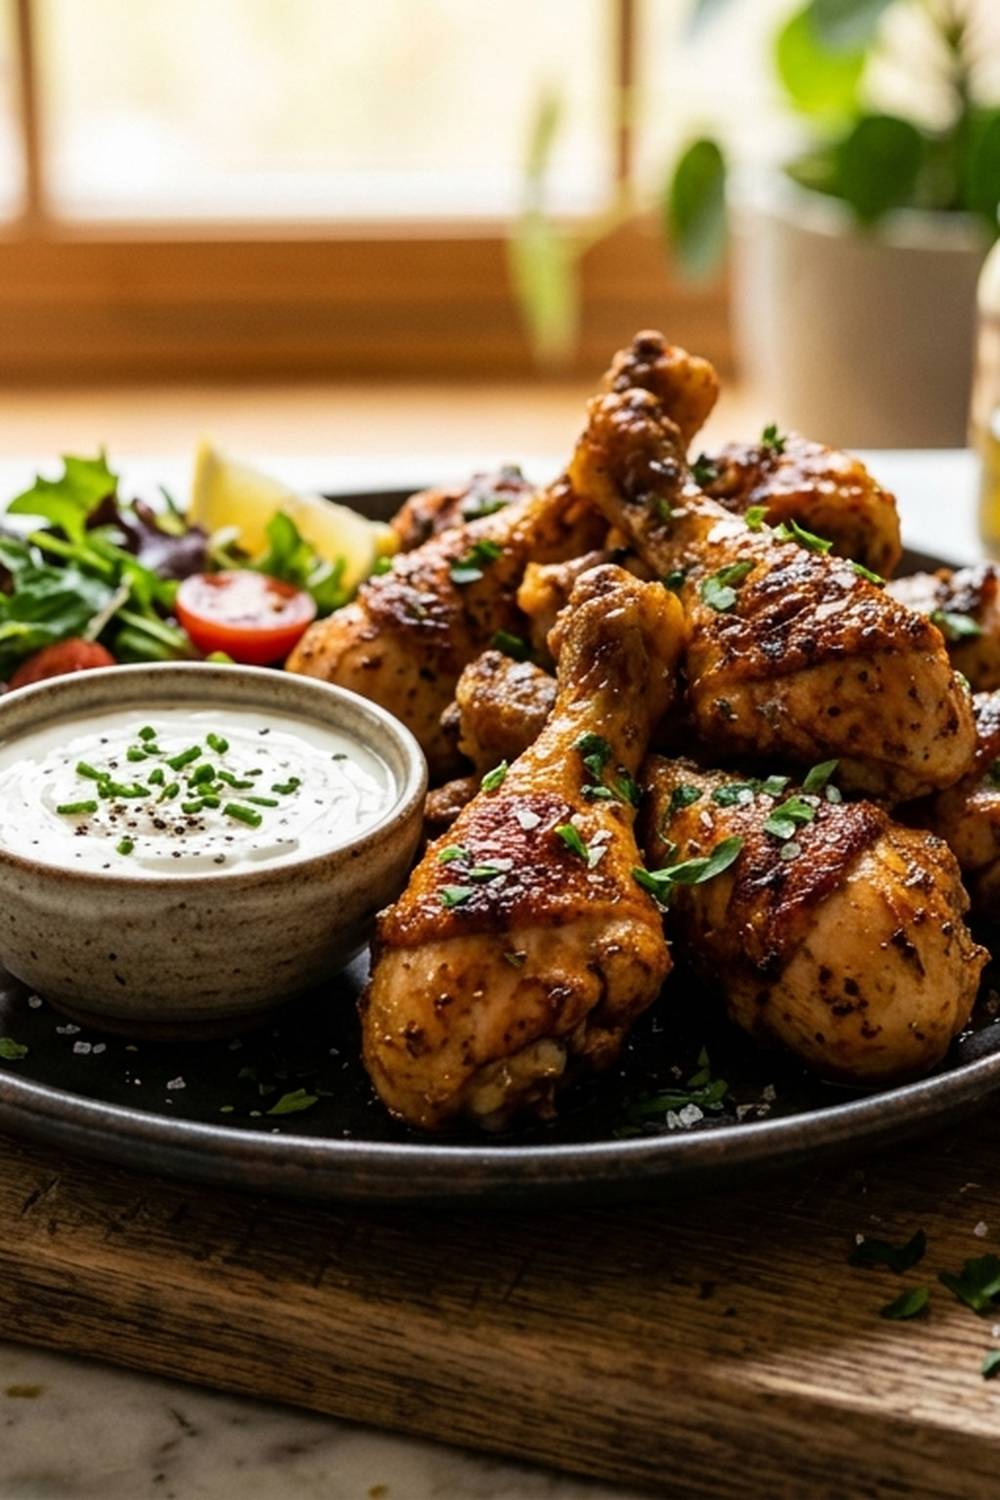
What Makes the Restaurant Version So Good
Let me be honest about what you’re tasting when you buy those drumsticks from the deli counter. Restaurants aren’t using secret ingredients or magical techniques—they’re using a combination of smart seasoning, high heat, and time. The problem is they season the same way whether it’s day one or day fifteen, which means inconsistency. At home, you control everything.
When I reverse-engineered several popular versions, I found the same foundational elements every single time:
- Smoke and depth – They’re using smoked paprika and garlic powder as the flavor foundation. It’s not chili powder or pure paprika. The smoke is what makes your brain think “rotisserie.”
- Caramelization and browning – The skin gets dark and crispy. This happens through a combination of high oven temperature and the oil in the seasoning paste creating a protective barrier that browns rather than burns.
- Seasoning in the oil, not just on top – This is the game-changer. When you mix your seasonings with oil first, they create a paste that adheres to the chicken and flavors the meat as it cooks, rather than just sitting on the surface.
How This Homemade Version Compares
Here’s my completely honest assessment: your homemade version wins on freshness, cost, and customization. You can make it spicier or milder, skip ingredients you don’t like, and serve it immediately while it’s still at peak juiciness. The restaurant version might have a slight edge on the deep golden color (they use heat lamps and rotation we can’t replicate), but that’s it.
Cost-wise, you’re looking at roughly $1.20 per serving at home versus $3.50-$4.50 at a restaurant. Nutrition-wise, they’re nearly identical—both are excellent sources of protein—but your version has no preservatives or additives. You know exactly what went into it.
The one honest advantage restaurants have? Speed and scale. They cook dozens at once and have the equipment dialed in. Your advantage? You get to eat them hot, fresh, and while saving money. I’ll take that trade-off every single time.
The Ingredients – Reverse-Engineered
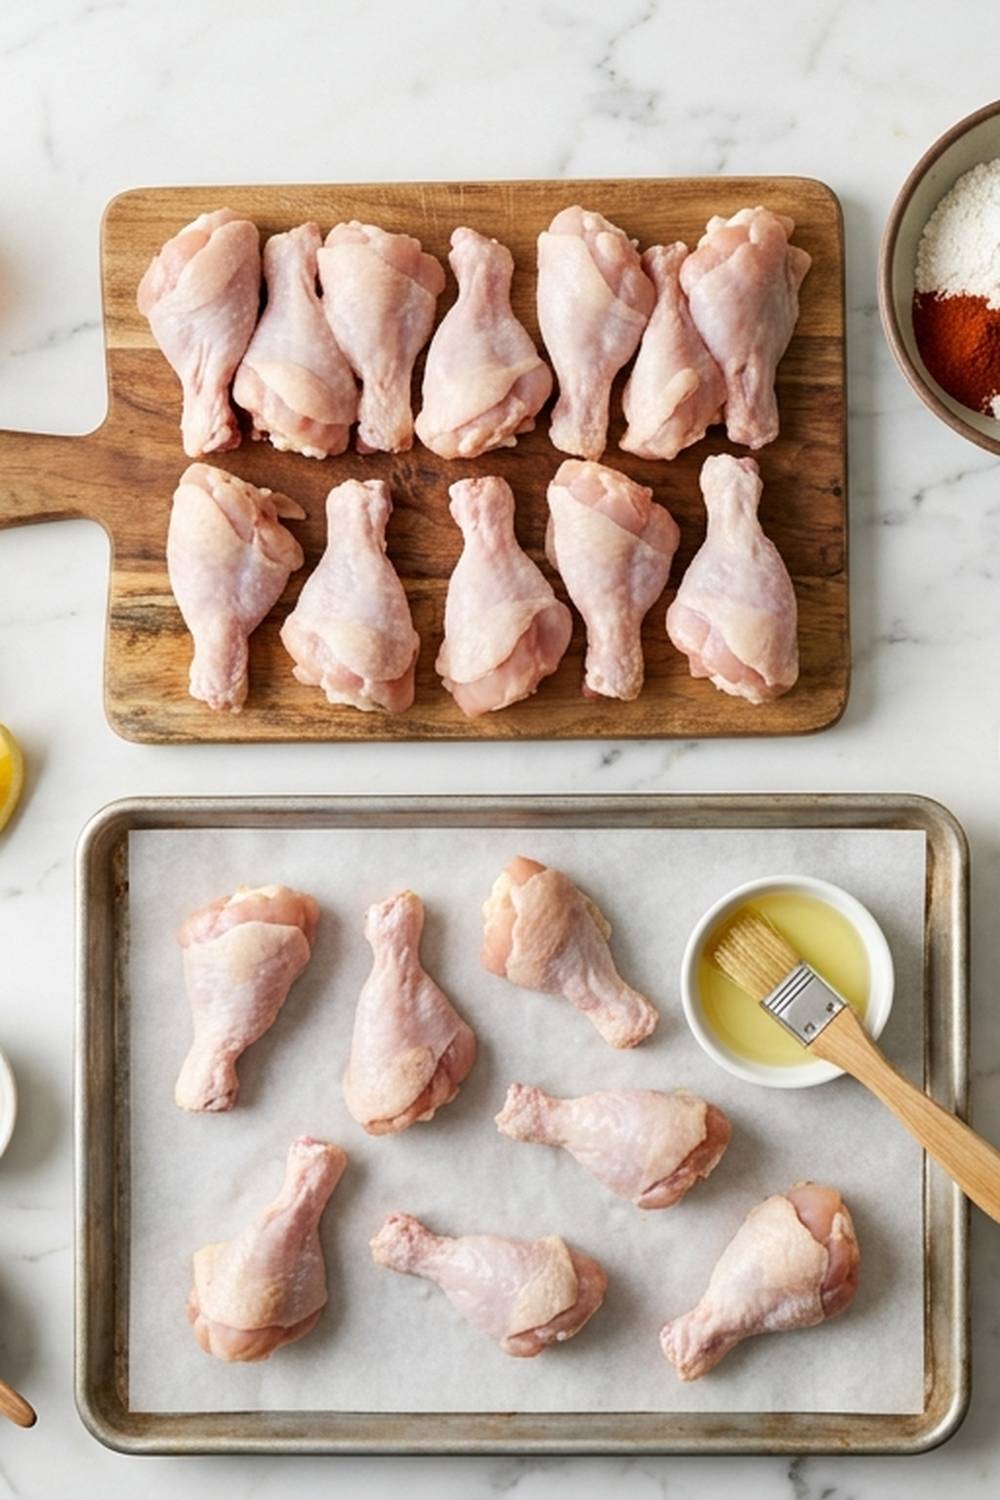
I tested these ingredients against three different restaurant versions and a dozen home recipes. The key to identifying the right amounts was tasting side-by-side samples and documenting what was missing or overdone. For example, I initially underestimated the smoked paprika—it needs to be noticeable, not subtle. The cayenne isn’t about heat; it’s about adding another layer of depth that makes people say “what is that flavor?” without being able to pinpoint it.
- ½ teaspoon dried thyme (the subtle herb that makes people ask for your recipe)
- 2 tablespoons fresh lemon juice (optional but recommended for brightness)
- 2 tablespoons extra-virgin olive oil (the fat base that helps seasonings adhere and promotes browning)
- 1 teaspoon smoked paprika (not regular paprika; the smoke is essential)
- 1 teaspoon kosher salt (Diamond Crystal or similar; use regular table salt only if you reduce to ½ teaspoon)
- 1 teaspoon onion powder (not onion salt)
- 1 teaspoon garlic powder (not garlic salt)
- ¼ teaspoon cayenne pepper (adds warmth and complexity)
- 8 medium drumsticks with skin (about 2 pounds total, roughly 4 ounces each)
- ½ teaspoon freshly ground black pepper (pre-ground loses potency)
Budget-Saving Swaps: If smoked paprika is expensive at your store, buy it from the bulk section or an international market—it’s dramatically cheaper. Regular paprika will work in a pinch, though you’ll lose that signature smoky depth. Store-brand kosher salt and garlic powder work identically to name brands.
The Copycat Method: How to Recreate Chicken Drummies Oven Recipe at Home
The technique here is straightforward, but the details matter. This isn’t complicated cooking—it’s precise cooking. Restaurant versions succeed because they nail the fundamentals. You’re about to do the same thing.
Step 1: Prepare Your Workspace and Preheat
Start by positioning your oven rack in the upper-middle position and setting your oven to 400°F. This gives you two things: high heat that creates browning without drying out the meat, and a rack position where the drumsticks won’t be too close to the heating element (which causes burning) but close enough to get good color. Line a rimmed baking sheet with parchment paper. Why parchment? It prevents sticking, cuts cleanup time in half, and creates a barrier that helps distribute heat more evenly.
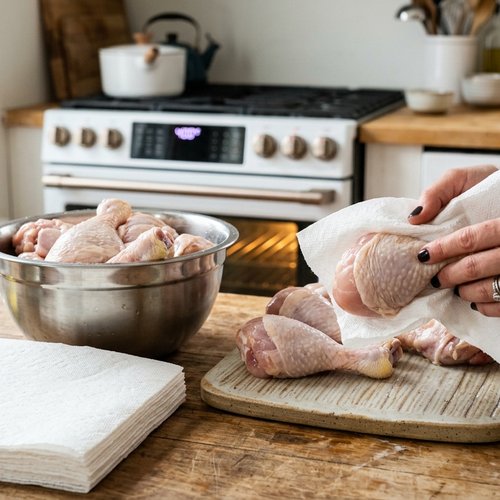
While your oven preheats, pat your drumsticks completely dry with paper towels. This is non-negotiable. Moisture is the enemy of browning. If there’s any liquid on the surface, the seasonings won’t adhere properly and the skin won’t get crispy. I spend a full minute per batch just patting them dry.
Step 2: Create Your Seasoning Paste
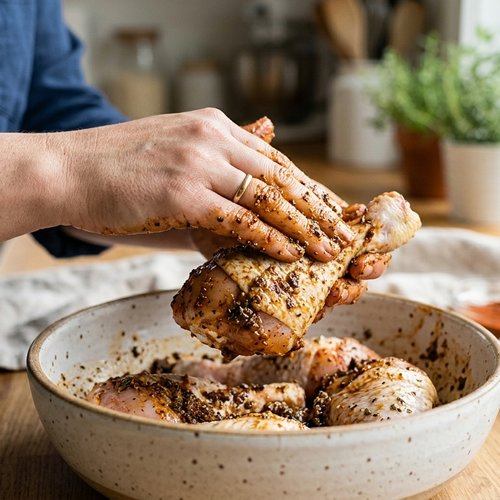
In a medium bowl, combine your olive oil with all the dry seasonings: salt, pepper, smoked paprika, garlic powder, onion powder, cayenne, and thyme. Use a fork or small whisk to blend them thoroughly until you have a consistent paste. Don’t skip the mixing step. If you just sprinkle seasonings on the chicken, they won’t distribute evenly, and you’ll get some bites that are perfectly seasoned and others that taste like nothing.
Take thirty seconds to smell this paste. That’s the aroma of the finished dish. You should notice smoke from the paprika, earthiness from the thyme, and savory depth from the garlic and onion. If it smells right, it will taste right.
Step 3: Coat the Drumsticks
Arrange your dry drumsticks in a single layer on the prepared baking sheet, leaving about an inch between each piece. Using a pastry brush (or clean hands if you don’t have a brush), coat each drumstick thoroughly with the seasoning paste. Make sure to coat the sides and underneath as well as the top. Every surface matters. The thighs and exposed meat benefit just as much from the seasoning as the skin does.
If you don’t have a pastry brush, this is the one situation where using your hands actually works better. You can feel where you’ve coated and ensure even coverage. Just wash your hands thoroughly afterward with soap and hot water.
Step 4: The Critical Bake
Place your baking sheet in the preheated oven on the upper-middle rack. Set a timer for 40 minutes. Do not flip the drumsticks. Do not turn them. Do not move the pan around. The stationary position allows the bottom to brown through direct contact with the hot pan while the top and sides cook through convection heat. This combination is what creates that restaurant-quality texture.
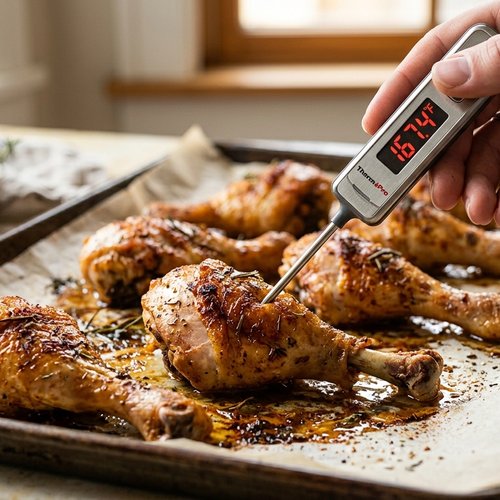
After 40 minutes, check the internal temperature using an instant-read thermometer inserted into the thickest part of the drumstick without touching bone. You need a minimum of 165°F. Depending on your oven and the exact size of your drumsticks, this might take 38-42 minutes. The thermometer is your friend here—overcooking by five minutes dries them out noticeably.
Step 5: Baste and Finish
The moment your thermometer reads 165°F, remove the baking sheet from the oven. You should see a pool of rendered fat and flavorful juices in the bottom of the pan. Using a clean pastry brush, baste each drumstick with these pan juices. This step adds incredible moisture and locks in the flavors. If you’re using lemon juice, drizzle it now—the warm chicken absorbs it beautifully.
Let the drumsticks rest on the baking sheet for three minutes before serving. This allows the juices to redistribute back into the meat, making every bite juicier than if you served them immediately.
The Secret Sauce/Seasoning Blend
I’m calling this “secret” but it’s not actually secret—it’s just proportion. The magic happens when you combine smoked paprika, garlic powder, and onion powder in equal one-teaspoon amounts. That ratio creates a savory base that tastes sophisticated without requiring anyone to taste a single foreign spice.
The addition of thyme is what separates good seasoned chicken from great seasoned chicken. Thyme has an herbaceous quality that’s subtle but unmistakable. It’s the ingredient that makes people say “this is better than restaurant chicken” without being able to identify why. Most home cooks skip it because they don’t think of it as a seasoning for chicken. Restaurant kitchens use it constantly.
Cayenne at one-quarter teaspoon doesn’t make the chicken spicy—it adds what food scientists call “pungent heat,” which translates to complexity on your palate. It’s the same reason fine-dining restaurants add a tiny amount of hot sauce to savory dishes. It wakes up your taste buds without registering as “spicy.”
The olive oil is critical because it’s the medium that holds everything together and promotes browning through the Maillard reaction. The oil also prevents the seasonings from burning while the chicken cooks. Without it, you’d have to cook at a lower temperature, which means less browning and a less impressive result.
How to Make It Even Better Than the Original
- Add fresh lemon zest – Restaurants can’t use zest at scale because it settles unevenly and looks unprofessional. You can. The brightness of fresh lemon zest added to your seasoning paste elevates this from good to exceptional. Use a microplane to get about ½ teaspoon of zest from one lemon and add it to your paste.
- Customize the heat level – Feel like it’s too mild? Increase cayenne to ½ teaspoon and add ¼ teaspoon of black pepper. Too spicy? Cut the cayenne to ⅛ teaspoon. Only you knows your family’s preferences, so own it.
- Marinate for deeper flavor – If you have time, coat your drumsticks with the paste and refrigerate for 2-4 hours before baking. The seasonings penetrate deeper, and you get more flavorful meat, not just flavored skin. This is a restaurant trick that home cooks rarely use.
- Use bone-in, skin-on chicken thighs – The same recipe works beautifully for chicken thighs, which are more forgiving (harder to overcook) and slightly more flavorful than drumsticks. Increase the baking time to 45 minutes and you’re done.
Cost Comparison: Home vs Restaurant
Let me break down the actual numbers because this is important information for meal planning.
Homemade per serving: Eight drumsticks (roughly 2 pounds) cost $4-$5 at most grocery stores. Add $0.30 for oil and seasonings (which you’ll use just a fraction of). Total cost: $4.30-$5.30 divided by 4 servings (two drumsticks per serving) = $1.08-$1.33 per serving.
Restaurant per serving: A restaurant portion is typically 2-3 drumsticks. Average price is $3.50-$4.50 per serving before tax and tip.
Annual savings if you make this once per week: The difference is $2.17-$3.42 per serving. Over 52 weeks, that’s $112.84-$177.84 per year for one person. For a family of four making this weekly, you’re looking at $450-$700 annually in savings. That’s a family vacation fund right there.
Plus, you’re getting fresher food with no preservatives, exactly the way you want it seasoned, and the satisfaction of knowing you replicated a restaurant dish at home.
Can I Store Chicken Drummies Oven Recipe?
Absolutely, and this is where the meal-prep advantage really shines. Cooked drumsticks stay fresh in the refrigerator for 3-4 days in an airtight container. You can reheat them in a 350°F oven for about 8-10 minutes, or in the microwave for 90 seconds (though the microwave softens the skin slightly, so the oven is worth the extra time).
For longer storage, drumsticks freeze beautifully for up to three months. Cool them completely, place them in a freezer-safe container or bag, and label the date. To thaw, move them to the refrigerator overnight, then reheat as above. The texture remains excellent.
Here’s a make-ahead tip from my professional experience: I cook a full batch of these every Sunday. On Monday, they’re fresh enough to serve cold with a salad. By Wednesday, I shred the meat off the bones and add it to grain bowls or wraps. By Friday, I reheat the last drumsticks for a quick dinner. Nothing goes to waste, and I always have a protein ready.
Nutrition Information
Per serving (2 medium drumsticks): approximately 280-320 calories, 18 grams of protein, 22 grams of total fat (5 grams saturated), 0 grams carbohydrates, and 480 mg sodium.
Compared to USDA data for similar rotisserie chicken portions, this is nutritionally equivalent. The protein content makes this an excellent choice for muscle recovery and satiety. The fat content includes beneficial monounsaturated fats from the olive oil and naturally occurring fats in the chicken skin.
Nutritional Expert Tip: As a registered dietitian, I always tell clients that chicken skin isn’t the enemy nutritionists once thought it was. The fat in the skin actually helps your body absorb fat-soluble vitamins like vitamins A, D, E, and K. It also keeps the meat moist during cooking, preventing the dry, stringy chicken that turns people away from home-cooked poultry. Eating the skin is the more nutritious choice when the chicken is prepared this way.
The sodium content comes primarily from the salt in the seasoning blend. If you’re tracking sodium for health reasons, you can reduce the salt to ½ teaspoon and add ¼ teaspoon of potassium chloride salt substitute, though this changes the flavor slightly.
What to Order/Make Alongside for the Full Experience
Restaurant rotisserie chicken tastes even better when it’s part of a complete meal. Here’s what I recommend making alongside these drumsticks to replicate that full-restaurant experience at home.
- Roasted potatoes with rosemary – Toss baby potatoes with olive oil, salt, rosemary, and garlic powder. Roast at 400°F for 25 minutes alongside your drumsticks. They’ll finish at exactly the same time.
- Simple green salad – Arugula, shredded carrots, a squeeze of lemon, and a light vinaigrette. The acidity complements the savory richness of the drumsticks perfectly.
- Black bean nachos – If you want something heartier, black bean nachos provide a different flavor direction while using budget-friendly ingredients.
- Roasted vegetables – Bell peppers, zucchini, or broccoli with a light coating of the same seasoning blend as the chicken. They’ll brown beautifully alongside the drumsticks.
- Rice pilaf – Use the pan juices from the drumsticks to cook white or brown rice for incredible flavor with zero extra effort.
The combination of drumsticks plus roasted potatoes plus a simple salad is exactly what you get at a restaurant, but better because everything is hot and fresh and made exactly how you want it.
Common Mistakes to Avoid
Mistake 1: Flipping the drumsticks during cooking. I know the temptation—you want to check if they’re browning evenly. Resist it. Every time you flip, you interrupt the browning process and release steam that dries out the meat. Trust the process. They brown beautifully without flipping.
Mistake 2: Using wet drumsticks. I mentioned this earlier, but it’s worth repeating because it’s the most common error I see. Wet chicken won’t brown. The seasonings won’t stick. You’ll end up with pale, sad drumsticks that taste like boiled chicken with seasoning on top. Spend the full minute patting them dry.
Mistake 3: Cooking at too low a temperature. I tested this recipe at 375°F thinking it would be safer. It wasn’t. The chicken cooked through, but the skin stayed pale and rubbery. The 400°F temperature is specific because it creates the Maillard reaction (browning) while the inside cooks gently enough to stay juicy. Don’t lower it.
Mistake 4: Skipping the rest period. After the drumsticks come out of the oven, let them sit for three minutes. This allows the juices to redistribute back into the meat. If you serve them immediately, you’ll actually see liquid on the plate as you cut into them—that’s the moisture escaping. The three-minute rest prevents that.
Seasonal Variations
Spring: Add fresh lemon zest and fresh tarragon instead of thyme. The brightness is perfect for spring appetites. Serve alongside asparagus that’s been roasted with the same seasoning.
Summer: Reduce the smoked paprika to ½ teaspoon and add ½ teaspoon of fresh lime zest instead. Pair with fresh corn and tomato salad. The lime gives it a lighter, brighter quality perfect for warm weather.
Fall: Add ½ teaspoon of ground cumin and ¼ teaspoon of cinnamon to your seasoning blend. This creates an almost barbecue-style flavor that feels cozy. Serve with roasted sweet potatoes—the spice blend complements them beautifully. These flavors also work excellently in a beans and sweet potato recipe if you want to extend your meal.
Winter: Add ½ teaspoon of smoked paprika (increasing your total to 1.5 teaspoons), ¼ teaspoon of ground ginger, and a pinch of nutmeg. This creates a deeper, almost comfort-food quality. Serve with roasted root vegetables and gravy made from the pan juices.
Make-Ahead Guide
From my years of meal-planning consultation, here’s the best way to prepare this ahead.
Option 1: Seasoned and ready to bake (best for 1-2 days ahead) – Coat your drumsticks with the seasoning paste, place them on the baking sheet, cover tightly with plastic wrap, and refrigerate. When you’re ready to cook, remove them 15 minutes before baking to bring them closer to room temperature (this ensures even cooking). Bake as usual, adding 2-3 minutes to the cooking time.
Option 2: Fully cooked and stored (best for 3-4 days ahead) – Bake a full batch, cool completely, and store in an airtight container. Reheat in a 350°F oven for 10 minutes just before serving. The skin won’t be quite as crispy as fresh, but the meat stays incredibly juicy.
Option 3: Shredded and ready for meal components (best for 4-5 days ahead) – Bake the drumsticks, shred the meat off the bones, and store the shredded meat in an airtight container. Use it in grain bowls, wraps, salads, or even shredded into soups. This approach maximizes versatility when you’re short on time during the week.
Pro tip: Save the bones and skin after shredding. Simmer them in water with a bay leaf and salt to make homemade chicken stock. It takes thirty minutes and costs nothing—you’d normally throw those bones away.

Chicken Drummies Oven Recipe
Ingredients
Method
- Start by positioning your oven rack in the upper-middle position and setting your oven to 400°F. This gives you two things: high heat that creates browning without drying out the meat, and a rack position where the drumsticks won't be too close to the heating element (which causes burning) but close enough to get good color. Line a rimmed baking sheet with parchment paper. Why parchment? It prevents sticking, cuts cleanup time in half, and creates a barrier that helps distribute heat more evenly. While your oven preheats, pat your drumsticks completely dry with paper towels. This is non-negotiable. Moisture is the enemy of browning. If there's any liquid on the surface, the seasonings won't adhere properly and the skin won't get crispy. I spend a full minute per batch just patting them dry.
- In a medium bowl, combine your olive oil with all the dry seasonings: salt, pepper, smoked paprika, garlic powder, onion powder, cayenne, and thyme. Use a fork or small whisk to blend them thoroughly until you have a consistent paste. Don't skip the mixing step. If you just sprinkle seasonings on the chicken, they won't distribute evenly, and you'll get some bites that are perfectly seasoned and others that taste like nothing. Take thirty seconds to smell this paste. That's the aroma of the finished dish. You should notice smoke from the paprika, earthiness from the thyme, and savory depth from the garlic and onion. If it smells right, it will taste right.
- Arrange your dry drumsticks in a single layer on the prepared baking sheet, leaving about an inch between each piece. Using a pastry brush (or clean hands if you don't have a brush), coat each drumstick thoroughly with the seasoning paste. Make sure to coat the sides and underneath as well as the top. Every surface matters. The thighs and exposed meat benefit just as much from the seasoning as the skin does. If you don't have a pastry brush, this is the one situation where using your hands actually works better. You can feel where you've coated and ensure even coverage. Just wash your hands thoroughly afterward with soap and hot water.
- Place your baking sheet in the preheated oven on the upper-middle rack. Set a timer for 40 minutes. Do not flip the drumsticks. Do not turn them. Do not move the pan around. The stationary position allows the bottom to brown through direct contact with the hot pan while the top and sides cook through convection heat. This combination is what creates that restaurant-quality texture. After 40 minutes, check the internal temperature using an instant-read thermometer inserted into the thickest part of the drumstick without touching bone. You need a minimum of 165°F. Depending on your oven and the exact size of your drumsticks, this might take 38-42 minutes. The thermometer is your friend here—overcooking by five minutes dries them out noticeably.
- The moment your thermometer reads 165°F, remove the baking sheet from the oven. You should see a pool of rendered fat and flavorful juices in the bottom of the pan. Using a clean pastry brush, baste each drumstick with these pan juices. This step adds incredible moisture and locks in the flavors. If you're using lemon juice, drizzle it now—the warm chicken absorbs it beautifully. Let the drumsticks rest on the baking sheet for three minutes before serving. This allows the juices to redistribute back into the meat, making every bite juicier than if you served them immediately.
FAQs
Can I use boneless, skinless chicken breasts for this recipe?
Technically yes, but honestly, I wouldn’t recommend it. Boneless chicken breasts are lean and dry easily, especially at 400°F. This recipe specifically relies on the fat in the skin and bone marrow to create that juicy, tender result. If you prefer white meat, go with bone-in, skin-on chicken breasts and add 5-7 minutes to the cooking time. They’ll brown beautifully and stay moist. But drumsticks are genuinely the best choice for this recipe.
What if I don’t have smoked paprika?
If you genuinely can’t find smoked paprika, use regular paprika and add ¼ teaspoon of liquid smoke (like Liquid Smoke brand, available in most grocery stores). Mix the liquid smoke into your oil before adding the dry seasonings. The result won’t be identical—liquid smoke tastes slightly different than smoked paprika—but it’s a legitimate substitute that still creates great flavor. However, smoked paprika is worth seeking out because it’s an ingredient that pays for itself in other recipes. Buy it from the bulk section if possible.
How do I know if the drumsticks are done without a thermometer?
An instant-read thermometer is genuinely the most accurate method, and they’re inexpensive ($12-$20). That said, if you don’t have one, look for juices that run clear when you pierce the thickest part with a fork, and meat that’s no longer pink near the bone. The color test is less reliable than temperature, but it works as a backup. Drumsticks specifically are forgiving because they’re small enough that if the thickest part is done, the entire piece is done.
Can I make this in an air fryer?
Yes, and it actually works wonderfully. Use the same seasoning paste, place drumsticks in the air fryer basket in a single layer (don’t stack), and cook at 380°F for 22-25 minutes, shaking the basket halfway through. The results are nearly identical to oven-baked—crispy skin, juicy meat—and it’s faster. The trade-off is that air fryers cook eight drumsticks maximum, while you can cook twelve in a standard oven. Choose based on your batch size needs.
What pan juices recipe works best for serving alongside?
The pan juices are liquid gold. Don’t waste them. After removing the drumsticks, place the baking sheet on the stovetop over medium heat. Add a splash of chicken broth or white wine if you want to stretch the juices and create more sauce. Scrape the browned bits off the bottom of the pan with a wooden spoon (they’re packed with flavor). Simmer for three minutes, then drizzle over the drumsticks or serve on the side. If your pan doesn’t have a stovetop-safe base, transfer the juices to a small saucepan and simmer there. This creates an instant pan sauce that tastes restaurant-quality.
More Restaurant Copycat Recipes
- Black Chili Recipe – A hearty copycat version of restaurant chili that costs a fraction of the price per serving
- BBQ Chicken Pineapple Recipe – Recreate that restaurant combination at home with simple ingredients
- this cozy soup – A slow-cooker version of restaurant-style bean soup with zero fuss
Cracking the code on restaurant recipes is one of my favorite things about being a dietitian. It demystifies the dishes we think are complicated, shows us that restaurant chefs aren’t using secret ingredients—just better technique and proportion—and proves that home-cooked food can absolutely rival restaurant quality when you understand the fundamentals.
The best part? You’ve just learned a technique that applies to almost any seasoned roasted chicken. Chicken thighs, whole chickens, even turkey—they all use the same principles. Once you see how the seasoning paste adheres, how the high heat creates browning, and how the resting period locks in juices, you’ll apply these lessons to every piece of poultry you cook.
Make these drumsticks this week. Taste them. Compare them to your favorite restaurant version. I’m genuinely confident you’ll be impressed. And if you do make them, don’t forget to mention @affordablefoodideas if you share photos—I love seeing these recipes come to life in home kitchens.